Templates
Part 1, Chapter 5
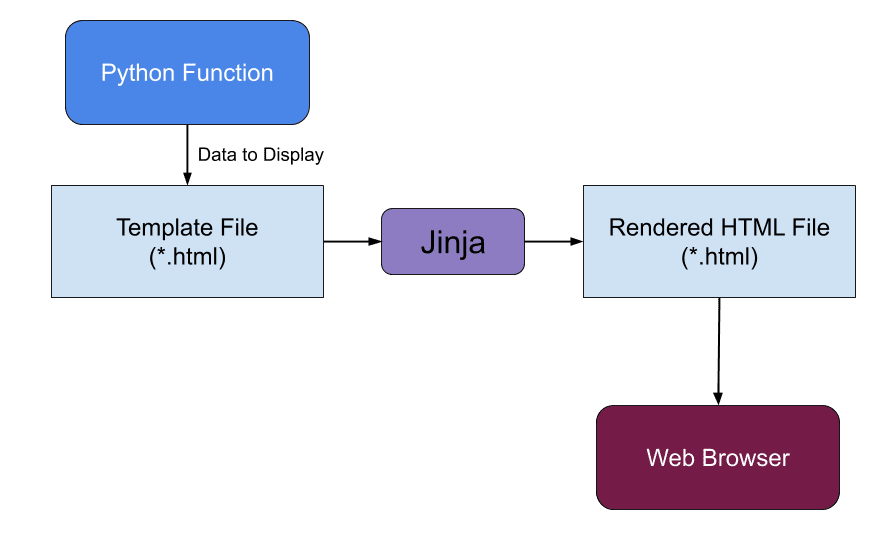
This chapter looks at how to render templates using the Jinja templating engine.
Template Engines
Thus far we've added HTML directly to the return value within the view function:
@app.route('/about')
def about():
    return '<h2>About this application...</h2>'
This is not an ideal solution as it adds clutter to the function. Plus, as your app scales and you add more and more view functions, you'll want to reuse the common pieces of HTML across several views. Templating engines simplify this for you.
With them, you can:
- Use static HTML template files to decouple the view from the HTML
- Separate the HTML structure from the content
- Use basic programming constructs -- variables, conditionals, and for loops -- directly in the HTML to manipulate the final rendered output
Flask comes packaged with the Jinja templating engine out-of-the-box, which we'll use to generate our HTML files.
Again, a template file contains variables and/or expressions, which get replaced with values when a template is rendered:
The Jinja2 module was already installed when we installed the Flask module:
(venv)$ pip freeze
blinker==1.7.0
click==8.1.7
Flask==3.0.1
itsdangerous==2.1.2
Jinja2==3.1.3      # <-- !!
MarkupSafe==2.1.4
Werkzeug==3.0.1
Jinja is also commonly referred to as "Jinja2" to specify the newest release version. Officially, the documentation refers to the package as 'jinja'.
Project Structure
In this chapter, we'll expand the project structure to include a new "templates" folder for defining each template file:
(venv)$ tree -L 2

.
├── app.py
├── requirements.txt
├── templates
│   ├── about.html
│   ├── base.html
│   └── index.html
└── venv
Go ahead and add the templates folder along with the three HTML files now.
Template Rendering
Within a Flask app, templates get rendered using the render_template() function. This tells Flask to serve up an HTML template via Jinja.
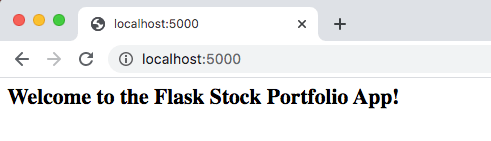
Let's update the index() view function in app.py to render a template when the '/' URL is accessed:
from flask import Flask, render_template


@app.route('/')
def index():
    return render_template('index.html')
Update the template file, templates/index.html:
<h1>Welcome to the Flask Stock Portfolio App!</h1>
If you navigate to the '/' URL, you should see:
Template Variables
Update the About page so that it uses a template by first updating the about() function in app.py:
@app.route('/about')
def about():
    return render_template('about.html')
Next, the template file needs to be updated in templates/about.html:
<h1>About</h1>
<br>
<h2>This application is built using the Flask web framework.</h2>
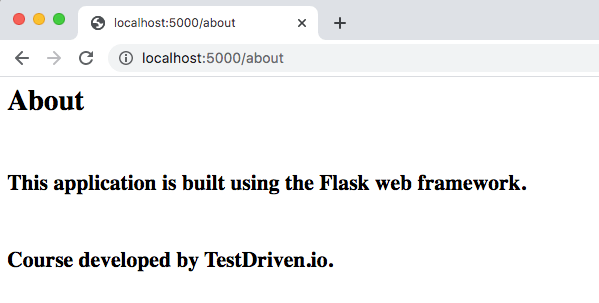
To pass in data to include when the template is rendered, add the company_name argument to the about() function:
@app.route('/about')
def about():
    return render_template('about.html', company_name='TestDriven.io')
The company_name variable can now be used in the template file (templates/about.html):
<h1>About</h1>
<br>
<h2>This application is built using the Flask web framework.</h2>
<br>
<h2>Course developed by {{ company_name }}.</h2>
Navigate to the '/about' URL:
Template Logic
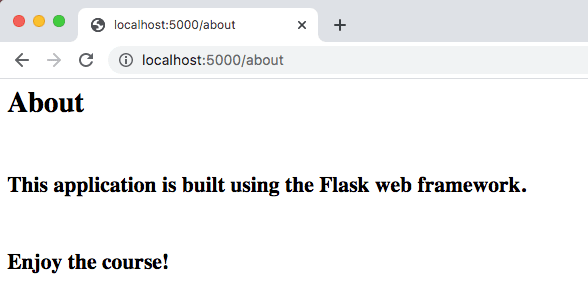
What if the company_name is not specified?
@app.route('/about')
def about():
    # return render_template('about.html', company_name='TestDriven.io')
    return render_template('about.html')
We can use IF-ELSE logic within the template file (about.html) like so:
<h1>About</h1>
<br>
<h2>This application is built using the Flask web framework.</h2>
<br>
{% if company_name %}
  <h2>Course developed by {{ company_name }}.</h2>
{% else %}
  <h2>Enjoy the course!</h2>
{% endif %}
Try it out:
Template Inheritance
The concept of template inheritance is similar to classes in object-oriented design. There's typically a parent template (like base.html) that provides an overall structure to your pages and then child templates (such as about.html) that provide the content of the pages.
Let's look at this in action.
Home Page
To start, update the templates/base.html file:
<!DOCTYPE html>
<html lang="en">
  <head>
    <!-- Required meta tags -->
    <meta charset="utf-8">
    <meta name="viewport" content="width=device-width, initial-scale=1, shrink-to-fit=no">
    <title>Flask Stock Portfolio App</title>
  </head>

  <body>
    <header>
      <h1>Flask Stock Portfolio App</h1>
    </header>

    <main>
      <!-- child template -->
      {% block content %}
      {% endblock %}
    </main>
  </body>
</html>
This parent template will be used by each child template.
The templates/index.html file should be updated to use the base.html file:
{% extends "base.html" %}

{% block content %}
<h1>Welcome to the Flask Stock Portfolio App!</h1>
{% endblock %}
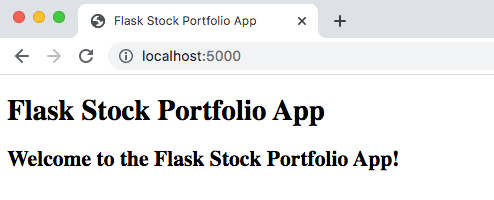
If you navigate to the '/' URL now, you'll now see the page has been updated to include the header:
About Page
Next, update the templates/about.html file to use the base.html file:
{% extends "base.html" %}

{% block content %}
<h1>About</h1>
<br>
<h2>This application is built using the Flask web framework.</h2>
<br>
{% if company_name %}
  <h2>Course developed by {{ company_name }}.</h2>
{% else %}
  <h2>Enjoy the course!</h2>
{% endif %}
{% endblock %}
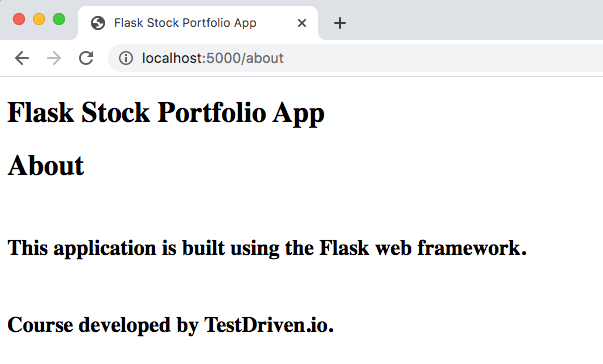
If you navigate to the '/' URL now, you'll see the page has been updated to include the header:
Conclusion
In this chapter we looked at templating with Jinja. You should now be able to:
- Explain what a template engine is
- Configure Flask to render templates using Jinja
- Use variables and conditional logic in a template
- Set up basic template inheritance
✓ Mark as Completed