 Michael Herman
This tutorial looks at how to containerize a full-stack web app powered by Flask and Vue and deploy it to Heroku using Gitlab CI.
This is an intermediate-level tutorial. It assumes that you a have basic working knowledge of Vue, Flask, and Docker. Review the following resources for more info:
Contents
Objectives
By the end of this tutorial, you will be able to:
- Containerize Flask and Vue with a single Dockerfile using a multi-stage build
- Deploy an app to Heroku with Docker
- Configure GitLab CI to deploy Docker images to Heroku
Project Setup
If you'd like to follow along, clone down the flask-vue-crud repo from GitHub, create and activate a virtual environment, and then spin up the Flask app:
$ git clone https://github.com/testdrivenio/flask-vue-crud
$ cd flask-vue-crud
$ cd server
$ python3.11 -m venv env
$ source env/bin/activate
(env)$

(env)$ pip install -r requirements.txt
(env)$ flask run --port=5001 --debug
The above commands, for creating and activating a virtual environment, may differ depending on your environment and operating system. Feel free to swap out virtualenv and Pip for Poetry or Pipenv. For more, review Modern Python Environments.
Point your browser of choice at http://localhost:5001/ping. You should see:
"pong!"
Then, install the dependencies and run the Vue app in a different terminal window:
$ cd client
$ npm install
$ npm run dev
Navigate to http://localhost:5173. Make sure the basic CRUD functionality works as expected, and then kill both apps:
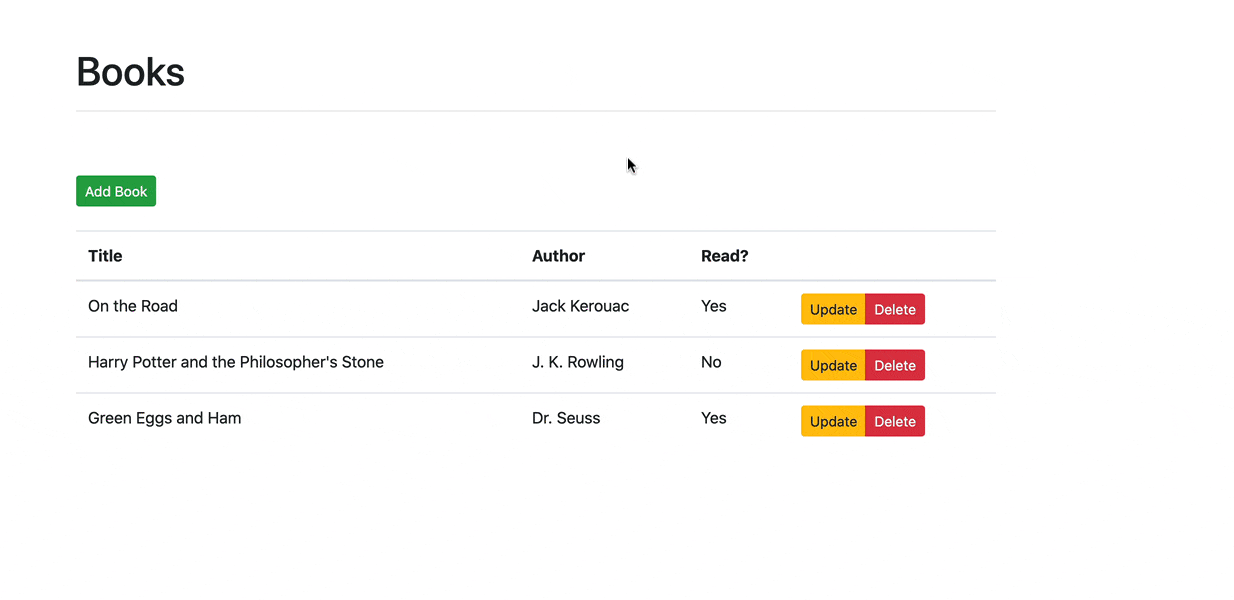
Want to learn how to build this project? Check out the Developing a Single Page App with Flask and Vue.js tutorial.
Docker
Let's start with Docker.
Add the following Dockerfile to the project root.
# build
FROM node:20 as build-vue
WORKDIR /app
ENV PATH /app/node_modules/.bin:$PATH
COPY ./client/package*.json ./
RUN npm install
COPY ./client .
RUN npm run build

# production
FROM nginx:stable-alpine as production
WORKDIR /app
RUN apk update && apk add --no-cache python3 && \
    python3 -m ensurepip && \
    rm -r /usr/lib/python*/ensurepip && \
    pip3 install --upgrade pip setuptools && \
    if [ ! -e /usr/bin/pip ]; then ln -s pip3 /usr/bin/pip ; fi && \
    if [[ ! -e /usr/bin/python ]]; then ln -sf /usr/bin/python3 /usr/bin/python; fi && \
    rm -r /root/.cache
RUN apk update && apk add postgresql-dev gcc python3-dev musl-dev
COPY --from=build-vue /app/dist /usr/share/nginx/html
COPY ./nginx/default.conf /etc/nginx/conf.d/default.conf
COPY ./server/requirements.txt .
RUN pip install -r requirements.txt
RUN pip install gunicorn
COPY ./server .
CMD gunicorn -b 0.0.0.0:5000 app:app --daemon && \
      sed -i -e 's/$PORT/'"$PORT"'/g' /etc/nginx/conf.d/default.conf && \
      nginx -g 'daemon off;'
What's happening here?
- We used a multi-stage build to reduce the final image size. Essentially,
build-vueis a temporary image that's used to generate a production build of the Vue app. The production static files are then copied over to theproductionimage and thebuild-vueimage is discarded. - The
productionimage extends the nginx:stable-alpine image by installing Python, copying over the static files from thebuild-vueimage, copying over our Nginx config, installing the requirements, and running Gunicorn along with Nginx. - Take note of the
sed -i -e 's/$PORT/'"$PORT"'/g' /etc/nginx/conf.d/default.confcommand. Here, we're using sed to replace$PORTin thedefault.conffile with the environment variablePORTsupplied by Heroku.
Next, add a new folder to the project root called "nginx", and then add a new config file to that folder called default.conf:
server {
  listen $PORT;

  root /usr/share/nginx/html;
  index index.html index.html;

  location / {
    try_files $uri /index.html =404;
  }

  location /ping {
    proxy_pass          http://127.0.0.1:5000;
    proxy_http_version  1.1;
    proxy_redirect      default;
    proxy_set_header    Upgrade $http_upgrade;
    proxy_set_header    Connection "upgrade";
    proxy_set_header    Host $host;
    proxy_set_header    X-Real-IP $remote_addr;
    proxy_set_header    X-Forwarded-For $proxy_add_x_forwarded_for;
    proxy_set_header    X-Forwarded-Host $server_name;
  }

  location /books {
    proxy_pass          http://127.0.0.1:5000;
    proxy_http_version  1.1;
    proxy_redirect      default;
    proxy_set_header    Upgrade $http_upgrade;
    proxy_set_header    Connection "upgrade";
    proxy_set_header    Host $host;
    proxy_set_header    X-Real-IP $remote_addr;
    proxy_set_header    X-Forwarded-For $proxy_add_x_forwarded_for;
    proxy_set_header    X-Forwarded-Host $server_name;
  }
}
To test locally, first remove all instances of http://localhost:5001 in client/src/components/Books.vue and client/src/components/Ping.vue. For example, the getBooks method in the Books component should now look like:
getBooks() {
  const path = '/books';
  axios.get(path)
    .then((res) => {
      this.books = res.data.books;
    })
    .catch((error) => {
      console.error(error);
    });
},
Next, build the image and run the container in detached mode:
$ docker build -t web:latest .
$ docker run -d --name flask-vue -e "PORT=8765" -p 8007:8765 web:latest
Notice how we passed in an environment variable called PORT. If all went well, then we should see this variable in the default.conf file within the running container:
$ docker exec flask-vue cat ../etc/nginx/conf.d/default.conf
Ensure Nginx is listening on port 8765: listen 8765;. Also, ensure the app is running at http://localhost:8007 in your browser. Stop then remove the running container once done:
$ docker stop flask-vue
$ docker rm flask-vue
Heroku
Unfortunately, on November 28, 2022, Heroku discontinued its free tier. While there are a number of alternatives on the market, none of them match Heroku's developer experience, which is why this tutorial still leverages Heroku. For more on this as well as some viable Heroku alternatives, check out the Heroku Alternatives for Python-based Applications article.
Sign up for a Heroku account (if you don’t already have one), and then install the Heroku CLI (if you haven't already done so).
Create a new app:
$ heroku create
Creating app... done, ⬢ secret-castle-36286
https://secret-castle-36286.herokuapp.com/ | https://git.heroku.com/secret-castle-36286.git
Log in to the Heroku Container Registry:
$ heroku container:login
Re-build the image and tag it with the following format:
registry.heroku.com/<app>/<process-type>
Make sure to replace <app> with the name of the Heroku app that you just created and <process-type> with web since this will be a web dyno.
For example:
$ docker build -t registry.heroku.com/secret-castle-36286/web .
Push the image to the registry:
$ docker push registry.heroku.com/secret-castle-36286/web
Release the image:
$ heroku container:release --app secret-castle-36286 web
Make sure to replace
secret-castle-36286in each of the above commands with the name of your app.
This will run the container. You should be able to view the app at https://APP_NAME.herokuapp.com.
GitLab CI
Sign up for a GitLab account (if necessary), and then create a new project (again, if necessary).
Retrieve your Heroku auth token:
$ heroku auth:token
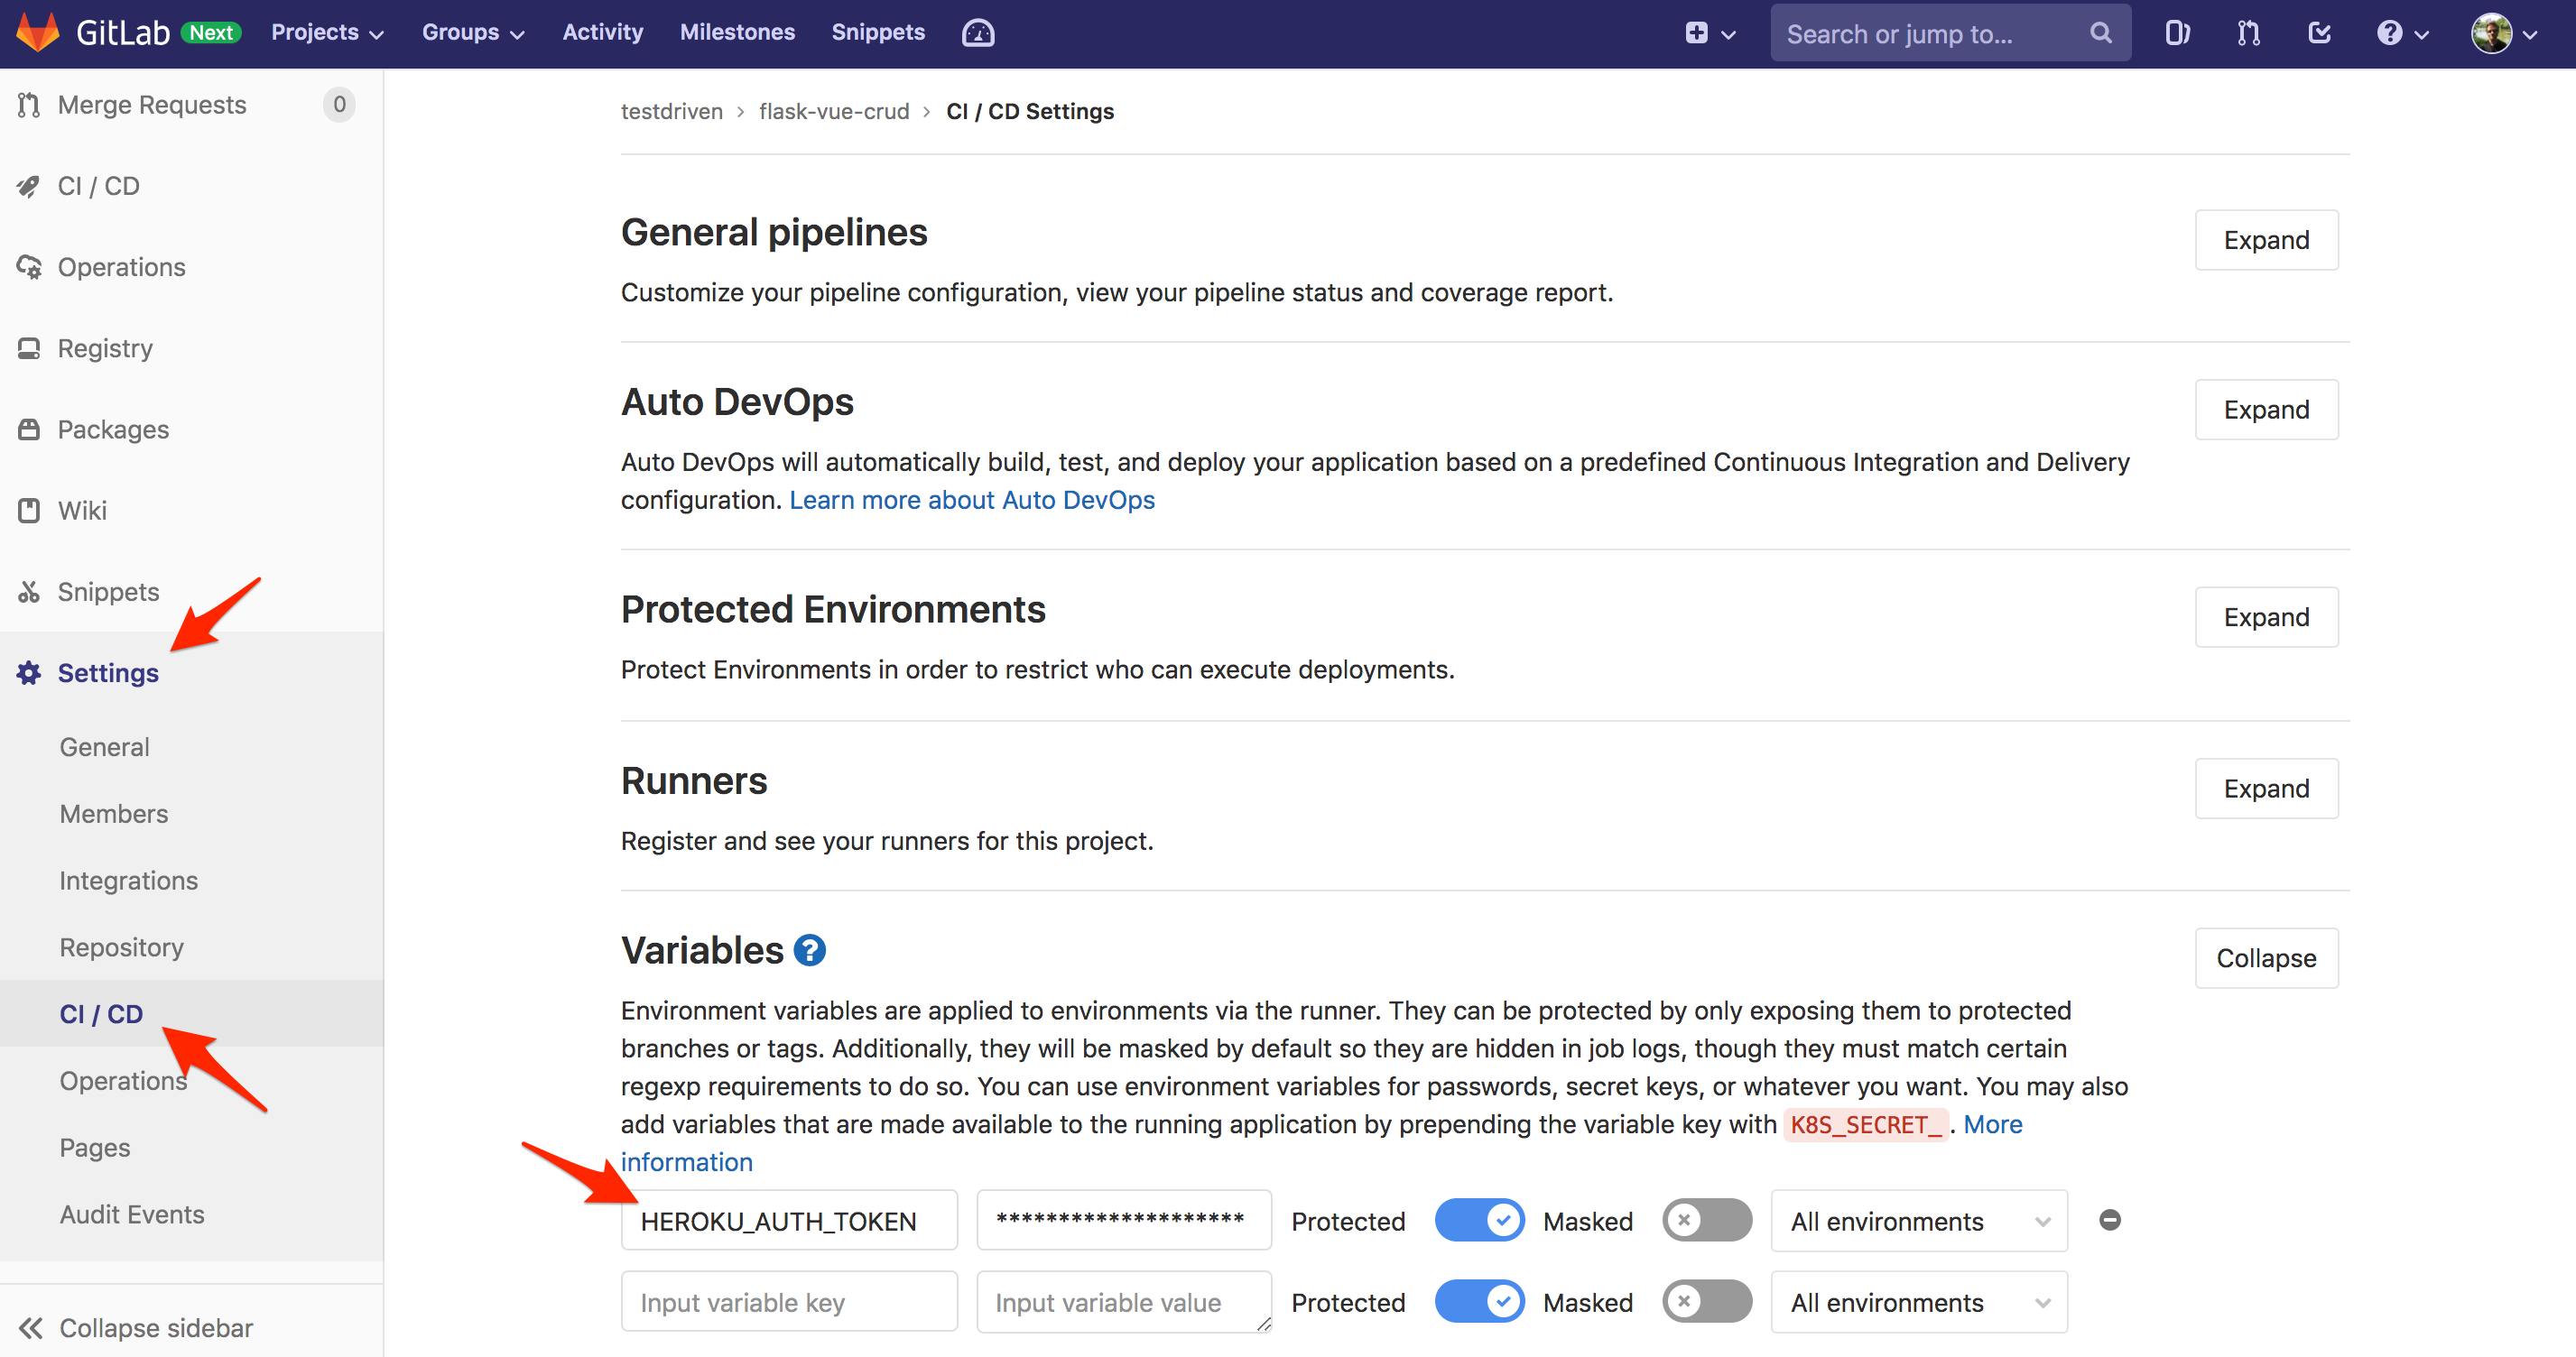
Then, save the token as a new variable called HEROKU_AUTH_TOKEN within your project's CI/CD settings: Settings > CI / CD > Variables.
Next, add a GitLab CI/CD config file called .gitlab-ci.yml to the project root:
image: docker:stable
services:
  - docker:dind

variables:
  DOCKER_DRIVER: overlay
  HEROKU_APP_NAME: <APP_NAME>
  HEROKU_REGISTRY_IMAGE: registry.heroku.com/${HEROKU_APP_NAME}/web

stages:
  - build

docker-build:
  stage: build
  script:
    - apk add --no-cache curl
    - docker build
        --tag $HEROKU_REGISTRY_IMAGE
        --file ./Dockerfile
        "."
    - docker login -u _ -p $HEROKU_AUTH_TOKEN registry.heroku.com
    - docker push $HEROKU_REGISTRY_IMAGE
    - chmod +x ./release.sh
    - ./release.sh
release.sh:
#!/bin/sh


IMAGE_ID=$(docker inspect ${HEROKU_REGISTRY_IMAGE} --format={{.Id}})
PAYLOAD='{"updates": [{"type": "web", "docker_image": "'"$IMAGE_ID"'"}]}'

curl -n -X PATCH https://api.heroku.com/apps/$HEROKU_APP_NAME/formation \
  -d "${PAYLOAD}" \
  -H "Content-Type: application/json" \
  -H "Accept: application/vnd.heroku+json; version=3.docker-releases" \
  -H "Authorization: Bearer ${HEROKU_AUTH_TOKEN}"
Here, we defined a single build stage where we:
- Install cURL
- Build and tag the new image
- Log in to the Heroku Container Registry
- Push the image up to the registry
- Create a new release via the Heroku API using the image ID within the release.sh script
Make sure to replace
<APP_NAME>with your Heroku app's name.
With that, commit and push your changes up to GitLab to trigger a new pipeline. This will run the build stage as a single job. Once complete, a new release should automatically be created on Heroku.
Finally, update the config script to take advantage of Docker layer caching:
image: docker:stable
services:
  - docker:dind

variables:
  DOCKER_DRIVER: overlay
  HEROKU_APP_NAME: <APP_NAME>
  CACHE_IMAGE: ${CI_REGISTRY}/${CI_PROJECT_NAMESPACE}/${CI_PROJECT_NAME}
  HEROKU_REGISTRY_IMAGE: registry.heroku.com/${HEROKU_APP_NAME}/web

stages:
  - build

docker-build:
  stage: build
  script:
    - apk add --no-cache curl
    - docker login -u $CI_REGISTRY_USER -p $CI_JOB_TOKEN $CI_REGISTRY
    - docker pull $CACHE_IMAGE:build-vue || true
    - docker pull $CACHE_IMAGE:production || true
    - docker build
        --target build-vue
        --cache-from $CACHE_IMAGE:build-vue
        --tag $CACHE_IMAGE:build-vue
        --file ./Dockerfile
        "."
    - docker build
        --cache-from $CACHE_IMAGE:production
        --tag $CACHE_IMAGE:production
        --tag $HEROKU_REGISTRY_IMAGE
        --file ./Dockerfile
        "."
    - docker push $CACHE_IMAGE:build-vue
    - docker push $CACHE_IMAGE:production
    - docker login -u _ -p $HEROKU_AUTH_TOKEN registry.heroku.com
    - docker push $HEROKU_REGISTRY_IMAGE
    - chmod +x ./release.sh
    - ./release.sh
Now, after installing cURL, we:
- Log in to the GitLab Container Registry
- Pull the previously pushed images (if they exist)
- Build and tag the new images (both
build-vueandproduction) - Push the images up to the GitLab Container Registry
- Log in to the Heroku Container Registry
- Push the
productionimage up to the registry - Create a new release via the Heroku API using the image ID within the release.sh script
For more on this caching pattern, review the "Multi-stage" section from the Faster CI Builds with Docker Cache article.
Make a quick change to one of the Vue components. Commit your code and again push it up to GitLab. Your app should be auto deployed to Heroku!