 Michael Herman
The following tutorial details how to set up and use Hashicorp's Vault and Consul projects to securely store and manage secrets.
We'll start by spinning up a single instance of Vault within a Docker container and then jump into managing both static and dynamic secrets along with Vault's "encryption as a service" feature. Then, we'll add Consul into the mix and look at how to scale Vault.
This is an intermediate-level tutorial. It assumes that you a have basic working knowledge of Docker. It's also recommended that you read through the Intro, Internals, and Basic Concepts guides from the official documentation to get up to speed with Vault before beginning.
Main dependencies:
- Docker v20.10.8
- Docker-Compose v1.29.2
- Vault v1.8.2
- Consul v1.10.2
Contents
Objectives
By the end of this tutorial, you should be able to:
- Explain what Vault is and why you may want to use it
- Describe the basic Vault architecture along with dynamic and static secrets, the various backends (storage, secret, auth, audit), and how Vault can be used as an "encryption as a service"
- Configure and run Vault and Consul with Docker
- Spin up Vault with the Filesystem backend
- Init and unseal Vault
- Authenticate against Vault
- Configure an Audit backend to log all interactions with Vault
- Work with static and dynamic secrets via the CLI, HTTP API, and UI
- Create a Vault policy to limit access to a specific path
- Use the Transit backend as an "encryption as a service"
- Set up Consul to work with Vault as Storage backend for secrets
- Define a custom lease period for a secret and revoke a secret before the end of that period
What is Vault?
Vault is an open-source tool used for securely storing and managing secrets.
What is a secret? Secrets, in the context of this tutorial, are securely-sensitive or personally identifiable info like database credentials, SSH keys, usernames and passwords, AWS IAM credentials, API tokens, Social Security Numbers, credit card numbers, just to name a few.
Take a moment to think about how your team currently manages and distributes secrets:
- Who has access to them?
- Who manages them?
- How do you control who has access to them?
- How do your apps get them?
- How are they updated?
- How are they revoked?
Vault provides answers to those questions and helps to solve the following problems with regard to secret management:
| Problems | Vault's Goals |
|---|---|
| Secrets are everywhere. | Vault is the single source of truth for all secrets. |
| They are generally unencrypted. | Vault manages encryption (during transit and at rest) out of the box. |
| It's difficult to dynamically generate them. | Secrets can be dynamically generated. |
| It's even more difficult to lease and revoke them. | Secrets can be leased and revoked. |
| There's no audit trail. | There's an audit trail for generating and using secrets. |
Vault has a number of moving pieces so it can take some time to get up to speed with the overall architecture. Take a moment to review the Architecture guide, taking note of the following backends:
| Backend | Use | Examples |
|---|---|---|
| Storage | Where secrets are stored | Consul*, Filesystem*, In-Memory, PostgreSQL, S3 |
| Secret | Handles static or dynamic secrets | AWS*, Databases, Key/Value*, RabbitMQ, SSH |
| Auth | Handles authentication and authorization | AWS, Azure, Google Cloud, GitHub, Tokens*, Username & Password |
| Audit | Logs all requests and responses | File*, Syslog, Socket |
* used in this tutorial
With that, let's start using Vault.
Filesystem Backend
To get up and running quickly, we'll use the Filesystem backend to store secrets at rest.
The filesystem backend should only be used for local development or a single-server Vault deployment since it does not support high availability.
Create a new project directory:
$ mkdir vault-consul-docker && cd vault-consul-docker
Then add the following folders:
└── vault
    ├── config
    ├── data
    ├── logs
    └── policies
Add a Dockerfile to the "vault" directory:
# base image
FROM alpine:3.14

# set vault version
ENV VAULT_VERSION 1.8.2

# create a new directory
RUN mkdir /vault

# download dependencies
RUN apk --no-cache add \
      bash \
      ca-certificates \
      wget

# download and set up vault
RUN wget --quiet --output-document=/tmp/vault.zip https://releases.hashicorp.com/vault/${VAULT_VERSION}/vault_${VAULT_VERSION}_linux_amd64.zip && \
    unzip /tmp/vault.zip -d /vault && \
    rm -f /tmp/vault.zip && \
    chmod +x /vault

# update PATH
ENV PATH="PATH=$PATH:$PWD/vault"

# add the config file
COPY ./config/vault-config.json /vault/config/vault-config.json

# expose port 8200
EXPOSE 8200

# run vault
ENTRYPOINT ["vault"]
Next, add a docker-compose.yml file to the project root:
version: '3.8'

services:

  vault:
    build:
      context: ./vault
      dockerfile: Dockerfile
    ports:
      - 8200:8200
    volumes:
      - ./vault/config:/vault/config
      - ./vault/policies:/vault/policies
      - ./vault/data:/vault/data
      - ./vault/logs:/vault/logs
    environment:
      - VAULT_ADDR=http://127.0.0.1:8200
      - VAULT_API_ADDR=http://127.0.0.1:8200
    command: server -config=/vault/config/vault-config.json
    cap_add:
      - IPC_LOCK
Add a config file called vault-config.json to "vault/config":
{
  "backend": {
    "file": {
      "path": "vault/data"
    }
  },
  "listener": {
    "tcp":{
      "address": "0.0.0.0:8200",
      "tls_disable": 1
    }
  },
  "ui": true
}
Here, we configured Vault to use the Filesystem backend, defined the listener for Vault, disabled TLS, and enabled the Vault UI. Review the docs for more info on configuring Vault.
Now we can build the image and spin up the container:
$ docker-compose up -d --build
Pull up the Docker logs to make sure there were no errors in the build:
$ docker-compose logs
You should see something similar to:
Attaching to vault-consul-docker_vault_1
vault_1  | ==> Vault server configuration:
vault_1  |
vault_1  |              Api Address: http://127.0.0.1:8200
vault_1  | 2021-09-08T14:48:35.014Z [INFO]  proxy environment: http_proxy="" https_proxy="" no_proxy=""
vault_1  |                      Cgo: disabled
vault_1  |          Cluster Address: https://127.0.0.1:8201
vault_1  |               Go Version: go1.16.7
vault_1  |               Listener 1: tcp (addr: "0.0.0.0:8200", cluster address: "0.0.0.0:8201", max_request_duration: "1m30s", max_request_size: "33554432", tls: "disabled")
vault_1  |                Log Level: info
vault_1  |                    Mlock: supported: true, enabled: true
vault_1  |            Recovery Mode: false
vault_1  |                  Storage: file
vault_1  |                  Version: Vault v1.8.2
vault_1  |              Version Sha: aca76f63357041a43b49f3e8c11d67358496959f
vault_1  |
vault_1  | ==> Vault server started! Log data will stream in below:
vault_1  |
Initializing and Unsealing
Start a bash session within the running container:
$ docker-compose exec vault bash
Within the shell, initialize Vault:
bash-5.1# vault operator init
Take note of the unseal keys and the initial root token. You will need to provide three of the unseal keys every time the Vault server is resealed or restarted.
Why 3 keys? Review Shamir's Secret Sharing.
Now you can unseal Vault using three of the keys:
bash-5.1# vault operator unseal
Unseal Key (will be hidden):
Run this command two more times, using different keys each time. Once done, make sure Sealed is false:
Key             Value
---             -----
Seal Type       shamir
Initialized     true
Sealed          false
Total Shares    5
Threshold       3
Version         1.8.2
Storage Type    file
Cluster Name    vault-cluster-8fcf9d05
Cluster ID      d86e0274-ad9c-d2c1-d6ec-baeab410797b
HA Enabled      false
Using the root token, you can now authenticate:
bash-5.1# vault login
Token (will be hidden):
You should see something similar to:
Success! You are now authenticated. The token information displayed below
is already stored in the token helper. You do NOT need to run "vault login"
again. Future Vault requests will automatically use this token.

Key                  Value
---                  -----
token                s.c0kYHWiOTqQvtR8JuSeTz6sZ
token_accessor       3FQJVxOY5C1brzlHHQSFaCdZ
token_duration       ∞
token_renewable      false
token_policies       ["root"]
identity_policies    []
policies             ["root"]
Keep in mind that this uses the root policy. In production you'll want to set up policies with different levels of access. We'll look at how to do this shortly.
Vault is now unsealed and ready for use.
Auditing
Before we test out the functionality, let's enable an Audit Device:
bash-5.1# vault audit enable file file_path=/vault/logs/audit.log

Success! Enabled the file audit device at: file/
You should now be able to view the logs locally in "vault/logs". To test, run the following command to view all enabled Audit Devices:
bash-5.1# vault audit list

Path     Type    Description
----     ----    -----------
file/    file    n/a
The request and subsequent response should be logged in vault/logs/audit.log. Take a look.
Secrets
There are two types of secrets in Vault: static and dynamic.
-
Static secrets (think encrypted Redis or Memcached) have refresh intervals but they do not expire unless explicitly revoked. They are defined ahead of time with the Key/Value backend (formerly the "generic" backend) and then shared.
![secure secret storage]()
-
Dynamic secrets are generated on demand. They have enforced leases and generally expire after a short period of time. Since they do not exist until they are accessed, there's less exposure -- so dynamic secrets are much more secure. Vault ships with a number of dynamic backends -- i.e., AWS, Databases, Google Cloud, Consul, and RabbitMQ.

Review the Why We Need Dynamic Secrets blog post for more info on the advantages of using dynamic secrets.
Static Secrets
Vault can be managed through the CLI, HTTP API, or UI.
CLI
Still within the bash session in the container, we can create, read, update, and delete secrets. We'll also look at how to version and roll back secrets.
Enable secrets with following command:
bash-5.1# vault secrets enable kv

Success! Enabled the kv secrets engine at: kv/
Create a new secret with a key of bar and value of precious within the kv/foo path:
bash-5.1# vault kv put kv/foo bar=precious

Success! Data written to: kv/foo
Read:
bash-5.1# vault kv get kv/foo

=== Data ===
Key    Value
---    -----
bar    precious
To work with different versions of a specific key, we'll need to upgrade to v2 of the Key/Value backend:
bash-5.1# vault kv enable-versioning kv/

Success! Tuned the secrets engine at: kv/
Add version 2 by updating the value to copper:
bash-5.1# vault kv put kv/foo bar=copper

Key              Value
---              -----
created_time     2021-09-08T18:23:14.4154928Z
deletion_time    n/a
destroyed        false
version          2
Read version 1:
bash-5.1# vault kv get -version=1 kv/foo

====== Metadata ======
Key              Value
---              -----
created_time     2021-09-08T18:22:37.2548824Z
deletion_time    n/a
destroyed        false
version          1

=== Data ===
Key    Value
---    -----
bar    precious
Read version 2:
bash-5.1# vault kv get -version=2 kv/foo

====== Metadata ======
Key              Value
---              -----
created_time     2021-09-08T18:23:14.4154928Z
deletion_time    n/a
destroyed        false
version          2

=== Data ===
Key    Value
---    -----
bar    copper
Delete the latest version (e.g., version 2):
bash-5.1# vault kv delete kv/foo

Success! Data deleted (if it existed) at: kv/foo
Delete version 1:
bash-5.1# vault kv delete -versions=1 kv/foo

Success! Data deleted (if it existed) at: kv/foo
You can undelete as well:
bash-5.1# vault kv undelete -versions=1 kv/foo

Success! Data written to: kv/undelete/foo
Delete is akin to a soft delete. If you want to remove the underlying metadata, you'll have to use the destroy command:
bash-5.1# vault kv destroy -versions=1 kv/foo

Success! Data written to: kv/destroy/foo
Review v1 and v2 to view all the available commands.
Take note of the audit log. Each of the above requests were logged!
API
You can also interact with Vault via the HTTP API. We'll make requests against v2 of the API. Open a new terminal tab, and then set the root token as an environment variable:
$ export VAULT_TOKEN=your_token_goes_here
Create a new secret called foo with a value of world:
$ curl \
    -H "X-Vault-Token: $VAULT_TOKEN" \
    -H "Content-Type: application/json" \
    -X POST \
    -d '{ "data": { "foo": "world" } }' \
    http://127.0.0.1:8200/v1/kv/data/hello
Read the secret:
$ curl \
    -H "X-Vault-Token: $VAULT_TOKEN" \
    -X GET \
    http://127.0.0.1:8200/v1/kv/data/hello
The JSON response should contain a data key with a value similar to:
"data": {
  "data":{
    "foo": "world"
  },
  "metadata": {
    "created_time": "2021-09-08T18:30:32.5140484Z",
    "deletion_time": "",
    "destroyed": false,
    "version": 1
  }
}
Try adding new versions, deleting, and destroying on your own.
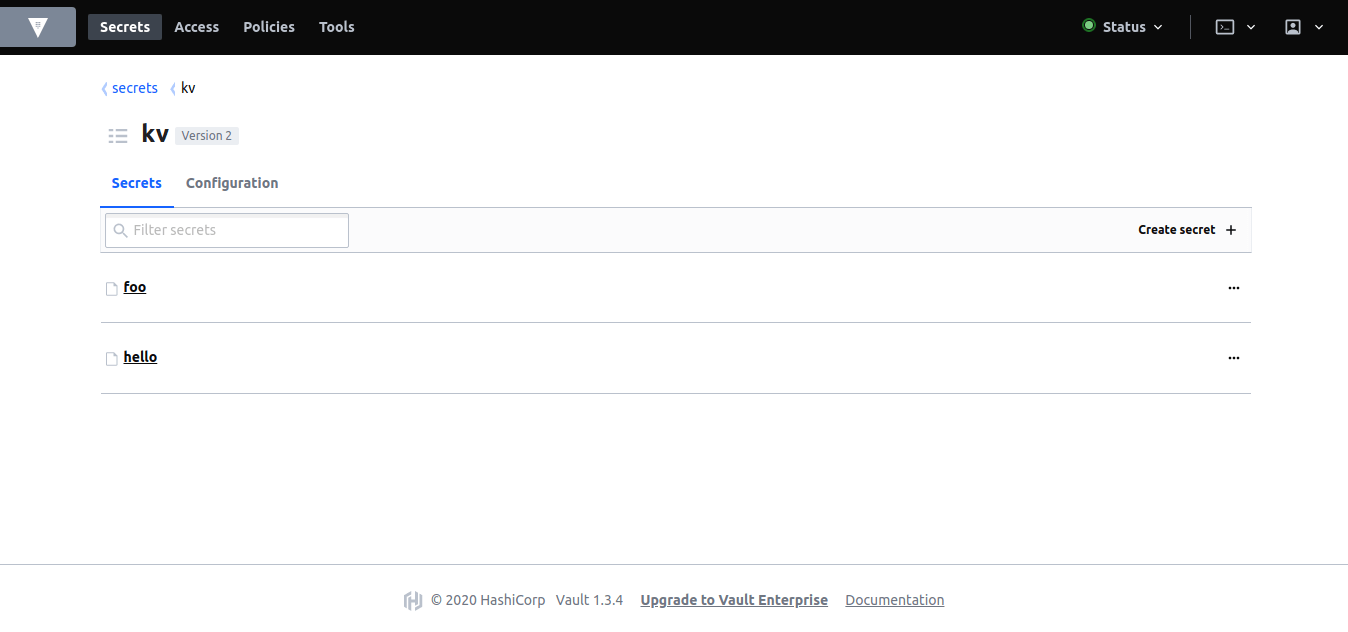
UI
The UI should be up at running at http://localhost:8200/ui/vault. Use the root token to login. Then, explore the Key/Value backend on your own:
Policies
Thus far we've been using the root policy to interact with the API. Let's set up a policy that only has read access.
Add a new config file called app-policy.json to "vault/policies":
{
  "path": {
    "kv/data/app/*": {
      "policy": "read"
    }
  }
}
Create a new policy back in the bash session:
bash-5.1# vault policy write app /vault/policies/app-policy.json

Success! Uploaded policy: app
Then, create a new token:
bash-5.1# vault token create -policy=app

Key                  Value
---                  -----
token                s.ZOUMx3RIhVRhI4ijlZg8KXRQ
token_accessor       TT53xOxbIfGjI7l4392gjXcg
token_duration       768h
token_renewable      true
token_policies       ["app" "default"]
identity_policies    []
policies             ["app" "default"]
Within another new terminal tab (you should now have three), add the VAULT_TOKEN environment variable with the new token:
$ export VAULT_TOKEN=your_token_goes_here
Try to read the foo secret that we previously set:
$ curl \
    -H "X-Vault-Token: $VAULT_TOKEN" \
    -X GET \
    http://127.0.0.1:8200/v1/kv/data/hello
You should not have the correct permissions to view that secret:
{
  "errors":[
    "1 error occurred:\n\t* permission denied\n\n"
  ]
}
Why can't we even read it? Jump back to the policy config in vault-config.json. kv/data/app/* indicates that the policy can only read from the app path.
As you've probably already noticed, nearly everything in Vault is path-based.
Back within the bash session in the container, add a new secret to the app/test path:
bash-5.1# vault kv put kv/app/test ping=pong

Key              Value
---              -----
created_time     2021-09-08T18:40:35.2694047Z
deletion_time    n/a
destroyed        false
version          1
You should be able to view the secret using the token associated with the app policy:
$ curl \
    -H "X-Vault-Token: $VAULT_TOKEN" \
    -X GET \
    http://127.0.0.1:8200/v1/kv/data/app/test
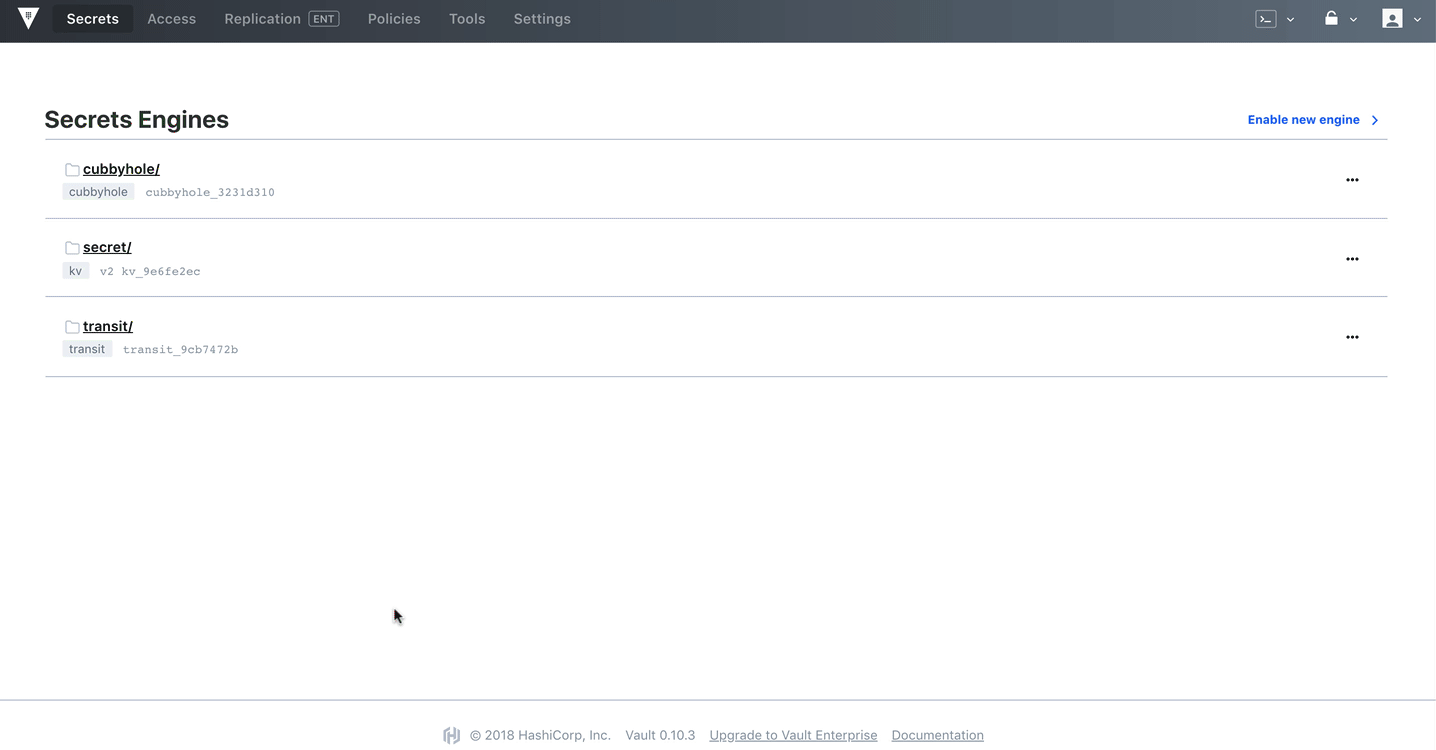
Policies can be managed from the UI as well:

Encryption as a Service
Before we look at dynamic secrets, let's quickly review the Transit backend, which can be used as an "encryption as a service" for:
- Encrypting and decrypting data "in-transit" without storing it inside Vault
- Easily integrating encryption into your application workflow
Back within the bash session in the container, enable Transit:
bash-5.1# vault secrets enable transit

Success! Enabled the transit secrets engine at: transit/
Configure a named encryption key:
bash-5.1# vault write -f transit/keys/foo

Success! Data written to: transit/keys/foo
Encrypt:
bash-5.1# vault write transit/encrypt/foo plaintext=$(base64 <<< "my precious")

Key           Value
---           -----
ciphertext    vault:v1:cFnk5AQLE9Mg+mZ7Ej17vRmYT5aqheikdZQ1FC4vre5jAod0L/uHDA==
Decrypt:
bash-5.1# vault write transit/decrypt/foo ciphertext=vault:v1:cFnk5AQLE9Mg+mZ7Ej17vRmYT5aqheikdZQ1FC4vre5jAod0L/uHDA==

Key          Value
---          -----
plaintext    bXkgcHJlY2lvdXMK
Decode:
bash-5.1# base64 -d <<< "bXkgcHJlY2lvdXMK"

my precious
Test it out in the UI as well:
Dynamic Secrets
As mentioned, Vault supports a number of dynamic secret backends for generating secrets dynamically when needed. For example, with the AWS and Google Cloud backends, you can create access credentials based on IAM policies. The Databases backend, meanwhile, generates database credentials based on configured roles.
Dynamic Secrets:
- are generated on demand
- have limited access based on role
- are leased for a period of time
- can be revoked
- come with an audit trail
Let's look at how to generate AWS credentials using the AWS backend.
AWS Credentials
Enable the AWS secrets backend:
bash-5.1# vault secrets enable -path=aws aws

Success! Enabled the aws secrets engine at: aws/
Authenticate:
bash-5.1# vault write aws/config/root access_key=foo secret_key=bar

Success! Data written to: aws/config/root
Make sure to replace
fooandbarwith your AWS access key id and secret key, respectively.
Create role:
bash-5.1# vault write aws/roles/ec2-read credential_type=iam_user policy_document=-<<EOF
{
  "Version": "2012-10-17",
  "Statement": [
    {
      "Sid": "Stmt1426528957000",
      "Effect": "Allow",
      "Action": [
        "ec2:*"
      ],
      "Resource": [
        "*"
      ]
    }
  ]
}
EOF

Success! Data written to: aws/roles/ec2-read
Here, we created a new role based on AmazonEC2ReadOnlyAccess, which is an AWS-managed policy. As the name suggests, it give users read-only access to the EC2 console; they cannot perform any actions or create new resources. You can also use an inline policy to create a custom role based on your individual needs. We'll look at an example of this shortly. Refer to the AWS Secrets Engine docs for more info.
Remember: Dynamic Secrets are generated only when they are requested (i.e., a web app requests access to S3). They are not available in the store before this.
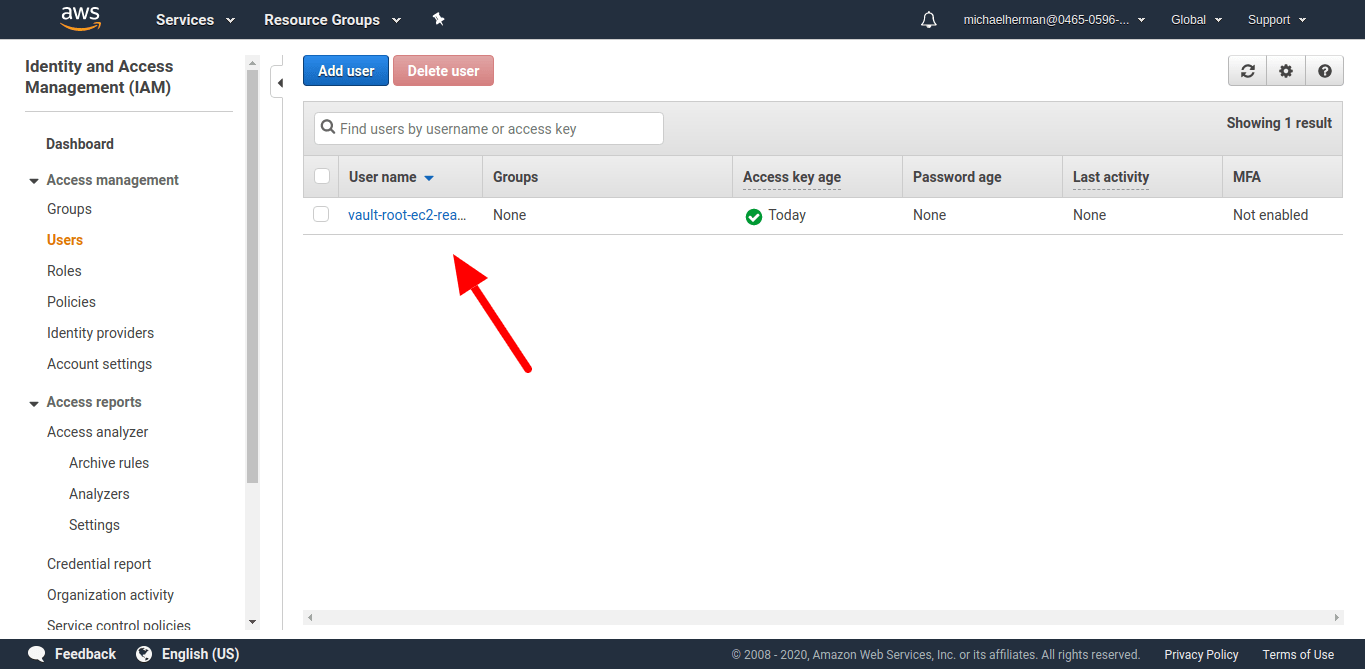
Create a new set of credentials:
bash-5.1# vault read aws/creds/ec2-read

Key                Value
---                -----
lease_id           aws/creds/ec2-read/9KdO6J7KVBiSwOPEvwrqqALG
lease_duration     768h
lease_renewable    true
access_key         AKIAZ4DZAKZKEULSDW5A
secret_key         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
security_token     <nil>
You should now be able to see the user within the "Users" section on the IAM console on AWS:
Leases and Revocation
In this section, we'll take a quick look at how to define a custom lease period and revoke a secret before the end of that period.
Create a new AWS role:
bash-5.1# vault write aws/roles/foo credential_type=iam_user policy_document=-<<EOF
{
  "Version": "2012-10-17",
  "Statement": [
    {
      "Sid": "Stmt1426528957000",
      "Effect": "Allow",
      "Action": [
        "ec2:*"
      ],
      "Resource": [
        "*"
      ]
    }
  ]
}
EOF

Success! Data written to: aws/roles/foo
Take note of the lease_duration when you create a new AWS credential:
bash-5.1# vault read aws/creds/foo

Key                Value
---                -----
lease_id           aws/creds/foo/F0oBbnBIHEoz0ywVVtbuJB7r
lease_duration     768h
lease_renewable    true
access_key         AKIAZ4DZAKZKLJKB7CPX
secret_key         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
security_token     <nil>
What if you only wanted the lease period for all AWS IAM dynamic secrets to be 30 minutes?
bash-5.1# vault write aws/config/lease lease=1800s lease_max=1800s
In this example, since lease_max is the same as lease, you won't be able to renew the token. If you set the lease_max to 3600s, you'd be able to renew the lease once. For more, review the Tokens and Leases guide.
Create a new credential:
bash-5.1# vault read aws/creds/foo

Key                Value
---                -----
lease_id           aws/creds/foo/xQlJpKDS1ljE9Awz0aywXgbB
lease_duration     30m
lease_renewable    true
access_key         AKIAZ4DZAKZKJPL5OM5W
secret_key         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
security_token     <nil>
Want to quickly revoke this credential? Grab the lease_id and then run:
bash-5.1# vault lease revoke aws/creds/foo/xQlJpKDS1ljE9Awz0aywXgbB
Want to revoke all AWS creds?
bash-5.1# vault lease revoke -prefix aws/
Refer to the Lease, Renew, and Revoke guide for more info these concepts.
Consul Backend
Thus far, we've been using the Filesystem backend. This will not scale beyond a single server, so it does not take advantage of Vault's high availability. Fortunately, there are a number of other Storage backends, like the Consul backend, designed for distributed systems.
To set up Consul, start by updating the docker-compose.yml file:
version: '3.8'

services:

  vault:
    build:
      context: ./vault
      dockerfile: Dockerfile
    ports:
      - 8200:8200
    volumes:
      - ./vault/config:/vault/config
      - ./vault/policies:/vault/policies
      - ./vault/data:/vault/data
      - ./vault/logs:/vault/logs
    environment:
      - VAULT_ADDR=http://127.0.0.1:8200
      - VAULT_API_ADDR=http://127.0.0.1:8200
    command: server -config=/vault/config/vault-config.json
    cap_add:
      - IPC_LOCK
    depends_on:
      - consul

  consul:
    build:
      context: ./consul
      dockerfile: Dockerfile
    ports:
      - 8500:8500
    command: agent -server -bind 0.0.0.0 -client 0.0.0.0 -bootstrap-expect 1 -config-file=/consul/config/config.json
    volumes:
      - ./consul/config/consul-config.json:/consul/config/config.json
      - ./consul/data:/consul/data
Add a new directory in the project root called "consul", and then add a new Dockerfile to that newly created directory:
# base image
FROM alpine:3.14

# set consul version
ENV CONSUL_VERSION 1.10.2

# create a new directory
RUN mkdir /consul

# download dependencies
RUN apk --no-cache add \
      bash \
      ca-certificates \
      wget

# download and set up consul
RUN wget --quiet --output-document=/tmp/consul.zip https://releases.hashicorp.com/consul/${CONSUL_VERSION}/consul_${CONSUL_VERSION}_linux_amd64.zip && \
    unzip /tmp/consul.zip -d /consul && \
    rm -f /tmp/consul.zip && \
    chmod +x /consul/consul

# update PATH
ENV PATH="PATH=$PATH:$PWD/consul"

# add the config file
COPY ./config/consul-config.json /consul/config/config.json

# expose ports
EXPOSE 8300 8400 8500 8600

# run consul
ENTRYPOINT ["consul"]
Next, within the "consul" directory add two new directories: "config" and "data". Then, within "config", add a config file called consul-config.json:
{
  "datacenter": "localhost",
  "data_dir": "/consul/data",
  "log_level": "DEBUG",
  "server": true,
  "ui": true,
  "ports": {
    "dns": 53
  }
}
Be sure to review the Configuration options from the Consul docs for more info on the above options.
The "consul" directory should now look like:
├── Dockerfile
├── config
│   └── consul-config.json
└── data
Exit out of the bash session. Bring the container down, and then update the Vault config file:
{
  "backend": {
    "consul": {
      "address": "consul:8500",
      "path": "vault/"
    }
  },
  "listener": {
    "tcp":{
      "address": "0.0.0.0:8200",
      "tls_disable": 1
    }
  },
  "ui": true
}
So, now we're using the Consul backend instead of the Filesystem. We used the name of the service, consul, as part of the address. The path key defines the path in Consul's key/value store where the Vault data will be stored.
Clear out all files and folders within the "vault/data" directory to remove the Filesystem backend. Build the new images and spin up the containers:
$ docker-compose down
$ docker-compose up -d --build
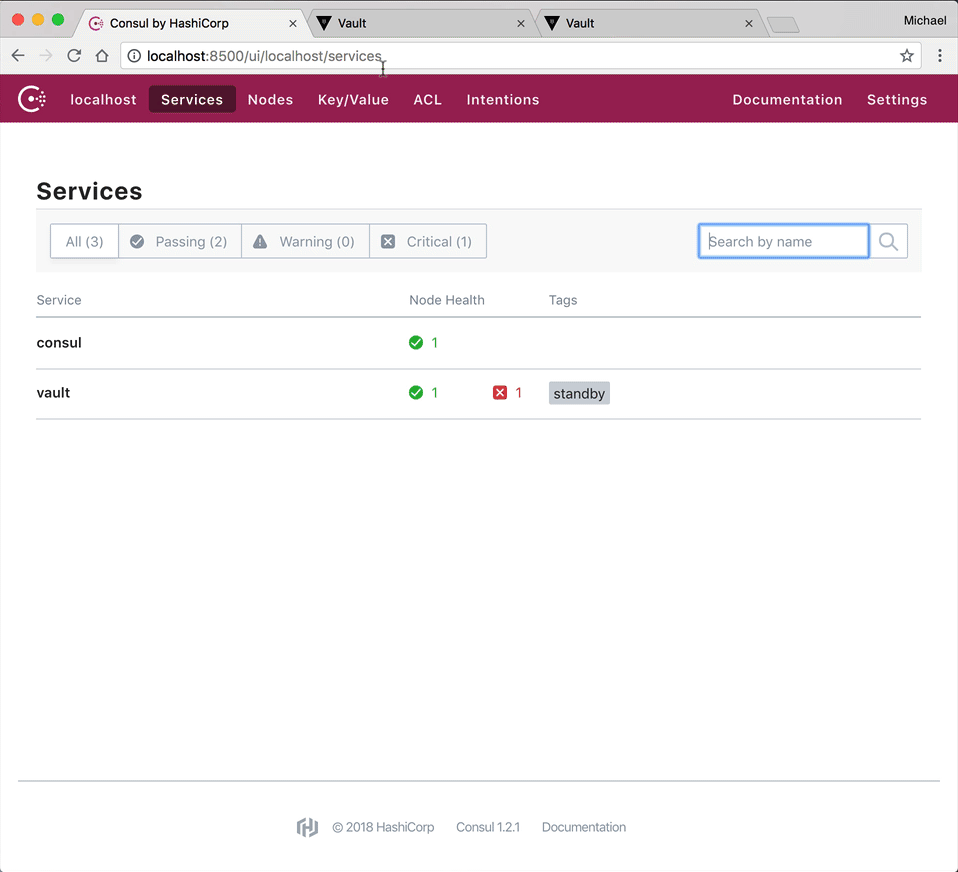
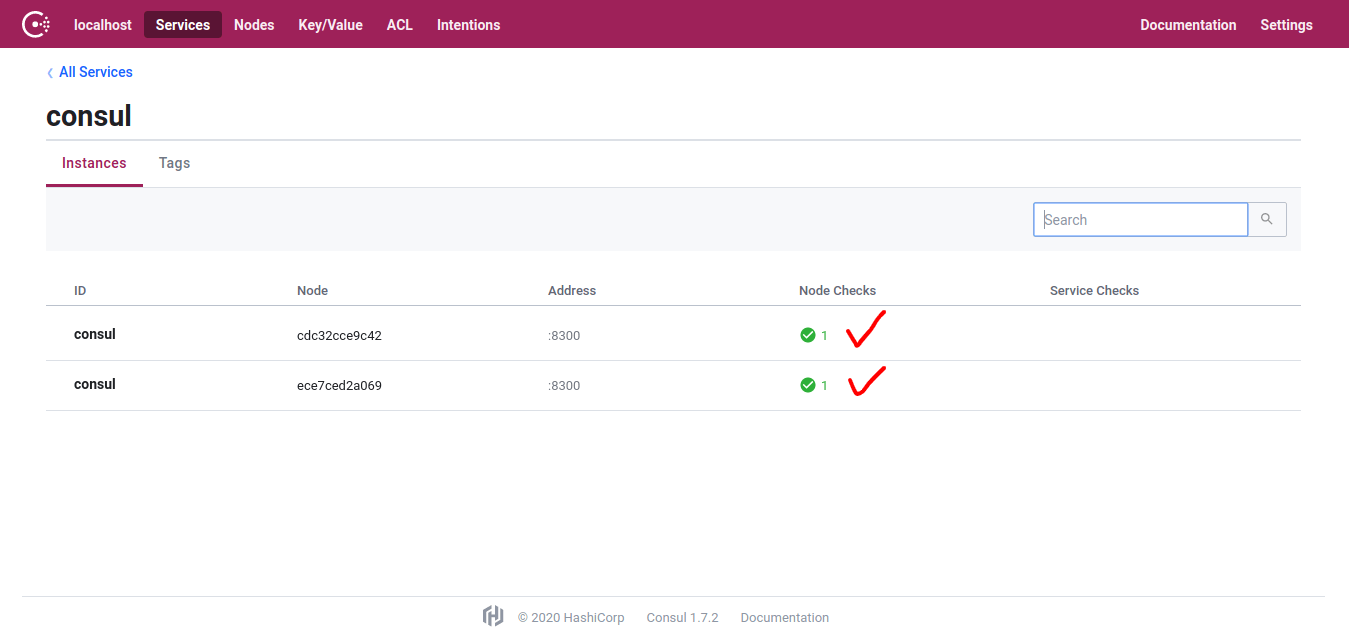
Ensure all is well by navigating in your browser to http://localhost:8500/ui:

Test this out from the CLI or UI.
CLI
Create a new bash session in the Vault container:
$ docker-compose exec vault bash
Then, run:
# Init
bash-5.1# vault operator init

# Unseal
bash-5.1# vault operator unseal

# Authenticate
bash-5.1# vault login

# Enable secrets
bash-5.1# vault secrets enable kv

# Add a new static secret
bash-5.1# vault kv put kv/foo bar=precious

# Read it back
bash-5.1# vault kv get kv/foo
UI
Notice how there's no files or folders within "vault/data". Why do you think this is?
Want to add another Consul server into the mix? Add a new service to docker-compose.yml:
consul-worker:
  build:
    context: ./consul
    dockerfile: Dockerfile
  command: agent -server -join consul -config-file=/consul/config/config.json
  volumes:
    - ./consul/config/consul-config.json:/consul/config/config.json
  depends_on:
    - consul
Here, we used the join command to connect this agent to an existing cluster. Notice how we simply had to reference the service name: consul.
Then:
- Exit from the bash session (if necessary)
- Bring down the containers
- Clear out the data directory in "consul/data" (Why?)
- Spin the containers back up and test
Conclusion
In this tutorial, we went over how to set up and run Vault and Consul inside a Docker container. You should now have a clear understanding of how to interact with Vault and perform basic operations.
Grab the final code from the vault-consul-docker repo. Check out the presentation as well.
Looking for more? Take a look at the following posts: