If a long-running task is part of your application's workflow you should handle it in the background, outside the normal flow.
Perhaps your web application requires users to submit a thumbnail (which will probably need to be re-sized) and confirm their email when they register. If your application processed the image and sent a confirmation email directly in the request handler, then the end user would have to wait for them both to finish. Instead, you'll want to pass these tasks off to a task queue and let a separate worker process deal with it, so you can immediately send a response back to the client. The end user can do other things on the client-side and your application is free to respond to requests from other users.
This tutorial looks at how to configure Redis Queue (RQ) to handle long-running tasks in a Flask app.
Celery is a viable solution as well. Check out Asynchronous Tasks with Flask and Celery for more.
Contents
Objectives
By the end of this tutorial, you will be able to:
- Integrate Redis Queue into a Flask app and create tasks.
- Containerize Flask and Redis with Docker.
- Run long-running tasks in the background with a separate worker process.
- Set up RQ Dashboard to monitor queues, jobs, and workers.
- Scale the worker count with Docker.
Workflow
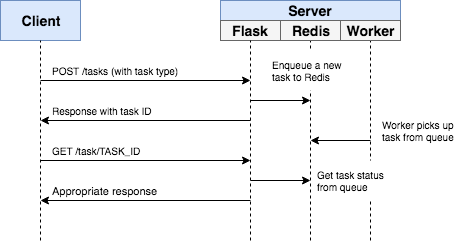
Our goal is to develop a Flask application that works in conjunction with Redis Queue to handle long-running processes outside the normal request/response cycle.
- The end user kicks off a new task via a POST request to the server-side
- Within the view, a task is added to the queue and the task id is sent back to the client-side
- Using AJAX, the client continues to poll the server to check the status of the task while the task itself is running in the background
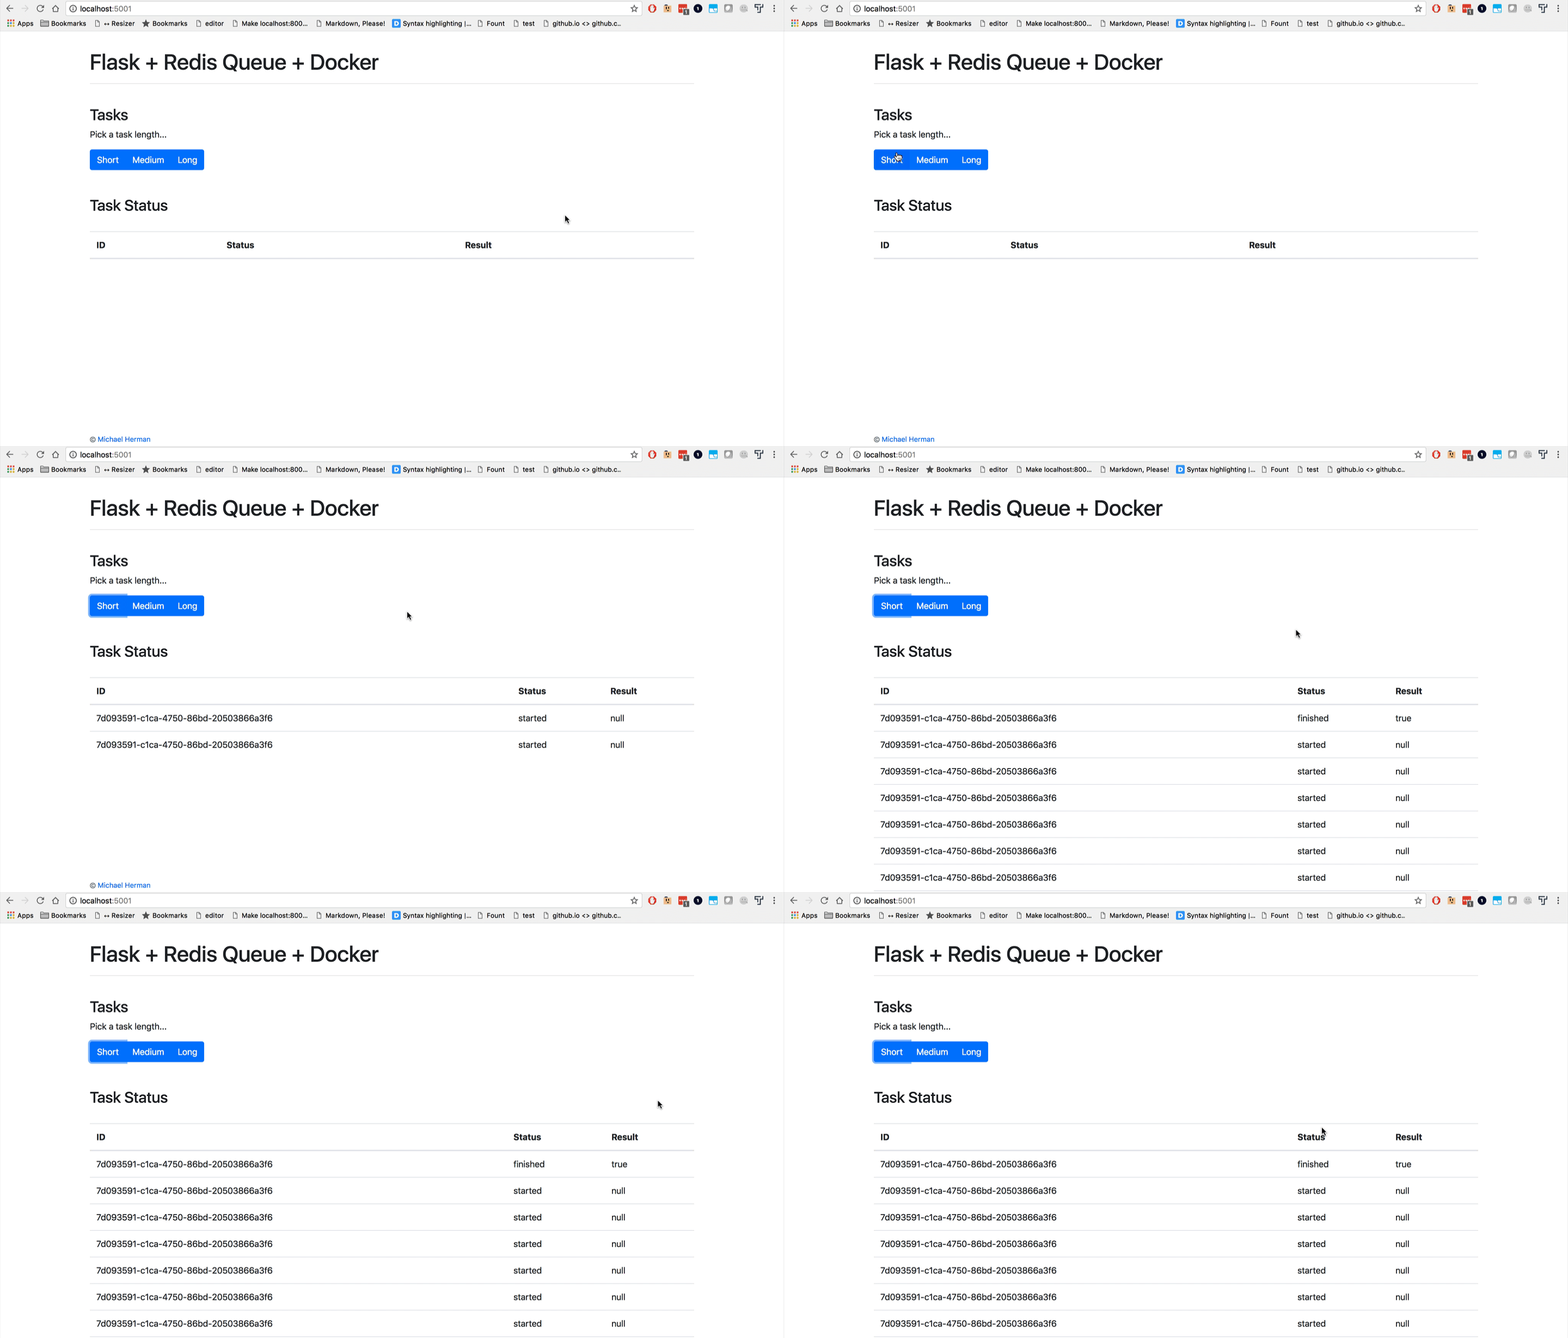
In the end, the app will look like this:
Project Setup
Want to follow along? Clone down the base project, and then review the code and project structure:
$ git clone https://github.com/mjhea0/flask-redis-queue --branch base --single-branch
$ cd flask-redis-queue
Since we'll need to manage three processes in total (Flask, Redis, worker), we'll use Docker to simplify our workflow so they can be managed from a single terminal window.
To test, run:
$ docker-compose up -d --build
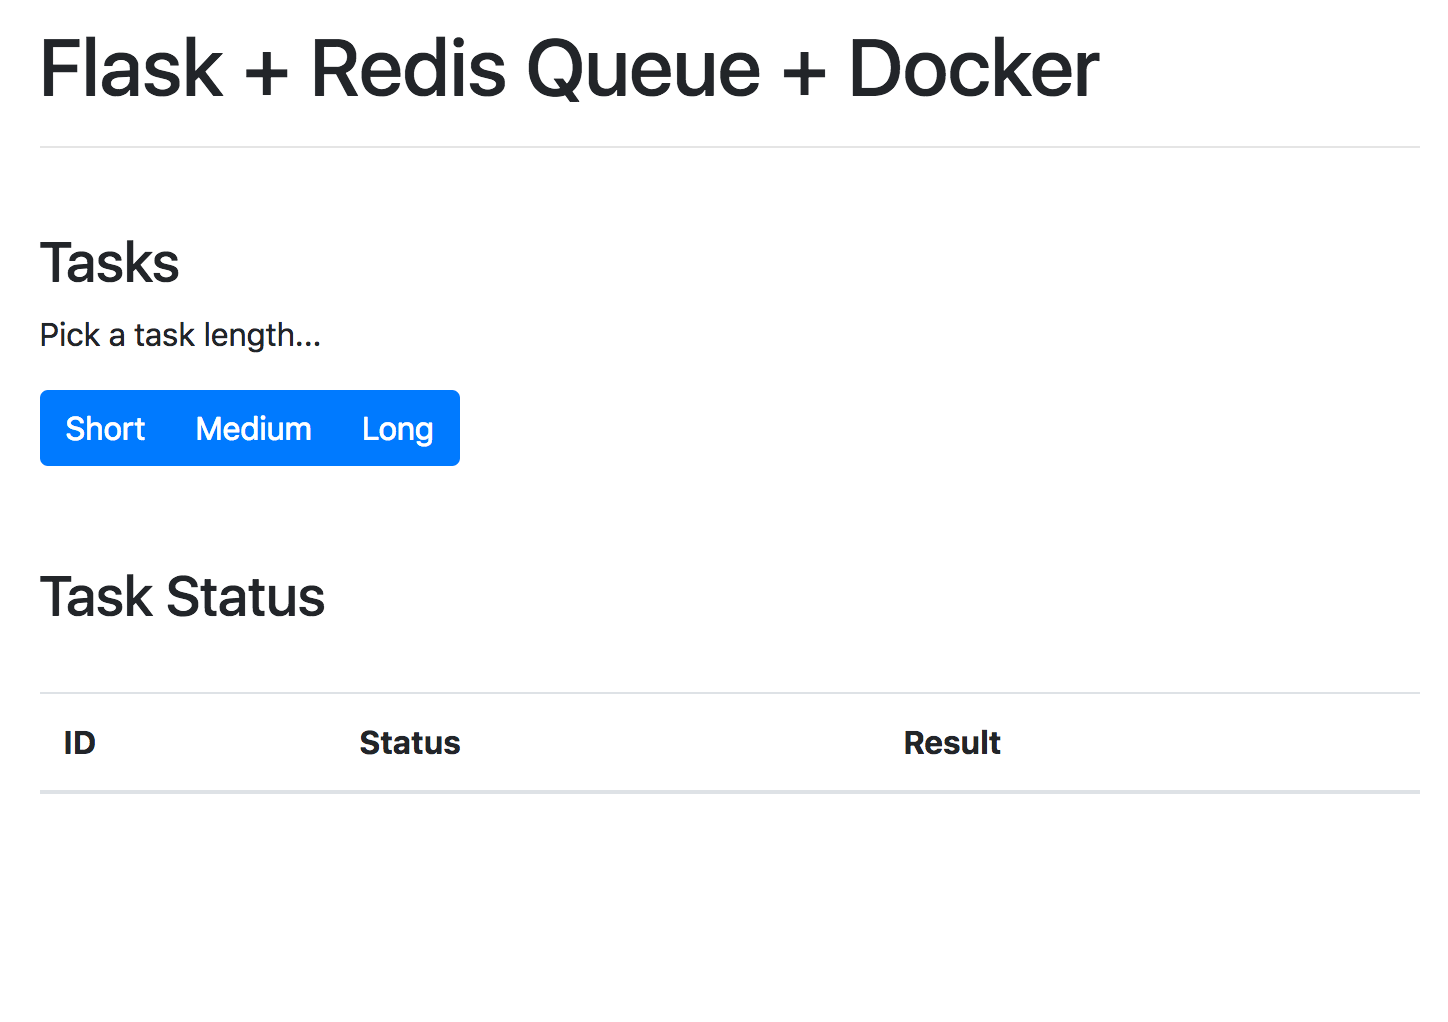
Open your browser to http://localhost:5004. You should see:
Trigger a Task
An event handler in project/client/static/main.js is set up that listens for a button click and sends an AJAX POST request to the server with the appropriate task type: 1, 2, or 3.
$('.btn').on('click', function() {
  $.ajax({
    url: '/tasks',
    data: { type: $(this).data('type') },
    method: 'POST'
  })
  .done((res) => {
    getStatus(res.data.task_id);
  })
  .fail((err) => {
    console.log(err);
  });
});
On the server-side, a view is already configured to handle the request in project/server/main/views.py:
@main_blueprint.route("/tasks", methods=["POST"])
def run_task():
    task_type = request.form["type"]
    return jsonify(task_type), 202
We just need to wire up Redis Queue.
Redis Queue
So, we need to spin up two new processes: Redis and a worker. Add them to the docker-compose.yml file:
version: '3.8'

services:

  web:
    build: .
    image: web
    container_name: web
    ports:
      - 5004:5000
    command: python manage.py run -h 0.0.0.0
    volumes:
      - .:/usr/src/app
    environment:
      - FLASK_DEBUG=1
      - APP_SETTINGS=project.server.config.DevelopmentConfig
    depends_on:
      - redis

  worker:
    image: web
    command: python manage.py run_worker
    volumes:
      - .:/usr/src/app
    environment:
      - APP_SETTINGS=project.server.config.DevelopmentConfig
    depends_on:
      - redis

  redis:
    image: redis:6.2-alpine
Add the task to a new file called tasks.py in "project/server/main":
# project/server/main/tasks.py


import time


def create_task(task_type):
    time.sleep(int(task_type) * 10)
    return True
Update the view to connect to Redis, enqueue the task, and respond with the id:
@main_blueprint.route("/tasks", methods=["POST"])
def run_task():
    task_type = request.form["type"]
    with Connection(redis.from_url(current_app.config["REDIS_URL"])):
        q = Queue()
        task = q.enqueue(create_task, task_type)
    response_object = {
        "status": "success",
        "data": {
            "task_id": task.get_id()
        }
    }
    return jsonify(response_object), 202
Don't forget the imports:
import redis
from rq import Queue, Connection
from flask import render_template, Blueprint, jsonify, request, current_app

from project.server.main.tasks import create_task
Update BaseConfig:
class BaseConfig(object):
    """Base configuration."""

    WTF_CSRF_ENABLED = True
    REDIS_URL = "redis://redis:6379/0"
    QUEUES = ["default"]
Did you notice that we referenced the redis service (from docker-compose.yml) in the REDIS_URL rather than localhost or some other IP? Review the Docker Compose docs for more info on connecting to other services via the hostname.
Finally, we can use a Redis Queue worker, to process tasks at the top of the queue.
manage.py:
@cli.command("run_worker")
def run_worker():
    redis_url = app.config["REDIS_URL"]
    redis_connection = redis.from_url(redis_url)
    with Connection(redis_connection):
        worker = Worker(app.config["QUEUES"])
        worker.work()
Here, we set up a custom CLI command to fire the worker.
It's important to note that the @cli.command() decorator will provide access to the application context along with the associated config variables from project/server/config.py when the command is executed.
Add the imports as well:
import redis
from rq import Connection, Worker
Add the dependencies to the requirements file:
redis==4.1.1
rq==1.10.1
Build and spin up the new containers:
$ docker-compose up -d --build
To trigger a new task, run:
$ curl -F type=0 http://localhost:5004/tasks
You should see something like:
{
  "data": {
    "task_id": "bdad64d0-3865-430e-9cc3-ec1410ddb0fd"
  },
  "status": "success"
}
Task Status
Turn back to the event handler on the client-side:
$('.btn').on('click', function() {
  $.ajax({
    url: '/tasks',
    data: { type: $(this).data('type') },
    method: 'POST'
  })
  .done((res) => {
    getStatus(res.data.task_id);
  })
  .fail((err) => {
    console.log(err);
  });
});
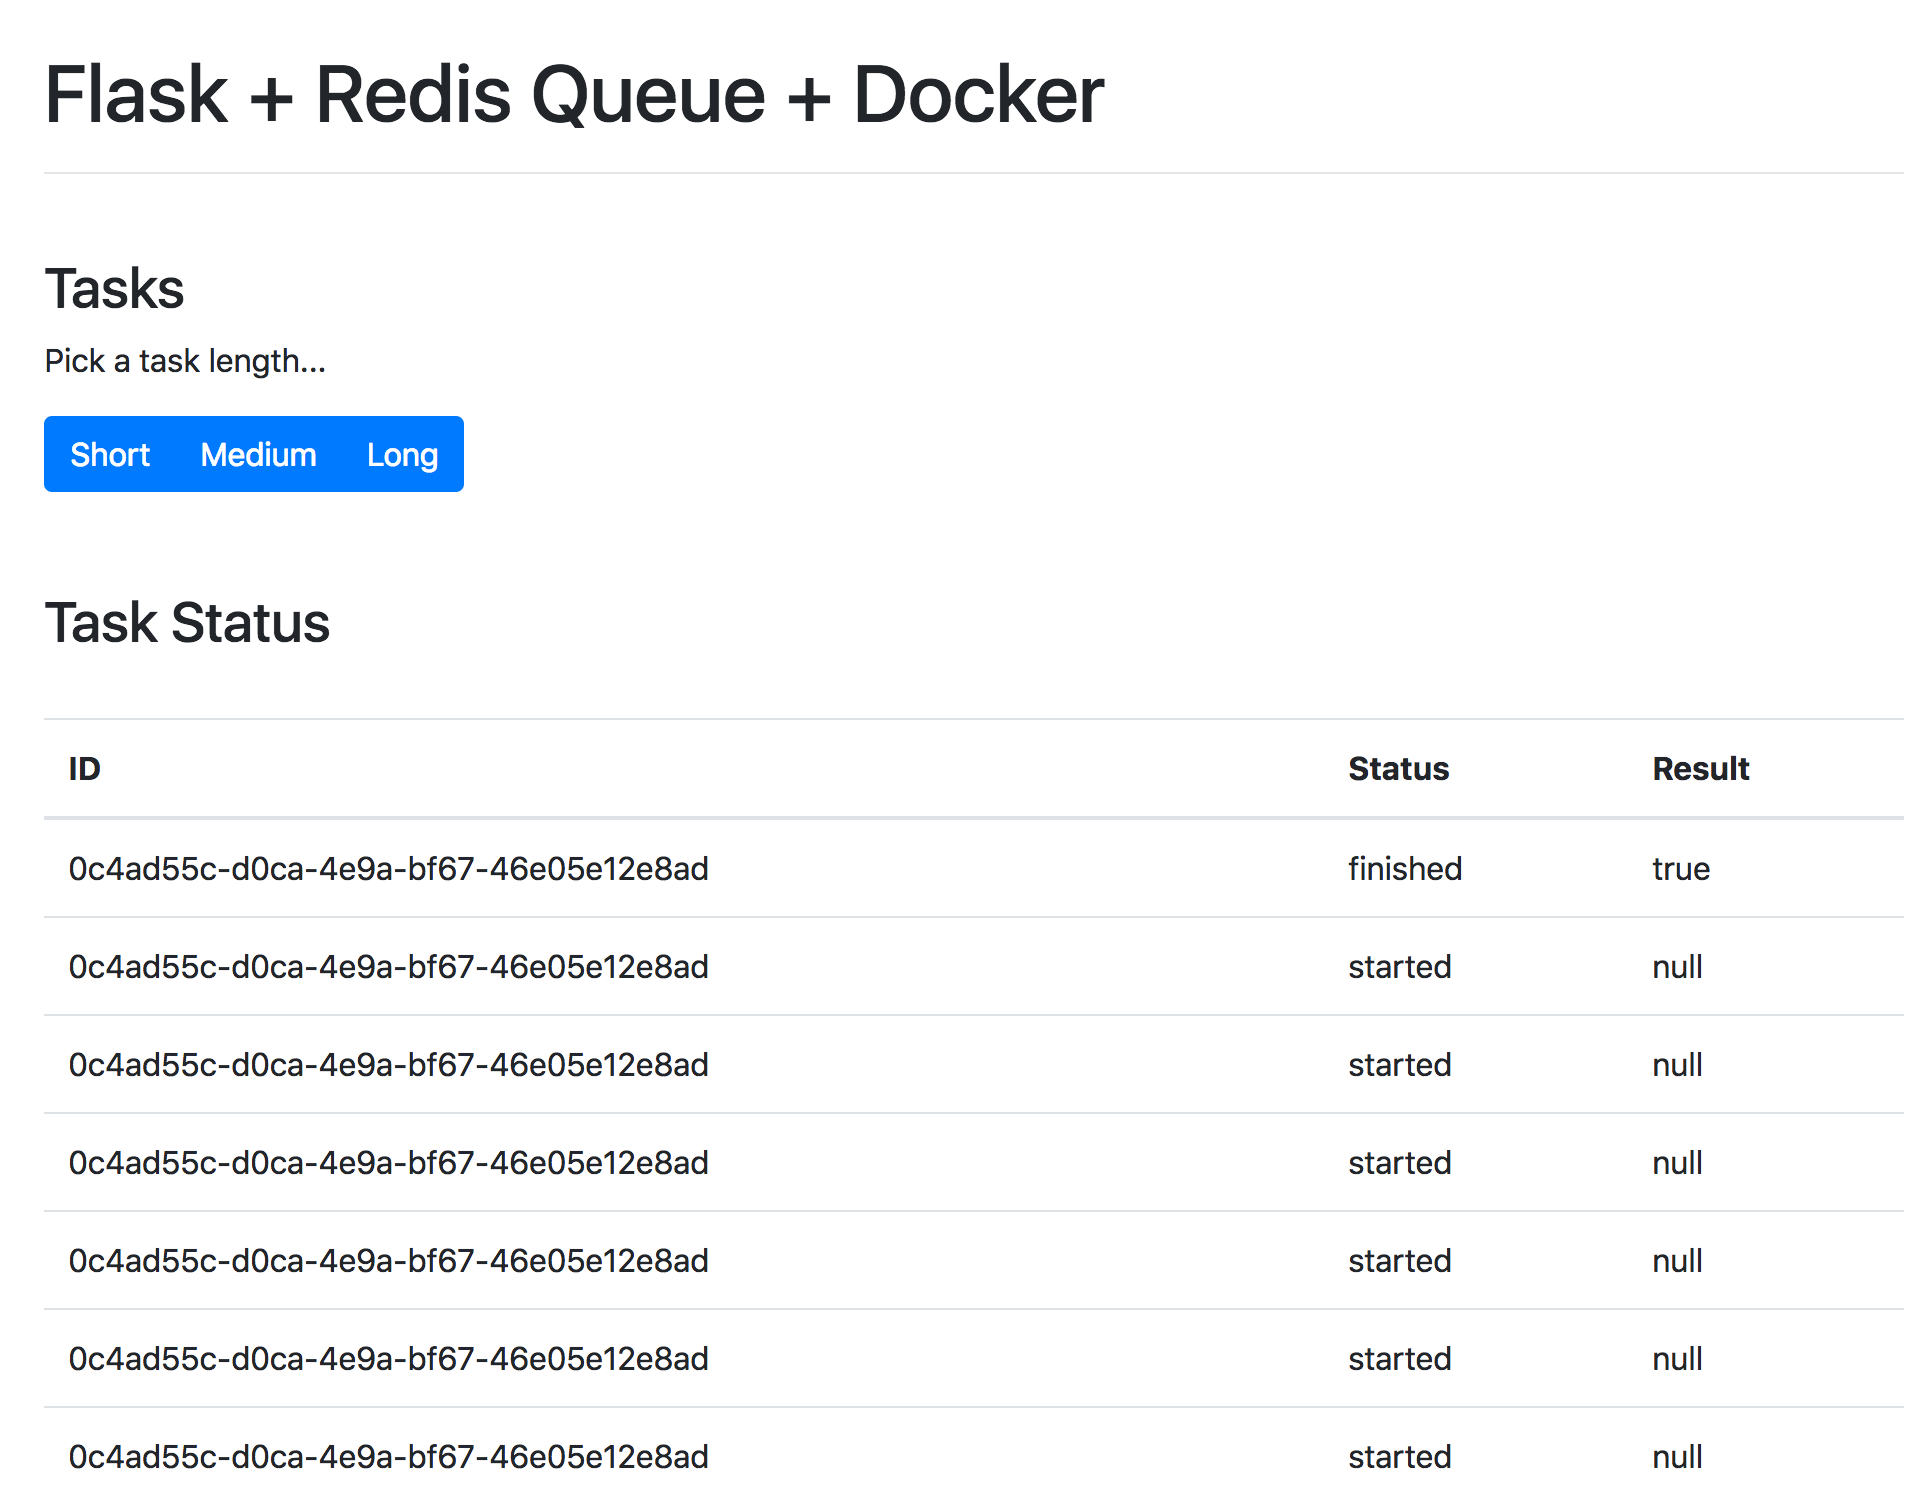
Once the response comes back from the original AJAX request, we then continue to call getStatus() with the task id every second. If the response is successful, a new row is added to the table on the DOM.
function getStatus(taskID) {
  $.ajax({
    url: `/tasks/${taskID}`,
    method: 'GET',
  })
  .done((res) => {
    const html = `
    <tr>
      <td>${res.data.task_id}</td>
      <td>${res.data.task_status}</td>
      <td>${res.data.task_result}</td>
    </tr>`;
    $('#tasks').prepend(html);
    const taskStatus = res.data.task_status;
    if (taskStatus === 'finished' || taskStatus === 'failed') return false;
    setTimeout(function () {
      getStatus(res.data.task_id);
    }, 1000);
  })
  .fail((err) => {
    console.log(err);
  });
}
Update the view:
@main_blueprint.route("/tasks/<task_id>", methods=["GET"])
def get_status(task_id):
    with Connection(redis.from_url(current_app.config["REDIS_URL"])):
        q = Queue()
        task = q.fetch_job(task_id)
    if task:
        response_object = {
            "status": "success",
            "data": {
                "task_id": task.get_id(),
                "task_status": task.get_status(),
                "task_result": task.result,
            },
        }
    else:
        response_object = {"status": "error"}
    return jsonify(response_object)
Add a new task to the queue:
$ curl -F type=1 http://localhost:5004/tasks
Then, grab the task_id from the response and call the updated endpoint to view the status:
$ curl http://localhost:5004/tasks/5819789f-ebd7-4e67-afc3-5621c28acf02

{
  "data": {
    "task_id": "5819789f-ebd7-4e67-afc3-5621c28acf02",
    "task_result": true,
    "task_status": "finished"
  },
  "status": "success"
}
Test it out in the browser as well:
Dashboard
RQ Dashboard is a lightweight, web-based monitoring system for Redis Queue.
To set up, first add a new directory to the "project" directory called "dashboard". Then, add a new Dockerfile to that newly created directory:
FROM python:3.10-alpine

RUN pip install rq-dashboard

# https://github.com/rq/rq/issues/1469
RUN pip uninstall -y click
RUN pip install click==7.1.2

EXPOSE 9181

CMD ["rq-dashboard"]
Simply add the service to the docker-compose.yml file like so:
version: '3.8'

services:

  web:
    build: .
    image: web
    container_name: web
    ports:
      - 5004:5000
    command: python manage.py run -h 0.0.0.0
    volumes:
      - .:/usr/src/app
    environment:
      - FLASK_DEBUG=1
      - APP_SETTINGS=project.server.config.DevelopmentConfig
    depends_on:
      - redis

  worker:
    image: web
    command: python manage.py run_worker
    volumes:
      - .:/usr/src/app
    environment:
      - APP_SETTINGS=project.server.config.DevelopmentConfig
    depends_on:
      - redis

  redis:
    image: redis:6.2-alpine

  dashboard:
    build: ./project/dashboard
    image: dashboard
    container_name: dashboard
    ports:
      - 9181:9181
    command: rq-dashboard -H redis
    depends_on:
      - redis
Build the image and spin up the container:
$ docker-compose up -d --build
Navigate to http://localhost:9181 to view the dashboard:
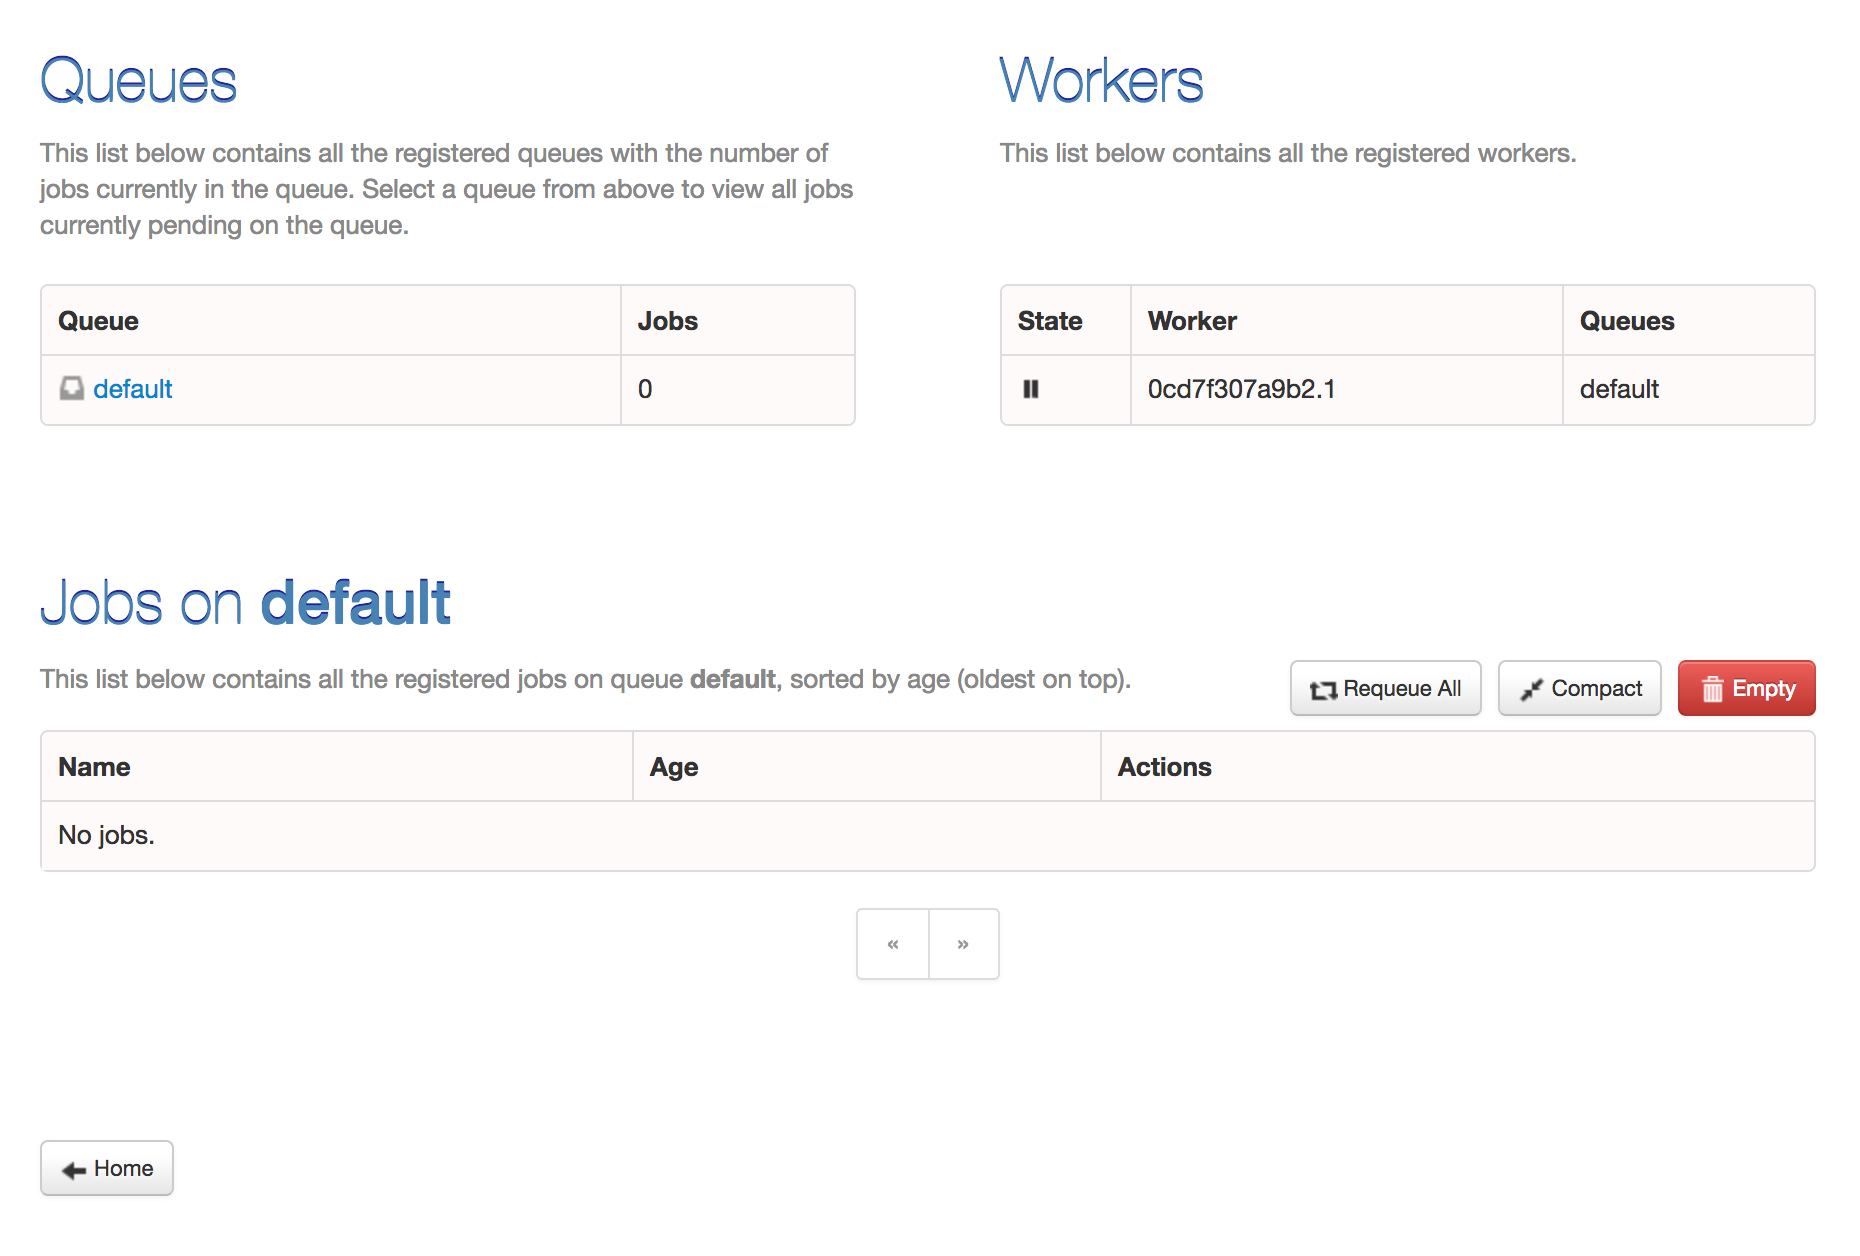
Kick off a few jobs to fully test the dashboard:
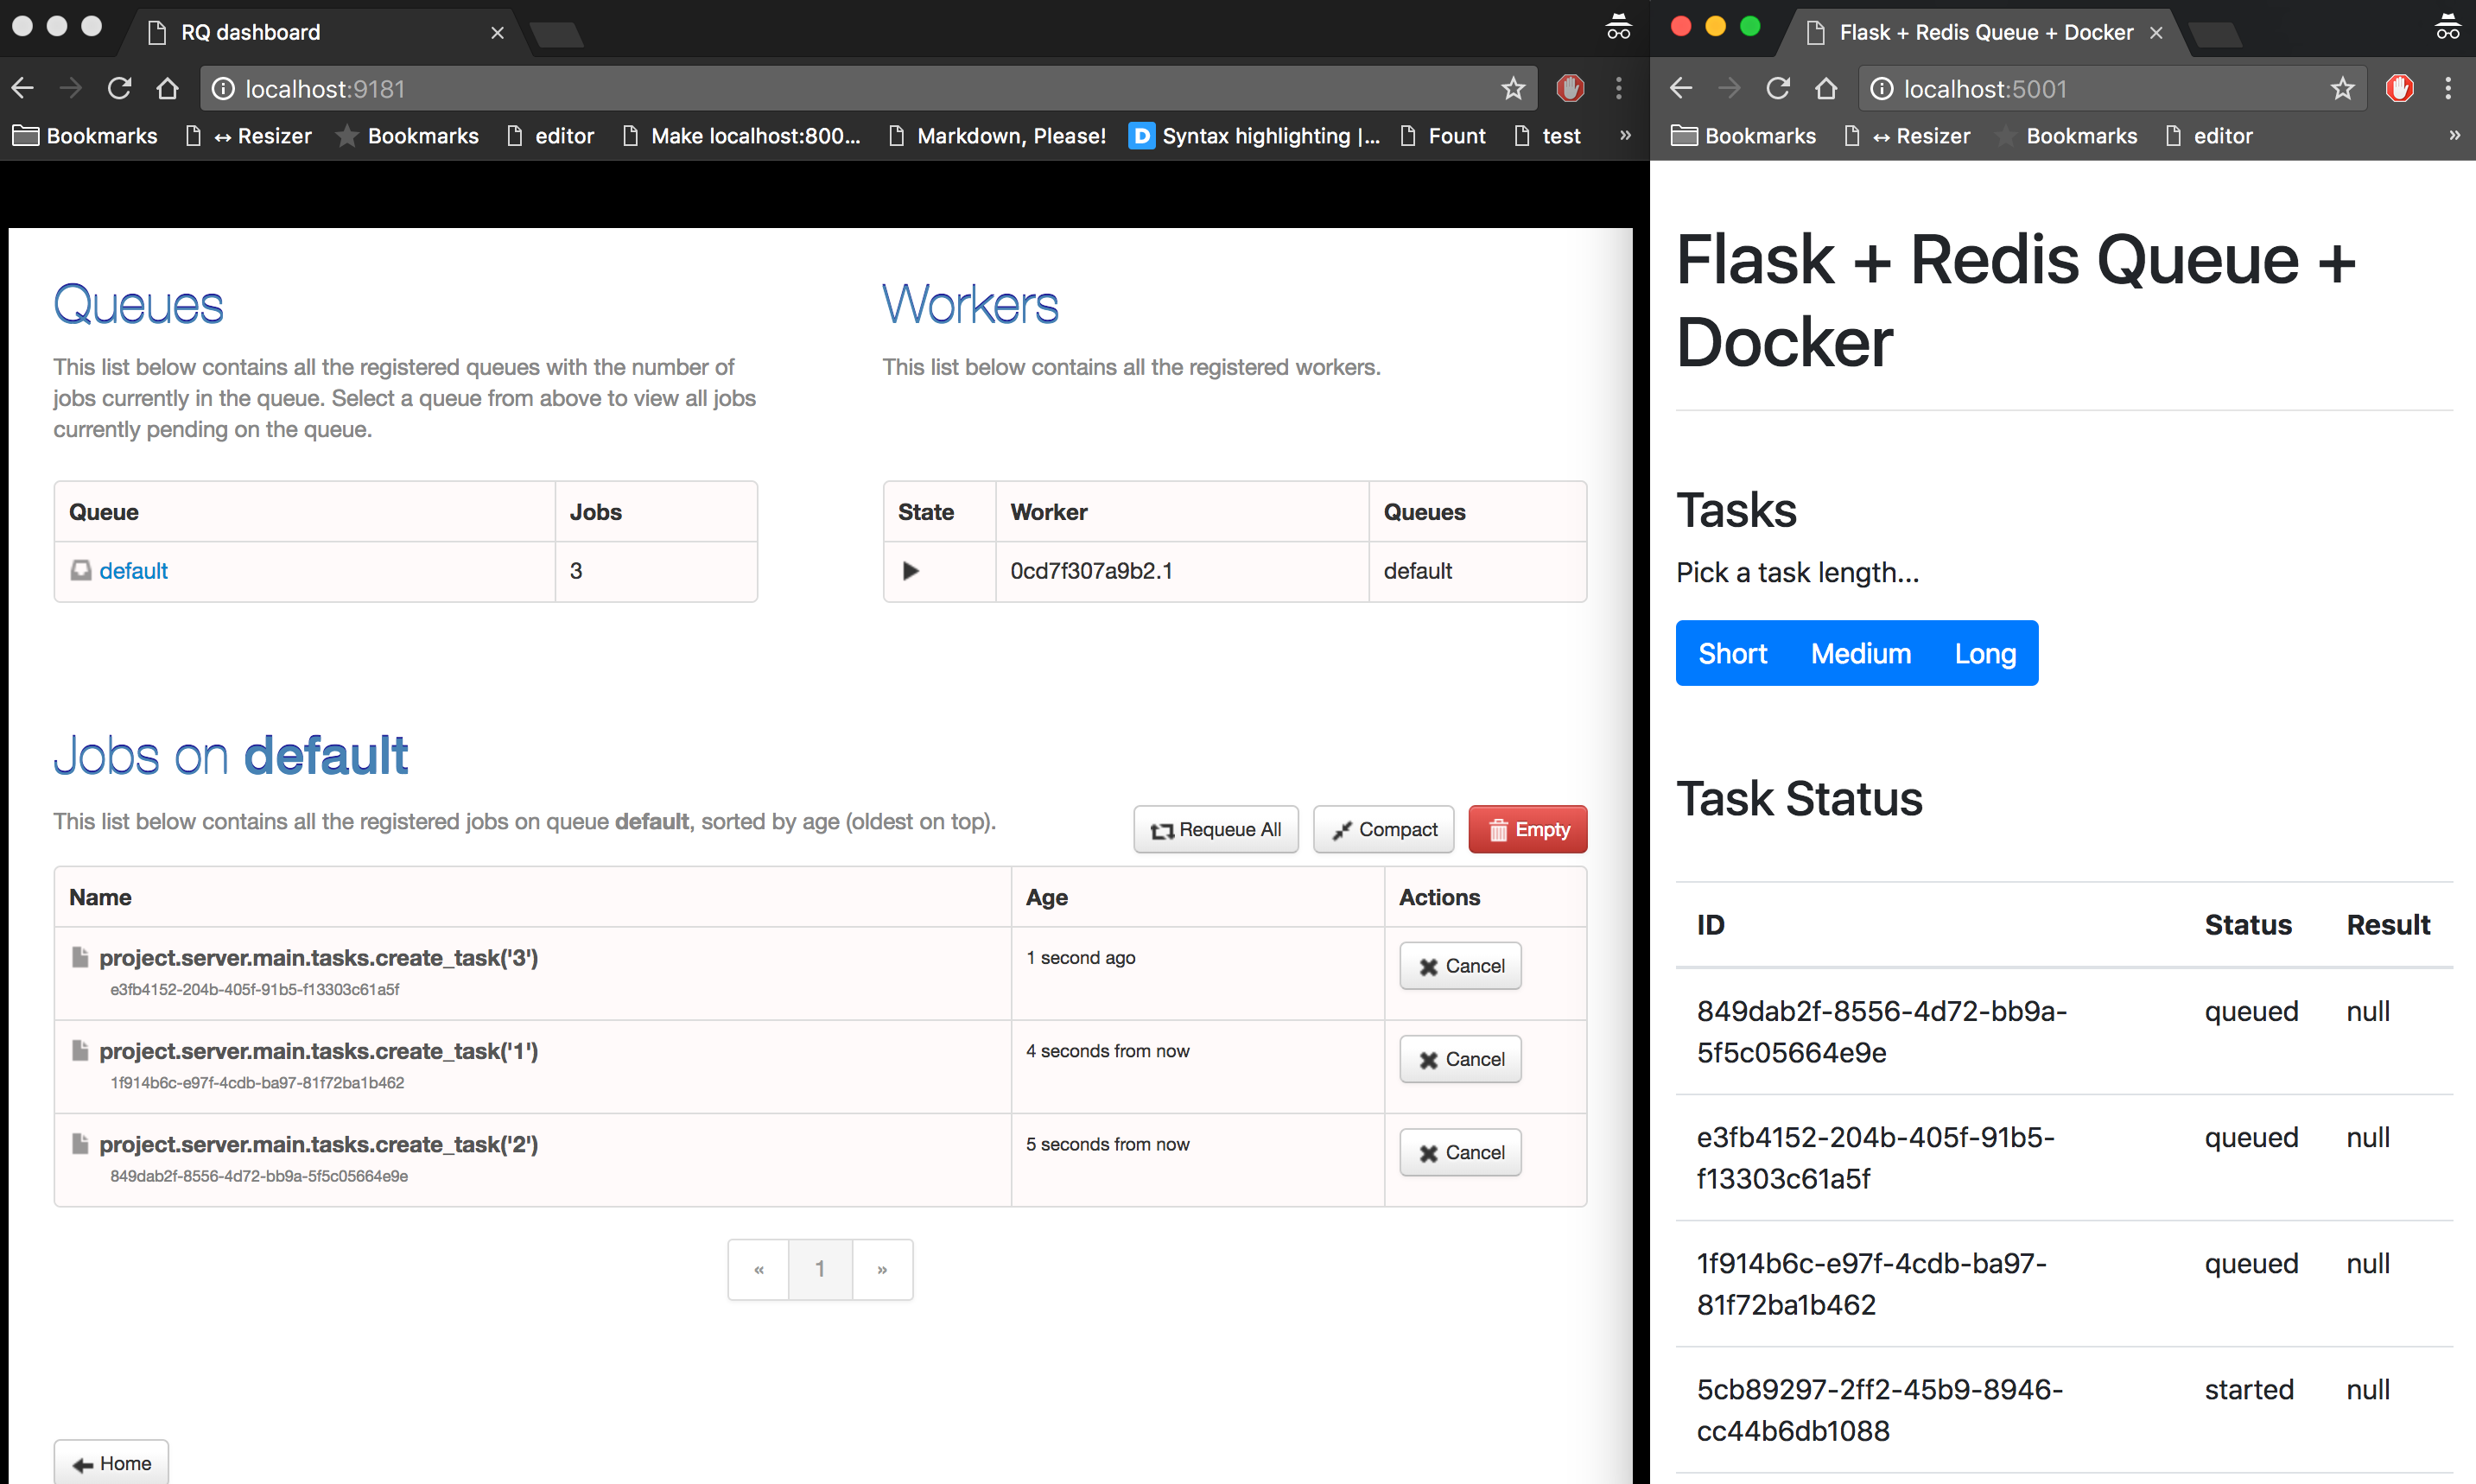
Try adding a few more workers to see how that affects things:
$ docker-compose up -d --build --scale worker=3
Conclusion
This has been a basic guide on how to configure Redis Queue to run long-running tasks in a Flask app. You should let the queue handle any processes that could block or slow down the user-facing code.
Looking for some challenges?
- Deploy this application across a number of DigitalOcean droplets using Kubernetes or Docker Swarm.
- Write unit tests for the new endpoints. (Mock out the Redis instance with fakeredis)
- Instead of polling the server, try using Flask-SocketIO to open up a websocket connection.
Grab the code from the repo.
 Michael Herman