 Patrick Kennedy
This article explains what Werkzeug is and how Flask uses it for its core HTTP functionality. Along the way, you'll develop your own WSGI-compatible application using Werkzeug to create a Flask-like web framework!
This article assumes that you have prior experience with Flask. If you're interested in learning more about Flask, check out my course on how to build, test, and deploy a Flask application:
Contents
Flask Dependencies
You may have already noticed, but every time you install Flask, you also install the following dependencies:
Flask is a wrapper around all of them.
$ pip install Flask
$ pip freeze

blinker==1.7.0
click==8.1.7
Flask==3.0.0
itsdangerous==2.1.2
Jinja2==3.1.2
MarkupSafe==2.1.3
Werkzeug==3.0.1  # !!!
What is Werkzeug?
Werkzeug is a collection of libraries that can be used to create a WSGI (Web Server Gateway Interface) compatible web application in Python.
A WSGI (Web Server Gateway Interface) server is necessary for Python web applications since a web server cannot communicate directly with Python. WSGI is an interface between a web server and a Python-based web application.
Put another way, Werkzeug provides a set of utilities for creating a Python application that can talk to a WSGI server, like Gunicorn.
Want to learn more about WSGI?
Check out 'What is Gunicorn in Python?' and take a look at the Building a Python Web Framework course.
Werkzeug provides the following functionality (which Flask uses):
- Request processing
- Response handling
- URL routing
- Middleware
- HTTP utilities
- Exception handling
It also provides a basic development server with hot reloading.
Let's dive into an example of building a web application using Werkzeug. We'll also look at how Flask implements similar functionality.
Hello World App
As an introduction to Werkzeug, let's start by creating a "Hello World" app using some of the key functionality provided by Werkzeug.
You can find the source code for the project discussed in this article on GitLab: https://gitlab.com/patkennedy79/werkzeug_movie_app.
Installation
Start by creating a new project:
$ mkdir werkzeug_movie_app
$ cd werkzeug_movie_app
$ python3 -m venv venv
$ source venv/bin/activate
(venv)$
Install Werkzeug, Jinja2, and redis-py:
(venv)$ pip install Werkzeug Jinja2 redis
(venv)$ pip freeze > requirements.txt
Redis will be used as the data storage solution for storing movie data.
Application
Werkzeug is a collection of libraries used to build a WSGI-compatible web application. It doesn't provide a high-level class, like Flask, for scaffolding out a full web application. Instead, you need to create the application yourself from Werkzeug's libraries.
Create a new app.py file in the top-level folder of your project:
from werkzeug.wrappers import Request, Response


class MovieApp(object):
    """Implements a WSGI application for managing your favorite movies."""
    def __init__(self):
        pass

    def dispatch_request(self, request):
        """Dispatches the request."""
        return Response('Hello World!')

    def wsgi_app(self, environ, start_response):
        """WSGI application that processes requests and returns responses."""
        request = Request(environ)
        response = self.dispatch_request(request)
        return response(environ, start_response)

    def __call__(self, environ, start_response):
        """The WSGI server calls this method as the WSGI application."""
        return self.wsgi_app(environ, start_response)


def create_app():
    """Application factory function that returns an instance of MovieApp."""
    app = MovieApp()
    return app
The MovieApp class implements a WSGI-compatible web application, which processes requests from different users and generates responses back to the users. Here's the flow of how this class interfaces with a WSGI server:
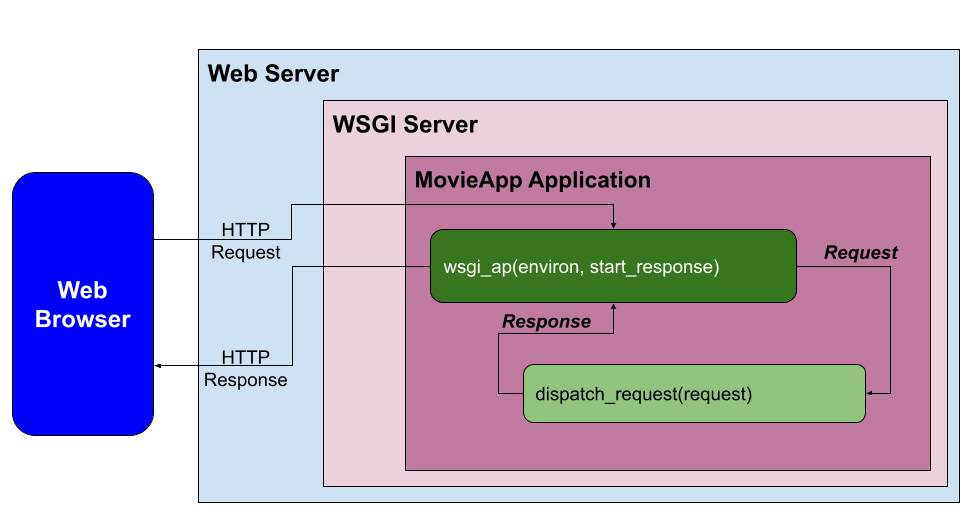
When a request comes in, it's processed in wsgi_app():
def wsgi_app(self, environ, start_response):
    """WSGI application that processes requests and returns responses."""
    request = Request(environ)
    response = self.dispatch_request(request)
    return response(environ, start_response)
The environment (environ) is automatically processed in the Request class to create a request object. The request is then processed in dispatch_request(). For this initial example, dispatch_request() returns a response of 'Hello World!'. The response is then returned from wsgi_app().
Flask Comparison:
MovieAppis an simplified version of theFlaskclass.Within the
Flaskclass, thewsgi_app()is the actual WSGI application that interfaces with the WSGI server. Also,dispatch_request()andfull_dispatch_request()are used to do the request dispatching, which matches the URL to the applicable view function and handles exceptions.
Development Server
Add the following code to the bottom of app.py to run the Werkzeug development server:
if __name__ == '__main__':
    # Run the Werkzeug development server to serve the WSGI application (MovieApp)
    from werkzeug.serving import run_simple
    app = create_app()
    run_simple('127.0.0.1', 5000, app, use_debugger=True, use_reloader=True)
Run the application:
(venv)$ python app.py
Navigate to http://127.0.0.1:5000 to see the 'Hello World!' Message.
Flask Comparison:
Within the
Flaskclass, there's an equivalentrun()method that utilizes the Werkzeug development server.
Middleware for Serving Static Files
In web applications, middleware is a software component that can be added to the request/response processing pipeline to perform a specific function.
One important function for a web server/application to perform is serving static files (CSS, JavaScript, and image files). Werkzeug provides a middleware for this functionality called SharedDataMiddleware.
SharedDataMiddleware is ideally suited for working with the Werkzeug development server to serve static files.
For a production environment, you'll want to switch out the Werkzeug development server and
SharedDataMiddlewarefor a web server such as Nginx and a WSGI server such as Gunicorn.
To utilize SharedDataMiddleware, start by adding a new folder called "static" to the project with "css" and "img" folders:
├── app.py
├── requirements.txt
└── static
    ├── css
    └── img
Within the "static/img" folder, add the Flask logo from https://gitlab.com/patkennedy79/werkzeug_movie_app/-/blob/main/static/img/flask.png. Save it as flask.png.
Next, expand the application factory function:
def create_app():
    """Application factory function that returns an instance of MovieApp."""
    app = MovieApp()
    app.wsgi_app = SharedDataMiddleware(app.wsgi_app, {
        '/static': os.path.join(os.path.dirname(__file__), 'static')
    })
    return app
Update the imports at the top:
import os

from werkzeug.middleware.shared_data import SharedDataMiddleware
from werkzeug.wrappers import Request, Response
Now when a request is processed by the Werkzeug applicaiton (app), it will first be routed to SharedDataMiddleware to determine if a static file has been requested:
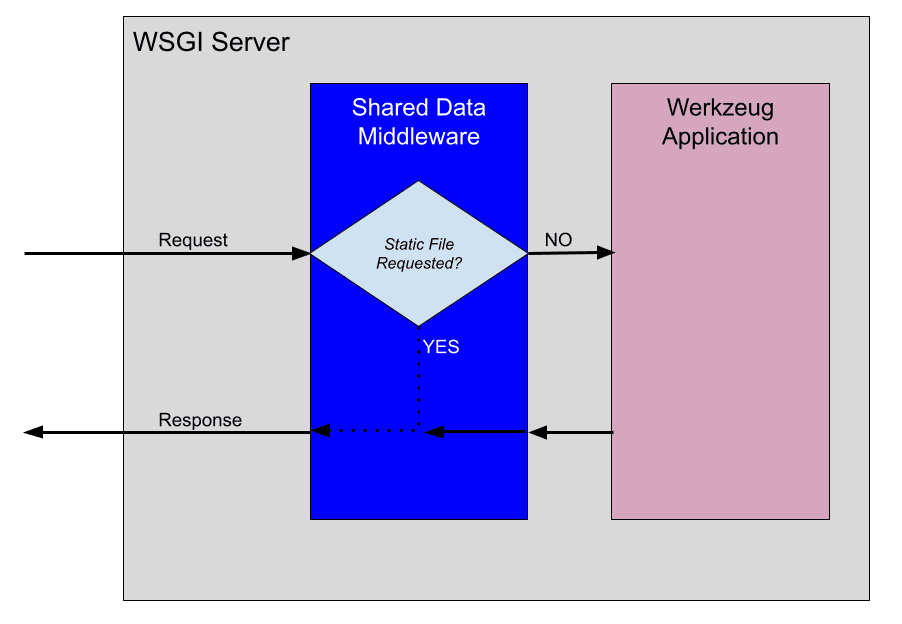
If a static file is requested, SharedDataMiddleware will generate the response with the static file. Otherwise, the request is passed down the chain to the Werkzeug app for processing in wsgi_app().
To see SharedDataMiddleware in action, run the server and navigate to http://127.0.0.1:5000/static/img/flask.png to view the Flask logo.
For a full list of middleware solutions provided by Werkzeug, check out the Middleware docs.
Flask Comparison:
Flask does not utilize the
SharedDataMiddleware. It takes a different approach for serving static files. By default, if a static folder exists, Flask automatically adds a new URL rule to serve the static files up.To illustrate this concept, run
flask routesin the top-level project of a Flask application and you will see:(venv)$ flask routes Endpoint Methods Rule ----------- ------- ----------------------- index GET / static GET /static/<path:filename>
Templates
As is typically done in a Flask project, we'll use Jinja for the templating engine for our app.
Start by adding a new folder called "templates" to the project:
├── app.py
├── requirements.txt
├── static
│   ├── css
│   └── img
│       └── flask.png
└── templates
In order to utilize Jinja, expand the constructor of the MovieApp class:
def __init__(self):
    """Initializes the Jinja templating engine to render from the 'templates' folder."""
    template_path = os.path.join(os.path.dirname(__file__), 'templates')
    self.jinja_env = Environment(loader=FileSystemLoader(template_path),
                                 autoescape=True)
Add the import:
from jinja2 import Environment, FileSystemLoader
Flask Comparison:
Flask utilizes Jinja
Environmentas well to create the templating engine.
Within the MovieApp class, add a new render_template() method:
def render_template(self, template_name, **context):
    """Renders the specified template file using the Jinja templating engine."""
    template = self.jinja_env.get_template(template_name)
    return Response(template.render(context), mimetype='text/html')
This method takes the template_name and any variables to pass to the templating engine (**context). It then generates a Response using the render() method from Jinja.
Flask Comparison:
Doesn't the
render_template()function look familiar? The Flask flavor is one of the most used functions in Flask.
To see render_template() in action, update dispatch_request() to render a template:
def dispatch_request(self, request):
    """Dispatches the request."""
    return self.render_template('base.html')
All requests to the app will now render the templates/base.html template.
<!DOCTYPE html>
<html lang="en">
<head>
    <meta charset="UTF-8">
    <title>Werkzeug Movie App</title>

    <!-- CSS file for styling the application -->
    <link rel="stylesheet" href="/static/css/style.css" type="text/css">
</head>
<body>
    <h1>Werkzeug Movie App</h1>
    {% block body %}
    {% endblock %}
</body>
</html>
Make sure to add this template to the "templates" folder and save a copy of https://gitlab.com/patkennedy79/werkzeug_movie_app/-/blob/main/static/css/style.css to static/css/style.css.
Run the server. Navigate to http://127.0.0.1:5000. You should now see:

Routing
Routing means to match the URL to the appropriate view function. Werkzeug provides a Map class that allows you to match URLs to view functions using Rule objects.
Let's create the Map object in the MovieApp constructor to illustrate how this works:
def __init__(self):
    """Initializes the Jinja templating engine to render from the 'templates' folder."""
    template_path = os.path.join(os.path.dirname(__file__), 'templates')
    self.jinja_env = Environment(loader=FileSystemLoader(template_path),
                                 autoescape=True)
    self.url_map = Map([
        Rule('/', endpoint='index'),
        Rule('/movies', endpoint='movies'),
    ])
Don't forget the import:
from werkzeug.routing import Map, Rule
Each Rule object defines a URL and the view function (endpoint) to call if the URL is matched:
    self.url_map = Map([
        Rule('/', endpoint='index'),
        Rule('/movies', endpoint='movies'),
    ])
For example, when the homepage ('/') is requested, the index view function should be called.
Flask Comparison:
One of the amazing features of Flask is the
@routedecorator, which is used to assign a URL to a view function. This decorator updates theurl_mapfor the Flask app, similar to the hand-codedurl_mapthat we defined above.
In order to utilize the URL mapping, dispatch_request() needs to be updated:
def dispatch_request(self, request):
    """Dispatches the request."""
    adapter = self.url_map.bind_to_environ(request.environ)
    try:
        endpoint, values = adapter.match()
        return getattr(self, endpoint)(request, **values)
    except HTTPException as e:
        return e
Now when a request comes in to dispatch_request(), the url_map will be utilized to attempt to match() the URL to an entry. If the URL requested is included in the url_map, then the applicable view function (endpoint) will be called. If the URL is not found in the url_map, then an exception is raised.
Exception handling will be covered shortly!
Add the import:
from werkzeug.exceptions import HTTPException
We've specified two view functions in the url_map, so let's create them now within the MovieApp class:
def index(self, request):
    return self.render_template('base.html')

def movies(self, request):
    return self.render_template('movies.html')
While templates/base.html was created in the previous section, templates/movies.html needs to be created now:
{% extends "base.html" %}

{% block body %}
<div class="table-container">
    <table>
        <!-- Table Header -->
        <thead>
            <tr>
                <th>Index</th>
                <th>Movie Title</th>
            </tr>
        </thead>

        <!-- Table Elements (Rows) -->
        <tbody>
            <tr>
                <td>1</td>
                <td>Knives Out</td>
            </tr>
            <tr>
                <td>2</td>
                <td>Pirates of the Caribbean</td>
            </tr>
            <tr>
                <td>3</td>
                <td>Inside Man</td>
            </tr>
        </tbody>
    </table>
</div>
{% endblock %}
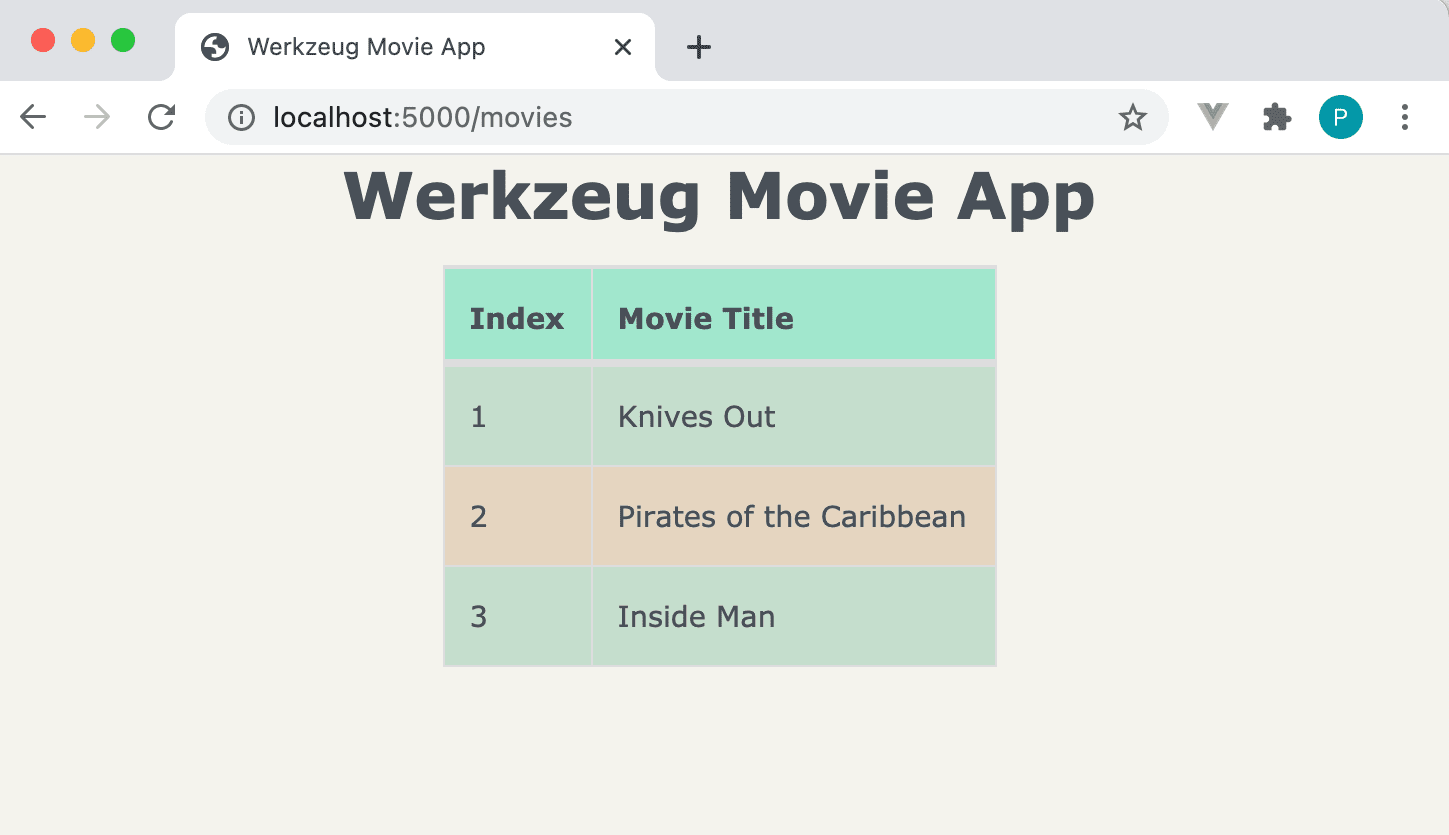
This template file utilizes template inheritance to use base.html as the parent template. It generates a table of three movies.
http://127.0.0.1:5000 should look the same:
However, if you navigate to http://127.0.0.1:5000/movies, you'll now see the table of movies:
Exception Handling
Try navigating to http://127.0.0.1:5000/movies2:
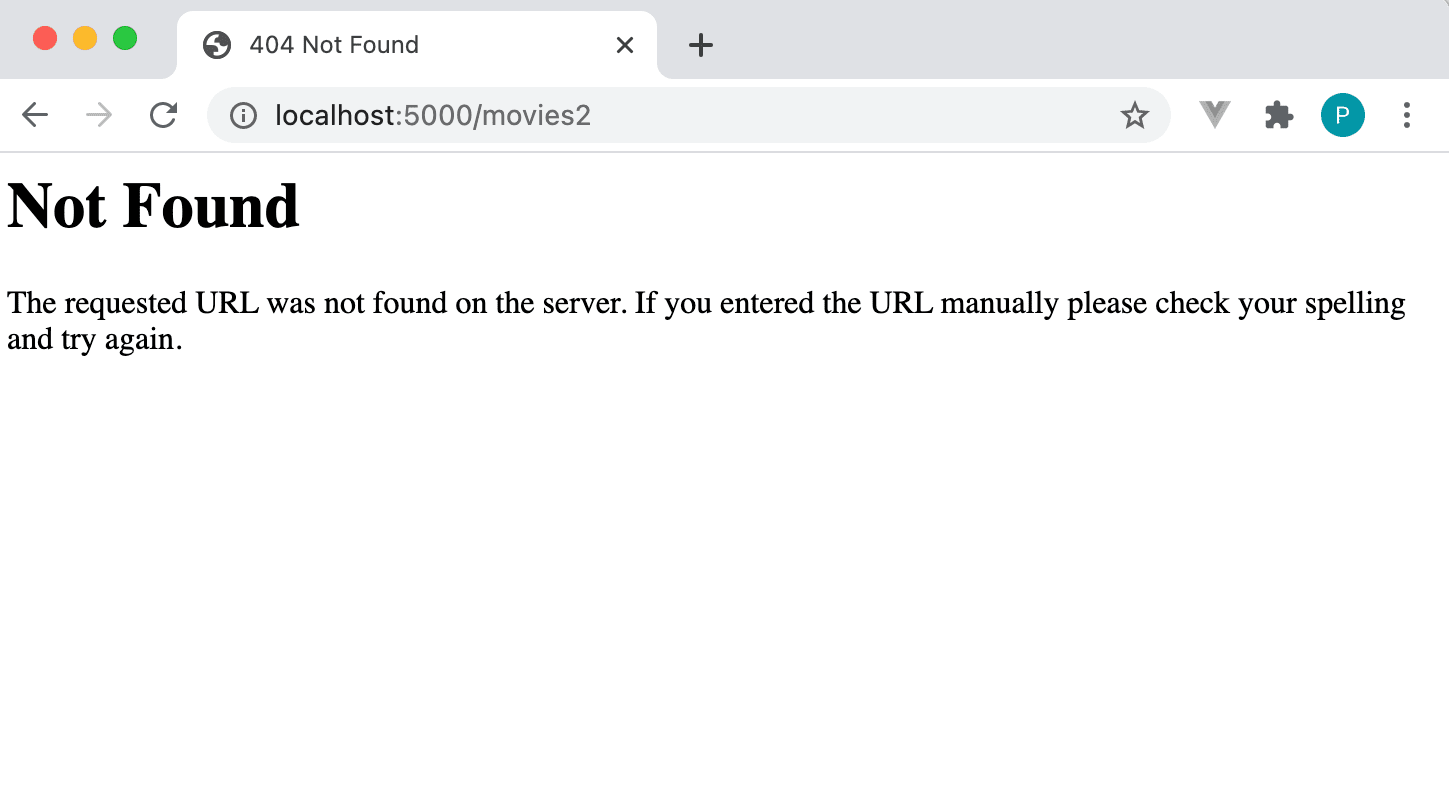
The page returned is the default error page when a URL is not found in url_map:
def dispatch_request(self, request):
    """Dispatches the request."""
    adapter = self.url_map.bind_to_environ(request.environ)
    try:
        endpoint, values = adapter.match()
        return getattr(self, endpoint)(request, **values)
    except HTTPException as e:
        return e
Additionally, you should see the following in the console:
127.0.0.1 - - [07/Mar/2021 12:13:17] "GET /movies2 HTTP/1.1" 404 -
Let's create a custom error page by expanding dispatch_request():
def dispatch_request(self, request):
    """Dispatches the request."""
    adapter = self.url_map.bind_to_environ(request.environ)
    try:
        endpoint, values = adapter.match()
        return getattr(self, endpoint)(request, **values)
    except NotFound:
        return self.error_404()
    except HTTPException as e:
        return e
Update the import:
from werkzeug.exceptions import HTTPException, NotFound
Now when a URL is not found in the url_map, it will be handled by calling error_404(). Create this new method within the MovieApp class:
def error_404(self):
    response = self.render_template("404.html")
    response.status_code = 404
    return response
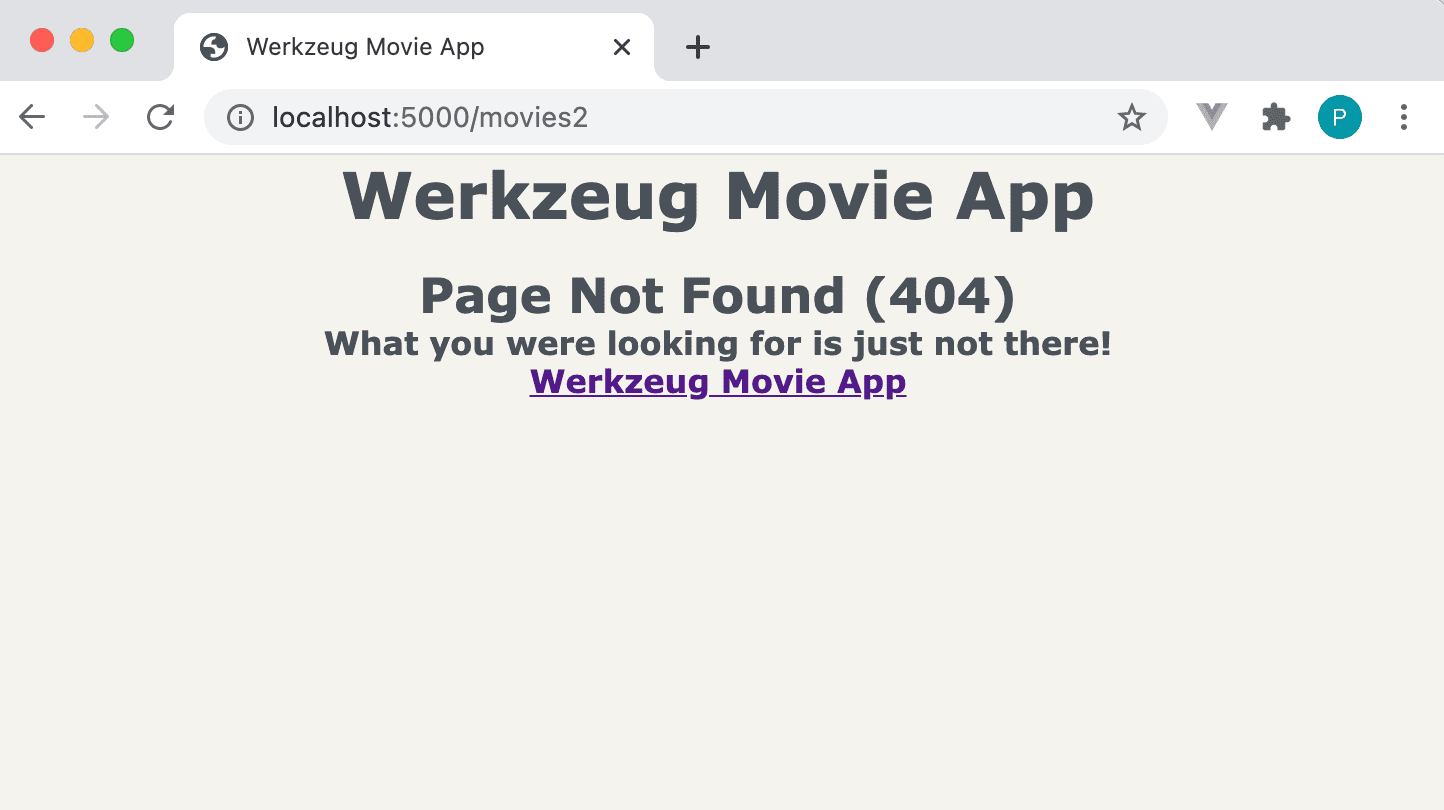
Create templates/404.html:
{% extends "base.html" %}

{% block body %}
<div class="error-description">
    <h2>Page Not Found (404)</h2>
    <h4>What you were looking for is just not there!</h4>
    <h4><a href="/">Werkzeug Movie App</a></h4>
</div>
{% endblock %}
Now when you navigate to http://127.0.0.1:5000/movies2, you should see a friendly message:
Flask Comparison:
When
full_dispatch_request()in theFlaskclass detects an exception, it will be handled gracefully inhandle_user_exceptions(). Flask allows custom error pages for all HTTP error codes as well.
Request Processing
In this section, we'll add a form to the app to allow the user to input their favorite movies.
Redis
As mentioned, we'll be using Redis, an in-memory data structure store, to persist the movies due to its fast read/write speed and ease of setup.
Install and run Redis.
The quickest way to get Redis up and running is with Docker:
$ docker run --name some-redis -d -p 6379:6379 redisTo check that the Redis container is running:
$ docker psTo stop the running Redis container:
$ docker stop some-redis # Use name of Docker containerIf you're not a Docker user, check out these resources:
In order to utilize Redis, start by updating the MovieApp constructor to create an instance of StrictRedis:
def __init__(self, config):  # Updated!!
    """Initializes the Jinja templating engine to render from the 'templates' folder,
    defines the mapping of URLs to view methods, and initializes the Redis interface."""
    template_path = os.path.join(os.path.dirname(__file__), 'templates')
    self.jinja_env = Environment(loader=FileSystemLoader(template_path),
                                 autoescape=True)
    self.url_map = Map([
        Rule('/', endpoint='index'),
        Rule('/movies', endpoint='movies'),
    ])
    self.redis = StrictRedis(config['redis_host'], config['redis_port'],
                             decode_responses=True)  # New!!
Additionally, the constructor (__init__()) has an additional argument (config), which is used for creating the instance of StrictRedis.
Import:
from redis import StrictRedis
The configuration parameters that are passed in to the constructor need to be specified in the application factory function:
def create_app():
    """Application factory function that returns an instance of MovieApp."""
    app = MovieApp({'redis_host': '127.0.0.1', 'redis_port': 6379})
    app.wsgi_app = SharedDataMiddleware(app.wsgi_app, {
        '/static': os.path.join(os.path.dirname(__file__), 'static')
    })
    return app
Form Processing
In order to allow the user to add a movie to the Redis storage, we need to add a new view function in url_map:
def __init__(self, config):
    """Initializes the Jinja templating engine to render from the 'templates' folder,
    defines the mapping of URLs to view methods, and initializes the Redis interface."""

    ...

    self.url_map = Map([
        Rule('/', endpoint='index', methods=['GET']),
        Rule('/movies', endpoint='movies', methods=['GET']),
        Rule('/add', endpoint='add_movie', methods=['GET', 'POST']),  # !!!
    ])

    ...
The Rule entries in url_map have been expanded to specify the HTTP methods that are allowed for each URL. Additionally, the '/add' URL has been added:
Rule('/add', endpoint='add_movie', methods=['GET', 'POST']),
If the '/add' URL is requested with either the GET or POST methods, then the add_movie() view function will be called.
Next, we need to create the add_movie() view function in the MovieApp class:
def add_movie(self, request):
    """Adds a movie to the list of favorite movies."""
    if request.method == 'POST':
        movie_title = request.form['title']
        self.redis.lpush('movies', movie_title)
        return redirect('/movies')
    return self.render_template('add_movie.html')
Import:
from werkzeug.utils import redirect
If a GET request is made to '/add', then add_movie() will render the templates/add_movie.html file. If a POST request is made to '/add', then the form data is stored in the Redis storage in the movies list and the user is redirected to the list of movies.
Create the templates/add_movie.html template file:
{% extends "base.html" %}

{% block body %}
<div class="form-container">
    <form method="post">
        <div class="field">
            <label for="movieTitle">Movie Title:</label>
            <input type="text" id="movieTitle" name="title"/>
        </div>
        <div class="field">
            <button type="submit">Submit</button>
        </div>
    </form>
</div>
{% endblock %}
Display Movies
Since we're now storing the movies in Redis, the movie() view function needs to be updated to read from the movies list in Redis:
def movies(self, request):
    """Displays the list of favorite movies."""
    movies = self.redis.lrange('movies', 0, -1)
    return self.render_template('movies.html', movies=movies)
The list of movies is being passed to the templates/movies.html template file, which needs to be updated to loop through this list to create the table of movies:
{% extends "base.html" %}

{% block body %}
<div class="table-container">
    <table>
        <!-- Table Header -->
        <thead>
            <tr>
                <th>Index</th>
                <th>Movie Title</th>
            </tr>
        </thead>

        <!-- Table Elements (Rows) -->
        <tbody>
            {% for movie in movies %}
            <tr>
                <td>{{ loop.index }}</td>
                <td>{{ movie }}</td>
            </tr>
            {% endfor %}
        </tbody>
    </table>
</div>
{% endblock %}
To see the form processing in action, start by navigating to http://127.0.0.1:5000/add and adding a new movie:

After submitting the form, you should be automatically redirected to the list of movies (which may include movies previously added):

That's it!
Why Not Use Werkzeug Instead of Flask?
Werkzeug provides much of the key functionality found in Flask, but Flask adds a number of powerful features, like:
- Sessions
- Application and Request contexts
- Blueprints
- Request callback functions
- Utilities:
@routedecoratorurl_for()function
- CLI commands
- Exception handling
- Test client
- Flask shell
- Logging
- Signals
- Extensions
As with any web framework -- Don't re-invent the wheel! Flask is a much better option (when compared to Werkzeug) for web development based on its rich feature set and large collection of extensions.
Conclusion
This article provided an overview of Werkzeug, which is one of the key components of Flask, by showing how to build a simple web application using Werkzeug. While it's important to understand how the underlying libraries work in Flask, the complexity of creating a web application using Werkzeug should illustrate how easy it is to develop a web app using Flask!
Additionally, if you're interested in learning how to test a Werkzeug application, check out the tests for the Werkzeug Movie App: https://gitlab.com/patkennedy79/werkzeug_movie_app/-/tree/main/tests.
If you'd like to learn more about Flask, be sure to check out my course -- Developing Web Applications with Python and Flask.
Cheers!