 Michael Herman
Cypress is a powerful testing framework that makes writing end-to-end tests fast with very little setup.
This post details how to add end-to-end (E2E) tests to an Angular app with Cypress and Docker. We'll look at adding tests to both a new and an existing Angular project as well as incorporating Cypress into your continuous integration flow with Docker.
Dependencies:
- Cypress v2.1.0
- Angular CLI v1.7.3 (Angular v5.2.0)
- Docker v18.03.1-ce
- Node v10.0.0
Contents
Objectives
By the end of this tutorial, you will be able to...
- Add Cypress to both a new and an existing Angular project
- Test an Angular app with end-to-end tests
- Set up Cypress to run from a Docker container
- Integrate Cypress into a continuous integration process
New Angular Project
This section looks at how to add Cypress to a new Angular project.
Begin by installing the Angular CLI globally, if you don’t already have it installed, and then create a new Angular project:
$ npm install -g @angular/[email protected]
$ ng new angular-cypress
$ cd angular-cypress
Run the server:
$ ng serve
Navigate to http://localhost:4200 in your browser. You should see the "Welcome to app!" message along with the Angular logo. Kill the server when done.
Then, install Cypress:
$ npm install [email protected] --save-dev
Open the Cypress test runner:
$ ./node_modules/.bin/cypress open
Since this is the first time we're running the test runner, Cypress will automatically scaffold out a folder structure:
└─── cypress
    ├── fixtures
    │   └── example.json
    ├── integration
    │   └── example_spec.js
    ├── plugins
    │   └── index.js
    └── support
        ├── commands.js
        └── index.js
It will also add an empty cypress.json config file to the project root.
Review Writing and Organizing Tests, from the official Cypress documentation, for more info on the above folder structure.
It's worth noting that at this point we can already start writing and running tests. Cypress comes bundled with everything needed to get up and running without any configuration!
Finally, remove the example spec file - cypress/integration/example_spec.js. In its place, add a spec.js file:
describe('My App', () => {

  it('loads', () => {
    cy.visit('/');
    cy.get('h1').contains('Welcome to app!');
  });

});
Cypress has support for TypeScript, but I ran into a number of type definition conflicts. As of writing, there is an open issue on GitHub to address this.
This is a basic test spec file that opens the main page and confirms that the page loads and that there is an H1 tag with the Welcome to app! text present.
Commands:
visit()visits the provided URL.get()queries elements by selector.contains()gets the element that contains the text. It's also a built-in assertion.
For more on these commands, review the Cypress API.
Cypress uses a fork of Mocha under the hood as its test runner along with Chai for assertions and Sinon for mocking and stubbing. Thus, the describe and it blocks should look familiar to you if you've used either Mocha or Jasmine in the past.
Set the baseUrl and turn off video recording by updating the cypress.json file in the project root:
{
  "baseUrl": "http://127.0.0.1:4200",
  "videoRecording": "false"
}
Cypress will then prefix the URL in cy.visit() with the baseUrl.
Run the Angular app in one terminal window:
$ ng serve
Then, open the test runner in another terminal window:
$ ./node_modules/.bin/cypress open
Tests run in an Electron app that shows your tests side-by-side with the application itself under test. Click the "Run All Tests" button to kick off a new test run:
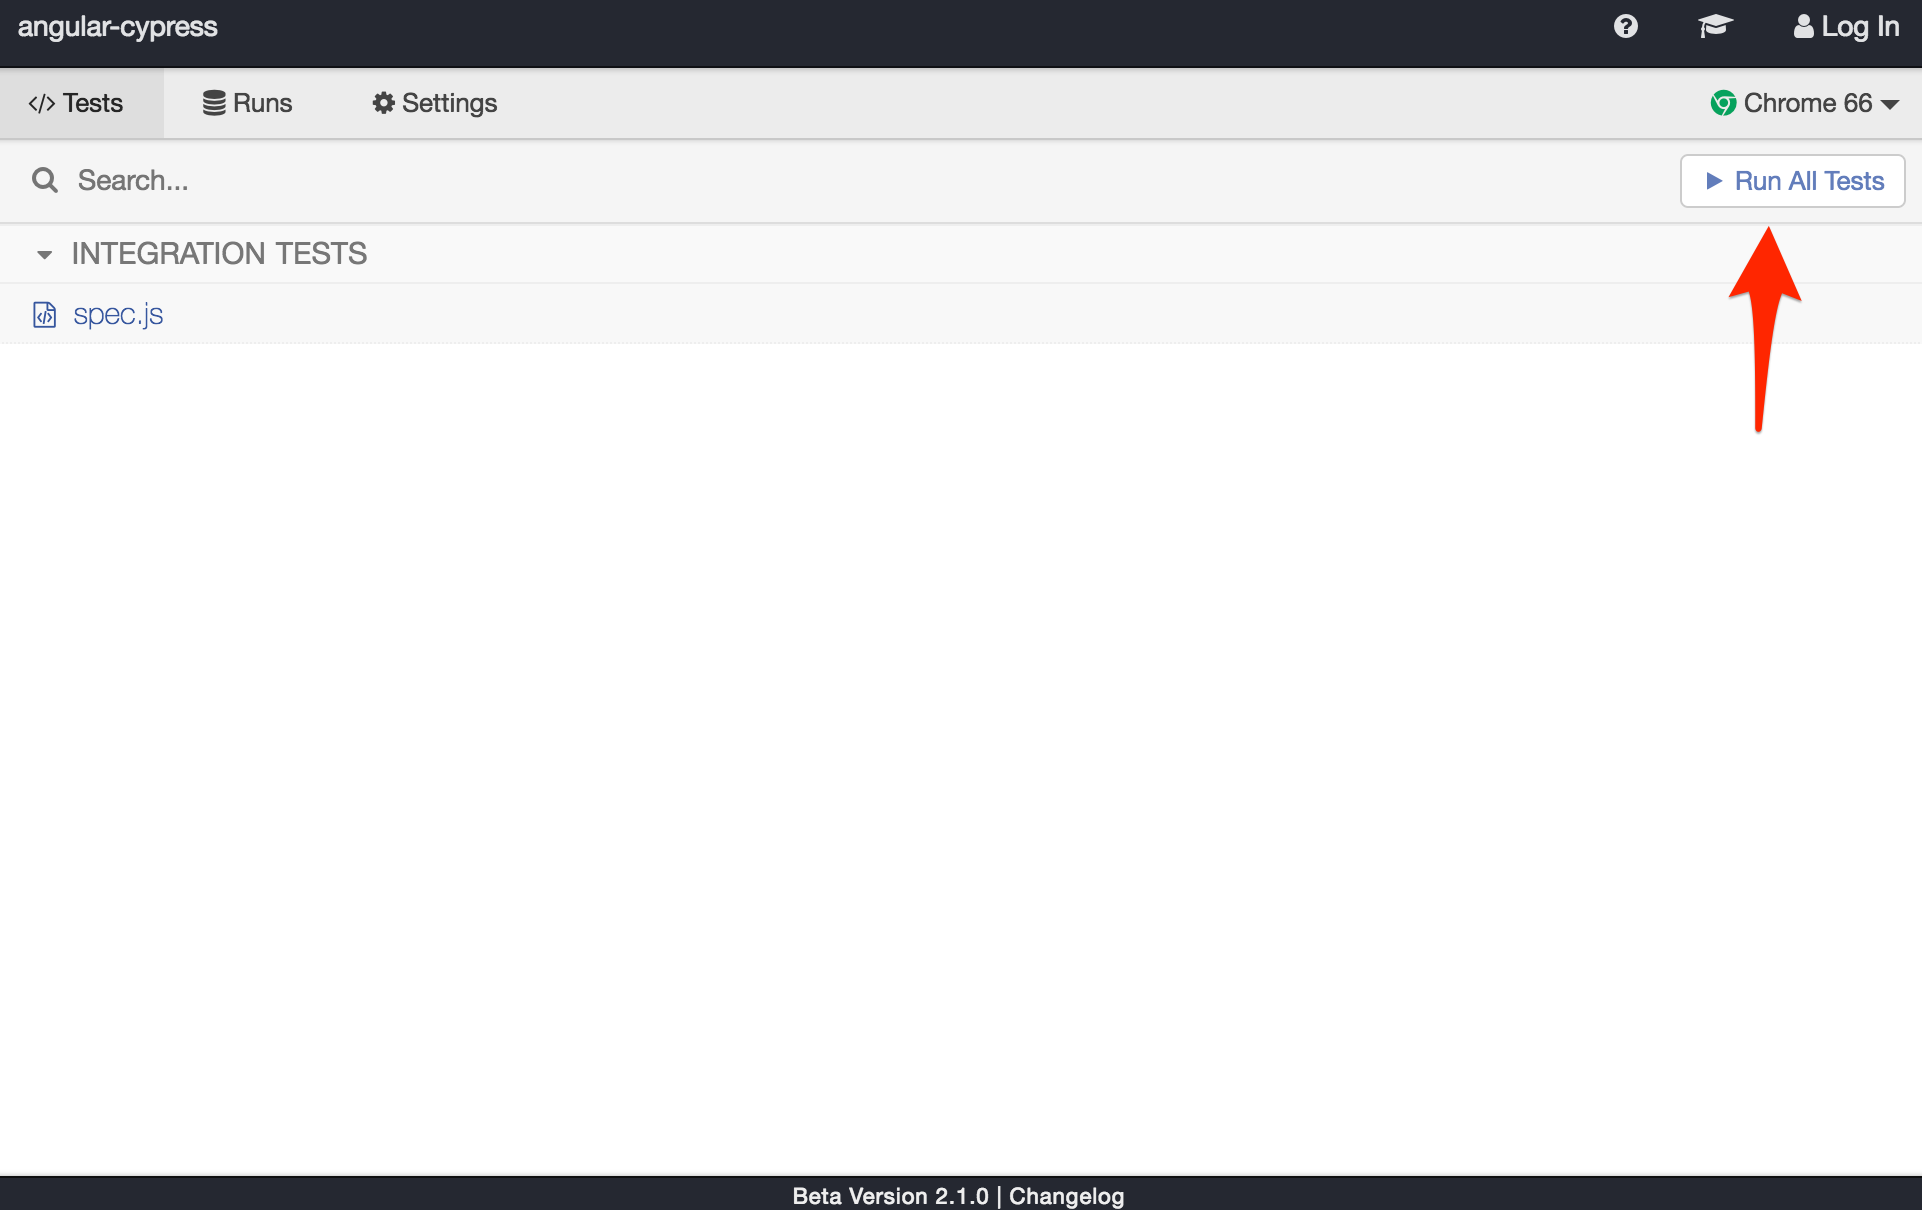
Cypress will launch a new UI that goes through each step from the spec file:
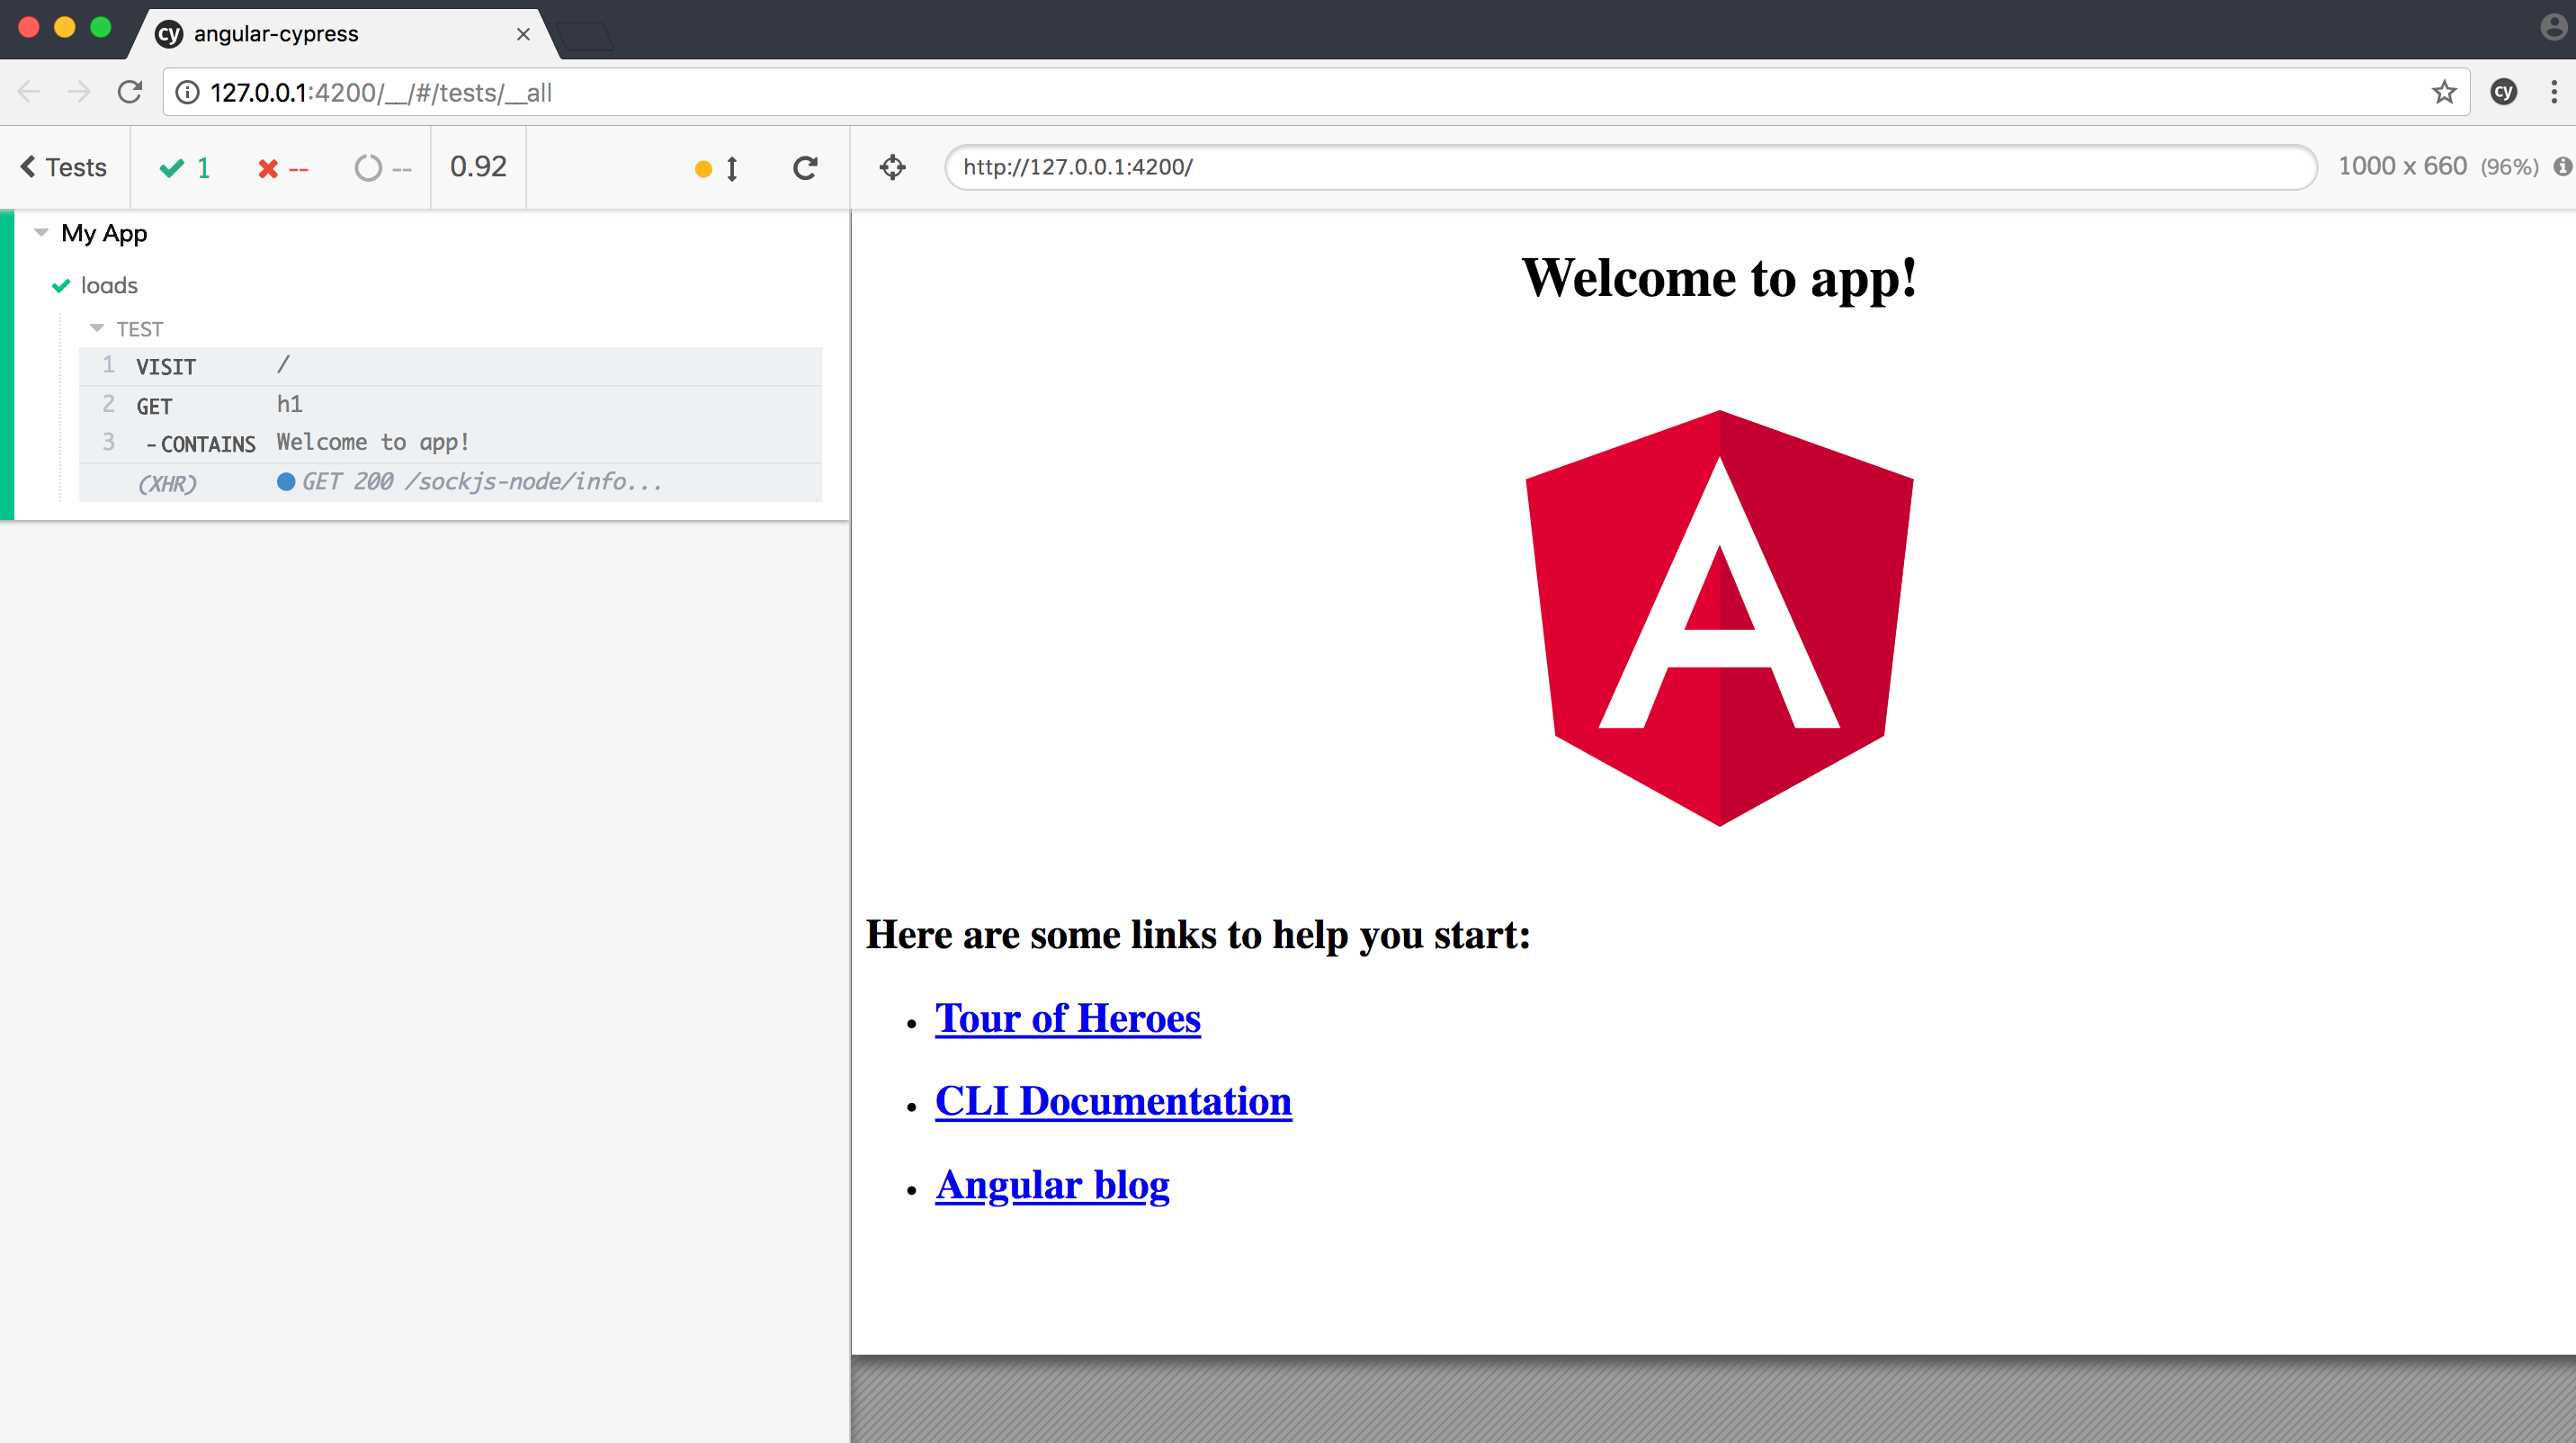
With the runner active, Cypress is watching your code and it will re-run the tests anytime changes are made. Try it out! Make a quick change to the <h1></h1> element in the src/app/app.component.html template to watch the tests break.
Revert the change(s) you just made so the tests pass once again and then stop the test runner along with the Angular development server before moving on.
Docker for CI
Let's add Docker into the mix to simplify testing for a continuous integration environment - like Jenkins, Travis CI, or Circle. In these environments, we'll want to serve the Angular app in one container and run the Cypress tests in another container.
Add a Dockerfile:
#########################
### build environment ###
#########################

# base image
FROM node:9.6.1 as builder

# install chrome for protractor tests
RUN wget -q -O - https://dl-ssl.google.com/linux/linux_signing_key.pub | apt-key add -
RUN sh -c 'echo "deb [arch=amd64] http://dl.google.com/linux/chrome/deb/ stable main" >> /etc/apt/sources.list.d/google.list'
RUN apt-get update && apt-get install -yq google-chrome-stable

# set working directory
RUN mkdir /usr/src/app
WORKDIR /usr/src/app

# add `/usr/src/app/node_modules/.bin` to $PATH
ENV PATH /usr/src/app/node_modules/.bin:$PATH

# install and cache app dependencies
COPY package.json /usr/src/app/package.json
RUN npm install
RUN npm install -g @angular/[email protected] --unsafe

# add app
COPY . /usr/src/app

# run tests
RUN ng test --watch=false

# generate build
RUN npm run build

##################
### production ###
##################

# base image
FROM nginx:1.13.9-alpine

# copy artifact build from the 'build environment'
COPY --from=builder /usr/src/app/dist /usr/share/nginx/html

# expose port 80
EXPOSE 80

# run nginx
CMD ["nginx", "-g", "daemon off;"]
Here, using a Docker multistage build, we created a temporary image used for building the Angular app. Once the Angular build process is complete, the static files are copied over to the production image and the temporary image is discarded.
For more on this, please review the Dockerizing an Angular App blog post.
Next, add a docker-compose.yml file:
version: '3.6'

services:

  angular:
    build:
      context: .
      dockerfile: Dockerfile
    ports:
      - '80:80'
Build the image and spin up the container:
$ docker-compose up -d --build
Once up, ensure the app is running at http://localhost.
Again, we'll run the Cypress tests from within a separate container, so add a new Dockerfile called Dockerfile-cypress:
# base image
FROM cypress/browsers:chrome65-ff57

# set working directory
RUN mkdir /usr/src/app
WORKDIR /usr/src/app

# install cypress
RUN npm install cypress@2.1.0

# copy cypress files and folders
COPY cypress /usr/src/app/cypress
COPY cypress.json /usr/src/app/cypress.json

# confirm the cypress install
RUN ./node_modules/.bin/cypress verify
Review the official Cypress Docker Images repo for more info on the available base images.
Update the docker-compose.yml file like so:
version: '3.6'

services:

  angular:
    build:
      context: .
      dockerfile: Dockerfile
    ports:
      - '80:80'

  cypress:
    build:
      context: .
      dockerfile: Dockerfile-cypress
    depends_on:
      - angular
    network_mode: 'host'
Take note of the network_mode. By setting it to host, the Cypress container will be able to access localhost from the host machine. Review this Stack Overflow question for more info.
Now, we'll need to override the baseURL set in the cypress.json file when we run the tests:
$ docker-compose run cypress ./node_modules/.bin/cypress run \
    --config baseUrl=http://127.0.0.1
It's worth knowing that you could also copy over a different configuration file, with config specific to running the tests with Docker and/or in the CI environment, to the container like so:
COPY cypress-ci.json /usr/src/app/cypress.json
The tests should pass:
(Tests Starting)


My App
  ✓ loads (679ms)


1 passing (792ms)


(Tests Finished)

- Tests:           1
- Passes:          1
- Failures:        0
- Pending:         0
- Duration:        0 seconds
- Screenshots:     0
- Video Recorded:  false
- Cypress Version: 2.1.0


(All Done)
Bring down the containers:
$ docker-compose down
Travis CI
Next, let's use Travis CI for continuous integration. Add a .travis.yml file to the project root:
language: node_js

node_js:
  - 10

services:
  - docker

env:
  global:
    - DOCKER_COMPOSE_VERSION=1.21.1

before_install:
  - sudo rm /usr/local/bin/docker-compose
  - curl -L https://github.com/docker/compose/releases/download/${DOCKER_COMPOSE_VERSION}/docker-compose-`uname -s`-`uname -m` > docker-compose
  - chmod +x docker-compose
  - sudo mv docker-compose /usr/local/bin

before_script:
  - sleep 3
  - docker-compose up -d --build

script:
  - docker-compose run cypress ./node_modules/.bin/cypress run --config baseUrl=http://127.0.0.1

after_script:
  - docker-compose down
If you'd like to test this out, create a new repo on GitHub, enable Travis for that repo, and the push up your code.
With that, let's move on to adding Cypress tests to an existing Angular project.
Existing Angular Project
In this section, we'll add Cypress to an Angular project with token-based authentication already built out. The app itself comes from the Authentication in Angular with NGRX blog post. There is a slight error in the code, which we'll flesh out with Cypress.
Start by cloning the project down and installing the dependencies:
$ git clone https://github.com/mjhea0/angular-auth-ngrx
$ cd angular-auth-ngrx
$ npm install
The application requires a back-end with the following routes:
| URL | HTTP Verb | Action |
|---|---|---|
| http://localhost:1337/register | POST | Register a new user |
| http://localhost:1337/login | POST | Log a user in |
| http://localhost:1337/status | GET | Get user status |
We'll use a fake back-end that generates a dummy token to test out the functionality on the front-end. Clone down the repo in a new terminal window, install the dependencies, and fire up the app:
$ git clone https://github.com/testdrivenio/fake-token-api
$ cd fake-token-api
$ npm install
$ npm start
Spin up the Angular app:
$ ng serve
Navigate to http://localhost:4200. Ensure that you can sign up and log in with the following credentials:
- email: [email protected]
- password: test
Leave the development server running.
Adding Cypress
Install Cypress and open the test runner in a new terminal window:
$ npm install [email protected] --save-dev
$ ./node_modules/.bin/cypress open
Remove the example spec file and update cypress.json:
{
  "baseUrl": "http://127.0.0.1:4200",
  "videoRecording": false
}
Let's write a number of tests to ensure that:
- The main page loads
- Users can sign up
- Users can log in
- Only authenticated users can view the
/statusroute
We'll break these up by component:
- Landing
- LogIn
- SignUp
- Status
TEST: Landing Component
Add a new spec file - landing.component.spec.js:
describe('Landing Component', () => {

  it('should display the landing page', () => {
    cy
      .visit('/')
      .get('h1').contains('Angular + NGRX')
      .get('a.btn').contains('Log in')
      .get('a.btn').contains('Sign up')
      .get('a.btn').contains('Status');
  });

});
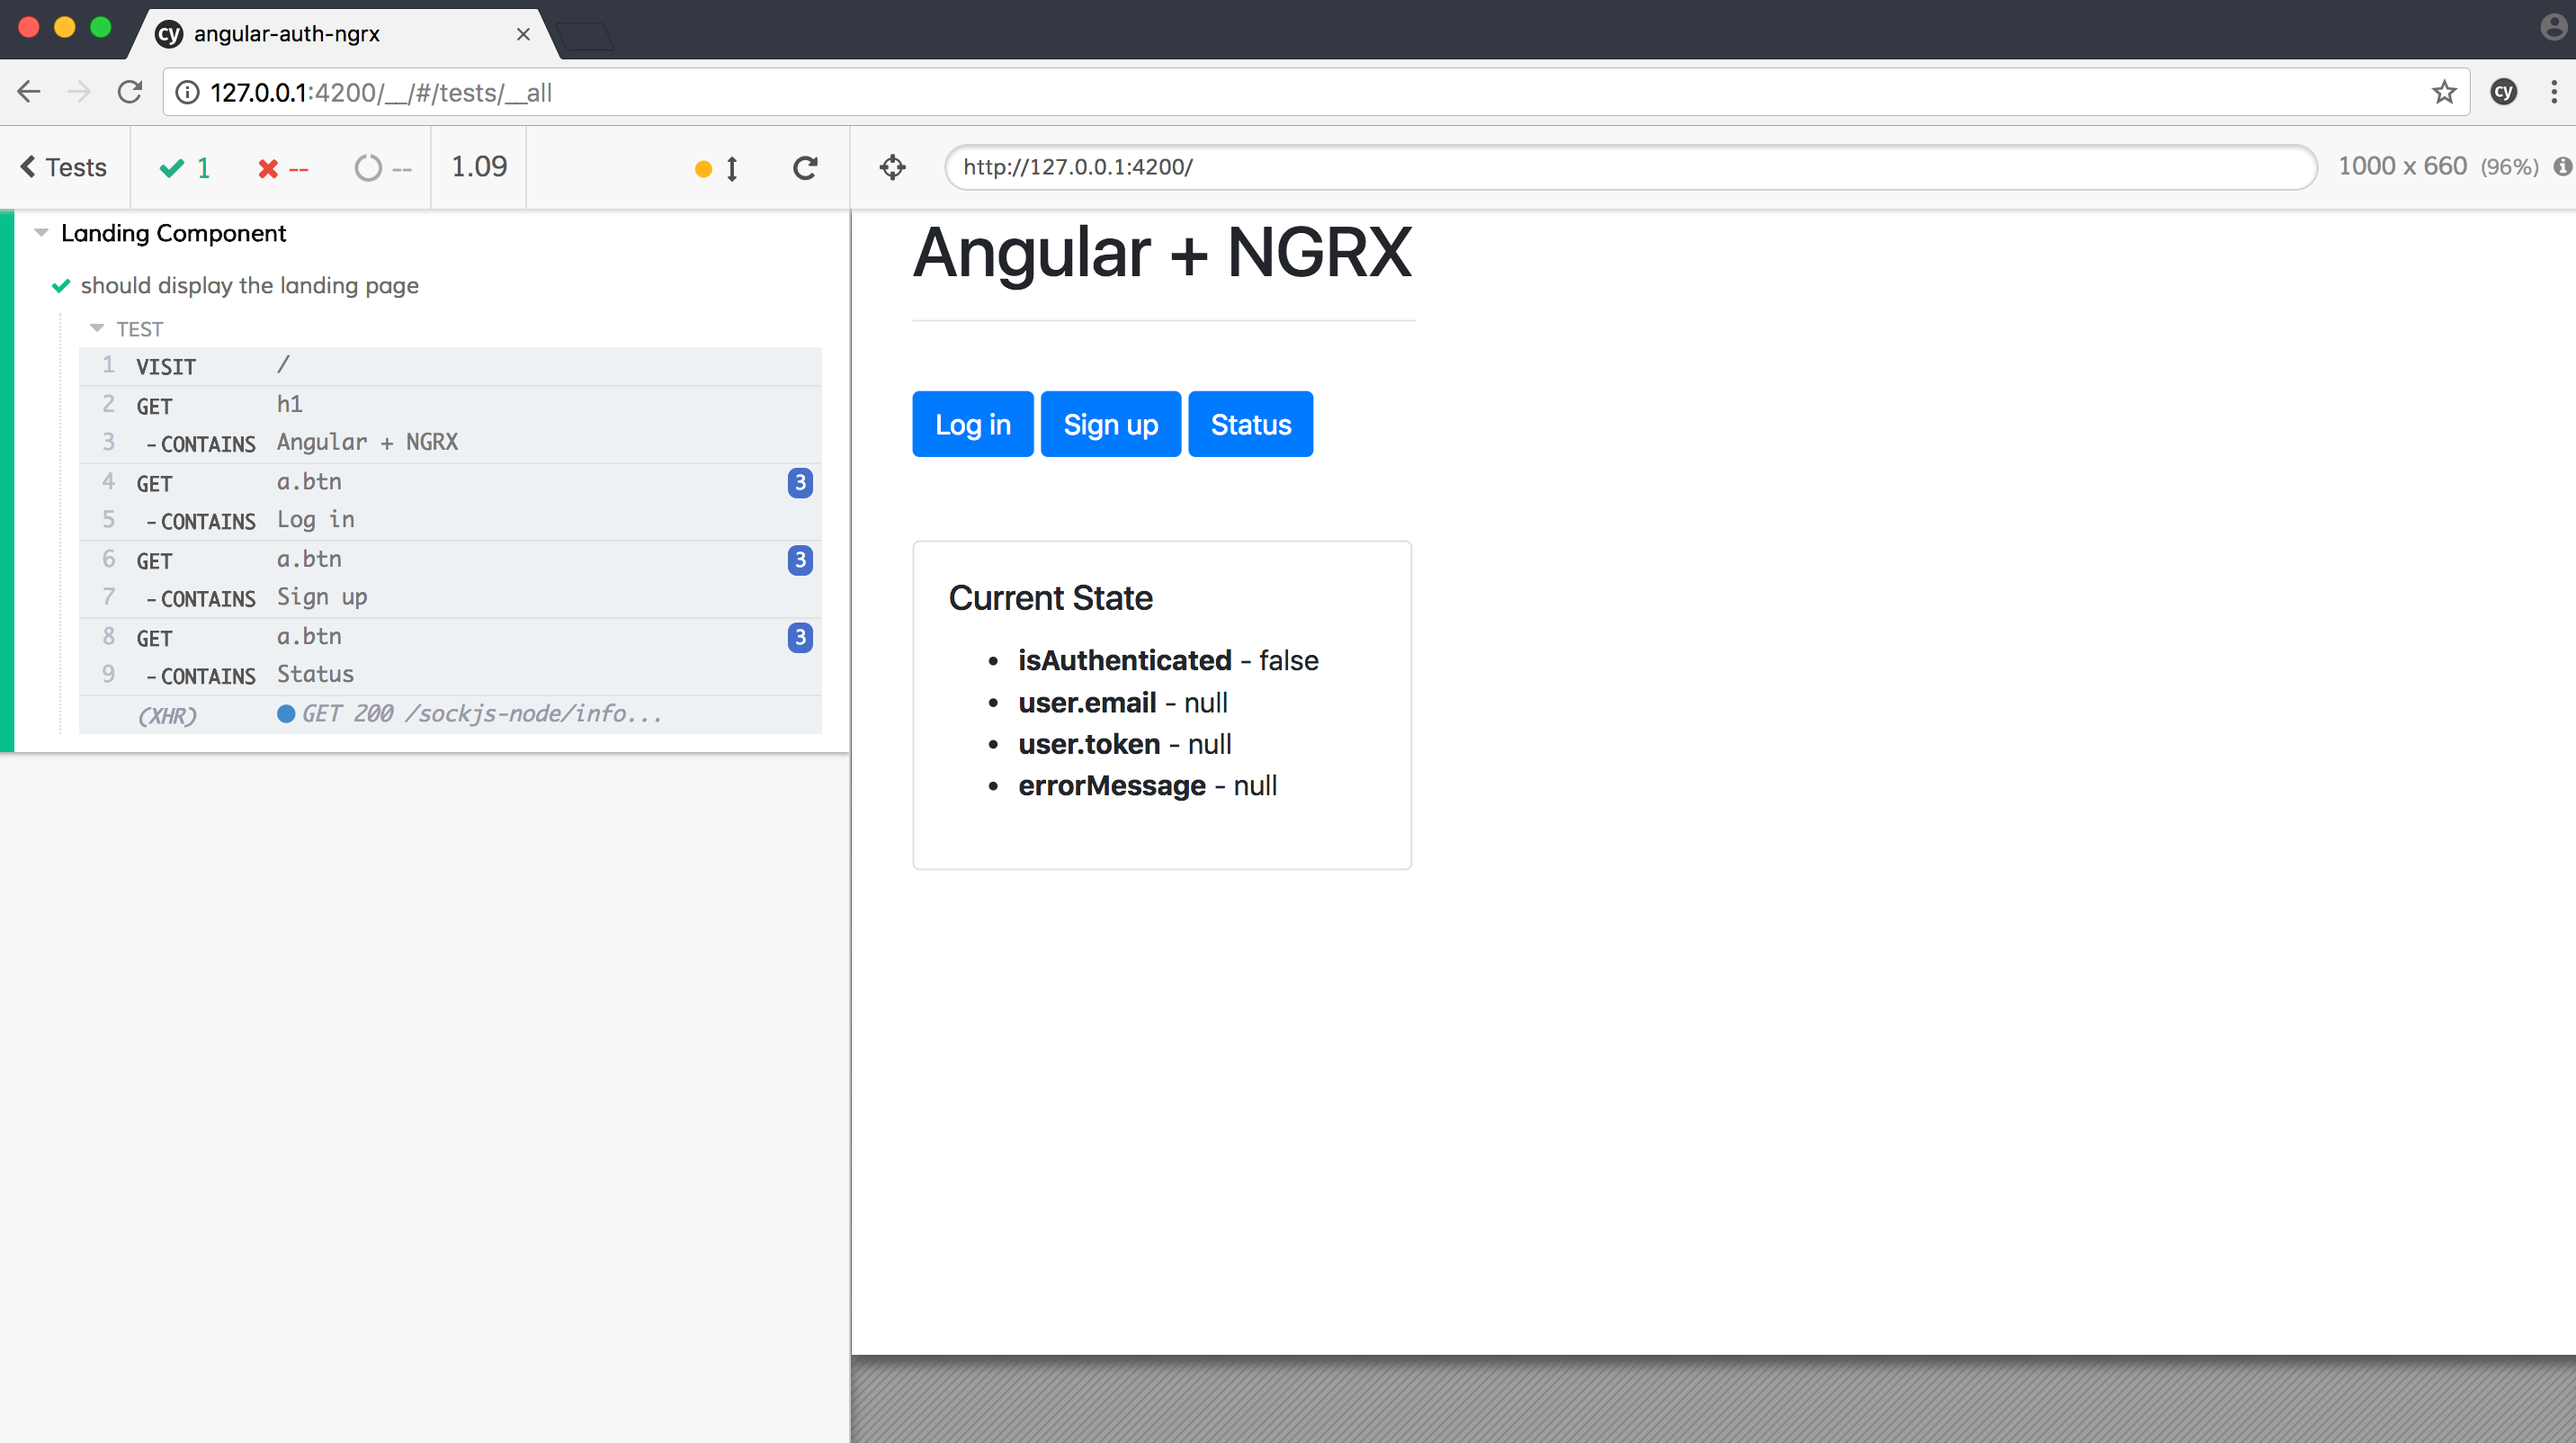
Nothing new here, so go ahead and run the tests:
TEST: LogIn Component
Again, add a new spec file - login.component.spec.js:
describe('LogIn Component', () => {

  it('should log a user in', () => {
    cy
      .visit('/')
      .get('a.btn').contains('Log in').click()
      .get('form input[name="email"]').clear().type('[email protected]')
      .get('form input[name="password"]').clear().type('test')
      .get('button[type="submit"]').click()
      .get('p').contains('You logged in [email protected]!')
      .get('a.btn').contains('Log in').should('not.be.visible')
      .get('a.btn').contains('Sign up').should('not.be.visible')
      .get('a.btn').contains('Status')
      .get('button.btn').contains('Log out');
  });

});
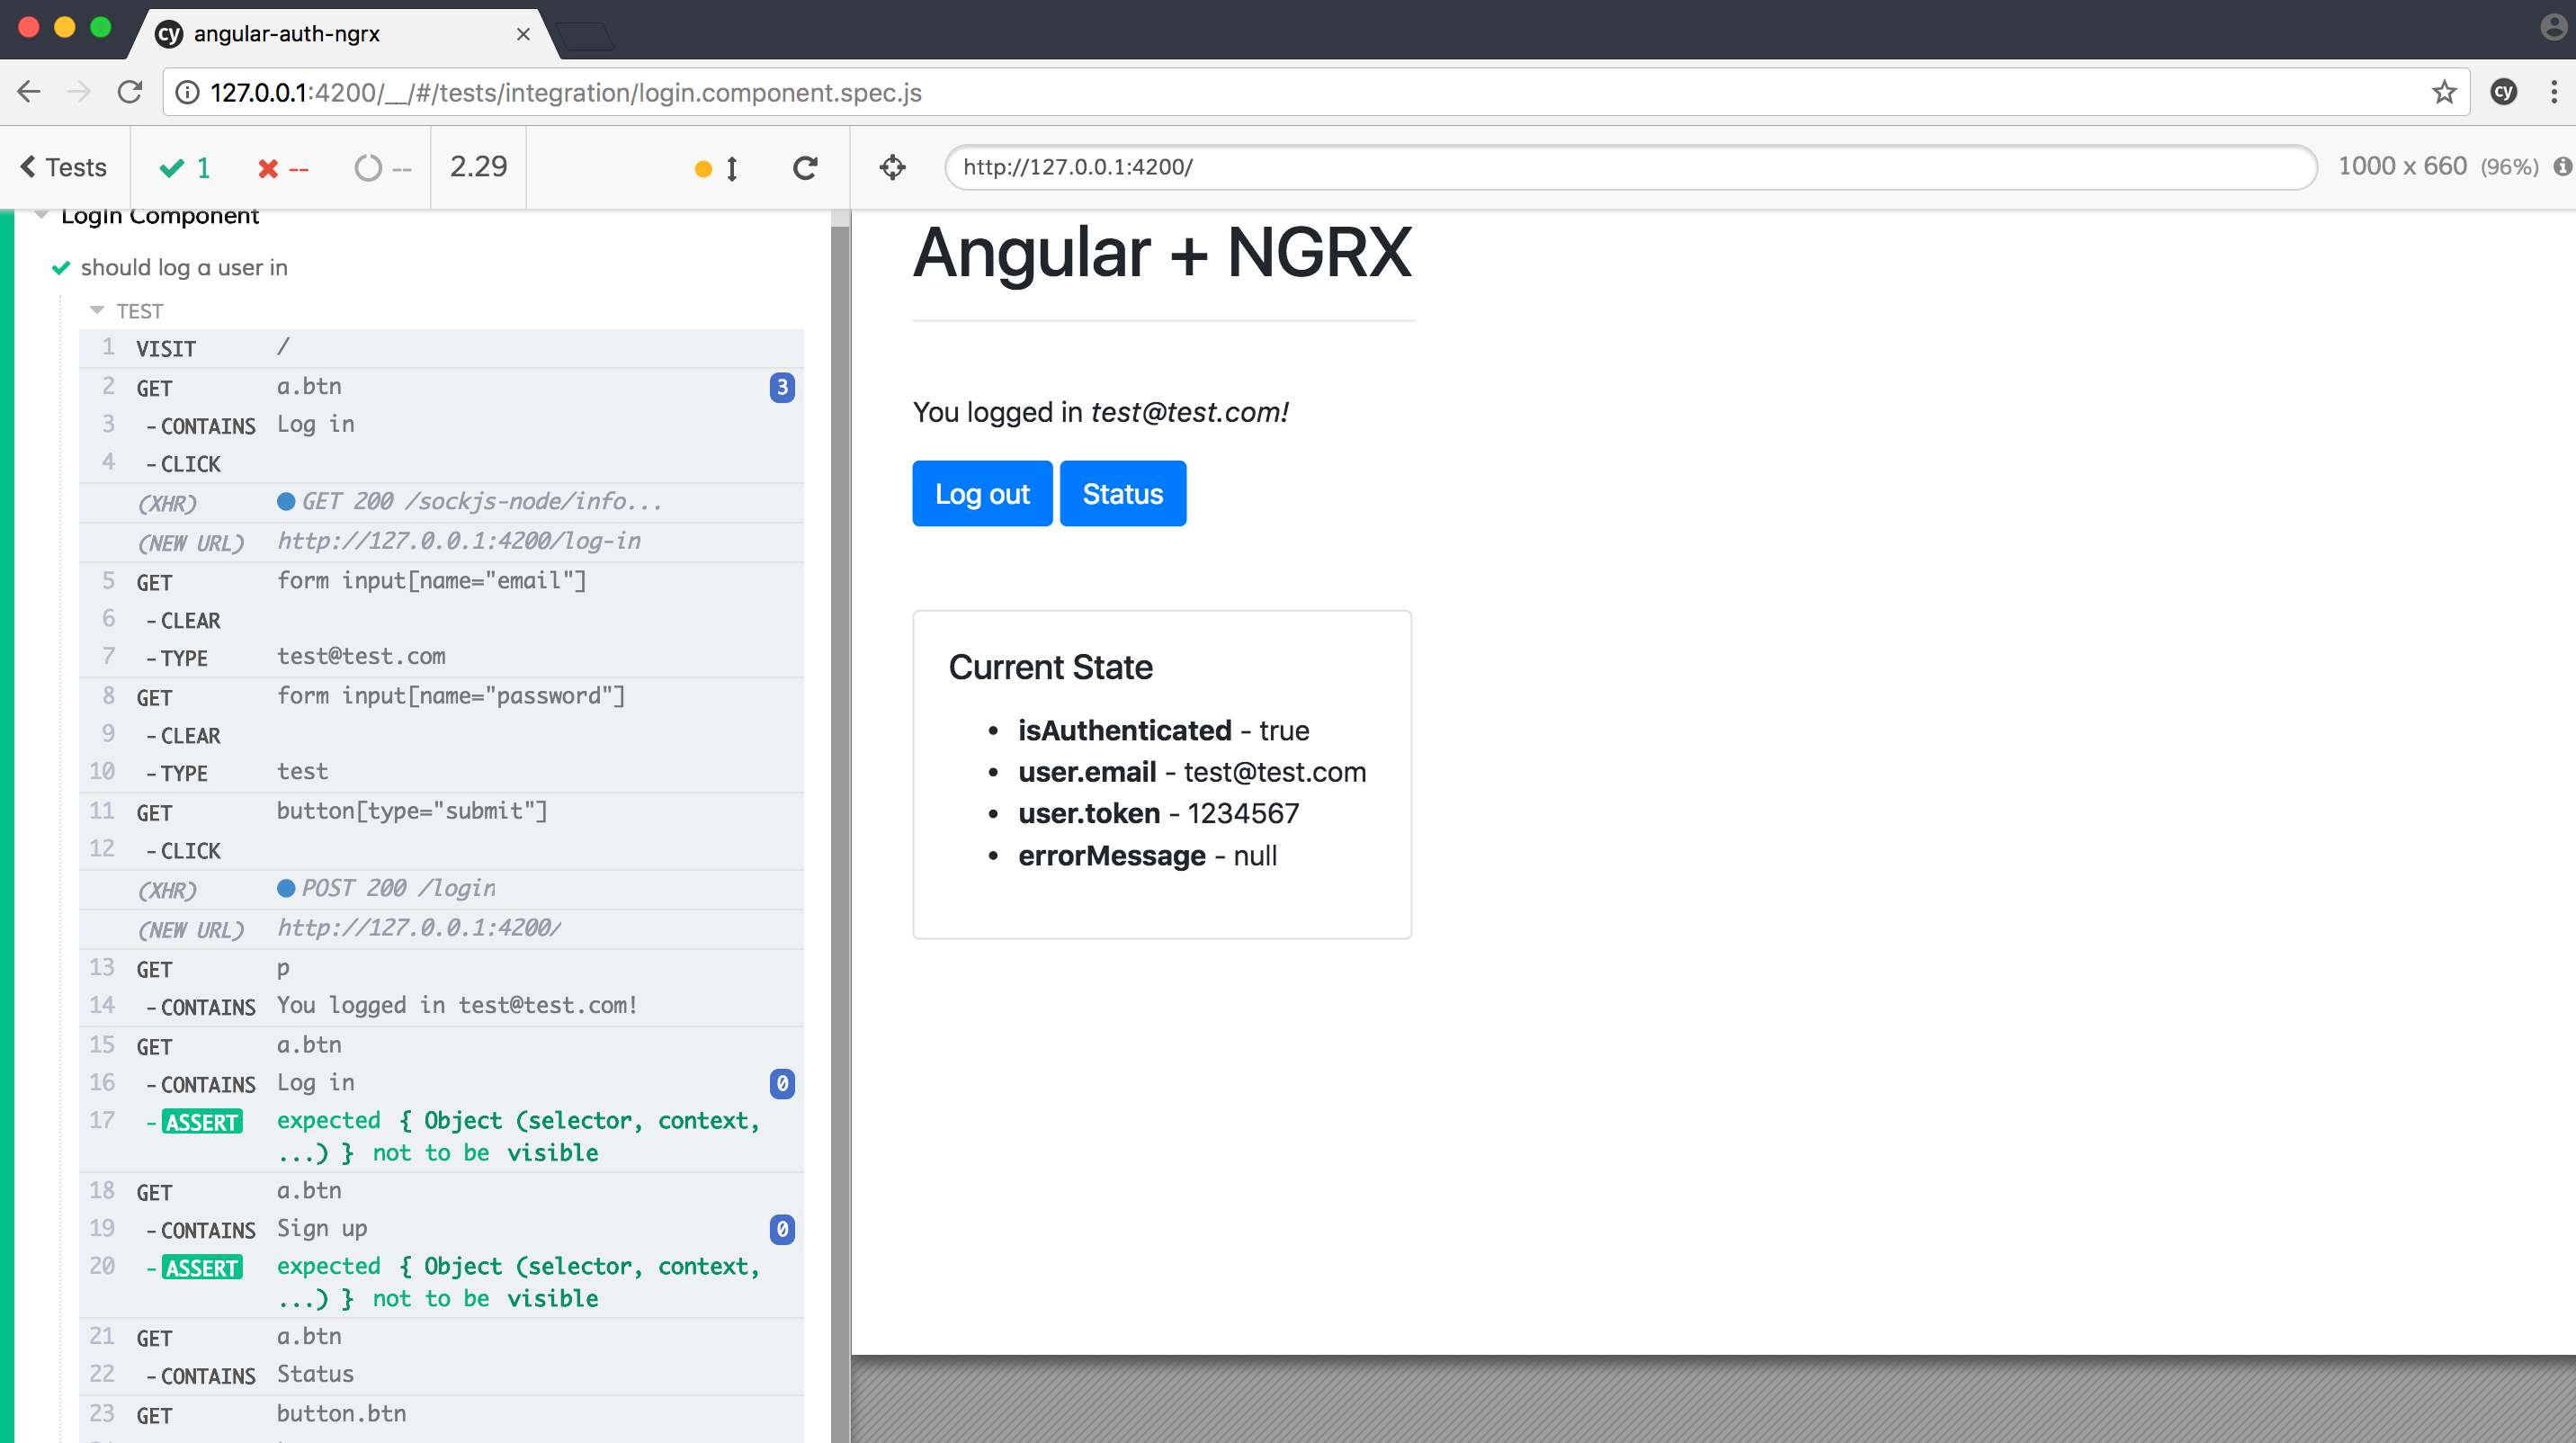
In this test, we navigate to the main page, click the Log in button, submit the form with the correct credentials, and then confirm the login worked.
Run the tests!
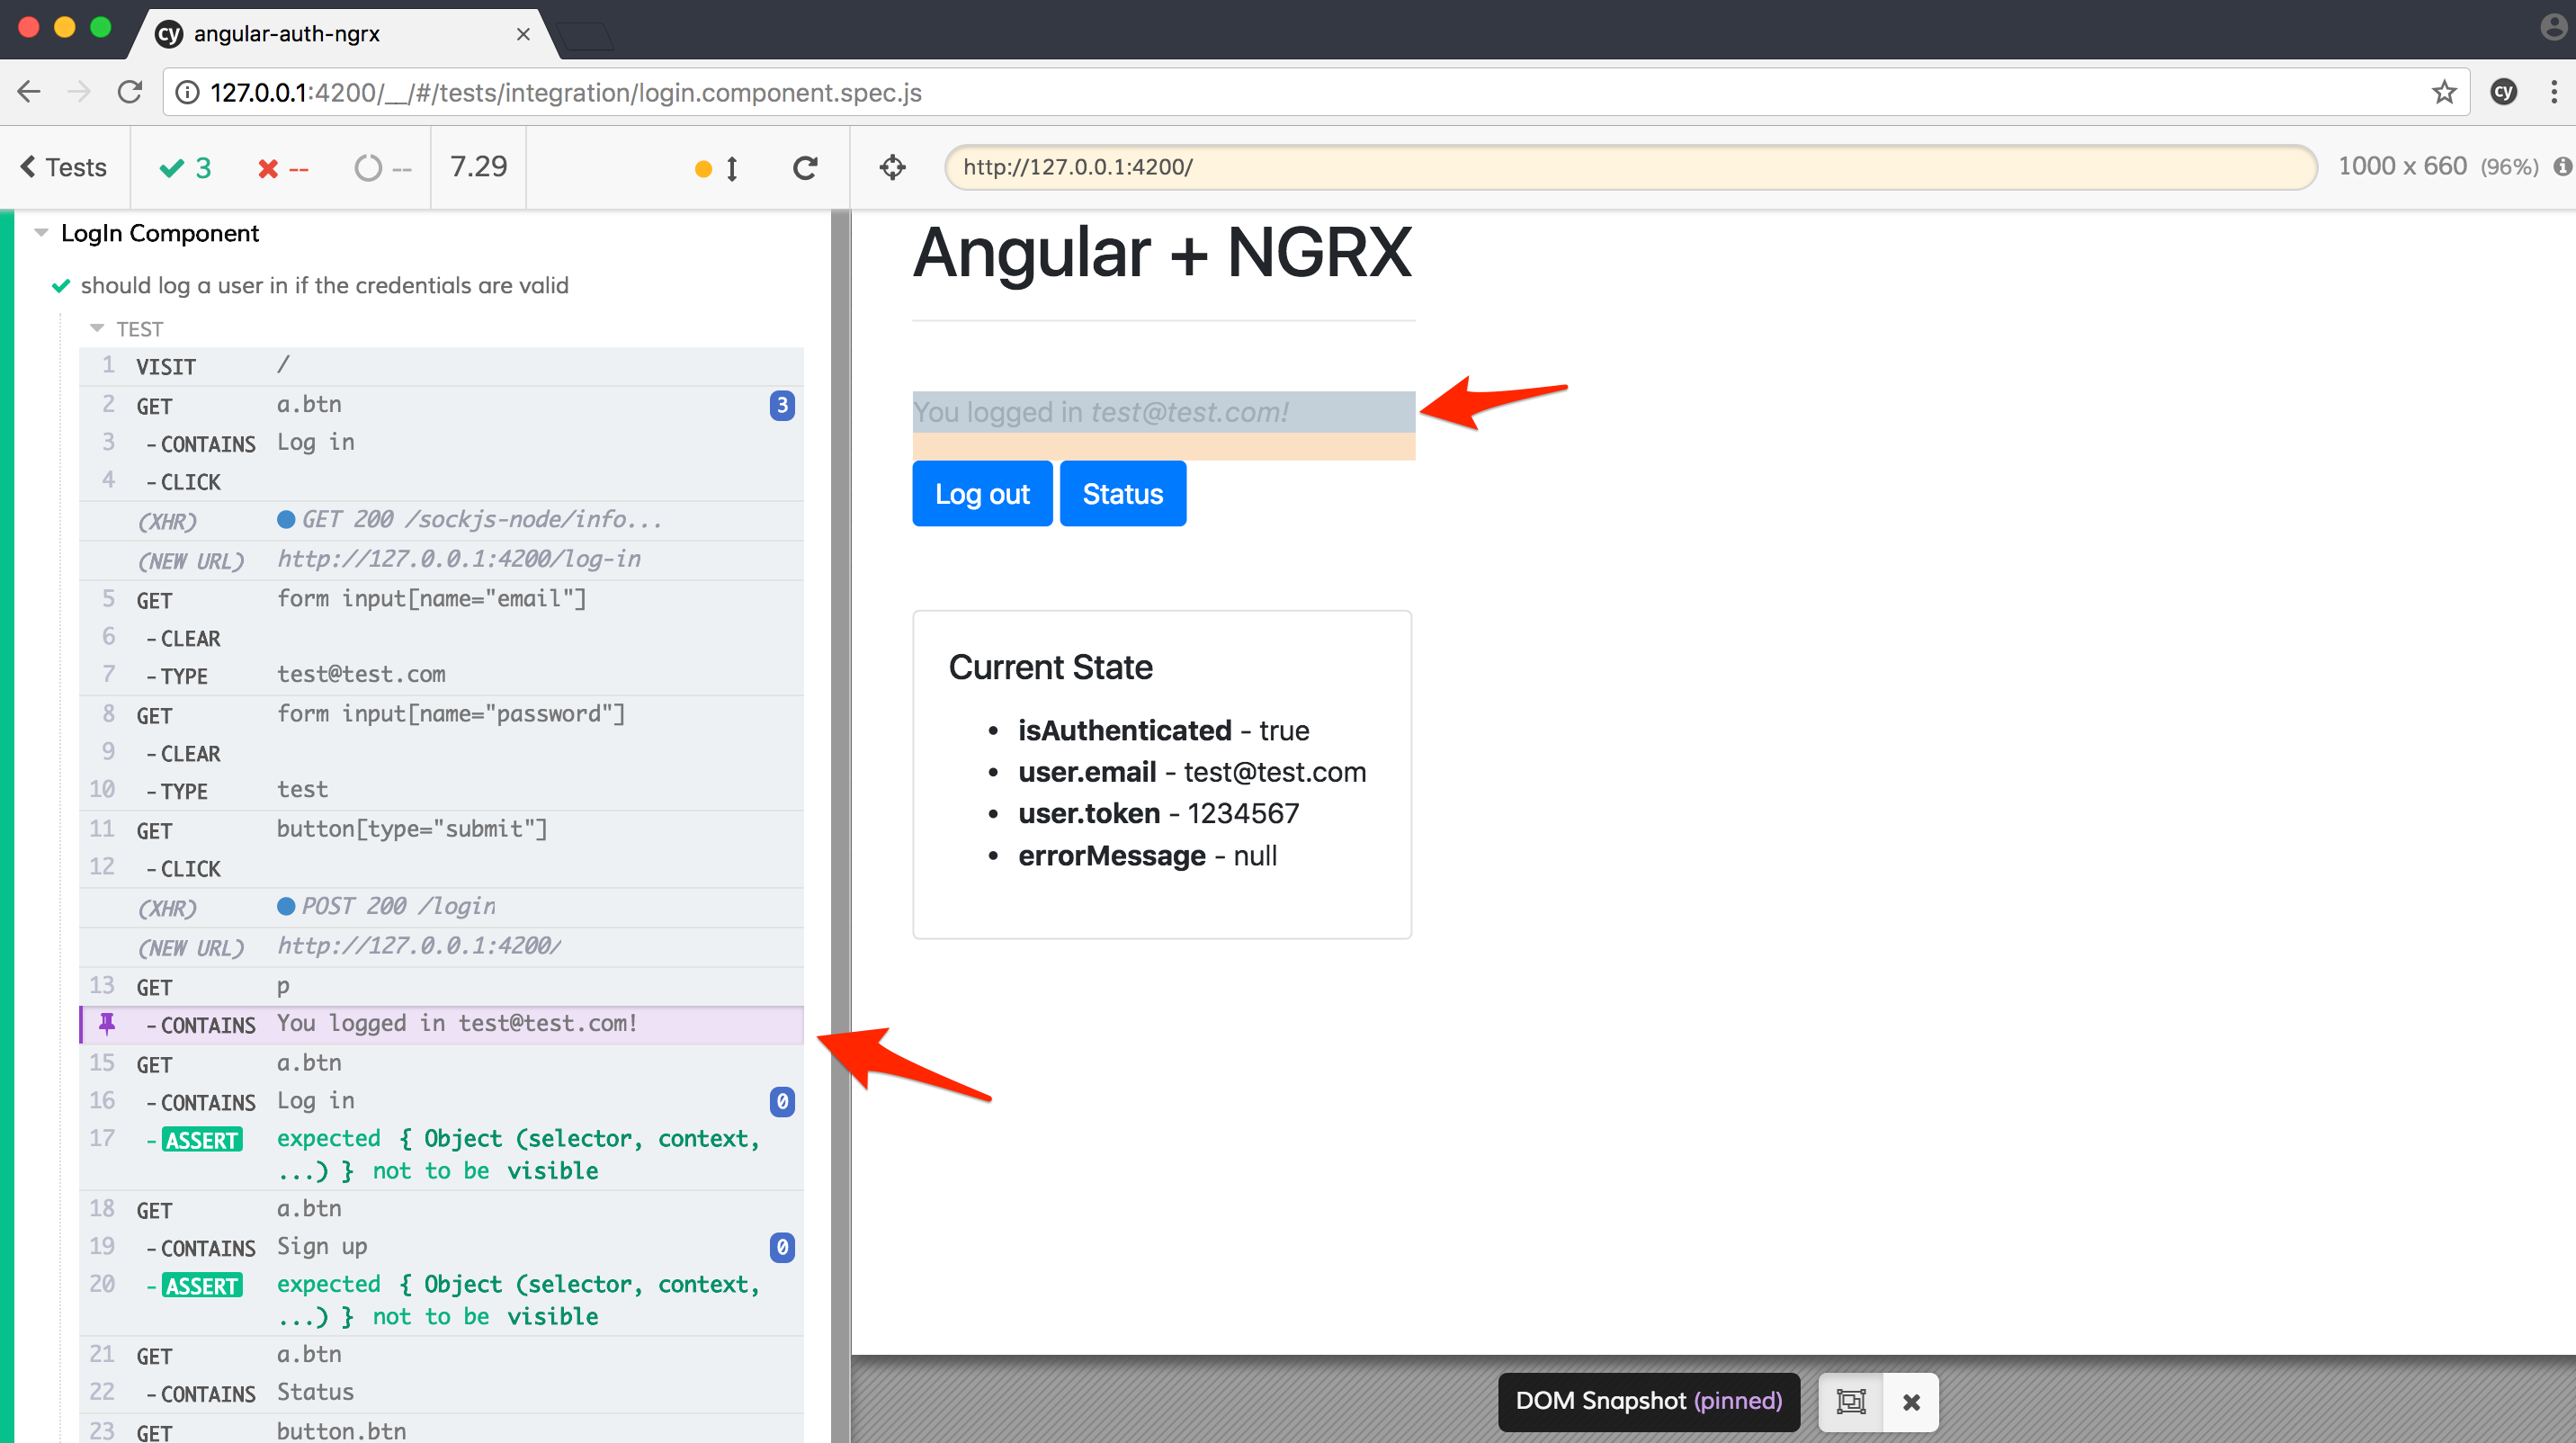
Try hovering over one of the test steps on the left side of the UI - it will show a snapshot of the DOM for that step. By default, Cypress saves 50 snapshots. For example, hover over the CONTAINS You logged in [email protected]! step. Notice how that element is now highlighted in the application on the right:
You can also open developer tools to get more info about the step:
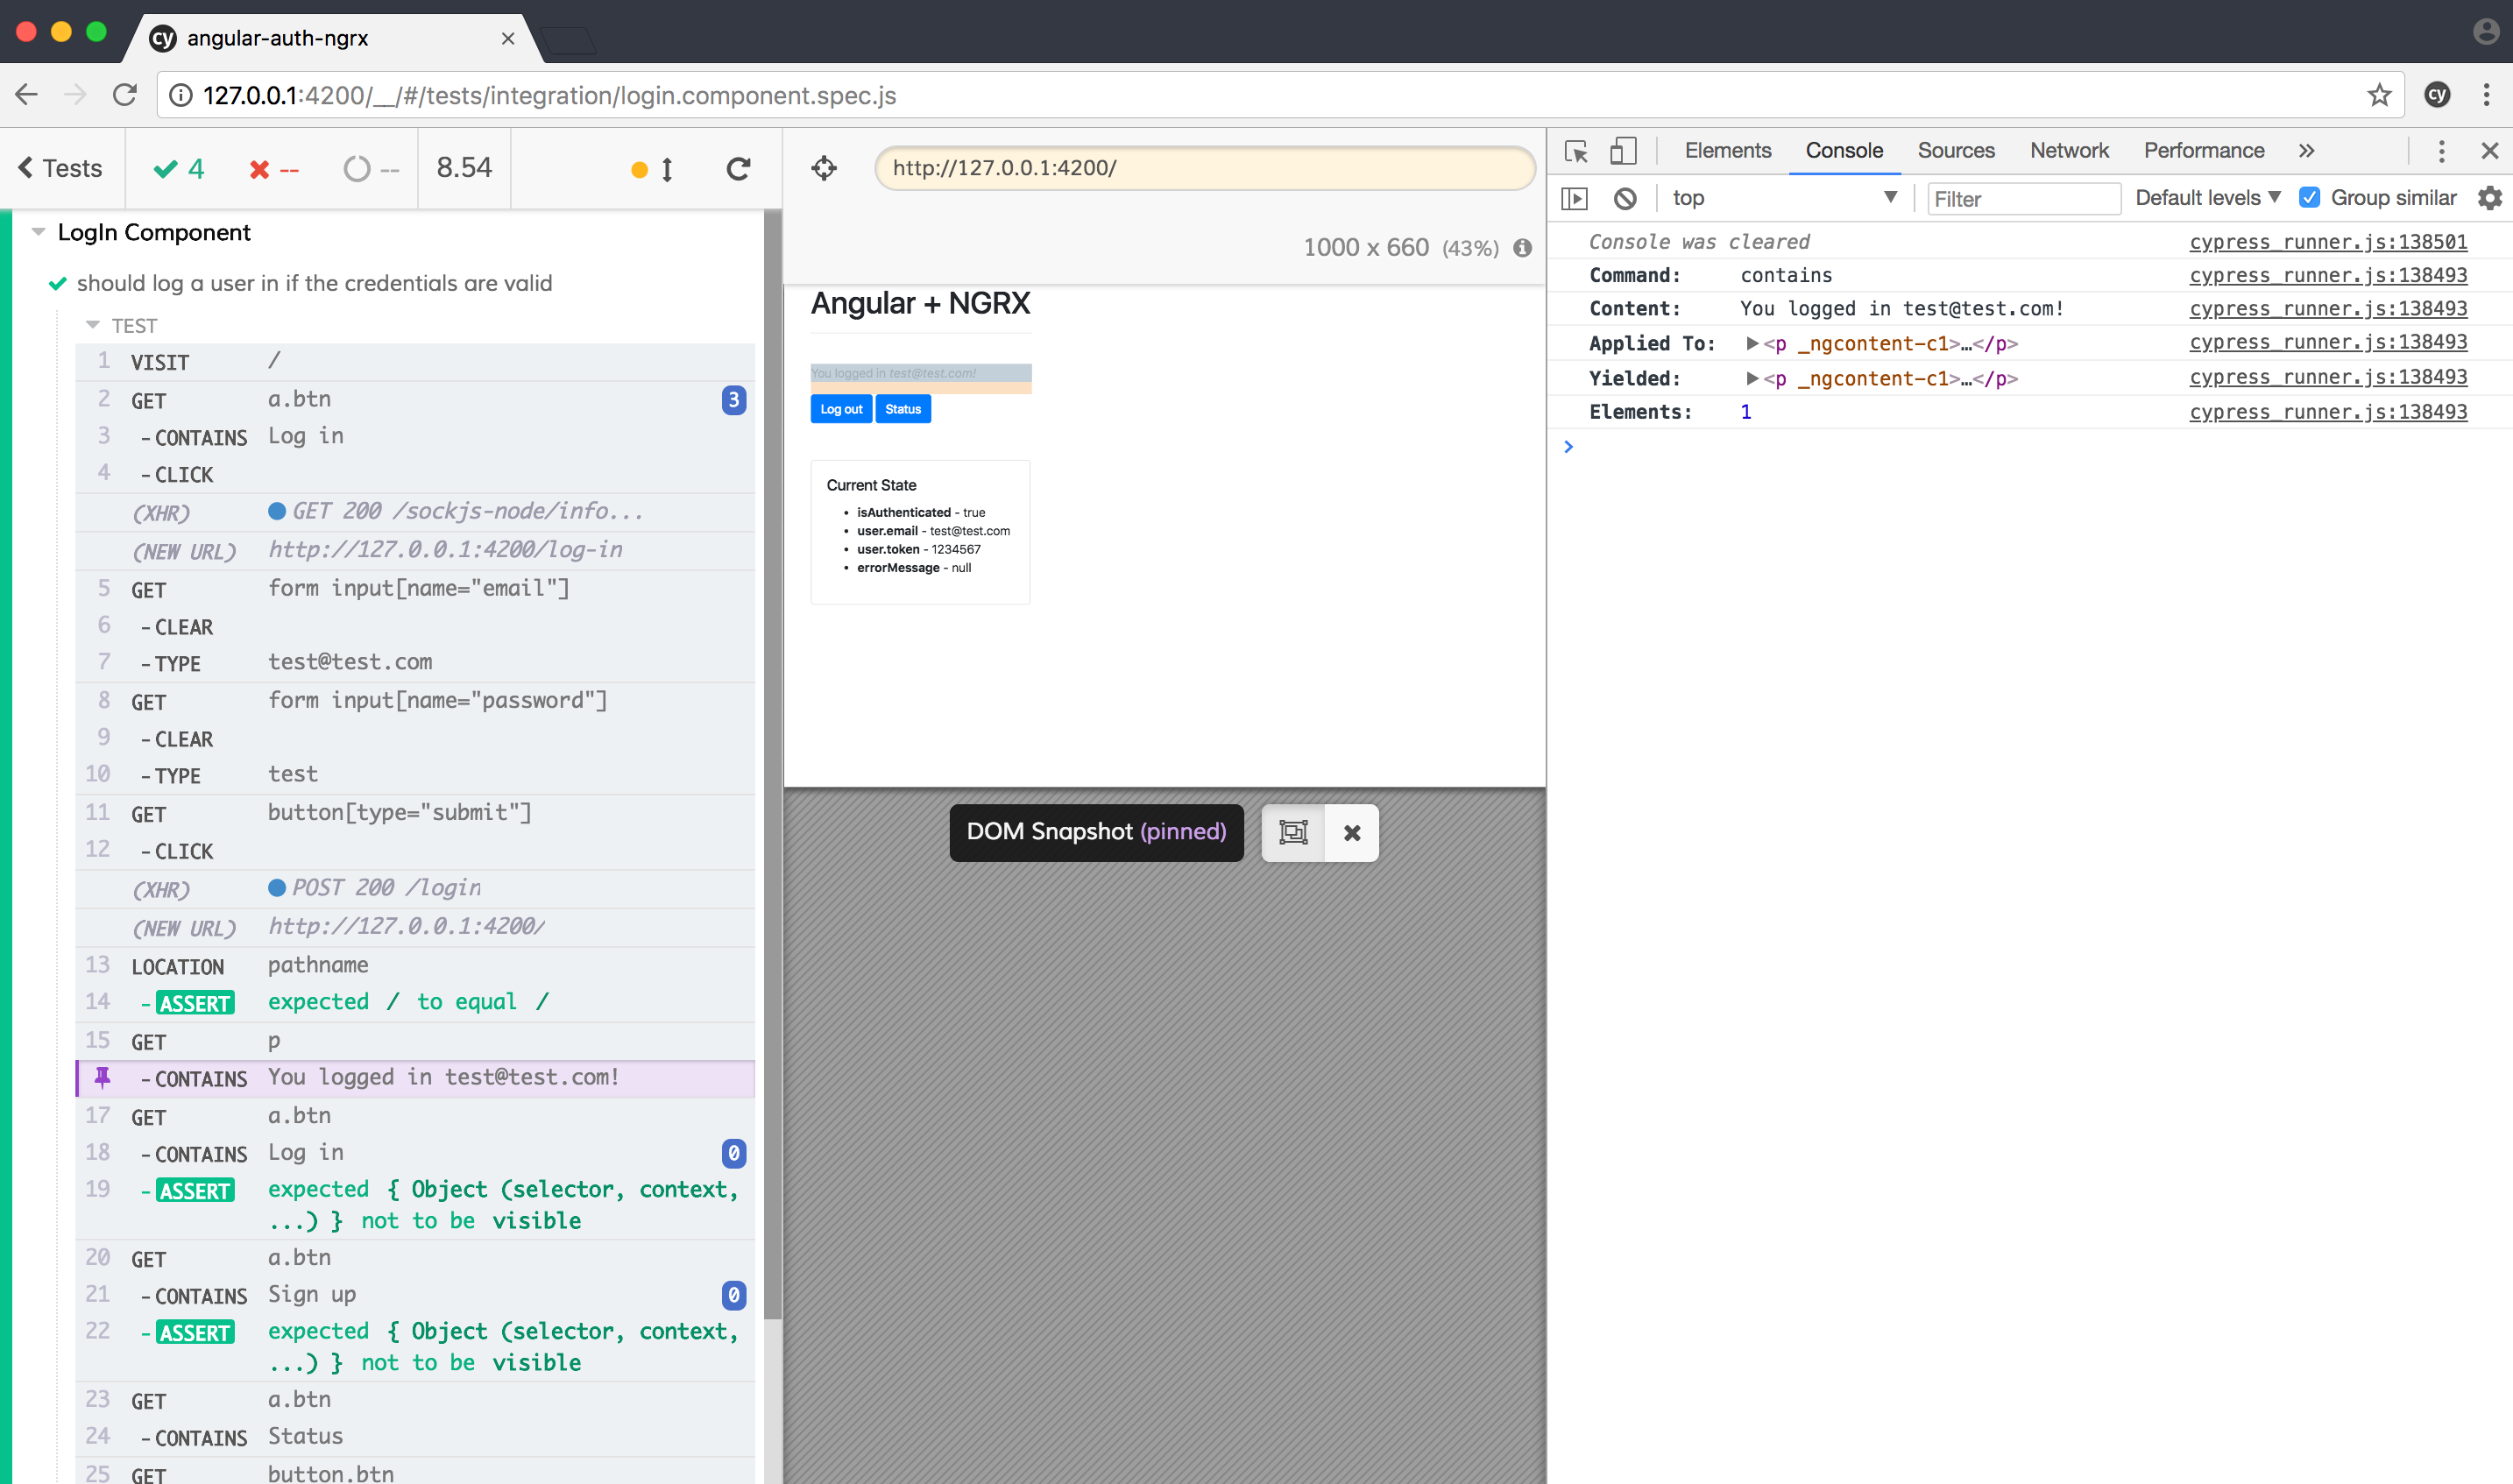
Finally, you can use the debugger to stop a running test, review the state of your variables, make changes, and then re-run the test.
These features make it easy to debug failing tests.
Moving on, let's ensure a user is not logged in if the credentials are incorrect. Update the spec like so:
describe('LogIn Component', () => {

  it('should log a user in if the credentials are valid', () => {
    cy
      .visit('/')
      .get('a.btn').contains('Log in').click()
      .get('form input[name="email"]').clear().type('[email protected]')
      .get('form input[name="password"]').clear().type('test')
      .get('button[type="submit"]').click();
    cy
      .get('p').contains('You logged in [email protected]!')
      .get('a.btn').contains('Log in').should('not.be.visible')
      .get('a.btn').contains('Sign up').should('not.be.visible')
      .get('a.btn').contains('Status')
      .get('button.btn').contains('Log out');
  });

  it('should not log a user in if the credentials are invalid', () => {
    cy
      .visit('/')
      .get('a.btn').contains('Log in').click()
      .get('form input[name="email"]').clear().type('[email protected]')
      .get('form input[name="password"]').clear().type('incorrect')
      .get('button[type="submit"]').click();
    cy
      .get('p')
      .contains('You logged in [email protected]!')
      .should('not.be.visible');
    cy
      .get('div.alert.alert-danger')
      .contains('Incorrect email and/or password.');
  });

});
The tests should pass. To keep the code DRY, we can create our own custom command for logging a user in. In short, Cypress commands allow you to create your own actions that can be reused.
Update cypress/support/commands.js:
Cypress.Commands.add('login', (email, password) => {
  cy
    .visit('/')
    .get('a.btn').contains('Log in').click()
    .get('form input[name="email"]').clear().type(email)
    .get('form input[name="password"]').clear().type(password)
    .get('button[type="submit"]').click();
});
Then update the spec:
describe('LogIn Component', () => {

  it('should log a user in if the credentials are valid', () => {
    cy
      .login('[email protected]', 'test');
    cy
      .location('pathname').should('eq', '/')
      .get('p').contains('You logged in [email protected]!')
      .get('a.btn').contains('Log in').should('not.be.visible')
      .get('a.btn').contains('Sign up').should('not.be.visible')
      .get('a.btn').contains('Status')
      .get('button.btn').contains('Log out');
  });

  it('should not log a user in if the credentials are invalid', () => {
    cy
      .login('[email protected]', 'incorrect');
    cy
      .get('p')
      .contains('You logged in [email protected]!')
      .should('not.be.visible');
    cy
      .location('pathname').should('eq', '/log-in')
      .get('div.alert.alert-danger')
      .contains('Incorrect email and/or password.');
  });

});
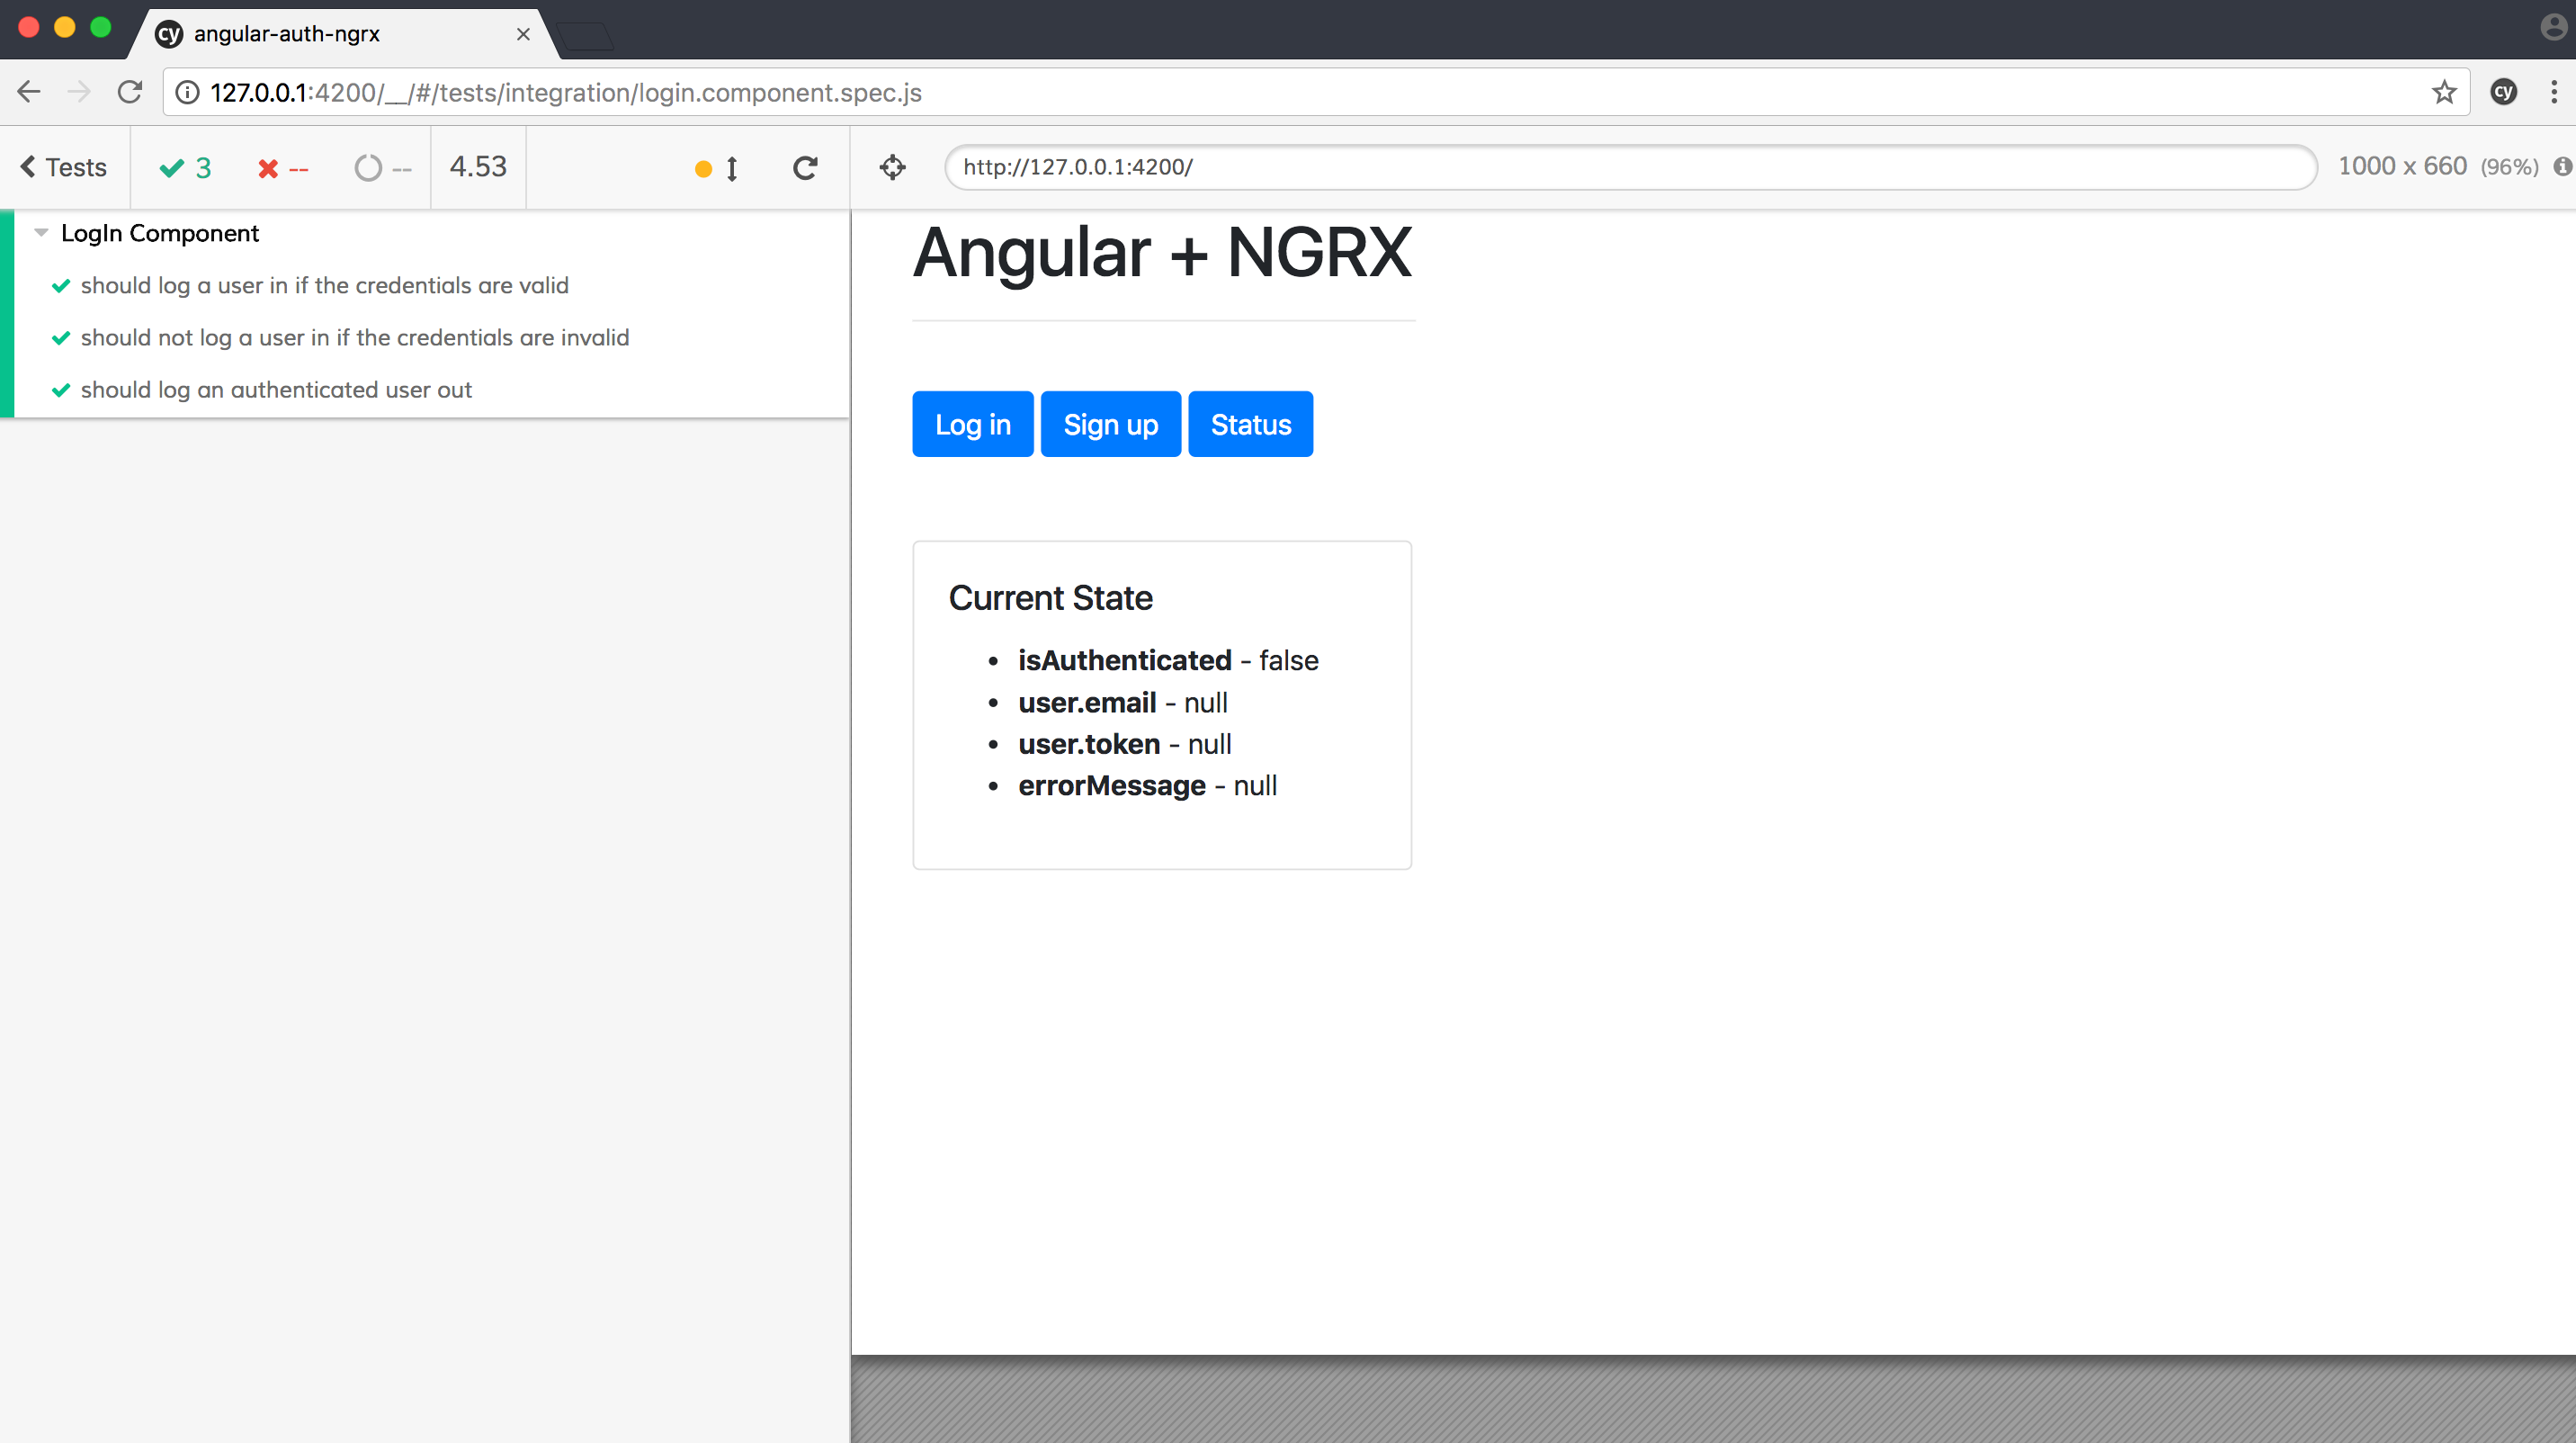
Ensure the tests still pass. Did you notice that we added an additional assertion with location() to ensure the user was properly redirected after a successful login?
Let's add one more test for logging out:
it('should log an authenticated user out', () => {
  cy
    .login('[email protected]', 'test');
  cy
    .get('p').contains('You logged in [email protected]!')
    .get('button.btn').contains('Log out').click()
  cy
    .location('pathname').should('eq', '/')
    .get('h1').contains('Angular + NGRX')
    .get('a.btn').contains('Log in')
    .get('a.btn').contains('Sign up')
    .get('a.btn').contains('Status');
});
TEST: SignUp Component
Testing this component will be very similar to the LogIn component. Start by creating a new spec file - signup.component.spec.js.
Test:
describe('SignUp Component', () => {
it('should sign a user up', () => {
cy
.signup('[email protected]', 'test');
cy
.location('pathname').should('eq', '/')
.get('p').contains('You logged in [email protected]!')
.get('a.btn').contains('Log in').should('not.be.visible')
.get('a.btn').contains('Sign up').should('not.be.visible')
.get('a.btn').contains('Status')
.get('button.btn').contains('Log out');
});
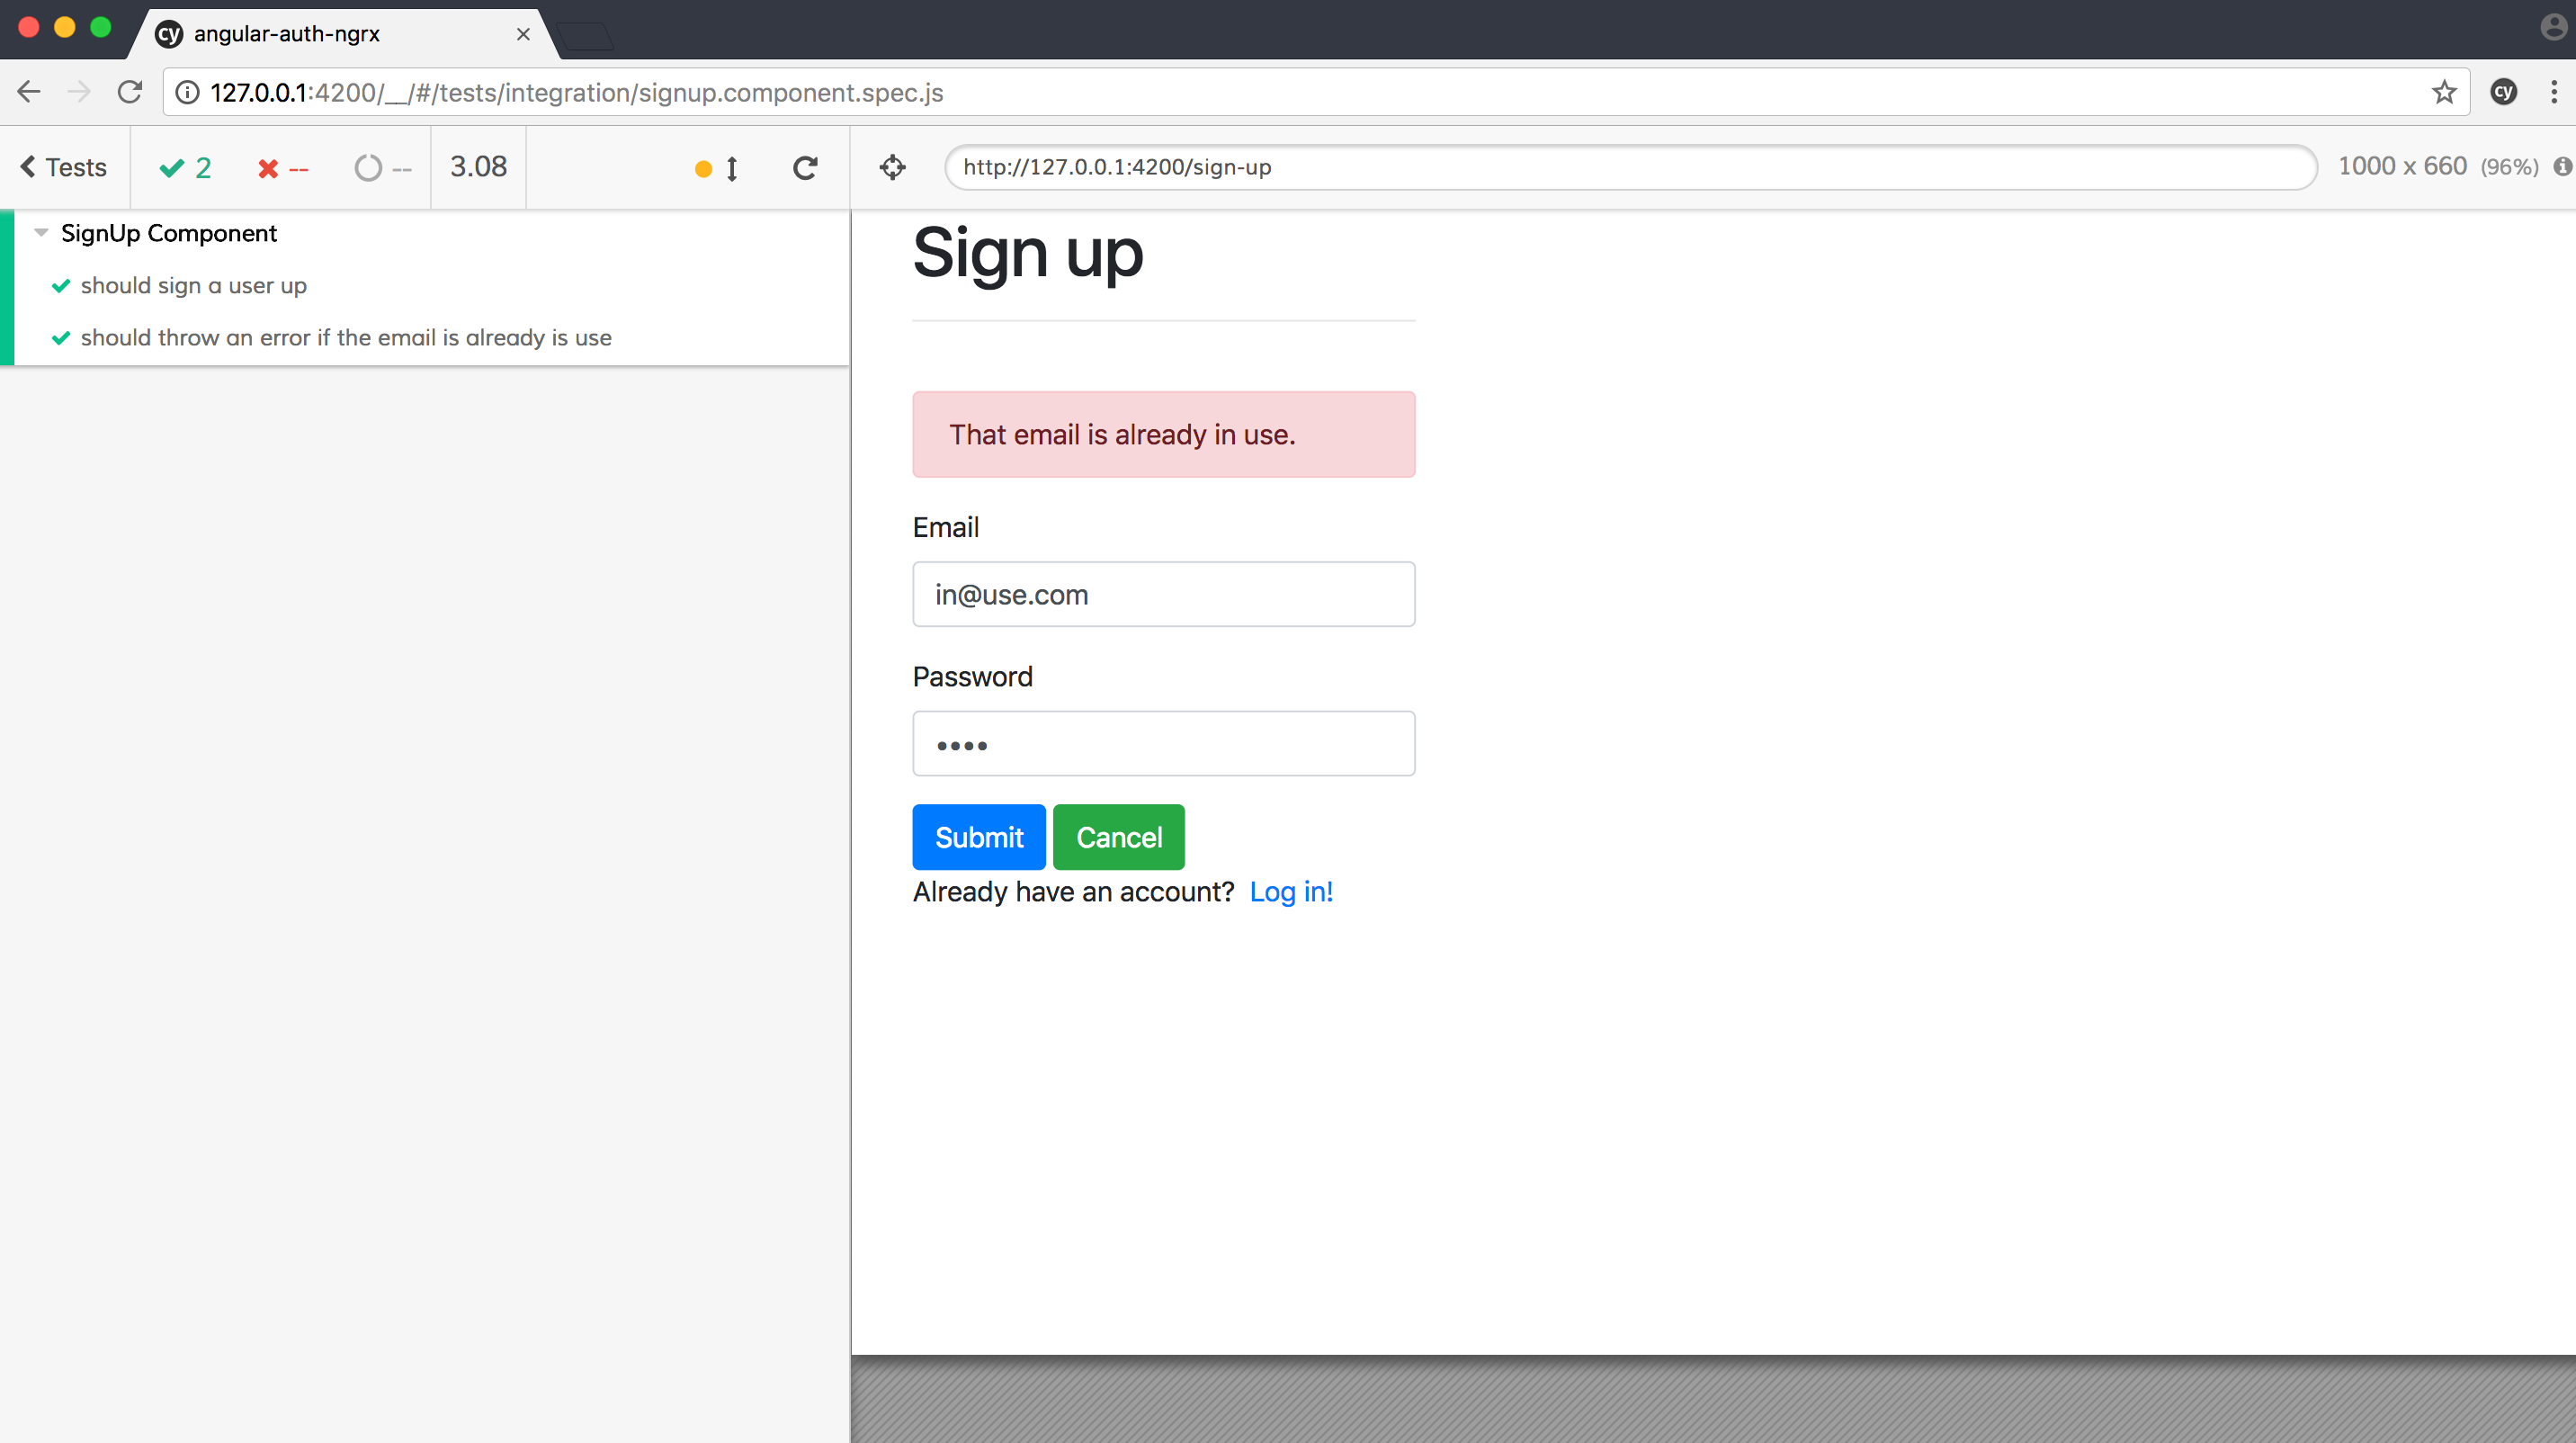
it('should throw an error if the email is already is use', () => {
cy
.signup('[email protected]', 'test');
cy
.get('p')
.contains('You logged in [email protected]!')
.should('not.be.visible');
cy
.location('pathname').should('eq', '/sign-up')
.get('div.alert.alert-danger')
.contains('That email is already in use.');
});
});
Add the command:
Cypress.Commands.add('login', (email, password) => {
  cy
    .visit('/')
    .get('a.btn').contains('Log in').click()
    .get('form input[name="email"]').clear().type(email)
    .get('form input[name="password"]').clear().type(password)
    .get('button[type="submit"]').click();
});

Cypress.Commands.add('signup', (email, password) => {
  cy
    .visit('/')
    .get('a.btn').contains('Sign up').click()
    .get('form input[name="email"]').clear().type(email)
    .get('form input[name="password"]').clear().type(password)
    .get('button[type="submit"]').click();
});
Ensure the tests pass:
One final thing before moving on, let's ensure that the state of the sign up form is correct on the initial load.
Add the following test:
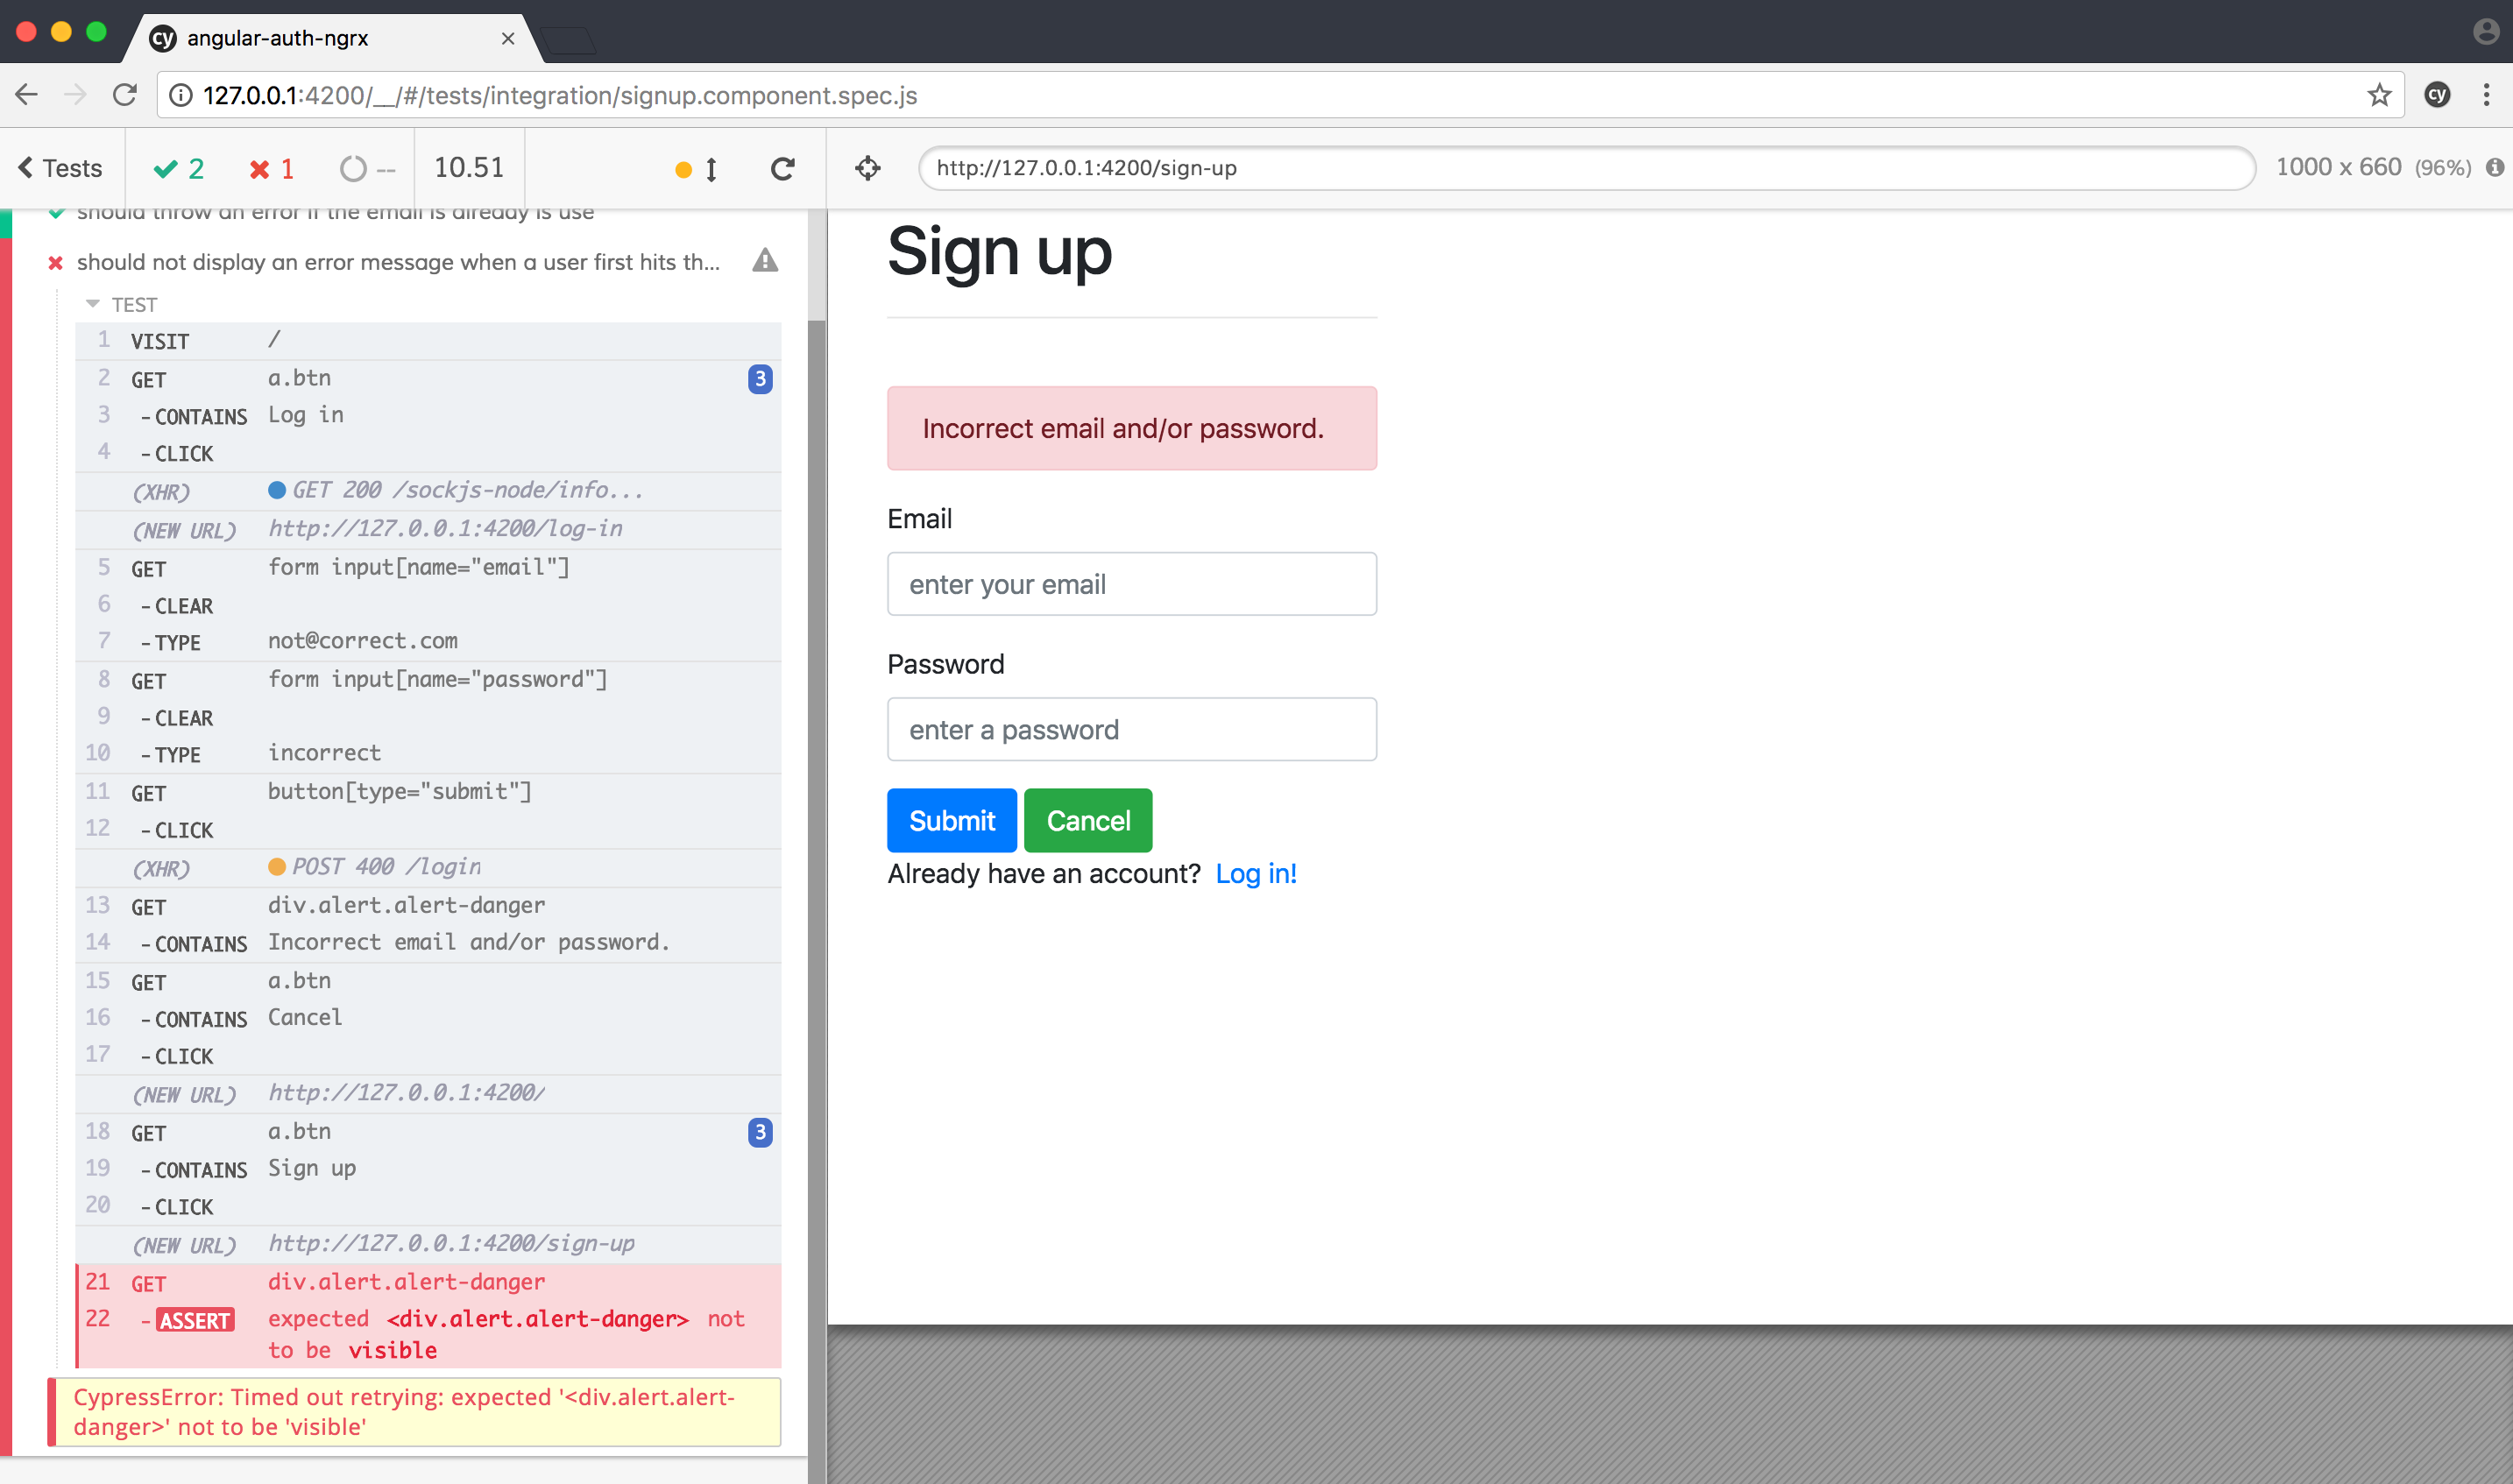
it('should not display an error message when a user first hits the component', () => {
  cy
    .login('[email protected]', 'incorrect')
    .get('div.alert.alert-danger')
    .contains('Incorrect email and/or password.')
    .get('a.btn').contains('Cancel').click()
    .get('a.btn').contains('Sign up').click();
  cy
    .get('div.alert.alert-danger')
    .should('not.be.visible');
});
This test should fail:
Add a similar test to the login spec:
it('should not display an error message when a user first hits the component', () => {
  cy
    .signup('[email protected]', 'test')
    .get('div.alert.alert-danger')
    .contains('That email is already in use.')
    .get('a.btn').contains('Cancel').click()
    .get('a.btn').contains('Log in').click();
  cy
    .get('div.alert.alert-danger')
    .should('not.be.visible');
});
It should also fail. So, we uncovered an error in the code: The message state is not getting cleared out on the component init. You can either fix this on your own or comment out the failing asserts.
TEST: Status Component
Add the spec - status.component.spec.js:
describe('Status Component', () => {

  it('should display the component if a user is logged in', () => {
    cy
      .login('[email protected]', 'test');
    cy
      .location('pathname').should('eq', '/')
      .get('p').contains('You logged in [email protected]!')
      .get('a.btn').contains('Status').click();
    cy
      .location('pathname').should('eq', '/status')
      .get('h1').contains('Status Works!')
      .get('a.btn').contains('Home');
  });

  it('should not display the component if a user is not logged in', () => {
    cy
      .visit('/')
      .get('a.btn').contains('Status').click();
    cy
      .location('pathname').should('eq', '/log-in')
      .get('h1').contains('Status Works!').should('not.be.visible');
  });

});
Ensure ALL tests pass:
Conclusion
That's it!
Cypress is a powerful, end-to-end testing tool. With it, you can start writing tests within minutes of download with a familiar assertion library. Tests run in real-time time in an Electron app, which makes it easy to debug failing assertions. There's a strong community behind the project, and the documentation is excellent!
Grab the final code from the following repos: