 Michael Herman
In the following tutorial we'll walk you through provisioning a highly-available Hashicorp Vault and Consul cluster on Kubernetes with TLS.
Main dependencies:
- Vault v1.7.1
- Consul v1.9.5
- Kubernetes v1.21.0
This is an intermediate-level tutorial. It assumes that you have basic working knowledge of Vault, Consul, Docker, and Kubernetes.
Contents
Minikube
Minikube is a tool used to run a single-node Kubernetes cluster locally. It's designed to get a cluster up and running quickly so you can start interacting with the Kubernetes API locally.
Follow the official Get Started guide to get Minikube installed along with:
- A Hypervisor (like VirtualBox or HyperKit) to manage virtual machines
- Kubectl to deploy and manage apps on Kubernetes
If you’re on a Mac, we recommend installing Kubectl and Minikube with Homebrew:
$ brew update
$ brew install kubectl
$ brew install minikube
Then, start the cluster and pull up the Minikube dashboard:
$ minikube config set vm-driver hyperkit
$ minikube start
$ minikube dashboard
With that, we'll turn our attention to configuring TLS.
TLS Certificates
TLS will be used to secure RPC communication between each Consul member. To set this up, we'll create a Certificate Authority (CA) to sign the certificates, via CloudFlare's SSL ToolKit (cfssl and cfssljson), and distribute keys to the nodes.
Start by installing Go if you don't already have it.
Again, if you’re on a Mac, the quickest way to install Go is with Homebrew:
$ brew update
$ brew install go
Once installed, create a workspace, configure the GOPATH and add the workspace's bin folder to your system path:
$ mkdir $HOME/go
$ export GOPATH=$HOME/go
$ export PATH=$PATH:$GOPATH/bin
Next, install the SSL ToolKit:
$ go get -u github.com/cloudflare/cfssl/cmd/cfssl
$ go get -u github.com/cloudflare/cfssl/cmd/cfssljson
Create a new project directory called "vault-consul-kubernetes" and add the following files and folders:
├── certs
│   ├── config
│   │   ├── ca-config.json
│   │   ├── ca-csr.json
│   │   ├── consul-csr.json
│   │   └── vault-csr.json
├── consul
└── vault
ca-config.json:
{
  "signing": {
    "default": {
      "expiry": "87600h"
    },
    "profiles": {
      "default": {
        "usages": [
          "signing",
          "key encipherment",
          "server auth",
          "client auth"
        ],
        "expiry": "8760h"
      }
    }
  }
}
ca-csr.json:
{
  "hosts": [
    "cluster.local"
  ],
  "key": {
    "algo": "rsa",
    "size": 2048
  },
  "names": [
    {
      "C": "US",
      "ST": "Colorado",
      "L": "Denver"
    }
  ]
}
consul-csr.json:
{
  "CN": "server.dc1.cluster.local",
  "hosts": [
    "server.dc1.cluster.local",
    "127.0.0.1"
  ],
  "key": {
    "algo": "rsa",
    "size": 2048
  },
  "names": [
    {
      "C": "US",
      "ST": "Colorado",
      "L": "Denver"
    }
  ]
}
vault-csr.json:
{
  "hosts": [
    "vault",
    "127.0.0.1"
  ],
  "key": {
    "algo": "rsa",
    "size": 2048
  },
  "names": [
    {
      "C": "US",
      "ST": "Colorado",
      "L": "Denver"
    }
  ]
}
For information on these files, review the Secure Consul Agent Communication with TLS Encryption guide.
Create a Certificate Authority:
$ cfssl gencert -initca certs/config/ca-csr.json | cfssljson -bare certs/ca
Then, create a private key and a TLS certificate for Consul:
$ cfssl gencert \
    -ca=certs/ca.pem \
    -ca-key=certs/ca-key.pem \
    -config=certs/config/ca-config.json \
    -profile=default \
    certs/config/consul-csr.json | cfssljson -bare certs/consul
Do the same for Vault:
$ cfssl gencert \
    -ca=certs/ca.pem \
    -ca-key=certs/ca-key.pem \
    -config=certs/config/ca-config.json \
    -profile=default \
    certs/config/vault-csr.json | cfssljson -bare certs/vault
You should now see the following PEM files within the "certs" directory:
- ca-key.pem
- ca.csr
- ca.pem
- consul-key.pem
- consul.csr
- consul.pem
- vault-key.pem
- vault.csr
- vault.pem
Consul
Gossip Encryption Key
Consul uses the Gossip protocol to broadcast encrypted messages and discover new members added to the cluster. This requires a shared key. To generate, first install the Consul client (Mac users should use Brew for this -- brew install consul), and then generate a key and store it in an environment variable:
$ export GOSSIP_ENCRYPTION_KEY=$(consul keygen)
Store the key along with the TLS certificates in a Secret:
$ kubectl create secret generic consul \
  --from-literal="gossip-encryption-key=${GOSSIP_ENCRYPTION_KEY}" \
  --from-file=certs/ca.pem \
  --from-file=certs/consul.pem \
  --from-file=certs/consul-key.pem
Verify:
$ kubectl describe secrets consul
You should see:
Name:         consul
Namespace:    default
Labels:       <none>
Annotations:  <none>

Type:  Opaque

Data
====
consul.pem:             1359 bytes
gossip-encryption-key:  44 bytes
ca.pem:                 1168 bytes
consul-key.pem:         1679 bytes
Config
Add a new file to "consul" called config.json:
{
  "ca_file": "/etc/tls/ca.pem",
  "cert_file": "/etc/tls/consul.pem",
  "key_file": "/etc/tls/consul-key.pem",
  "verify_incoming": true,
  "verify_outgoing": true,
  "verify_server_hostname": true,
  "ports": {
    "https": 8443
  }
}
By setting verify_incoming, verify_outgoing and verify_server_hostname to true all RPC calls must be encrypted.
Be sure to review the RPC Encryption with TLS guide from the Consul docs for more info on these options.
Save this config in a ConfigMap:
$ kubectl create configmap consul --from-file=consul/config.json
$ kubectl describe configmap consul
Service
Define a Headless Service -- a Service without a ClusterIP -- in consul/service.yaml to expose each of the Consul members internally:
apiVersion: v1
kind: Service
metadata:
  name: consul
  labels:
    name: consul
spec:
  clusterIP: None
  ports:
    - name: http
      port: 8500
      targetPort: 8500
    - name: https
      port: 8443
      targetPort: 8443
    - name: rpc
      port: 8400
      targetPort: 8400
    - name: serflan-tcp
      protocol: "TCP"
      port: 8301
      targetPort: 8301
    - name: serflan-udp
      protocol: "UDP"
      port: 8301
      targetPort: 8301
    - name: serfwan-tcp
      protocol: "TCP"
      port: 8302
      targetPort: 8302
    - name: serfwan-udp
      protocol: "UDP"
      port: 8302
      targetPort: 8302
    - name: server
      port: 8300
      targetPort: 8300
    - name: consuldns
      port: 8600
      targetPort: 8600
  selector:
    app: consul
Create the Service:
$ kubectl create -f consul/service.yaml
$ kubectl get service consul
Be sure to create the Service before the StatefulSet since the Pods created by the StatefulSet will immediately start doing DNS lookups to find other members.
StatefulSet
consul/statefulset.yaml:
apiVersion: apps/v1
kind: StatefulSet
metadata:
  name: consul
spec:
  serviceName: consul
  replicas: 3
  selector:
    matchLabels:
      app: consul
  template:
    metadata:
      labels:
        app: consul
    spec:
      securityContext:
        fsGroup: 1000
      containers:
        - name: consul
          image: "consul:1.4.0"
          env:
            - name: POD_IP
              valueFrom:
                fieldRef:
                  fieldPath: status.podIP
            - name: GOSSIP_ENCRYPTION_KEY
              valueFrom:
                secretKeyRef:
                  name: consul
                  key: gossip-encryption-key
            - name: NAMESPACE
              valueFrom:
                fieldRef:
                  fieldPath: metadata.namespace
          args:
            - "agent"
            - "-advertise=$(POD_IP)"
            - "-bind=0.0.0.0"
            - "-bootstrap-expect=3"
            - "-retry-join=consul-0.consul.$(NAMESPACE).svc.cluster.local"
            - "-retry-join=consul-1.consul.$(NAMESPACE).svc.cluster.local"
            - "-retry-join=consul-2.consul.$(NAMESPACE).svc.cluster.local"
            - "-client=0.0.0.0"
            - "-config-file=/consul/myconfig/config.json"
            - "-datacenter=dc1"
            - "-data-dir=/consul/data"
            - "-domain=cluster.local"
            - "-encrypt=$(GOSSIP_ENCRYPTION_KEY)"
            - "-server"
            - "-ui"
            - "-disable-host-node-id"
          volumeMounts:
            - name: config
              mountPath: /consul/myconfig
            - name: tls
              mountPath: /etc/tls
          lifecycle:
            preStop:
              exec:
                command:
                - /bin/sh
                - -c
                - consul leave
          ports:
            - containerPort: 8500
              name: ui-port
            - containerPort: 8400
              name: alt-port
            - containerPort: 53
              name: udp-port
            - containerPort: 8443
              name: https-port
            - containerPort: 8080
              name: http-port
            - containerPort: 8301
              name: serflan
            - containerPort: 8302
              name: serfwan
            - containerPort: 8600
              name: consuldns
            - containerPort: 8300
              name: server
      volumes:
        - name: config
          configMap:
            name: consul
        - name: tls
          secret:
            secretName: consul
Deploy a three-node Consul cluster:
$ kubectl create -f consul/statefulset.yaml
Verify that the Pods are up and running:
$ kubectl get pods

NAME       READY     STATUS    RESTARTS   AGE
consul-0   1/1       Running   0          17s
consul-1   1/1       Running   0          7s
consul-2   1/1       Running   0          6s
Take a look at the logs from each of the Pods to ensure that one of them has been chosen as the leader:
$ kubectl logs consul-0
$ kubectl logs consul-1
$ kubectl logs consul-2
Sample logs:
2021/04/27 21:24:36 [INFO] raft: Election won. Tally: 2
2021/04/27 21:24:36 [INFO] raft: Node at 172.17.0.7:8300 [Leader] entering Leader state
2021/04/27 21:24:36 [INFO] raft: Added peer a3ee83a0-e39b-f58b-e2d4-35a3689ff3d9, starting replication
2021/04/27 21:24:36 [INFO] consul: cluster leadership acquired
2021/04/27 21:24:36 [INFO] consul: New leader elected: consul-2
2021/04/27 21:24:36 [INFO] raft: Added peer f91746e3-881c-aebb-f8c5-b34bf37d3529, starting replication
2021/04/27 21:24:36 [WARN] raft: AppendEntries to {Voter a3ee83a0-e39b-f58b-e2d4-35a3689ff3d9 172.17.0.6:8300} rejected, sending older logs (next: 1)
2021/04/27 21:24:36 [INFO] raft: pipelining replication to peer {Voter a3ee83a0-e39b-f58b-e2d4-35a3689ff3d9 172.17.0.6:8300}
2021/04/27 21:24:36 [WARN] raft: AppendEntries to {Voter f91746e3-881c-aebb-f8c5-b34bf37d3529 172.17.0.5:8300} rejected, sending older logs (next: 1)
2021/04/27 21:24:36 [INFO] raft: pipelining replication to peer {Voter f91746e3-881c-aebb-f8c5-b34bf37d3529 172.17.0.5:8300}
2021/04/27 21:24:36 [INFO] consul: member 'consul-2' joined, marking health alive
2021/04/27 21:24:36 [INFO] consul: member 'consul-1' joined, marking health alive
2021/04/27 21:24:36 [INFO] consul: member 'consul-0' joined, marking health alive
2021/04/27 21:24:36 [INFO] agent: Synced node info
Forward the port to the local machine:
$ kubectl port-forward consul-1 8500:8500
Then, in a new terminal window, ensure that all members are alive:
$ consul members

Node      Address          Status  Type    Build  Protocol  DC   Segment
consul-0  172.17.0.6:8301  alive   server  1.4.0  2         dc1  <all>
consul-1  172.17.0.7:8301  alive   server  1.4.0  2         dc1  <all>
consul-2  172.17.0.8:8301  alive   server  1.4.0  2         dc1  <all>
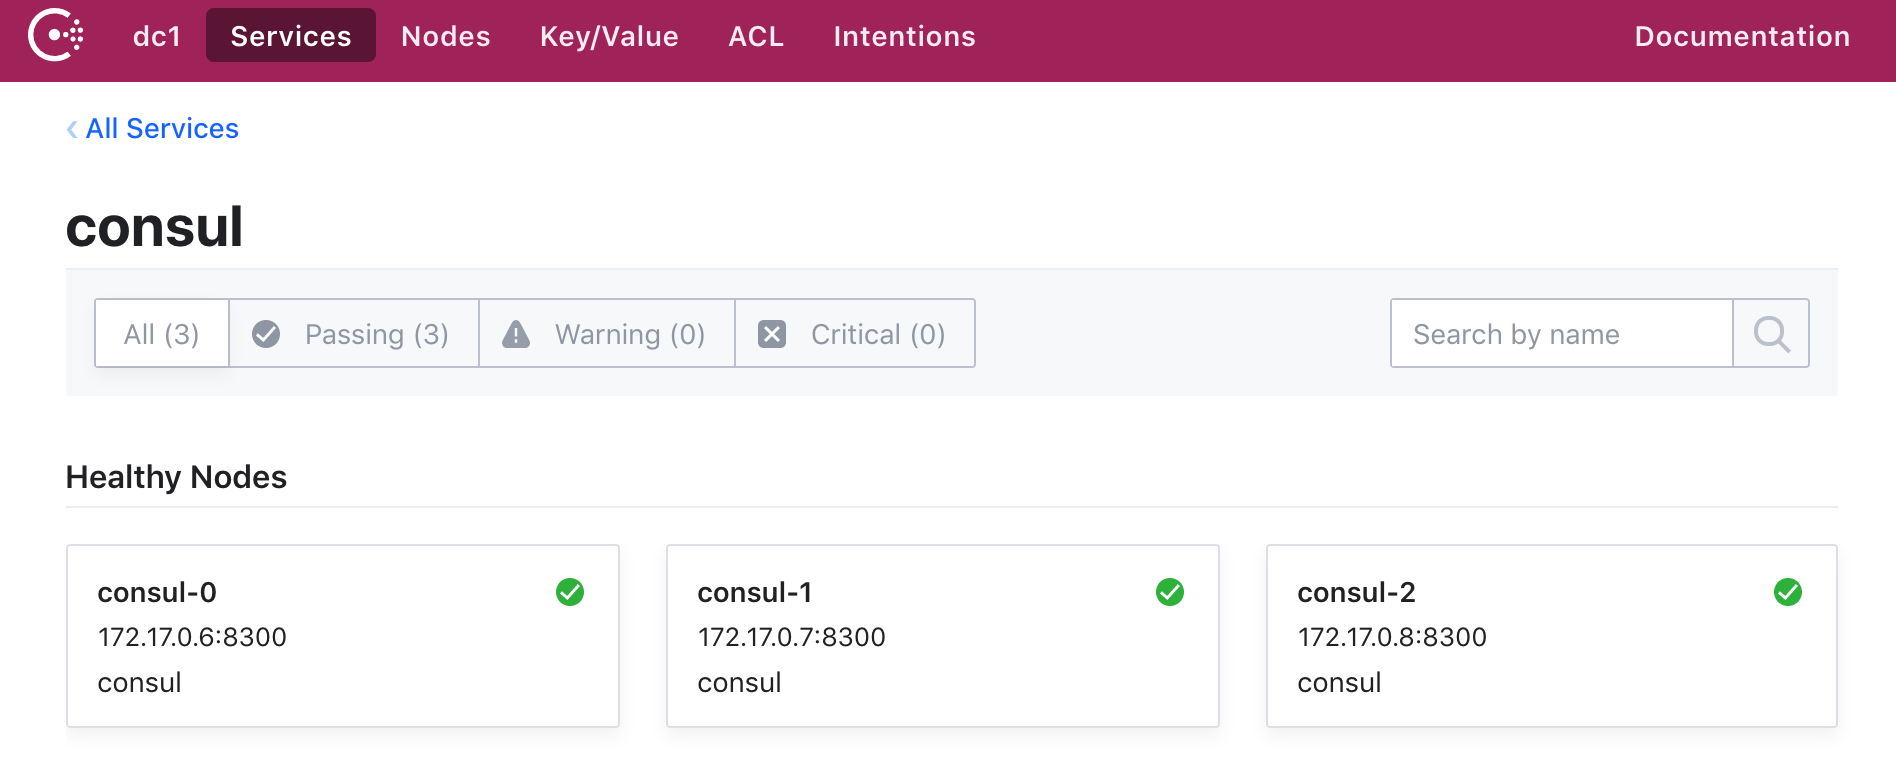
Finally, you should be able to access the web interface at http://localhost:8500.
Vault
Moving right along, let's configure Vault to run on Kubernetes.
Secret
Store the Vault TLS certificates that we created in a Secret:
$ kubectl create secret generic vault \
    --from-file=certs/ca.pem \
    --from-file=certs/vault.pem \
    --from-file=certs/vault-key.pem

$ kubectl describe secrets vault
ConfigMap
Add a new file for the Vault config called vault/config.json:
{
  "listener": {
    "tcp":{
      "address": "127.0.0.1:8200",
      "tls_disable": 0,
      "tls_cert_file": "/etc/tls/vault.pem",
      "tls_key_file": "/etc/tls/vault-key.pem"
    }
  },
  "storage": {
    "consul": {
      "address": "consul:8500",
      "path": "vault/",
      "disable_registration": "true",
      "ha_enabled": "true"
    }
  },
  "ui": true
}
Here, we configured Vault to use the Consul backend (which supports high availability), defined the TCP listener for Vault, enabled TLS, added the paths to the TLS certificate and the private key, and enabled the Vault UI. Review the docs for more info on configuring Vault.
Save this config in a ConfigMap:
$ kubectl create configmap vault --from-file=vault/config.json
$ kubectl describe configmap vault
Service
vault/service.yaml:
apiVersion: v1
kind: Service
metadata:
  name: vault
  labels:
    app: vault
spec:
  type: ClusterIP
  ports:
    - port: 8200
      targetPort: 8200
      protocol: TCP
      name: vault
  selector:
    app: vault
Create:
$ kubectl create -f vault/service.yaml
$ kubectl get service vault
Deployment
vault/deployment.yaml:
apiVersion: apps/v1
kind: Deployment
metadata:
  name: vault
  labels:
    app: vault
spec:
  replicas: 1
  selector:
    matchLabels:
      app: vault
  template:
    metadata:
      labels:
        app: vault
    spec:
      containers:
      - name: vault
        command: ["vault", "server", "-config", "/vault/config/config.json"]
        image: "vault:0.11.5"
        imagePullPolicy: IfNotPresent
        securityContext:
          capabilities:
            add:
              - IPC_LOCK
        volumeMounts:
          - name: configurations
            mountPath: /vault/config/config.json
            subPath: config.json
          - name: vault
            mountPath: /etc/tls
      - name: consul-vault-agent
        image: "consul:1.4.0"
        env:
          - name: GOSSIP_ENCRYPTION_KEY
            valueFrom:
              secretKeyRef:
                name: consul
                key: gossip-encryption-key
          - name: NAMESPACE
            valueFrom:
              fieldRef:
                fieldPath: metadata.namespace
        args:
          - "agent"
          - "-retry-join=consul-0.consul.$(NAMESPACE).svc.cluster.local"
          - "-retry-join=consul-1.consul.$(NAMESPACE).svc.cluster.local"
          - "-retry-join=consul-2.consul.$(NAMESPACE).svc.cluster.local"
          - "-encrypt=$(GOSSIP_ENCRYPTION_KEY)"
          - "-config-file=/consul/myconfig/config.json"
          - "-domain=cluster.local"
          - "-datacenter=dc1"
          - "-disable-host-node-id"
          - "-node=vault-1"
        volumeMounts:
            - name: config
              mountPath: /consul/myconfig
            - name: tls
              mountPath: /etc/tls
      volumes:
        - name: configurations
          configMap:
            name: vault
        - name: config
          configMap:
            name: consul
        - name: tls
          secret:
            secretName: consul
        - name: vault
          secret:
            secretName: vault
Deploy Vault:
$ kubectl apply -f vault/deployment.yaml
To test, grab the Pod name and then forward the port:
$ kubectl get pods

NAME                     READY     STATUS    RESTARTS   AGE
consul-0                 1/1       Running   0          35m
consul-1                 1/1       Running   0          35m
consul-2                 1/1       Running   0          35m
vault-64754b559d-dw459   2/2       Running   0          7m

$ kubectl port-forward vault-64754b559d-dw459 8200:8200
Make sure you can view the UI at https://localhost:8200.

Quick Test
With port forwarding still on, in a new terminal window, navigate to the project directory and set the VAULT_ADDR and VAULT_CACERT environment variables:
$ export VAULT_ADDR=https://127.0.0.1:8200
$ export VAULT_CACERT="certs/ca.pem"
Install the Vault client locally, if you don't already have it, and then init Vault with a single key:
$ vault operator init -key-shares=1 -key-threshold=1
Take note of the unseal key and the initial root token.
Unseal Key 1: iejZsVPrDFPbQL+JUW5HGMub9tlAwSSr7bR5NuAX9pg=

Initial Root Token: 85kVUa6mxr2VFawubh1YFG6t

Vault initialized with 1 key shares and a key threshold of 1. Please securely
distribute the key shares printed above. When the Vault is re-sealed,
restarted, or stopped, you must supply at least 1 of these keys to unseal it
before it can start servicing requests.

Vault does not store the generated master key. Without at least 1 key to
reconstruct the master key, Vault will remain permanently sealed!

It is possible to generate new unseal keys, provided you have a quorum of
existing unseal keys shares. See "vault operator rekey" for more information.
Unseal:
$ vault operator unseal

Unseal Key (will be hidden):

Key                    Value
---                    -----
Seal Type              shamir
Initialized            true
Sealed                 false
Total Shares           1
Threshold              1
Version                0.11.5
Cluster Name           vault-cluster-2c64d090
Cluster ID             42db2c78-938b-fe5c-aa15-f70be43a5cb4
HA Enabled             true
HA Cluster             n/a
HA Mode                standby
Active Node Address    <none>
Authenticate with the root token:
$ vault login

Token (will be hidden):

Success! You are now authenticated. The token information displayed below
is already stored in the token helper. You do NOT need to run "vault login"
again. Future Vault requests will automatically use this token.

Key                  Value
---                  -----
token                85kVUa6mxr2VFawubh1YFG6t
token_accessor       8hGliUJJeM8iijbiSzqiH49o
token_duration       ∞
token_renewable      false
token_policies       ["root"]
identity_policies    []
policies             ["root"]
Create a new secret:
$ vault kv put secret/precious foo=bar

Success! Data written to: secret/precious
Read:
$ vault kv get secret/precious

=== Data ===
Key    Value
---    -----
foo    bar
Bring down the cluster when done.
Automation Script
Finally, let’s create a quick script to automate the provisioning process:
- Generate Gossip encryption key
- Create a Secret to store the Gossip key along with the TLS certificates
- Store the Consul config in a ConfigMap
- Create the Consul Service and StatefulSet
- Create a Secret to store the Vault TLS certificates
- Store the Vault config in a ConfigMap
- Create the Vault Service and Deployment
- Add port forwarding to Vault for port 8200
Add a new file called create.sh to the project root:
#!/bin/bash


echo "Generating the Gossip encryption key..."

export GOSSIP_ENCRYPTION_KEY=$(consul keygen)


echo "Creating the Consul Secret to store the Gossip key and the TLS certificates..."

kubectl create secret generic consul \
  --from-literal="gossip-encryption-key=${GOSSIP_ENCRYPTION_KEY}" \
  --from-file=certs/ca.pem \
  --from-file=certs/consul.pem \
  --from-file=certs/consul-key.pem


echo "Storing the Consul config in a ConfigMap..."

kubectl create configmap consul --from-file=consul/config.json


echo "Creating the Consul Service..."

kubectl create -f consul/service.yaml


echo "Creating the Consul StatefulSet..."

kubectl create -f consul/statefulset.yaml


echo "Creating a Secret to store the Vault TLS certificates..."

kubectl create secret generic vault \
    --from-file=certs/ca.pem \
    --from-file=certs/vault.pem \
    --from-file=certs/vault-key.pem


echo "Storing the Vault config in a ConfigMap..."

kubectl create configmap vault --from-file=vault/config.json


echo "Creating the Vault Service..."

kubectl create -f vault/service.yaml


echo "Creating the Vault Deployment..."

kubectl apply -f vault/deployment.yaml


echo "All done! Forwarding port 8200..."

POD=$(kubectl get pods -o=name | grep vault | sed "s/^.\{4\}//")

while true; do
  STATUS=$(kubectl get pods ${POD} -o jsonpath="{.status.phase}")
  if [ "$STATUS" == "Running" ]; then
    break
  else
    echo "Pod status is: ${STATUS}"
    sleep 5
  fi
done

kubectl port-forward $POD 8200:8200
Before testing, make sure Minikube is up and create the TLS certificates.
$ sh create.sh
In a new terminal window, navigate to the project directory and run:
$ export VAULT_ADDR=https://127.0.0.1:8200
$ export VAULT_CACERT="certs/ca.pem"
Check the status:
$ vault status
You can find the final code in the vault-consul-kubernetes repo.