 Michael Herman
Cypress is a modern web automation test framework designed to simplify browser testing. While it's best known as a Selenium replacement, it's much more than just an end-to-end test automation tool. Cypress is a developer tool made to be used proactively by developers rather than a non-technical QA team focused on after-the-fact testing.
This post looks at how to introduce Cypress into your test-driven development workflow as you build out an app with Flask and React.
Contents
Sample Application
We'll be building a basic todo application with Flask and React based on the following user stories:
- As a user I can see all the todos in the list
- As a user I can add new todos to the list
- As a user I can toggle the completed state of each todo
Let's assume that our focus is on the client-side only. In other words, we need to create a React todo app that interacts with a Flask back-end via AJAX to get and add todos. If you'd like to code along, clone down the flask-react-cypress repo, and then check out the v1 tag to the master branch:
$ git clone https://github.com/testdrivenio/flask-react-cypress --branch v1 --single-branch
$ cd flask-react-cypress
$ git checkout tags/v1 -b master
Workflow
This workflow focuses on integration testing, where development and testing happen simultaneously using a TDD-like approach:
- Convert user stories, requirements, and acceptance criteria into partial test specs
- Add fixtures and stub out network calls
- Run the Cypress GUI and keep it open next to your code editor
- Use .only to focus, and iterate, on a single test
- Ensure the test fails
- Code until that test passes (red, green, refactor)
- Repeat the previous three steps until all tests are green
- Optional: Convert the integration tests to end-to-end tests by removing the network stubs
Want to see this workflow in action? Check out the My Cypress Workflow video.
Initial Setup
Steps:
- Convert user stories, requirements, and acceptance criteria into partial test specs
- Add fixtures and stub out network calls
- Run the Cypress GUI and keep it open next to your code editor
Create partial test specs
Add the partial test specs to a new file called client/cypress/integration/todos.spec.js:
describe('todo app', () => {
  beforeEach(() => {
    cy.visit('/');
    cy.get('h1').contains('Todo List');
  });

  it('should display the todo list', () => {});

  it('should add a new todo to the list', () => {});

  it('should toggle a todo correctly', () => {});
});
Then, add the baseUrl along with the serverUrl--the URL for the server-side Flask app--under an env key so it will be accessible as an environment variable to client/cypress.json:
{
  "baseUrl": "http://localhost:3000",
  "env": {
    "serverUrl": "http://localhost:5009"
  }
}
Add fixtures
Before we stub out the requests, let's add the fixture files, which will be used to simulate the data returned from the following server-side endpoints:
- GET - /todos - get all todos
- POST - /todos - add a todo
client/cypress/fixtures/todos/all_before.json:
{
  "data": {
    "todos": [
      {
        "complete": false,
        "created_date": "Mon, 28 Jan 2019 15:32:28 GMT",
        "id": 1,
        "name": "go for a walk"
      },
      {
        "complete": false,
        "created_date": "Mon, 28 Jan 2019 15:32:28 GMT",
        "id": 2,
        "name": "go for a short run"
      },
      {
        "complete": true,
        "created_date": "Mon, 28 Jan 2019 15:32:28 GMT",
        "id": 3,
        "name": "clean the stereo"
      }
    ]
  },
  "status": "success"
}
client/cypress/fixtures/todos/add.json:
{
  "name": "make coffee"
}
This final fixture is for the getting of all todos after a new todo has been added.
client/cypress/fixtures/todos/all_after.json:
{
  "data": {
    "todos": [
      {
        "complete": false,
        "created_date": "Mon, 28 Jan 2019 15:32:28 GMT",
        "id": 1,
        "name": "go for a walk"
      },
      {
        "complete": false,
        "created_date": "Mon, 28 Jan 2019 15:32:28 GMT",
        "id": 2,
        "name": "go for a short run"
      },
      {
        "complete": true,
        "created_date": "Mon, 28 Jan 2019 15:32:28 GMT",
        "id": 3,
        "name": "clean the stereo"
      },
      {
        "complete": false,
        "created_date": "Mon, 28 Jan 2019 17:22:35 GMT",
        "id": 4,
        "name": "drink a beverage"
      }
    ]
  },
  "status": "success"
}
Then, add the fixtures to the beforeEach in the test spec:
beforeEach(() => {
  // fixtures
  cy.fixture('todos/all_before.json').as('todosJSON');
  cy.fixture('todos/add.json').as('addTodoJSON');
  cy.fixture('todos/all_after.json').as('updatedJSON');

  cy.visit('/');
  cy.get('h1').contains('Todo List');
});
Stub network calls
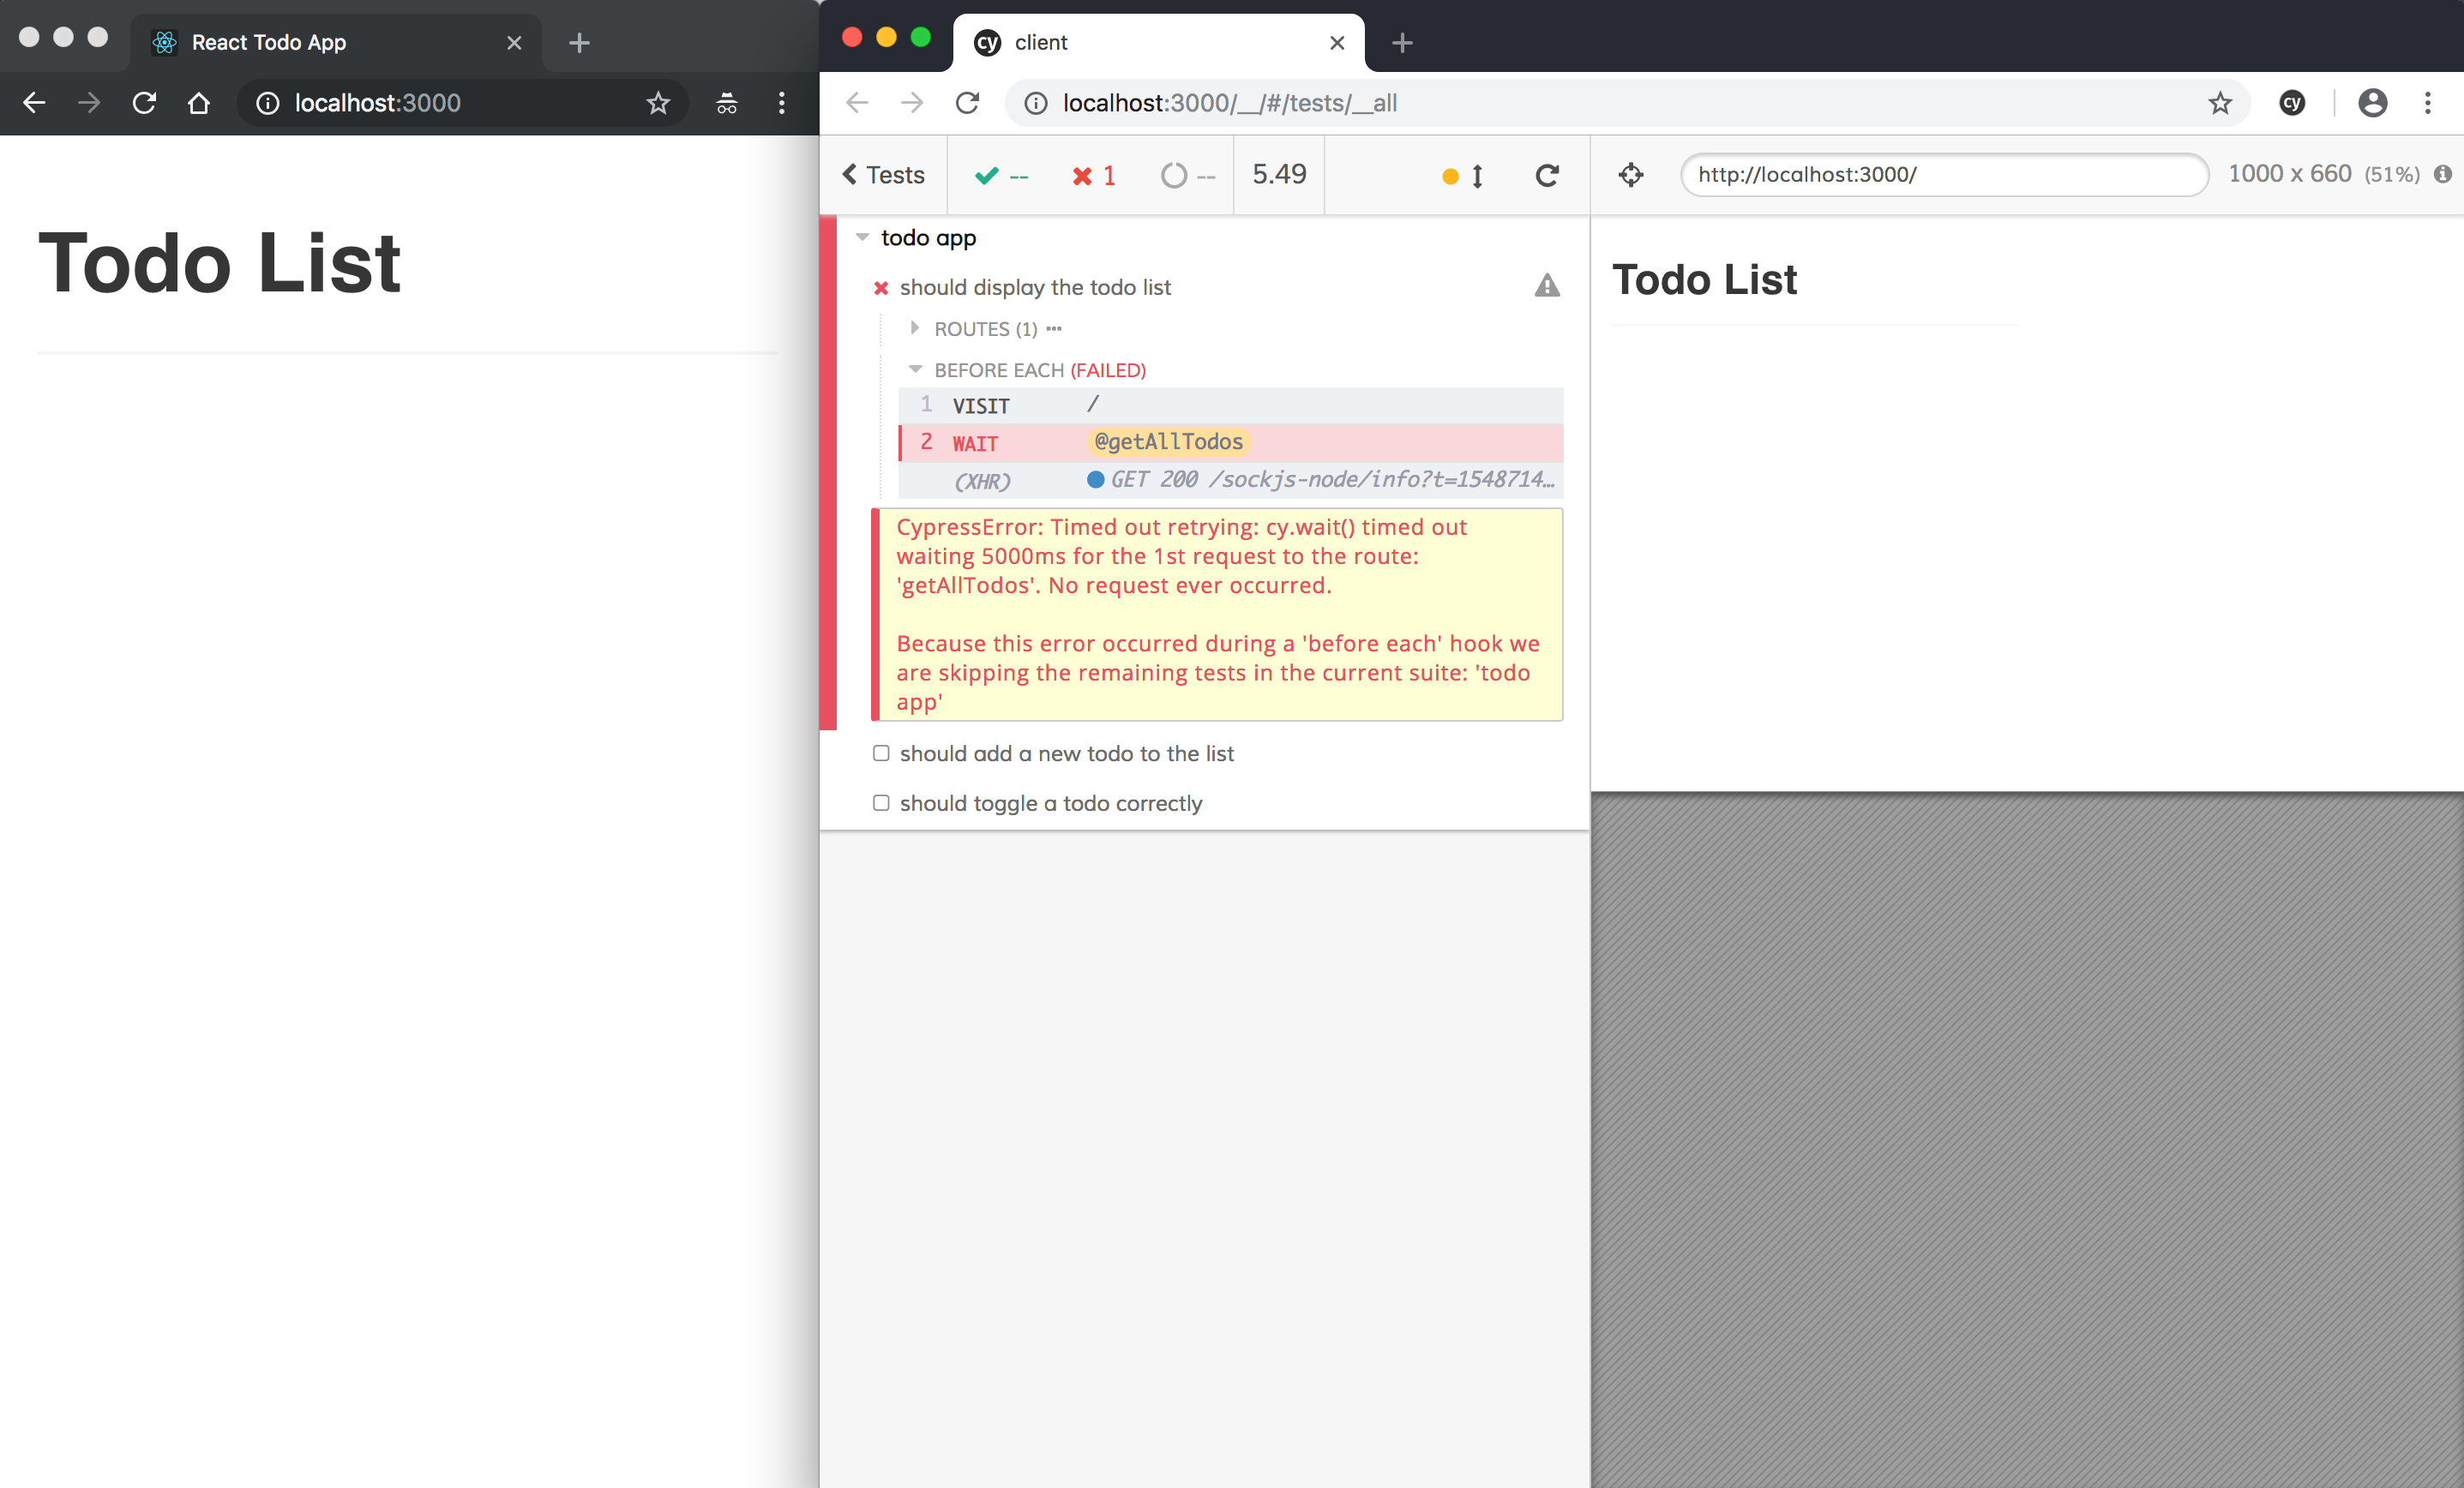
Update the beforeEach again, adding a stub and an explicit wait:
beforeEach(() => {
  // fixtures
  cy.fixture('todos/all_before.json').as('todosJSON');
  cy.fixture('todos/add.json').as('addTodoJSON');
  cy.fixture('todos/all_after.json').as('updatedJSON');

  // network stub
  cy.server();
  cy.route('GET', `${serverUrl}/todos`, '@todosJSON').as('getAllTodos');


  cy.visit('/');
  cy.wait('@getAllTodos');
  cy.get('h1').contains('Todo List');
});
Assign the value of the serverUrl environment variable to a variable:
const serverUrl = Cypress.env('serverUrl');
Add stubs to the should add a new todo to the list test:
it('should add a new todo to the list', () => {
  // network stubs
  cy.server();
  cy.route('GET', `${serverUrl}/todos`, '@updatedJSON').as('getAllTodos');
  cy.route('POST', `${serverUrl}/todos`, '@addTodoJSON').as('addTodo');
});
Open Cypress
Run the React app in one terminal window:
$ cd client
$ npm install
$ npm start
Then, open the Cypress GUI in a different window:
$ cd client
$ ./node_modules/.bin/cypress open
Development
Steps:
- Use .only to focus, and iterate, on a single test
- Ensure the test fails
- Code until that test passes (red, green, refactor)
- Repeat the previous three steps until all tests are green
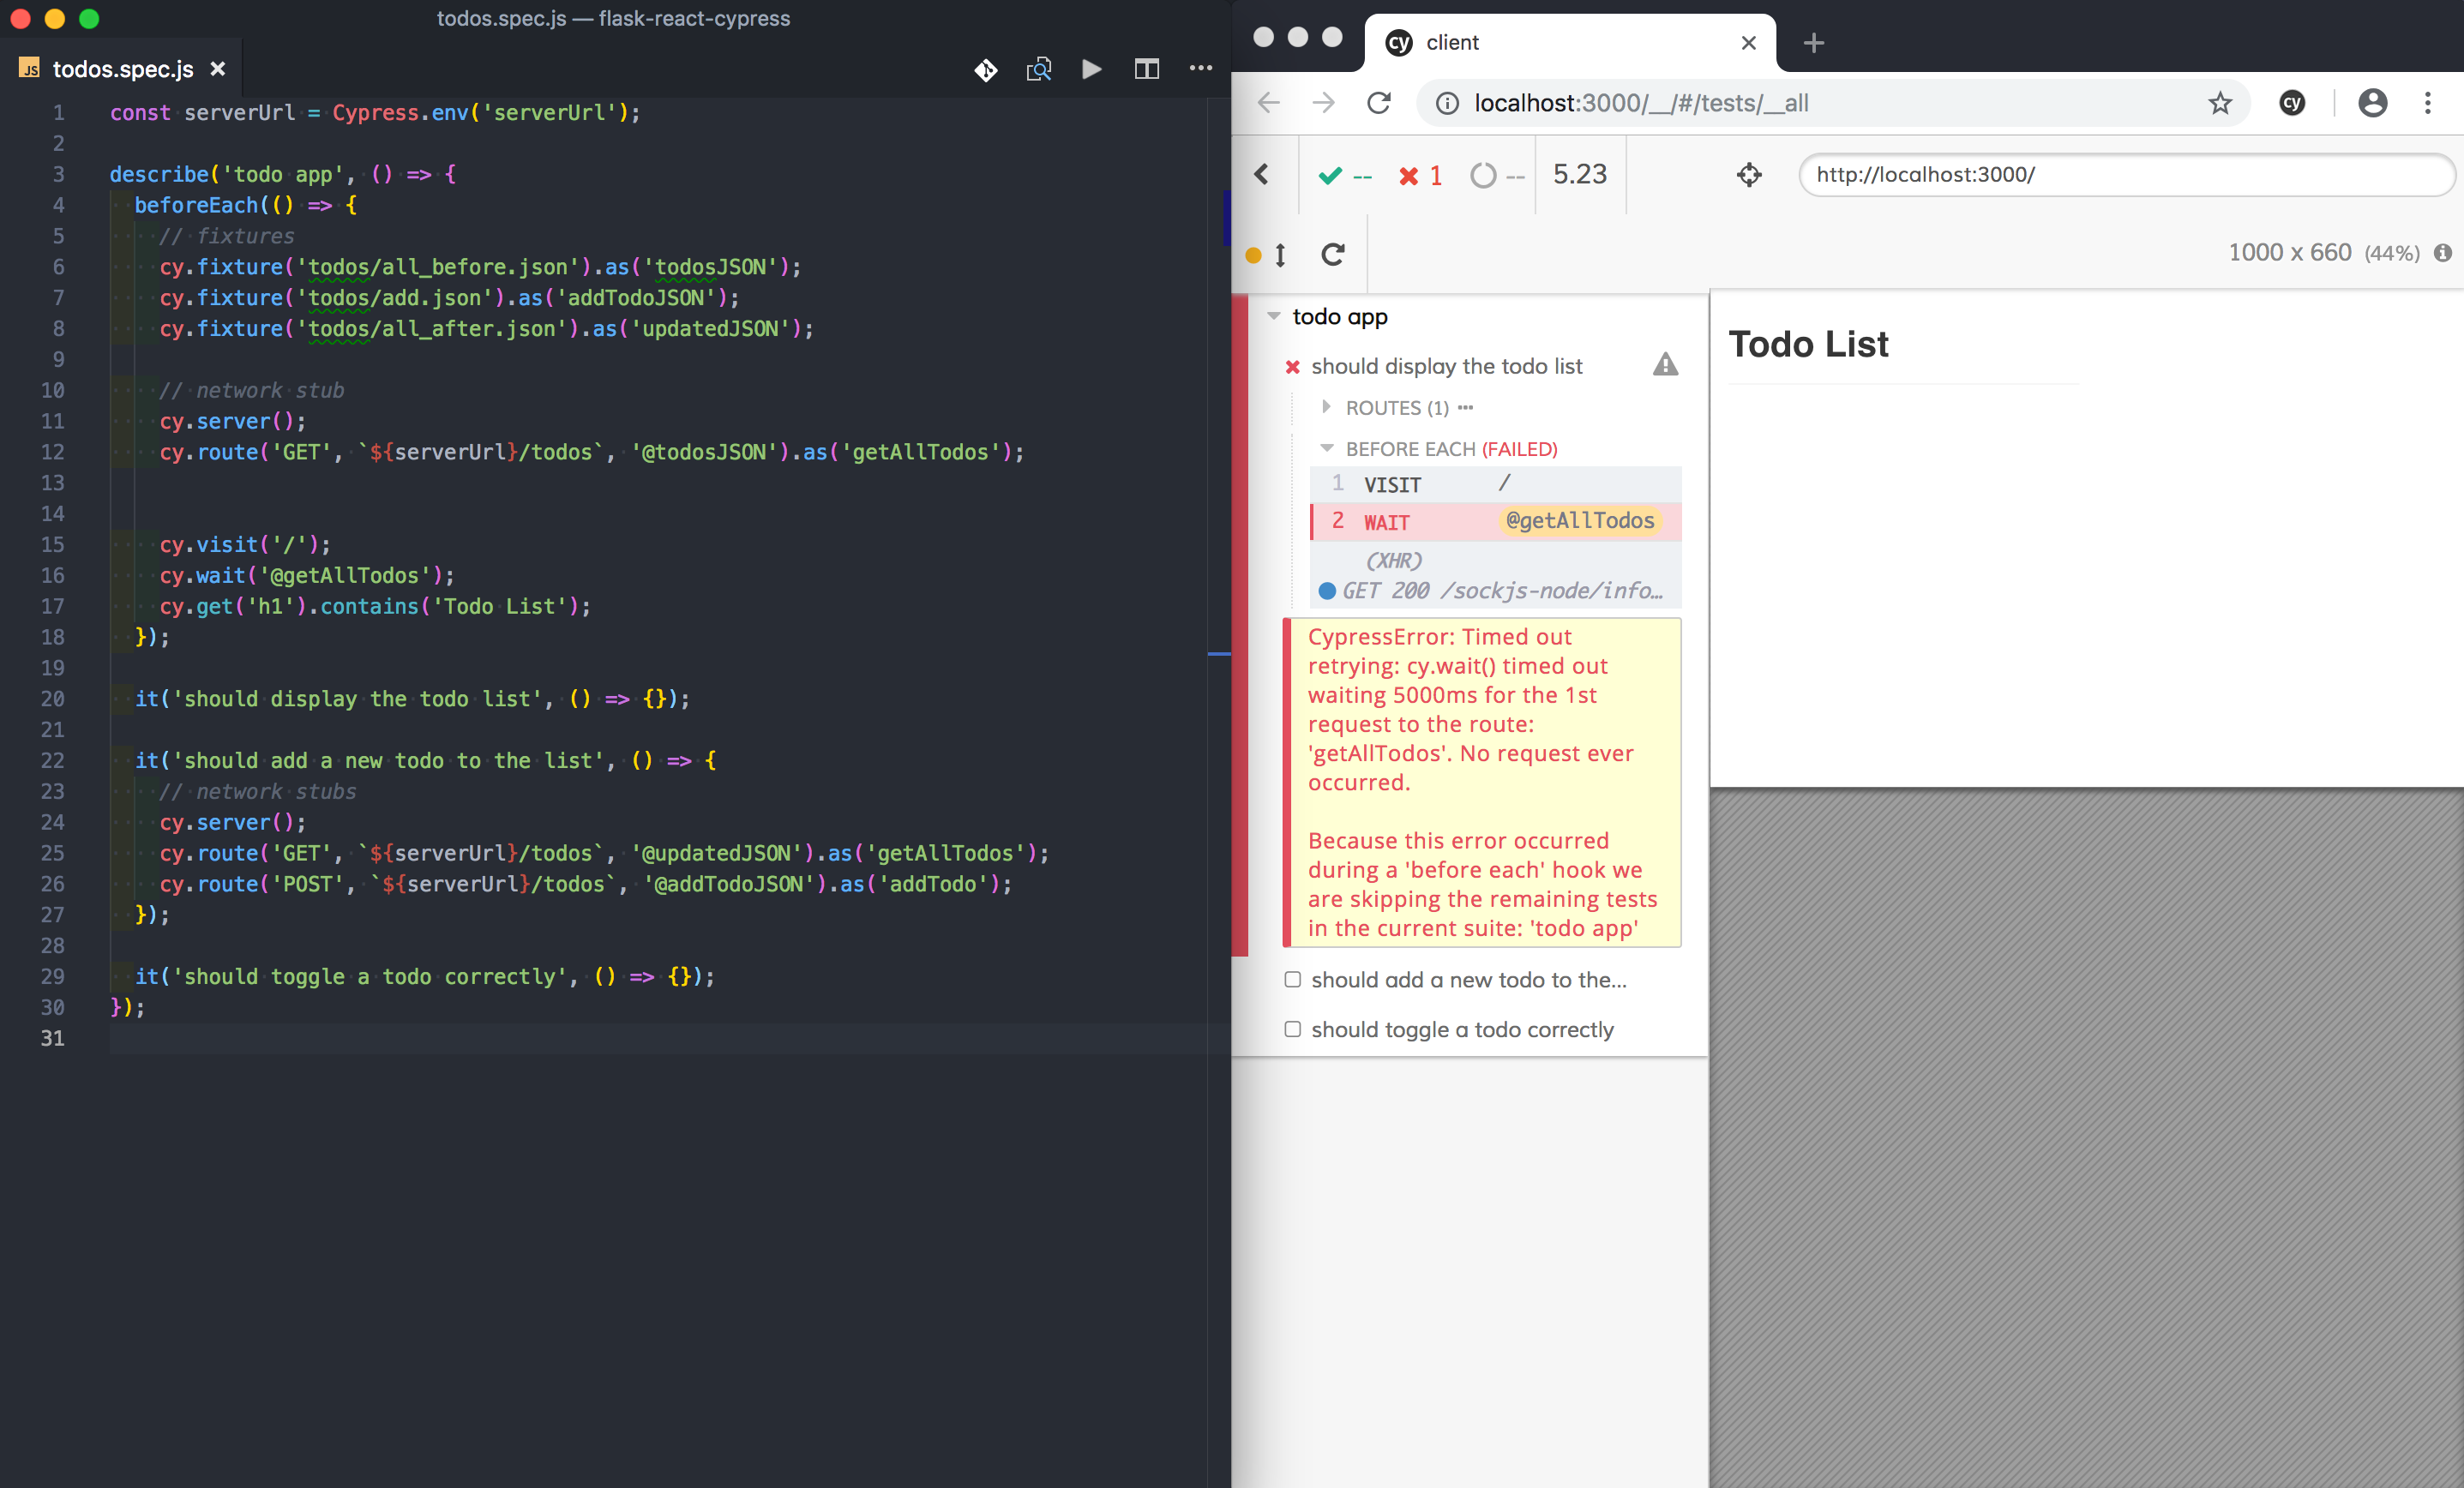
Displays all todos
Update the test:
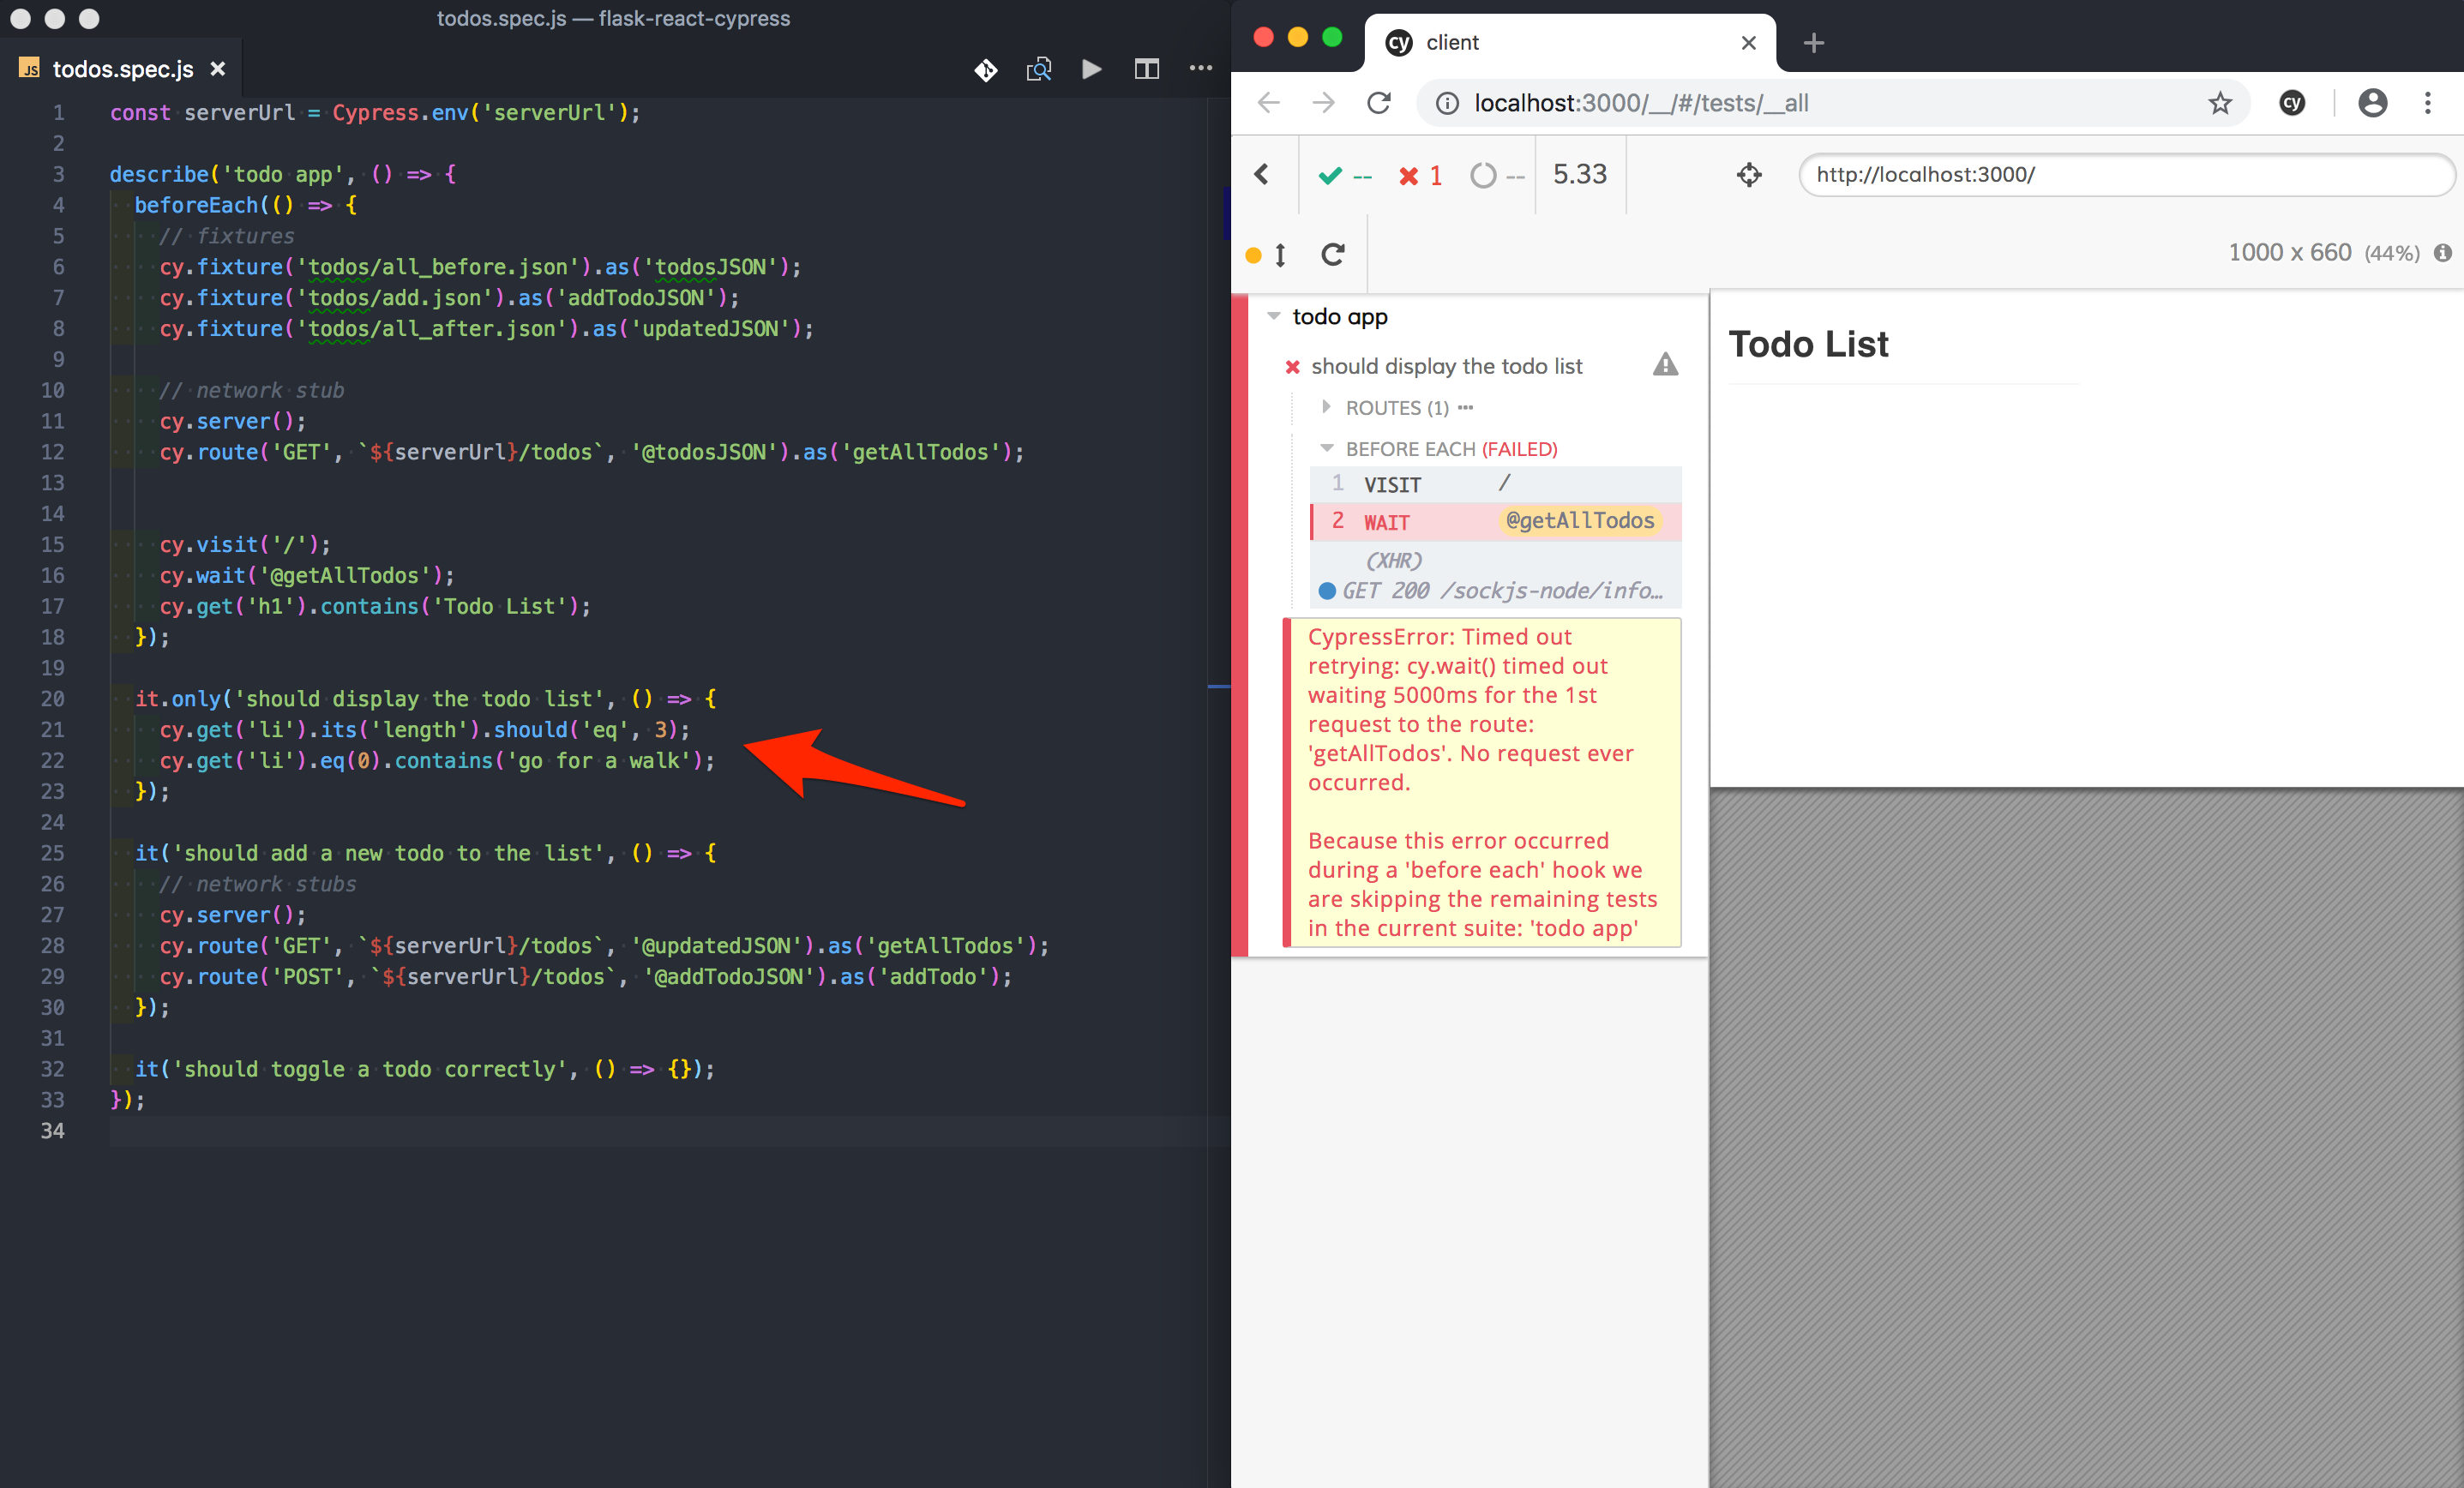
it.only('should display the todo list', () => {
  cy.get('li').its('length').should('eq', 3);
  cy.get('li').eq(0).contains('go for a walk');
});
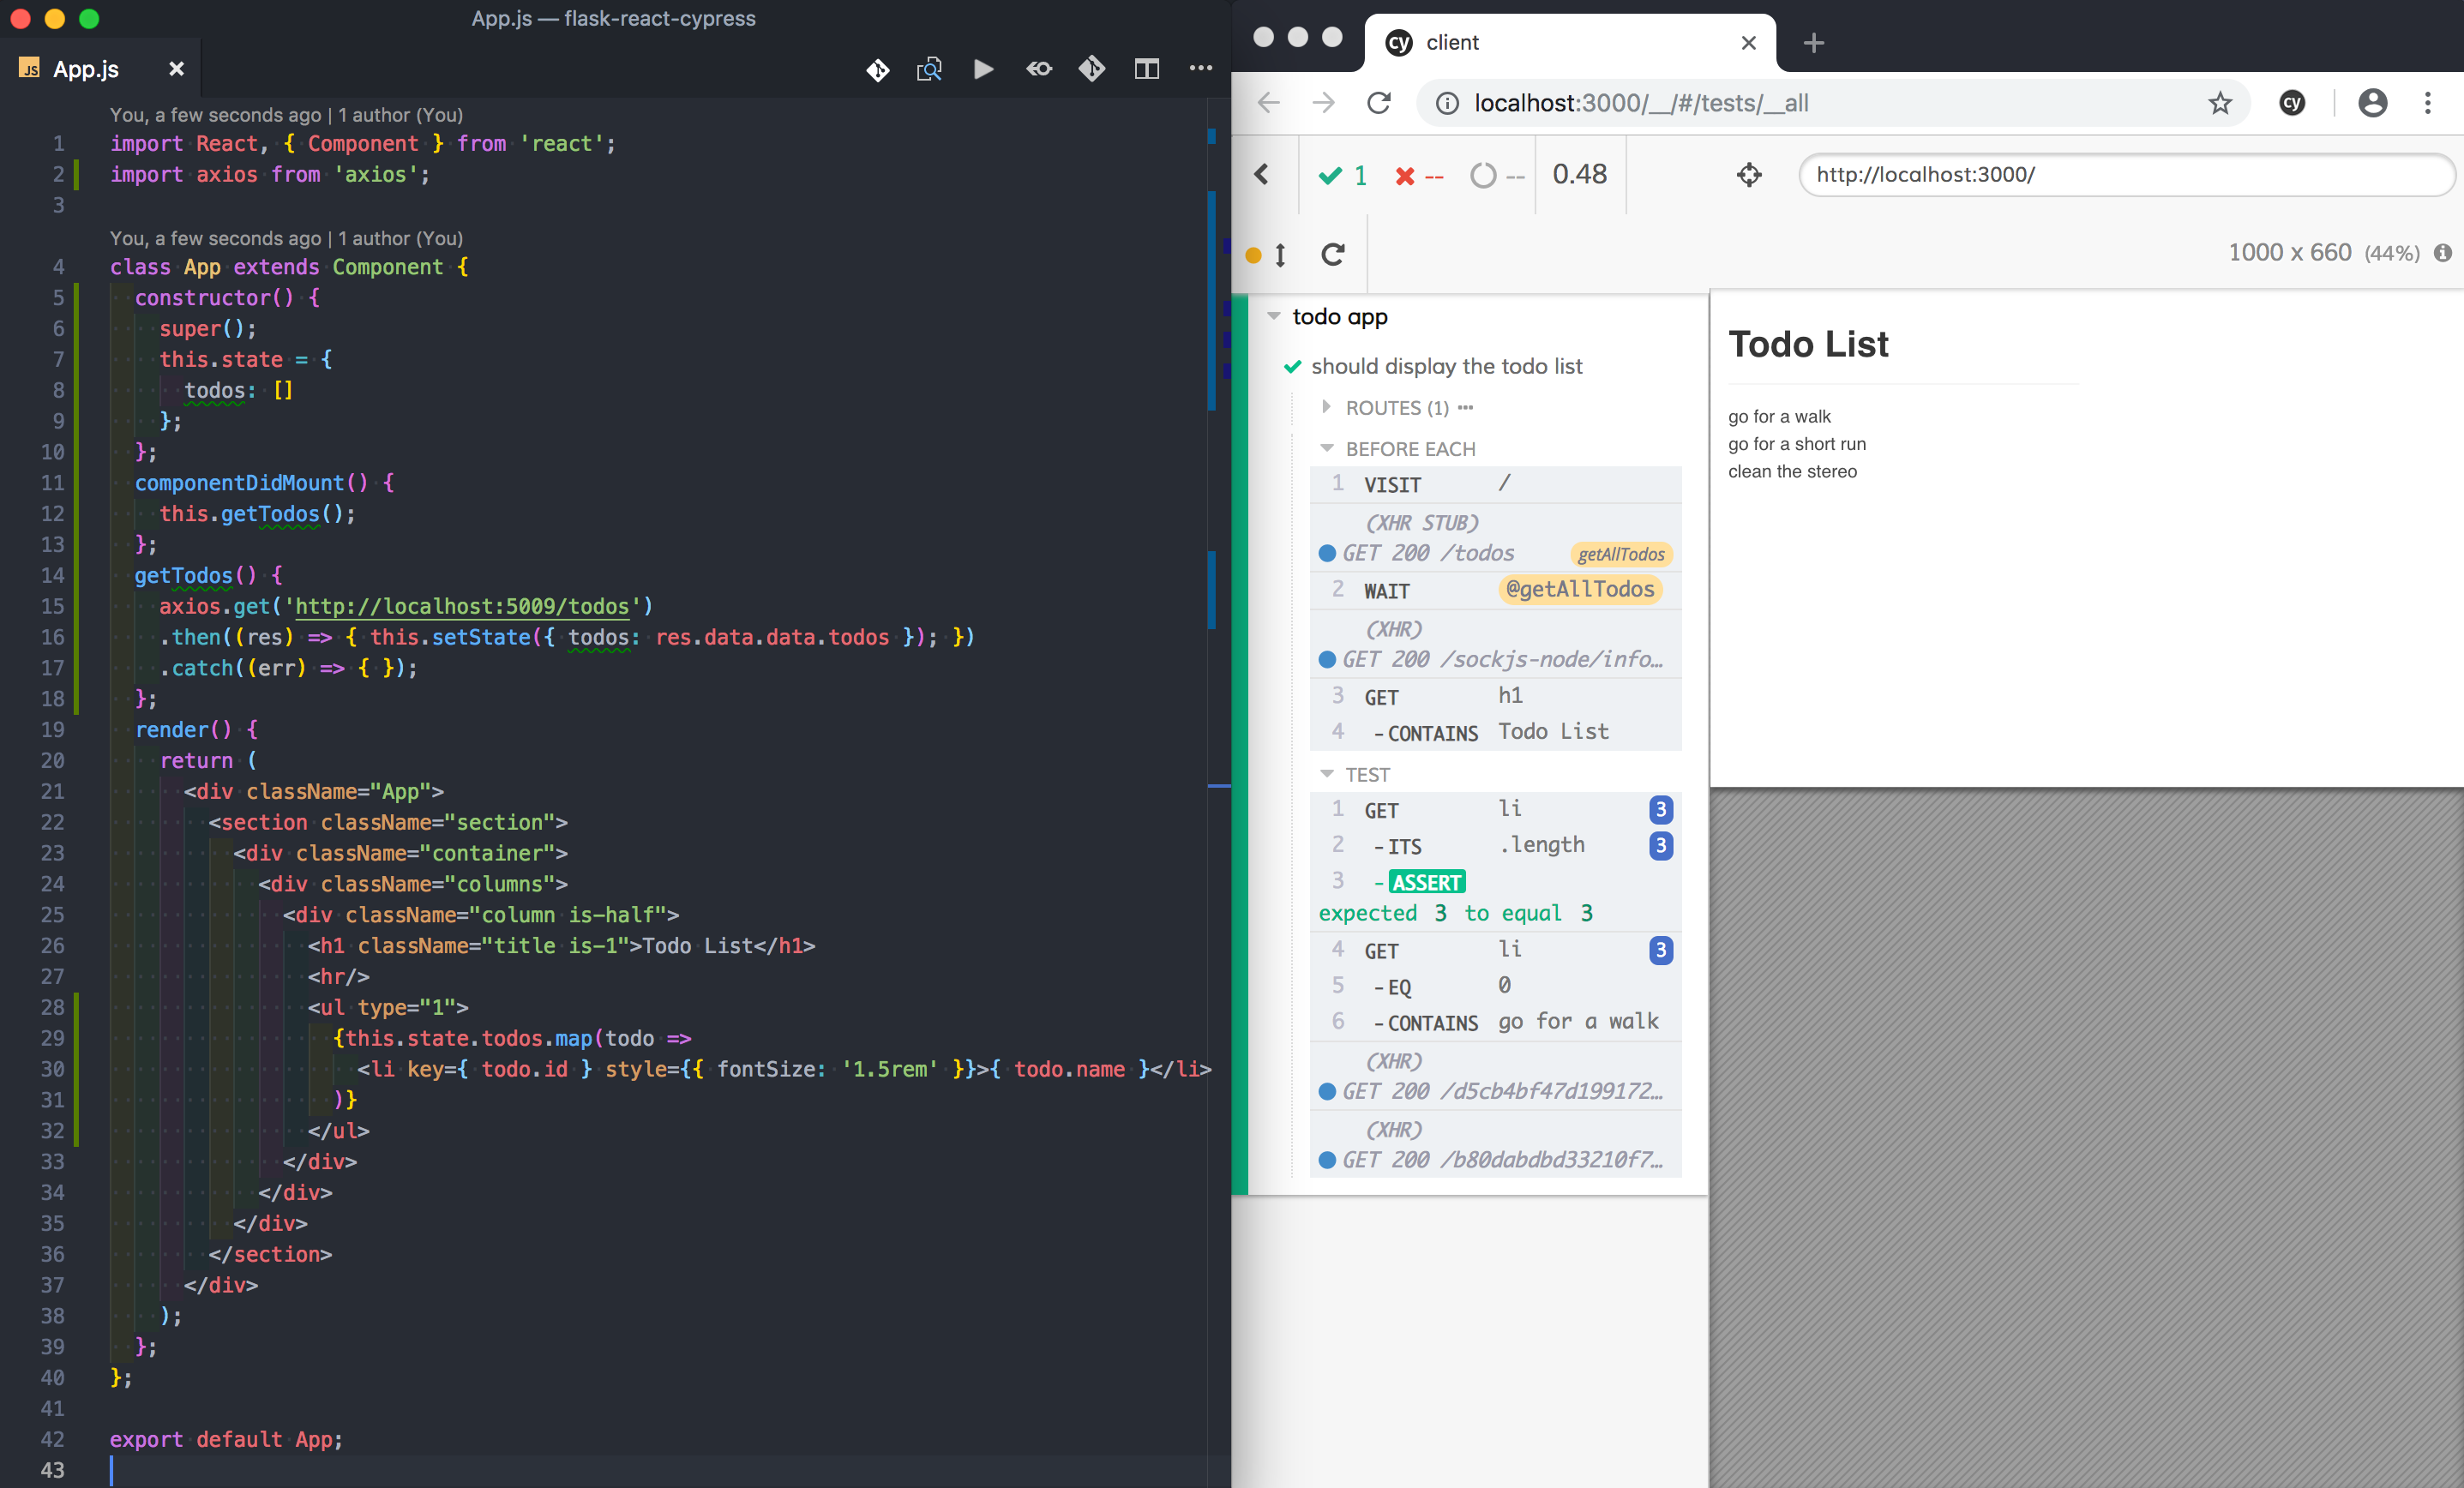
Then, update the App component:
import React, { Component } from 'react';
import axios from 'axios';

class App extends Component {
  constructor() {
    super();
    this.state = {
      todos: []
    };
  };
  componentDidMount() {
    this.getTodos();
  };
  getTodos() {
    axios.get('http://localhost:5009/todos')
    .then((res) => { this.setState({ todos: res.data.data.todos }); })
    .catch((err) => { });
  };
  render() {
    return (
      <div className="App">
        <section className="section">
          <div className="container">
            <div className="columns">
              <div className="column is-half">
                <h1 className="title is-1">Todo List</h1>
                <hr/>
                <ul type="1">
                  {this.state.todos.map(todo =>
                    <li key={ todo.id } style={{ fontSize: '1.5rem' }}>{ todo.name }</li>
                  )}
                </ul>
              </div>
            </div>
          </div>
        </section>
      </div>
    );
  };
};

export default App;
Within componentDidMount, an AJAX request is sent to the server-side to get all todos. When the response comes back, setState is called inside the success handler, which re-renders the component, displaying the todo list.
The test should now pass:
Add a todo
Remove the .only from the passing test, and update the next test:
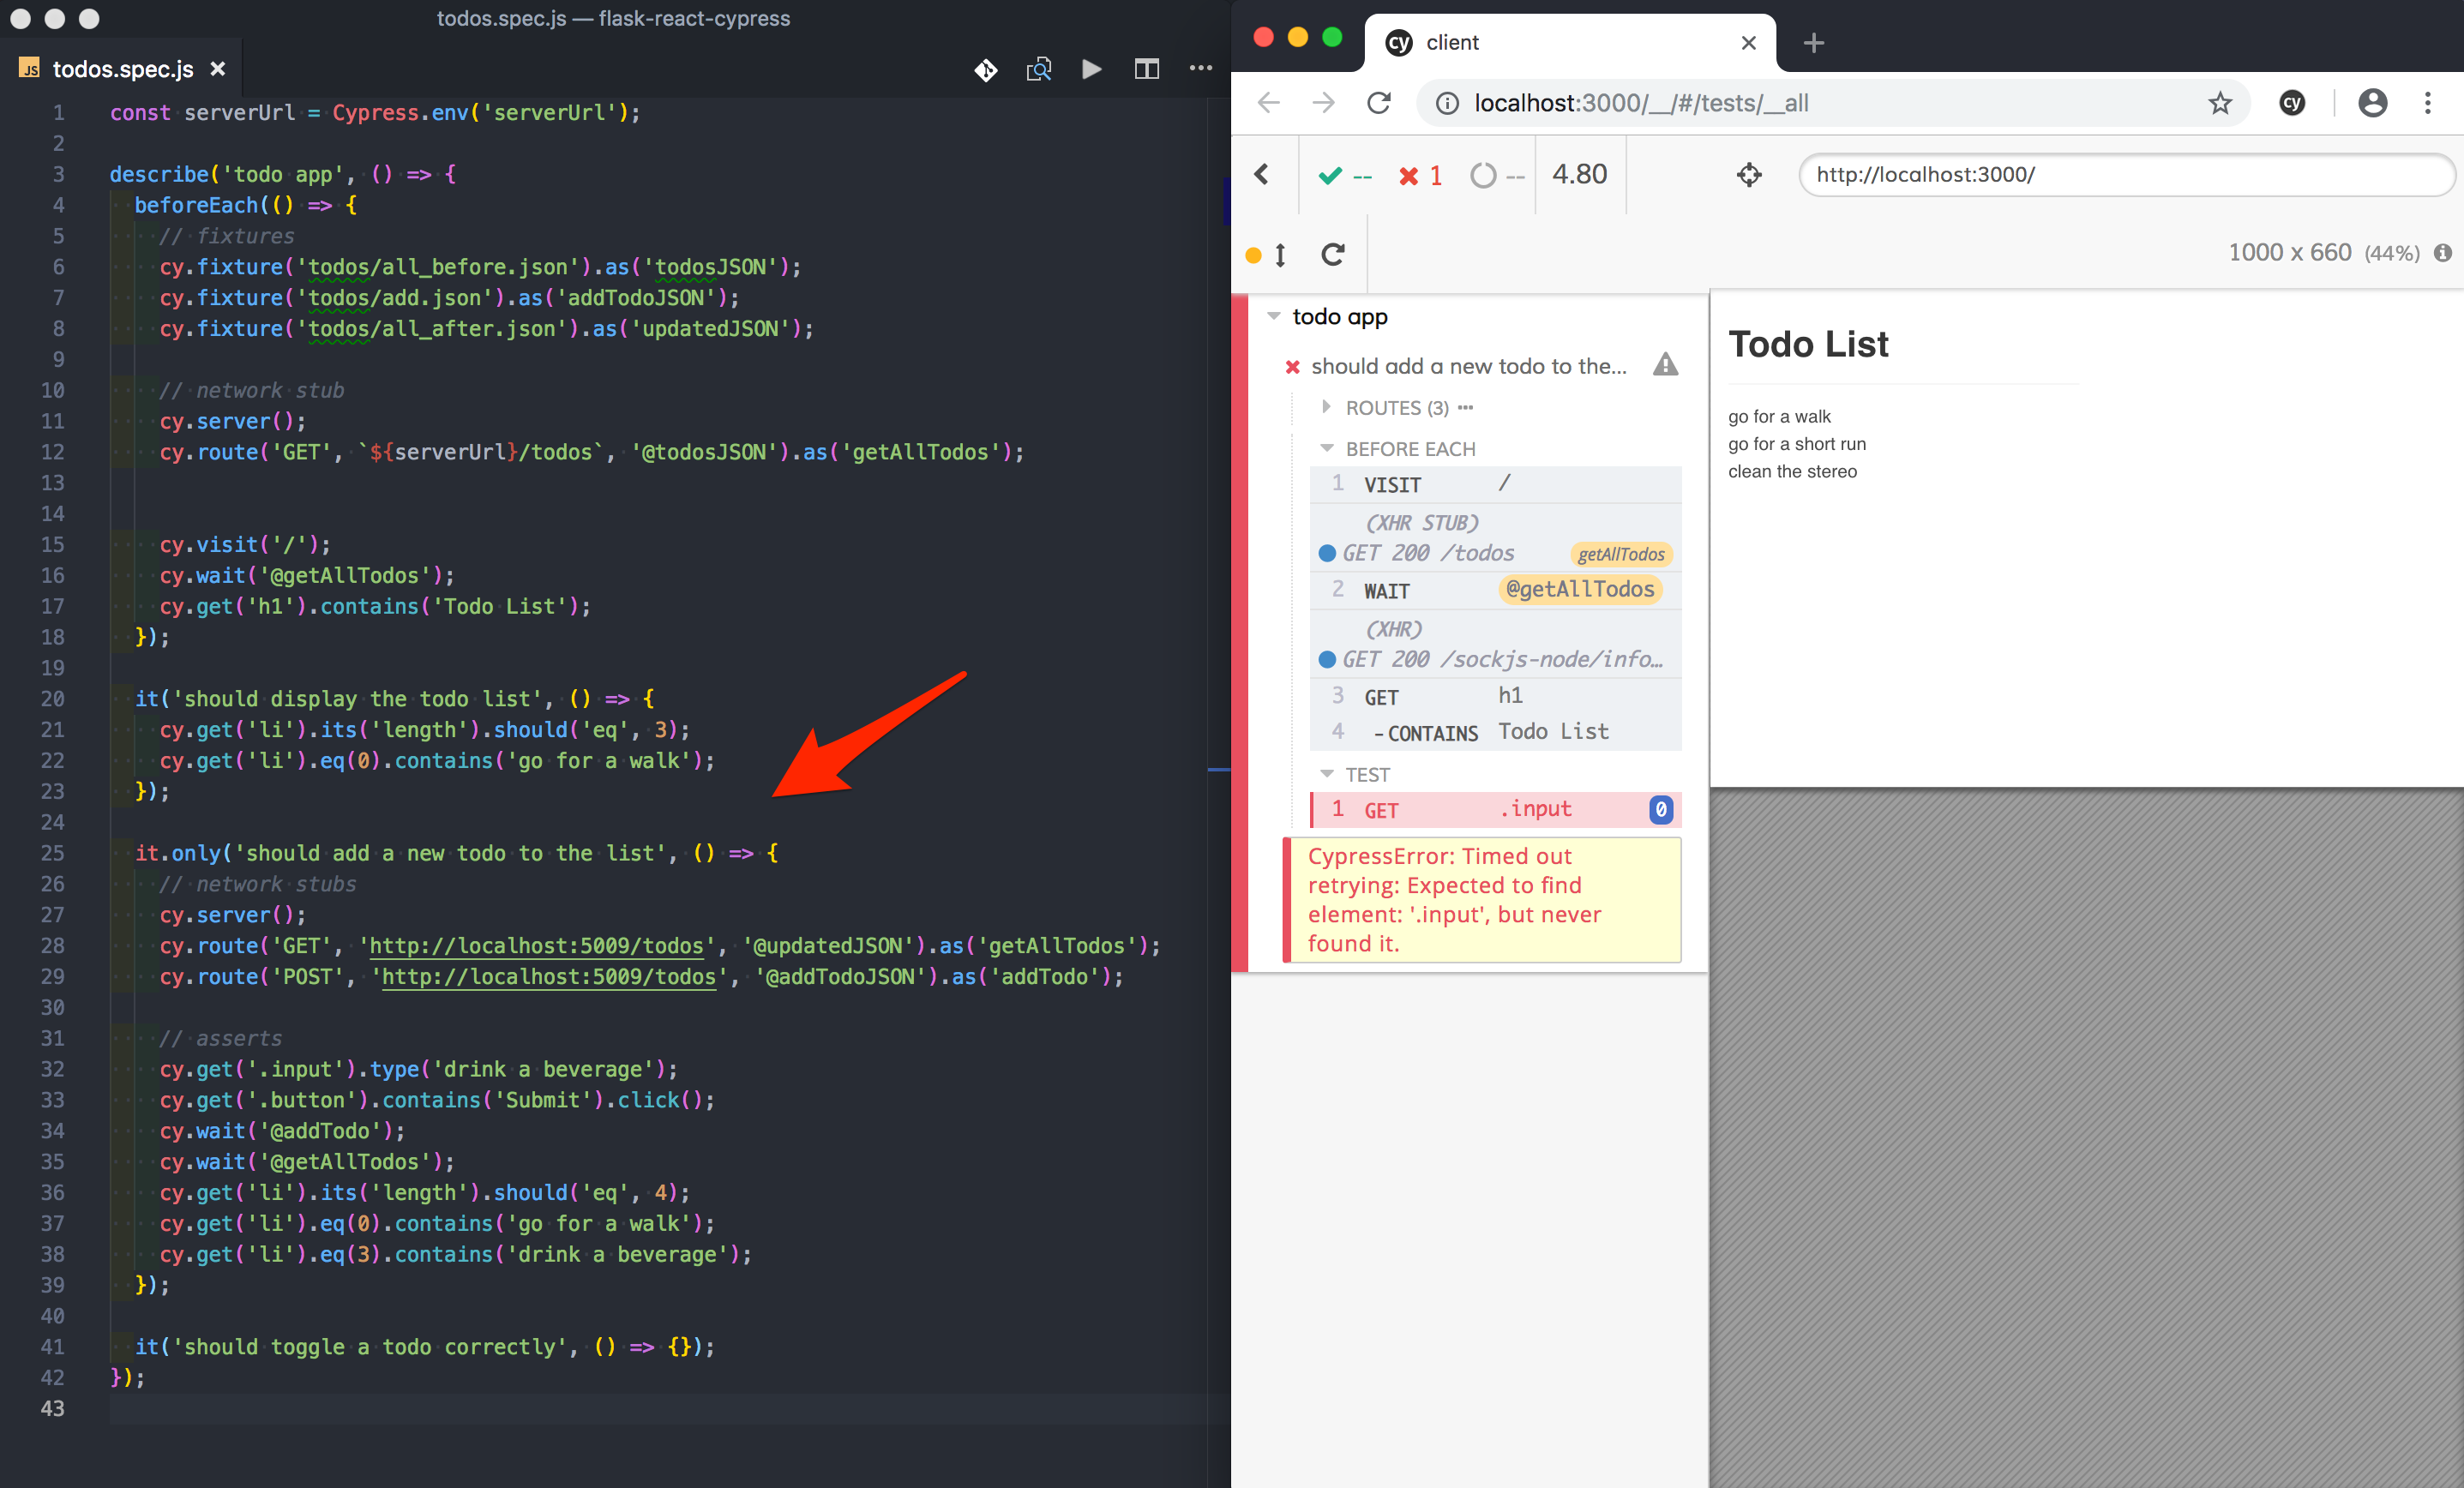
it.only('should add a new todo to the list', () => {
  // network stubs
  cy.server();
  cy.route('GET', 'http://localhost:5009/todos', '@updatedJSON').as('getAllTodos');
  cy.route('POST', 'http://localhost:5009/todos', '@addTodoJSON').as('addTodo');

  // asserts
  cy.get('.input').type('drink a beverage');
  cy.get('.button').contains('Submit').click();
  cy.wait('@addTodo');
  cy.wait('@getAllTodos');
  cy.get('li').its('length').should('eq', 4);
  cy.get('li').eq(0).contains('go for a walk');
  cy.get('li').eq(3).contains('drink a beverage');
});
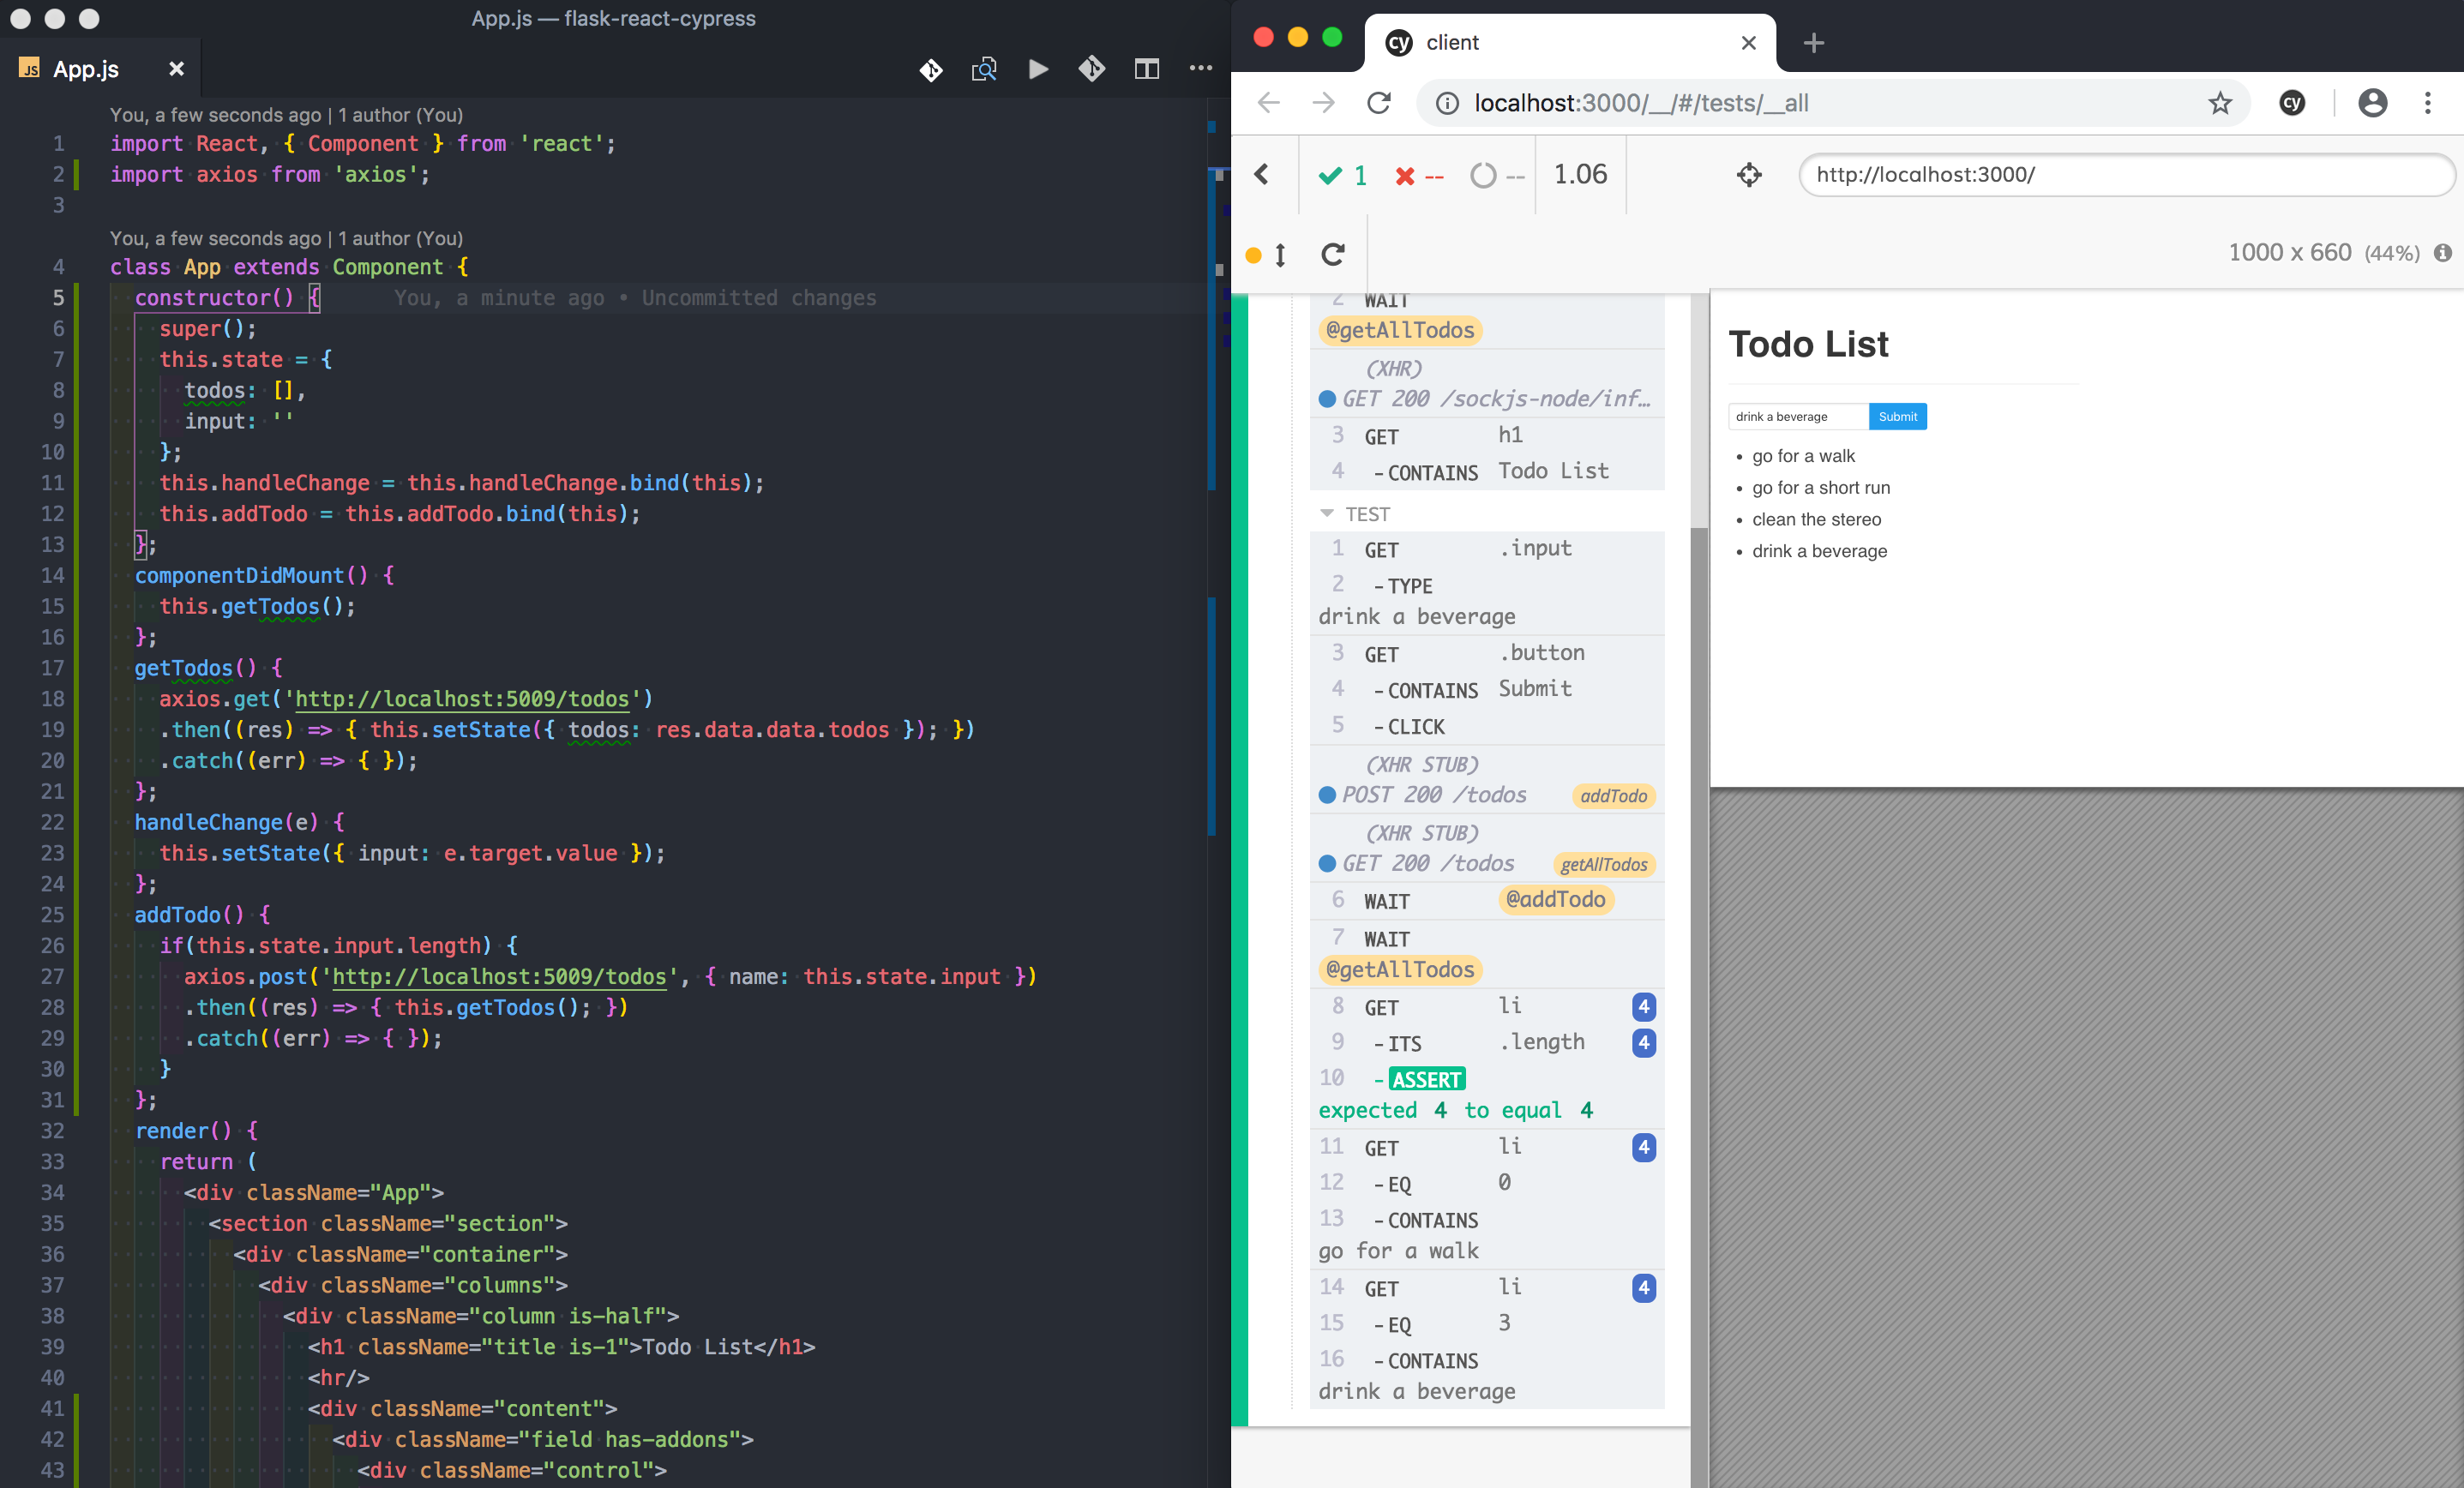
Again, update the component:
import React, { Component } from 'react';
import axios from 'axios';

class App extends Component {
  constructor() {
    super();
    this.state = {
      todos: [],
      input: ''
    };
    this.handleChange = this.handleChange.bind(this);
    this.addTodo = this.addTodo.bind(this);
  };
  componentDidMount() {
    this.getTodos();
  };
  getTodos() {
    axios.get('http://localhost:5009/todos')
    .then((res) => { this.setState({ todos: res.data.data.todos }); })
    .catch((err) => { });
  };
  handleChange(e) {
    this.setState({ input: e.target.value });
  };
  addTodo() {
    if(this.state.input.length) {
      axios.post('http://localhost:5009/todos', { name: this.state.input })
      .then((res) => { this.getTodos(); })
      .catch((err) => { });
    }
  };
  render() {
    return (
      <div className="App">
        <section className="section">
          <div className="container">
            <div className="columns">
              <div className="column is-half">
                <h1 className="title is-1">Todo List</h1>
                <hr/>
                <div className="content">
                  <div className="field has-addons">
                    <div className="control">
                      <input
                        className="input"
                        type="text"
                        placeholder="Add a todo"
                        onChange={ this.handleChange }
                      />
                    </div>
                    <div className="control" onClick={ this.addTodo }>
                      <button className="button is-info">Submit</button>
                    </div>
                  </div>
                  <ul type="1">
                    {this.state.todos.map(todo =>
                      <li key={ todo.id } style={{ fontSize: '1.5rem' }}>{ todo.name }</li>
                    )}
                  </ul>
                </div>
              </div>
            </div>
          </div>
        </section>
      </div>
    );
  };
};

export default App;
Todos can now be added via an input field. The onChange event is fired, which updates the state, anytime the input value is changed. After the submit button is clicked, an AJAX POST request is sent to the server along with the value from the input field. The todo list is updated when a successful response is returned.
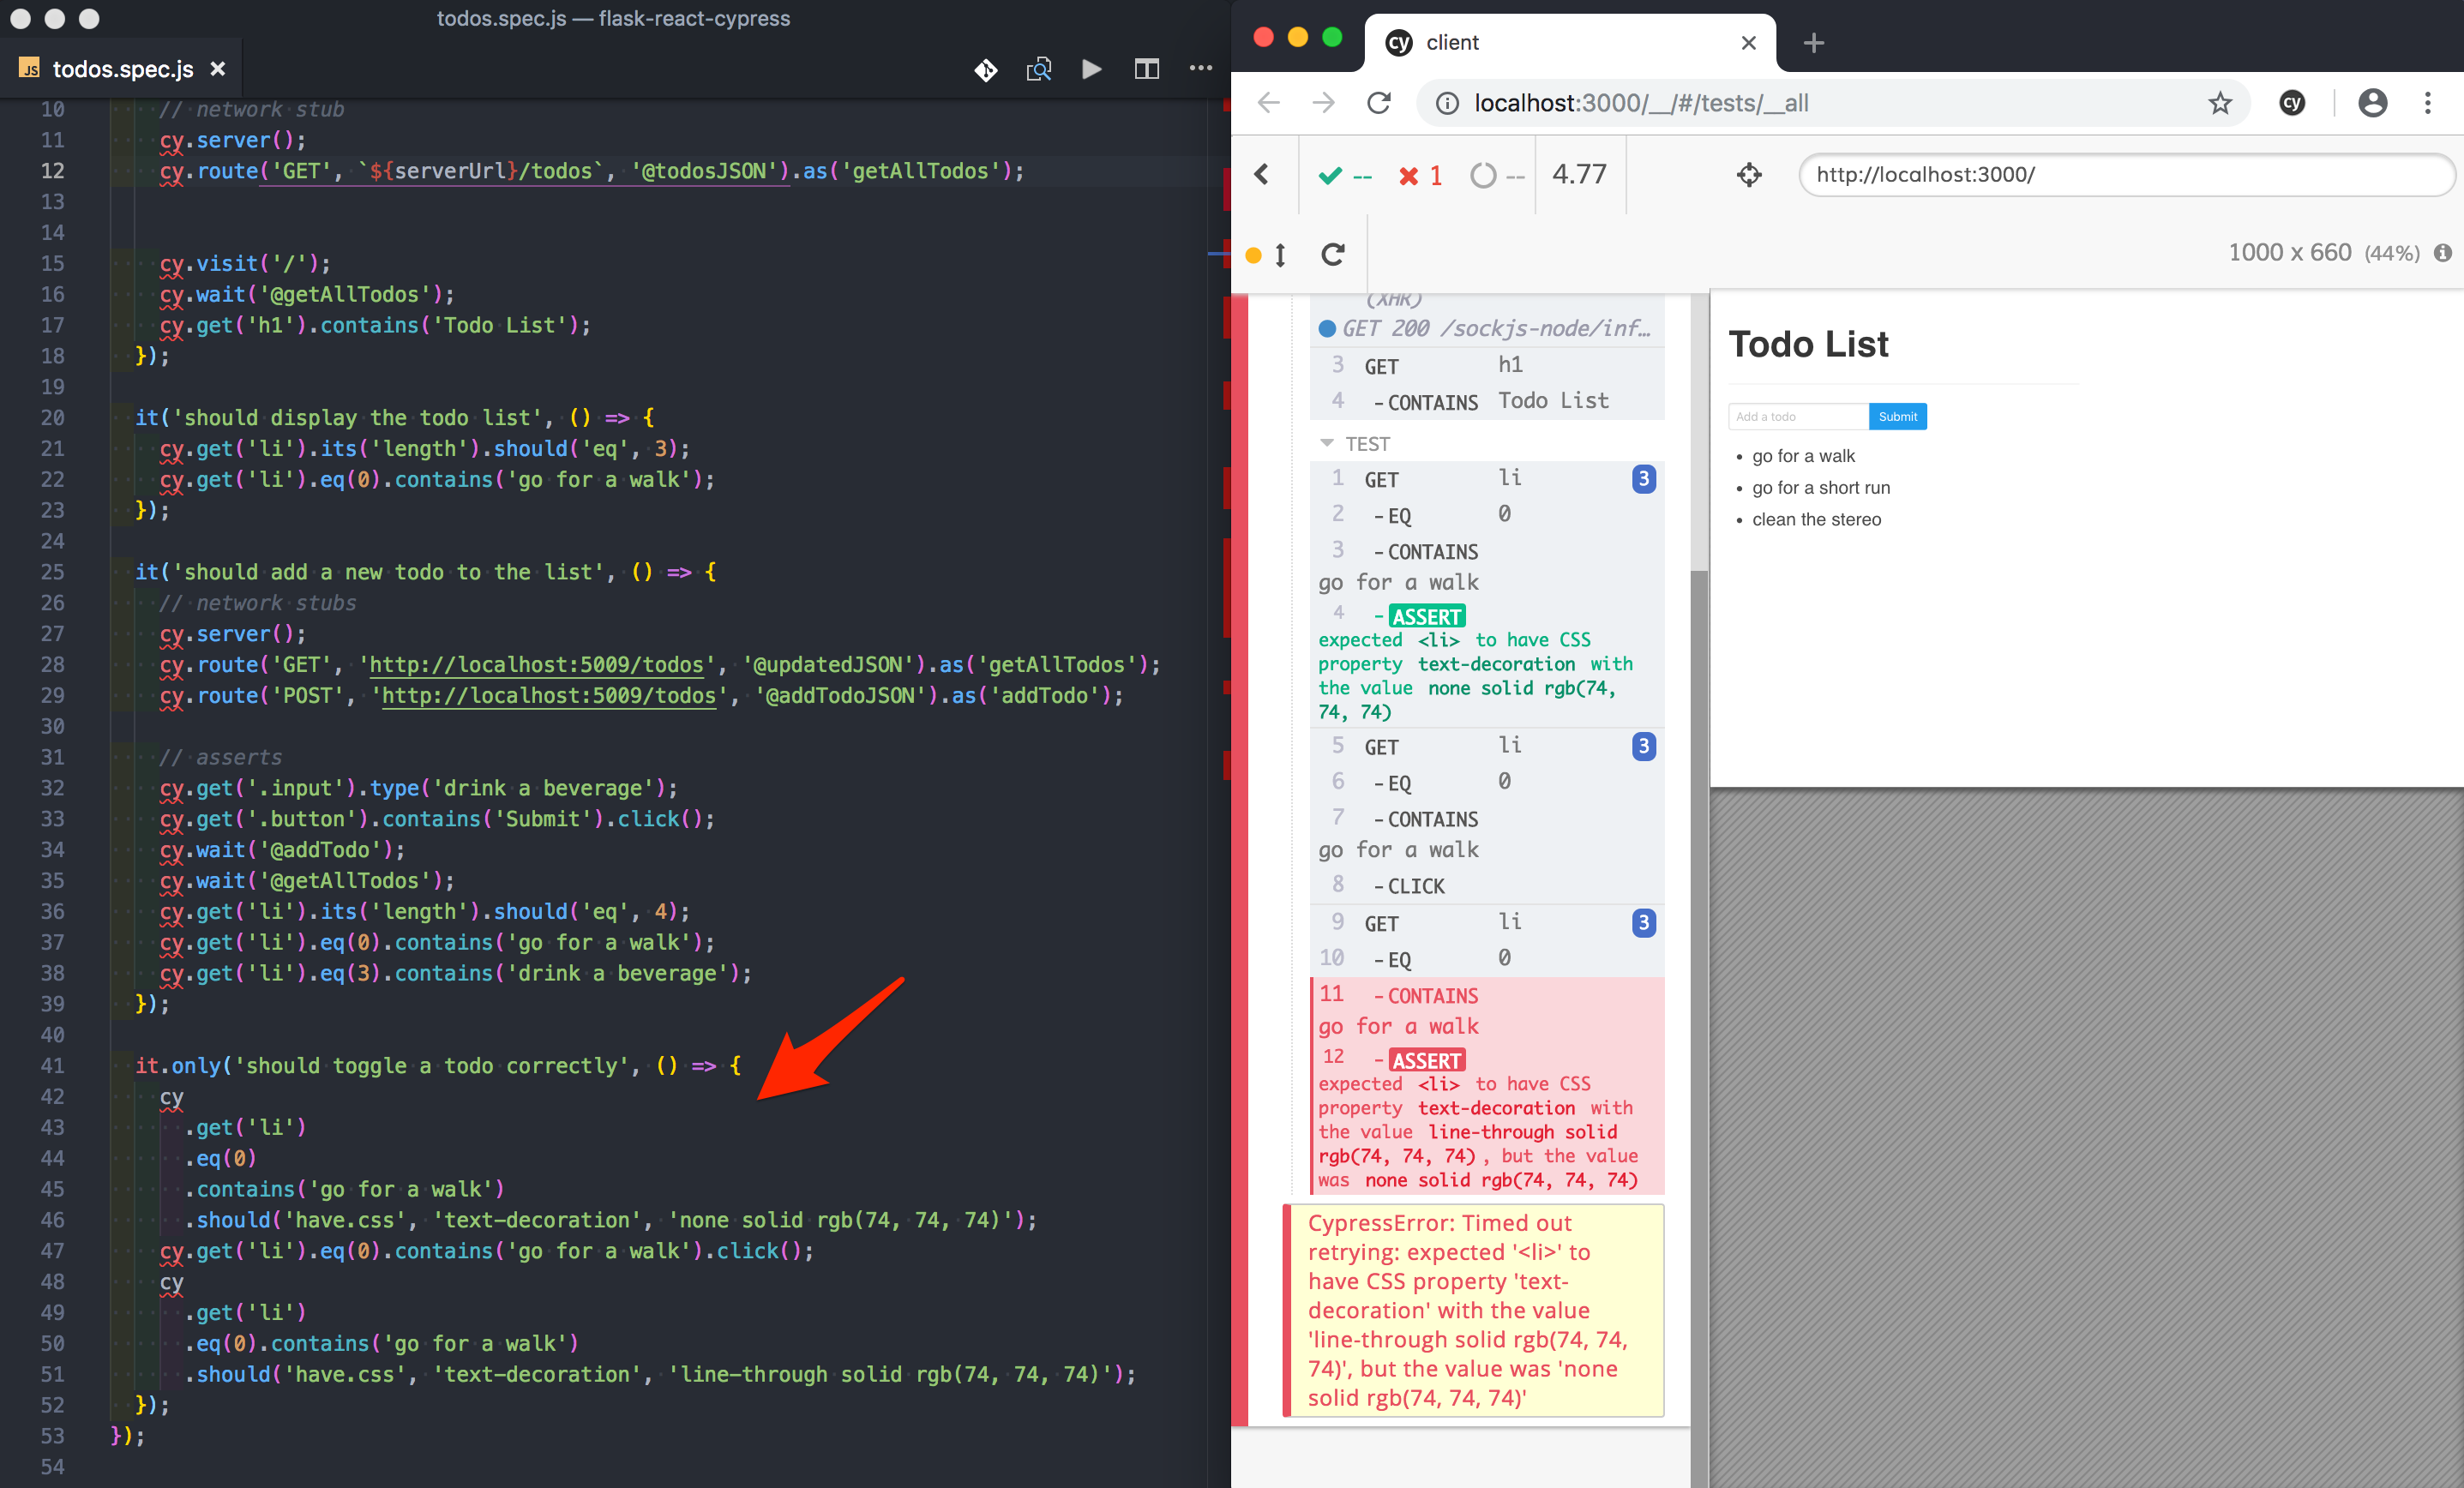
Toggle completed state
Test:
it.only('should toggle a todo correctly', () => {
  cy
    .get('li')
    .eq(0)
    .contains('go for a walk')
    .should('have.css', 'text-decoration', 'none solid rgb(74, 74, 74)');
  cy.get('li').eq(0).contains('go for a walk').click();
  cy
    .get('li')
    .eq(0).contains('go for a walk')
    .should('have.css', 'text-decoration', 'line-through solid rgb(74, 74, 74)');
});
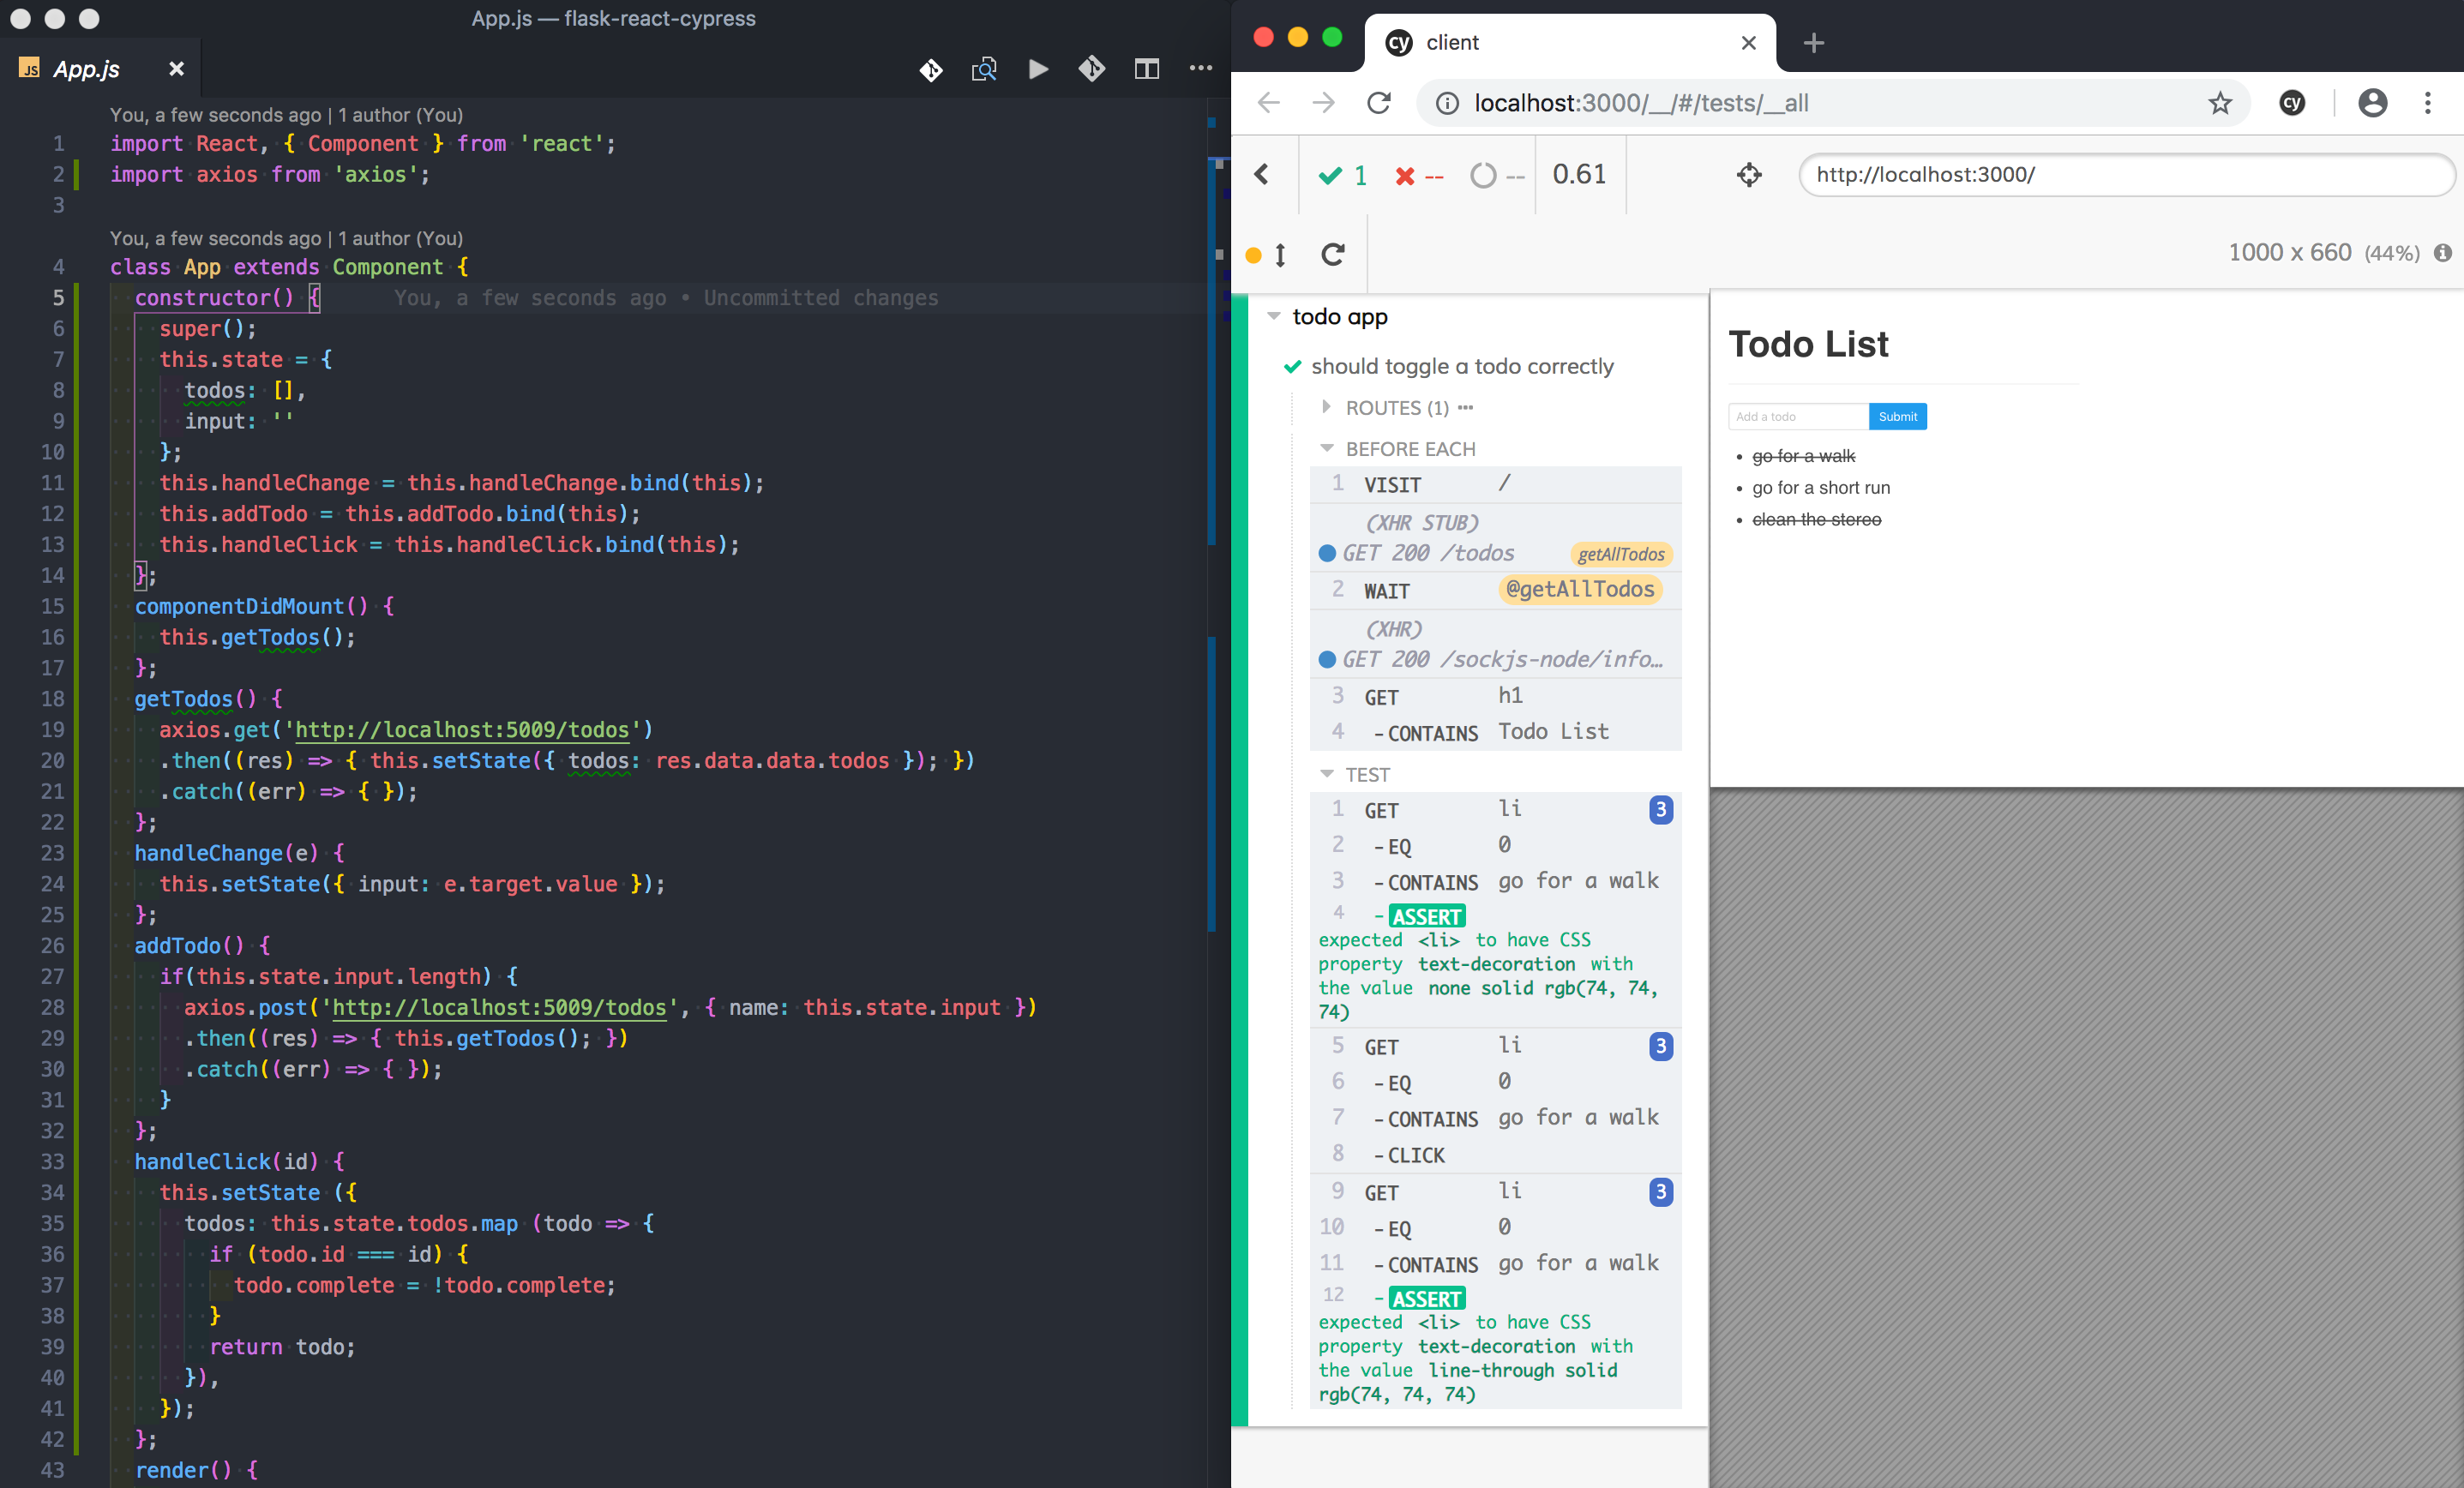
Component:
import React, { Component } from 'react';
import axios from 'axios';

class App extends Component {
  constructor() {
    super();
    this.state = {
      todos: [],
      input: ''
    };
    this.handleChange = this.handleChange.bind(this);
    this.addTodo = this.addTodo.bind(this);
    this.handleClick = this.handleClick.bind(this);
  };
  componentDidMount() {
    this.getTodos();
  };
  getTodos() {
    axios.get('http://localhost:5009/todos')
    .then((res) => { this.setState({ todos: res.data.data.todos }); })
    .catch((err) => { });
  };
  handleChange(e) {
    this.setState({ input: e.target.value });
  };
  addTodo() {
    if(this.state.input.length) {
      axios.post('http://localhost:5009/todos', { name: this.state.input })
      .then((res) => { this.getTodos(); })
      .catch((err) => { });
    }
  };
  handleClick(id) {
    this.setState ({
      todos: this.state.todos.map (todo => {
        if (todo.id === id) {
          todo.complete = !todo.complete;
        }
        return todo;
      }),
    });
  };
  render() {
    return (
      <div className="App">
        <section className="section">
          <div className="container">
            <div className="columns">
              <div className="column is-half">
                <h1 className="title is-1">Todo List</h1>
                <hr/>
                <div className="content">
                  <div className="field has-addons">
                    <div className="control">
                      <input
                        className="input"
                        type="text"
                        placeholder="Add a todo"
                        onChange={ this.handleChange }
                      />
                    </div>
                    <div className="control" onClick={ this.addTodo }>
                      <button className="button is-info">Submit</button>
                    </div>
                  </div>
                  <ul type="1">
                    {this.state.todos.map(todo =>
                      <li
                        key={ todo.id }
                        style={{
                          textDecoration: todo.complete ? 'line-through' : 'none',
                          fontSize: '1.5rem',
                        }}
                        onClick={() => this.handleClick(todo.id)}
                      >
                        { todo.name }
                      </li>
                    )}
                  </ul>
                </div>
              </div>
            </div>
          </div>
        </section>
      </div>
    );
  };
};

export default App;
When a todo li is clicked, handleClick is fired, which then toggles the value of the todo.complete boolean. If the boolean is true then the todo's text-direction will be set to line-through.
Remove the .only from the final test.
End-to-End Tests
Finally, let's convert the integration tests to end-to-end tests by removing the network stubs and fixtures. We'll do a bit of refactoring as well.
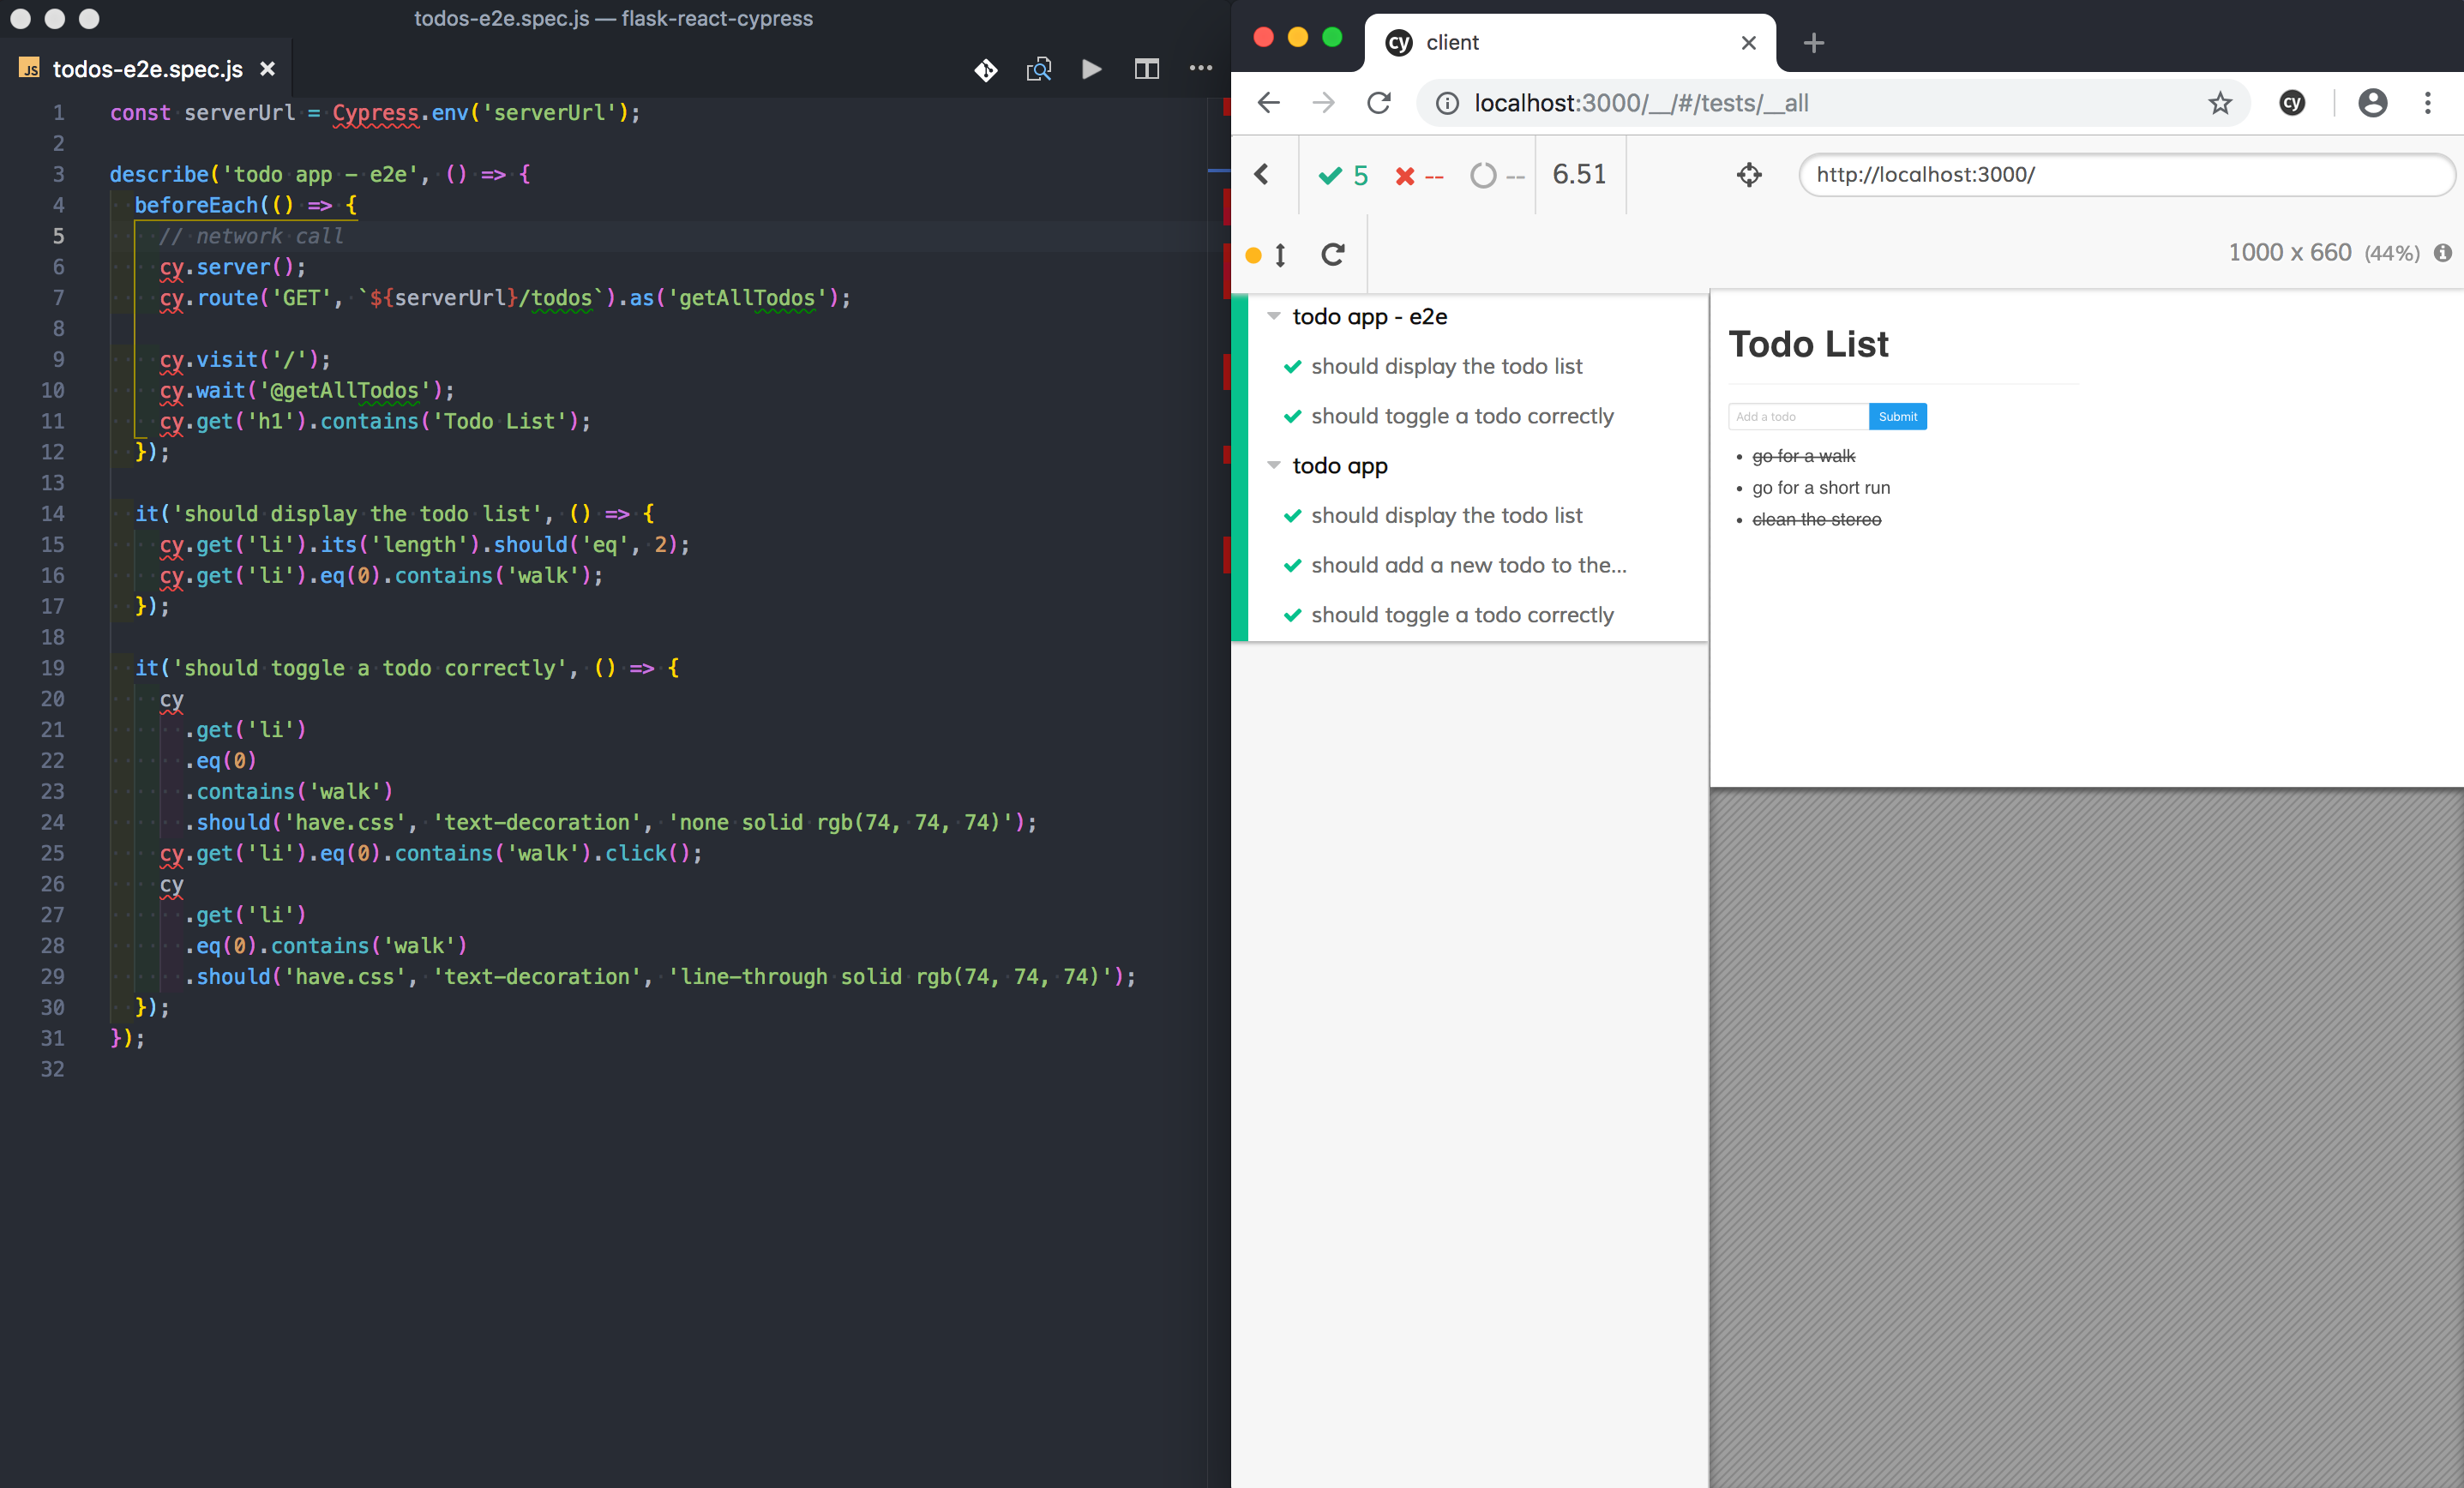
client/cypress/integration/todos-e2e.spec.js:
const serverUrl = Cypress.env('serverUrl');

describe('todo app - e2e', () => {
  beforeEach(() => {
    // network call
    cy.server();
    cy.route('GET', `${serverUrl}/todos`).as('getAllTodos');

    cy.visit('/');
    cy.wait('@getAllTodos');
    cy.get('h1').contains('Todo List');
  });

  it('should display the todo list', () => {
    cy.get('li').its('length').should('eq', 2);
    cy.get('li').eq(0).contains('walk');
  });

  it('should toggle a todo correctly', () => {
    cy
      .get('li')
      .eq(0)
      .contains('walk')
      .should('have.css', 'text-decoration', 'none solid rgb(74, 74, 74)');
    cy.get('li').eq(0).contains('walk').click();
    cy
      .get('li')
      .eq(0).contains('walk')
      .should('have.css', 'text-decoration', 'line-through solid rgb(74, 74, 74)');
  });
});
Before you run these, you will need to spin up the server-side Flask app along with Postgres and create and seed the database:
$ cd server
$ docker-compose up -d --build
$ docker-compose exec web python manage.py recreate_db
$ docker-compose exec web python manage.py seed_db
Now, since the full end-to-end tests require the Flask app to be running, you may not want to run them locally as you're developing. To ignore them, add the ignoreTestFiles config variable to the cypress.json file:
{
  "baseUrl": "http://localhost:3000",
  "env": {
    "serverUrl": "http://localhost:5009"
  },
  "ignoreTestFiles": "*e2e*"
}
You can then run them on other environments by using a different configuration file.
Conclusion
Cypress is a powerful tool that makes it easy to set up, write, run, and debug tests. Hopefully, this post showed you how easy it is to incorporate Cypress into your development workflow.
Resources: