 Amal Shaji
In this article, we'll look at how to authenticate Single-Page Applications (SPAs) with session-based authentication. We're going to use Flask as our backend with Flask-Login for managing sessions. The frontend will be built with Svelte, a JavaScript frontend framework designed for building rich user interfaces.
Feel free to swap out Svelte for a different tool like Angular, Vue, or React.
Contents
Session vs. Token-based Auth
What Are They?
With session-based auth, a session is generated and the ID is stored in a cookie.
After logging in, the server validates the credentials. If valid, it generates a session, stores it, and then sends the session ID back to the browser. The browser stores the session ID as a cookie, which gets sent anytime a request is made to the server.
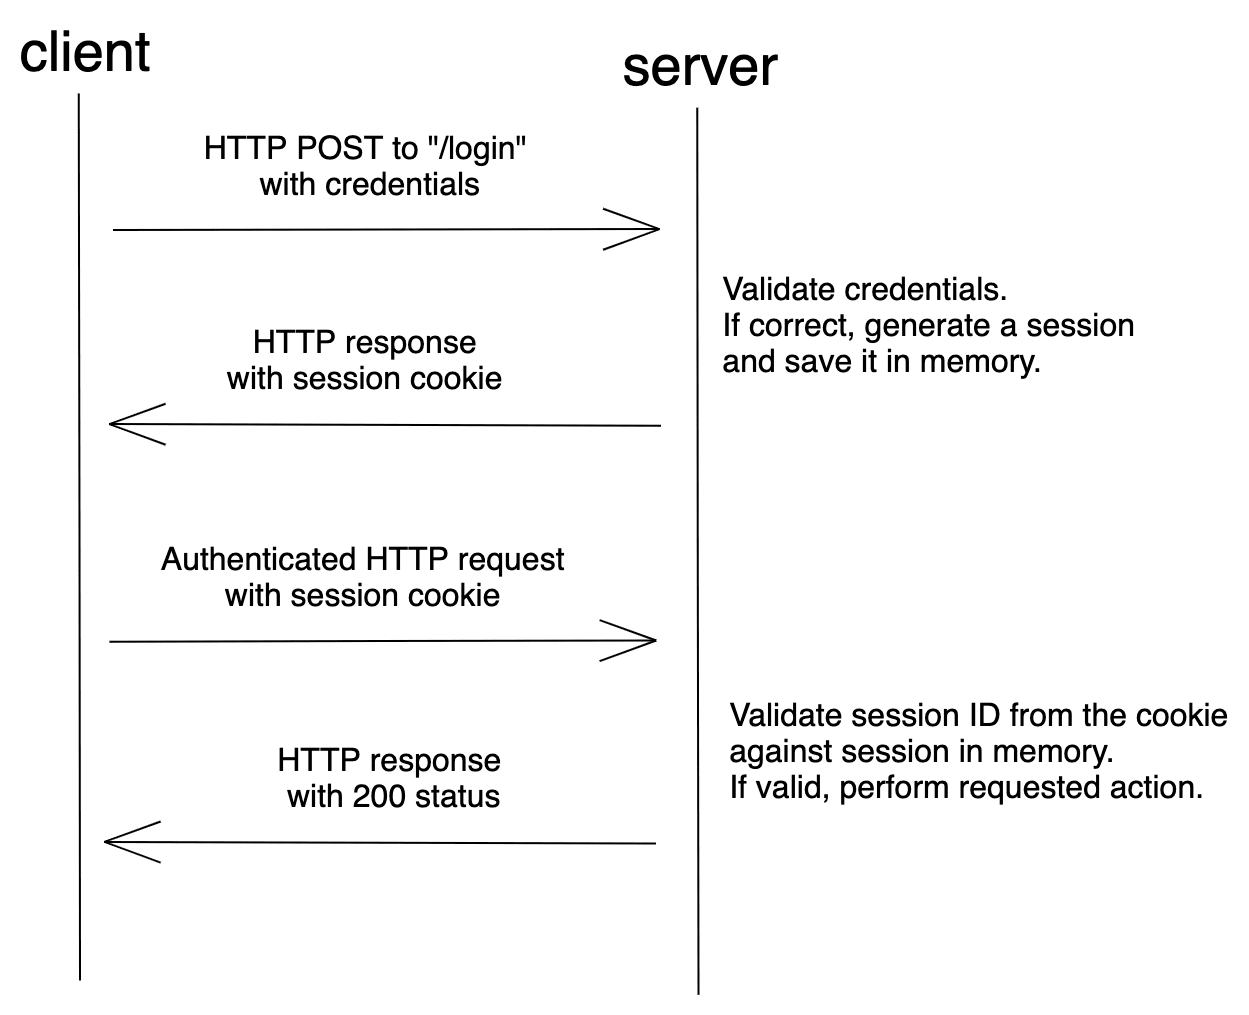
Session-based auth is stateful. Each time a client makes a request to the server, the server must locate the session in memory in order to tie the session ID back to the associated user.
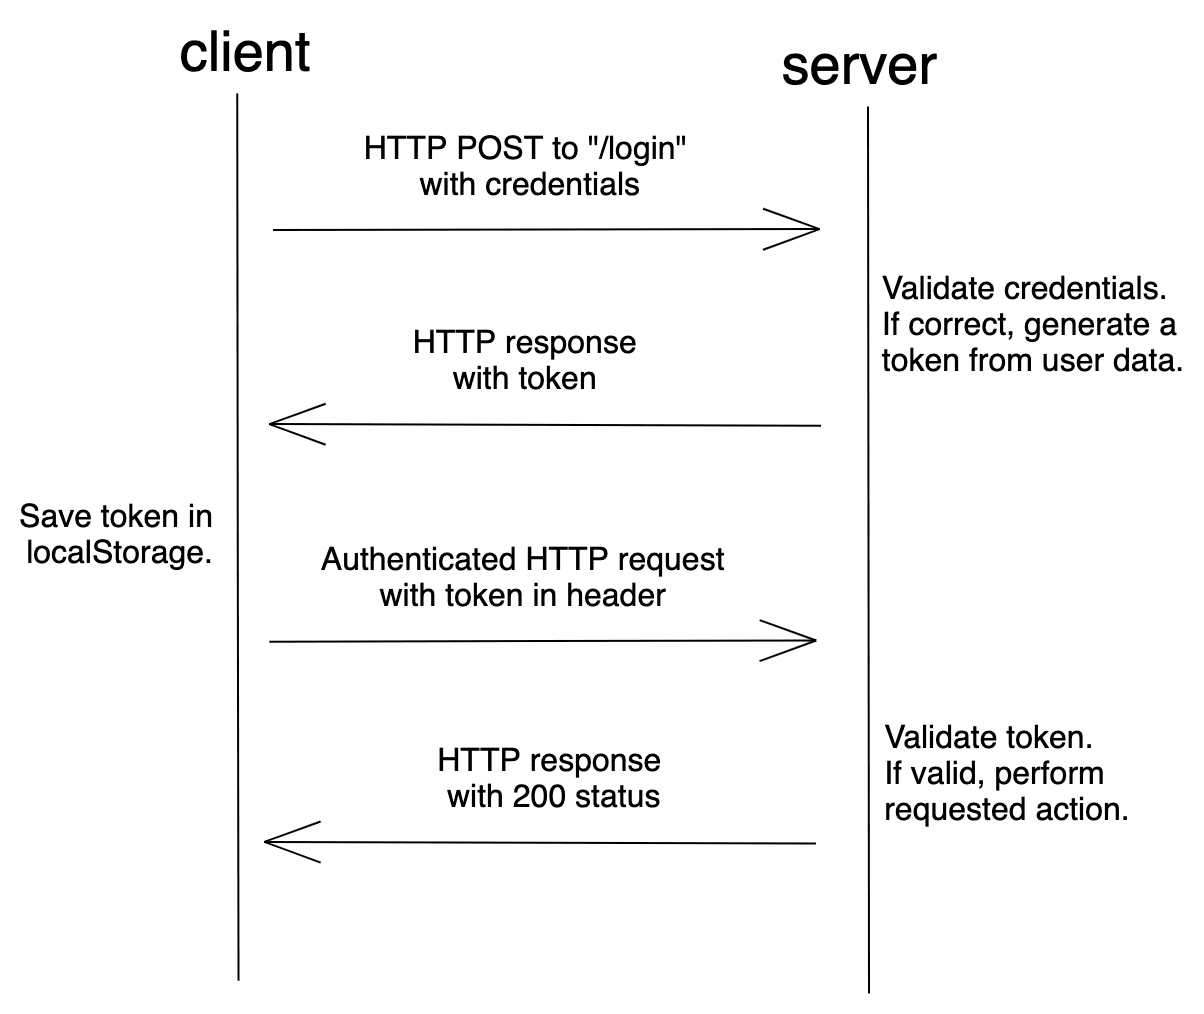
Token-based auth, on the other hand, is relatively new compared to session-based auth. It gained traction with the rise of SPAs and RESTful APIs.
With token-based auth, after logging in, the server validates the credentials and, if valid, creates and sends back a signed token to the browser. In most cases, the token is stored in localStorage. The client then adds the token to the header when a request is made to the server. Assuming the request came from an authorized source, the server decodes the token and checks its validity.
A token is a string that encodes user information.
For example:
// token header
{
  "alg": "HS256",
  "typ": "JWT"
}

// token payload
{
  "sub": "1234567890",
  "name": "John Doe",
  "iat": 1516239022
}
The token can be verified and trusted because it's digitally signed using a secret key or public/private key pair. The most common type of token is a JSON Web Token (JWT).
Since the token contains all information required for the server to verify a user's identity, token-based auth is stateless.
For more on sessions and tokens, check out Session Authentication vs Token Authentication from Stack Exchange.
Security Vulnerabilities
As mentioned, session-based auth maintains the state of the client in a cookie. While JWTs can be stored in localStorage or a cookie, most token-based auth implementations store the JWT in localStorage. Both of these methods come with potential security issues:
| Storage Method | Security Vulnerability |
|---|---|
| Cookie | Cross Site Request Forgery (CSRF) |
| localStorage | Cross-Site Scripting (XSS) |
CSRF is an attack against a web application in which the attacker attempts to trick an authenticated user into performing a malicious action. Most CSRF attacks target web applications that use cookie-based auth since web browsers include all of the cookies associated with each request's particular domain. So when a malicious request is made, the attacker can easily make use of the stored cookies.
To learn more about CSRF and how to prevent it in Flask, check out the CSRF Protection in Flask article.
XSS attacks are a type of injection where malicious scripts are injected into the client-side, usually to bypass the browser's same-origin policy. Web applications that store tokens in localStorage are open to XSS attacks. Open a browser and navigate to any site. Open the console in developer tools and type JSON.stringify(localStorage). Press enter. This should print the localStorage elements in a JSON serialized form. It's that easy for a script to access localStorage.
For more on where to store JWTs, check out Where to Store your JWTs – Cookies vs. HTML5 Web Storage.
Setting up Session-based Auth
There are essentially three different approaches for combining Flask with a frontend framework:
- Serve up the framework via a Jinja template
- Serve up the framework separately from Flask on the same domain
- Serve up the framework separately from Flask on a different domain
Again, feel free to swap out Svelte for the frontend of your choice -- e.g., Angular, React, or Vue.
Frontend Served From flask
With this approach, we'll build the frontend and serve up the generated index.html file with Flask.
Assuming, you have Node and npm installed, create a new project via the Svelte project template:
$ npx degit sveltejs/template flask-spa-jinja
$ cd flask-spa-jinja
Install the dependencies:
$ npm install
Create a file to hold the flask app called app.py:
$ touch app.py
Install Flask, Flask-Login, and Flask-WTF:
$ python3.10 -m venv env
$ source env/bin/activate
$ pip install Flask==2.2.2 Flask-Login==0.6.2 Flask-WTF==1.0.1
Add a "templates" folder and move the public/index.html file to it. Your project structure should now look like this:
├── .gitignore
├── README.md
├── app.py
├── package-lock.json
├── package.json
├── public
│   ├── favicon.png
│   └── global.css
├── rollup.config.js
├── scripts
│   └── setupTypeScript.js
├── src
│   ├── App.svelte
│   └── main.js
└── templates
    └── index.html
Flask Backend
The app has the following routes:
/serves up the index.html file/api/loginlogs a user in and generates a session/api/datafetches user data for an authenticated user/api/getsessionchecks whether a session exists/api/logoutlogs a user out
Grab the full code here and add it to the app.py file.
Take note of the handler for the / route:
@app.route("/", defaults={"path": ""})
@app.route("/<path:path>")
def home(path):
    return render_template("index.html")
Since Flask is ultimately serving up the SPA, the CSRF cookie will be set automatically.
Turn to the config:
app.config.update(
    DEBUG=True,
    SECRET_KEY="secret_sauce",
    SESSION_COOKIE_HTTPONLY=True,
    REMEMBER_COOKIE_HTTPONLY=True,
    SESSION_COOKIE_SAMESITE="Strict",
)
The HttpOnly flag set to True prevents any client-side usage of the session cookie:
SESSION_COOKIE_HTTPONLY=True,
REMEMBER_COOKIE_HTTPONLY=True,
We also prevented cookies from being sent from any external requests by setting SESSION_COOKIE_SAMESITE to Strict.
For more on these config options, review Set-Cookie options from the Flask docs.
Make sure to set
SESSION_COOKIE_SECUREandREMEMBER_COOKIE_SECUREtoTrueto limit the cookies to HTTPS traffic only for production.
Update templates/index.html to load the static files via url_for:
<!DOCTYPE html>
<html lang="en">
<head>
  <meta charset='utf-8'>
  <meta name='viewport' content='width=device-width,initial-scale=1'>
  <meta name="csrf-token" content="{{ csrf_token() }}" />

  <title>Svelte app</title>

  <link rel='icon' type='image/png' href="{{url_for('static', filename='favicon.png')}}">
  <link rel='stylesheet' href="{{url_for('static', filename='global.css') }}">
  <link rel='stylesheet' href="{{url_for('static', filename='build/bundle.css') }}">

  <script defer src="{{url_for('static', filename='build/bundle.js') }}"></script>
</head>

<body>
</body>
</html>
The csrf-token meta tag holds the CSRF token generated by the Flask application.
Svelte Frontend
The frontend will have a single component that displays either a login form (when the user is unauthenticated) or a simple "You are authenticated!" message (when the user is authenticated).
Grab the full code here and add it to the src/App.svelte file.
Take note of credentials: "same-origin" from each of the fetch requests. This will send along the cookies if the URL is on the same origin as the calling script.
For example:
const whoami = () => {
  fetch("/api/data", {
    method: "GET",
    headers: {
      "Content-Type": "application/json",
      "X-CSRFToken": csrf,
    },
    credentials: "same-origin",
  })
  .then((res) => res.json())
  .then((data) => {
    console.log(data);
    alert(`Welcome, ${data.username}!`);
  })
  .catch((err) => {
    console.log(err);
  });
};
Where does the CSRF token come from?
We added it to the meta tag in templates/index.html:
<meta name="csrf-token" content="{{ csrf_token() }}" />
We then assigned the CSRF token to the csrf variable when the App component mounts:
let csrf = document.getElementsByName("csrf-token")[0].content;
Next, update src/main.js:
import App from './App.svelte';

const app = new App({
  target: document.body,
});

export default app;
When the application is compiled, the code from the App.svelte file gets separated into JavaScript and CSS files. These files are then injected into src/index.html, which serves as our SPA. In this case, we created a new app and loaded it into the whole HTML body using target: document.body.
Test
That's it! We're ready to test.
Create a new build, and then run Flask:
$ npm run build
$ python app.py
Navigate to http://localhost:5000. You should see the login form:
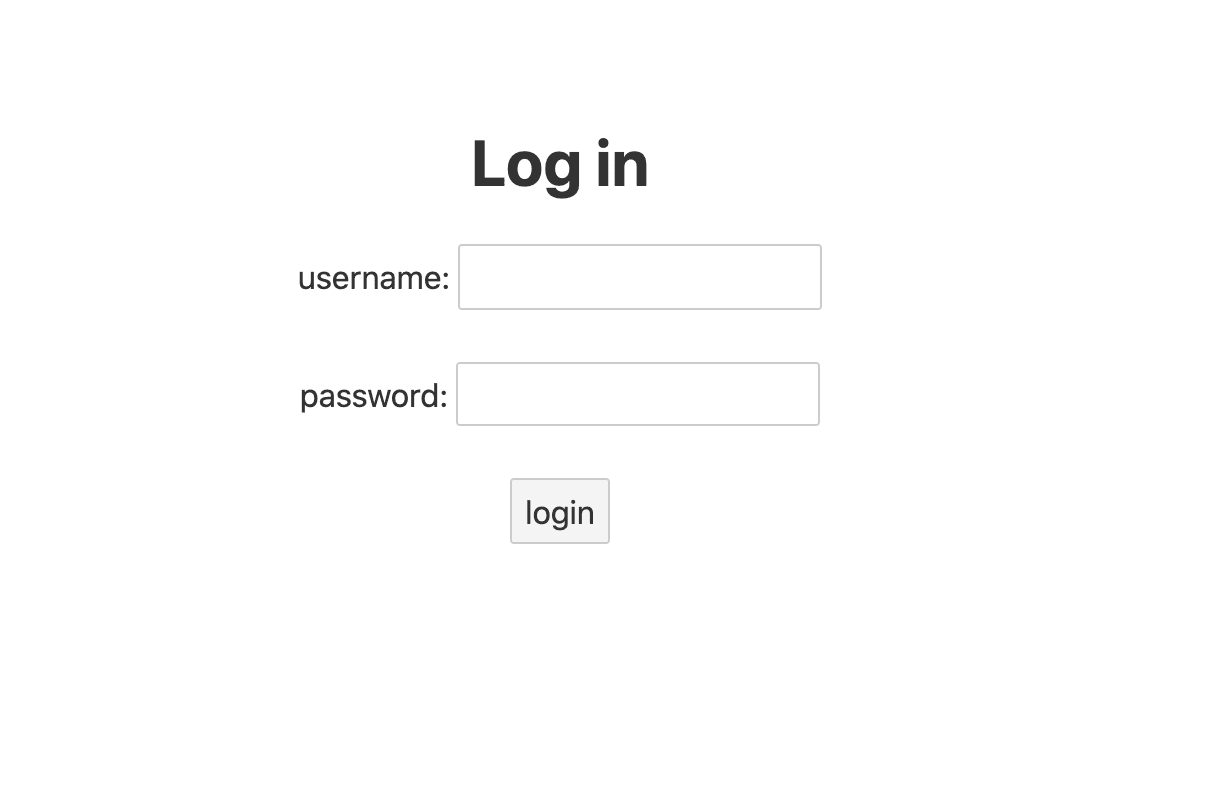
You can log in with:
- username:
test - password:
test
Once logged in you can see the session cookie from the console and the value of the CSRF token in the HTML source:
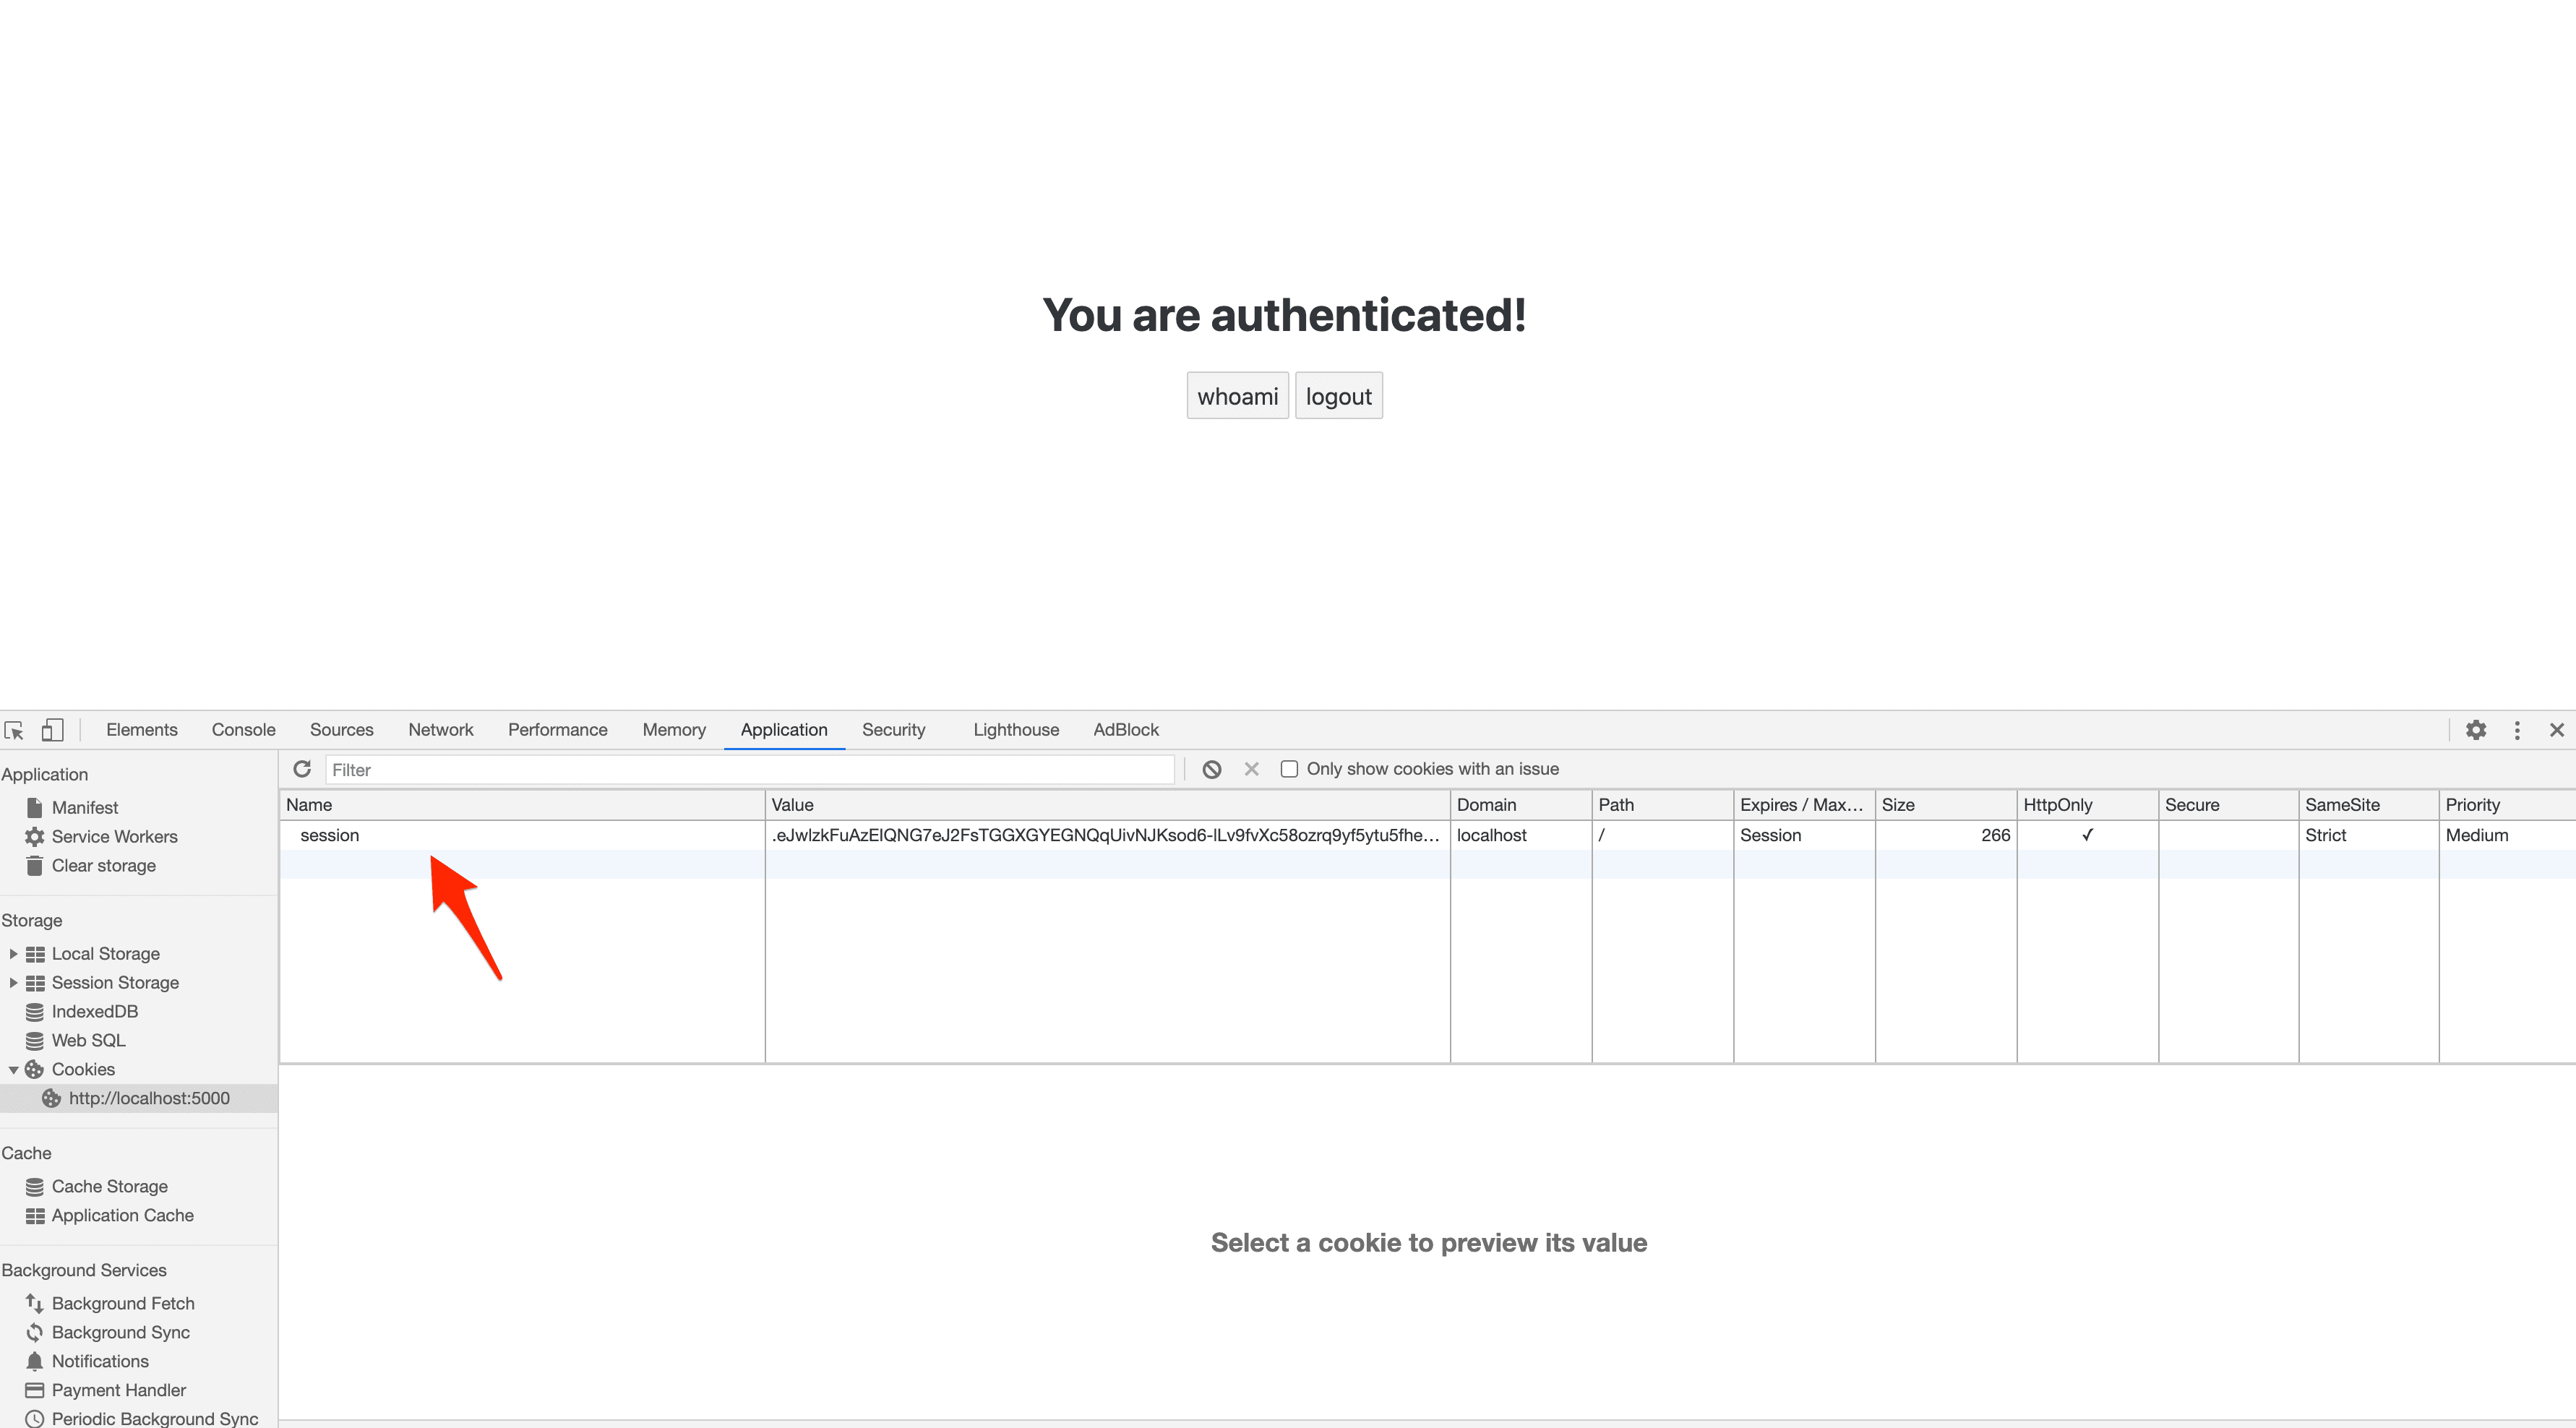
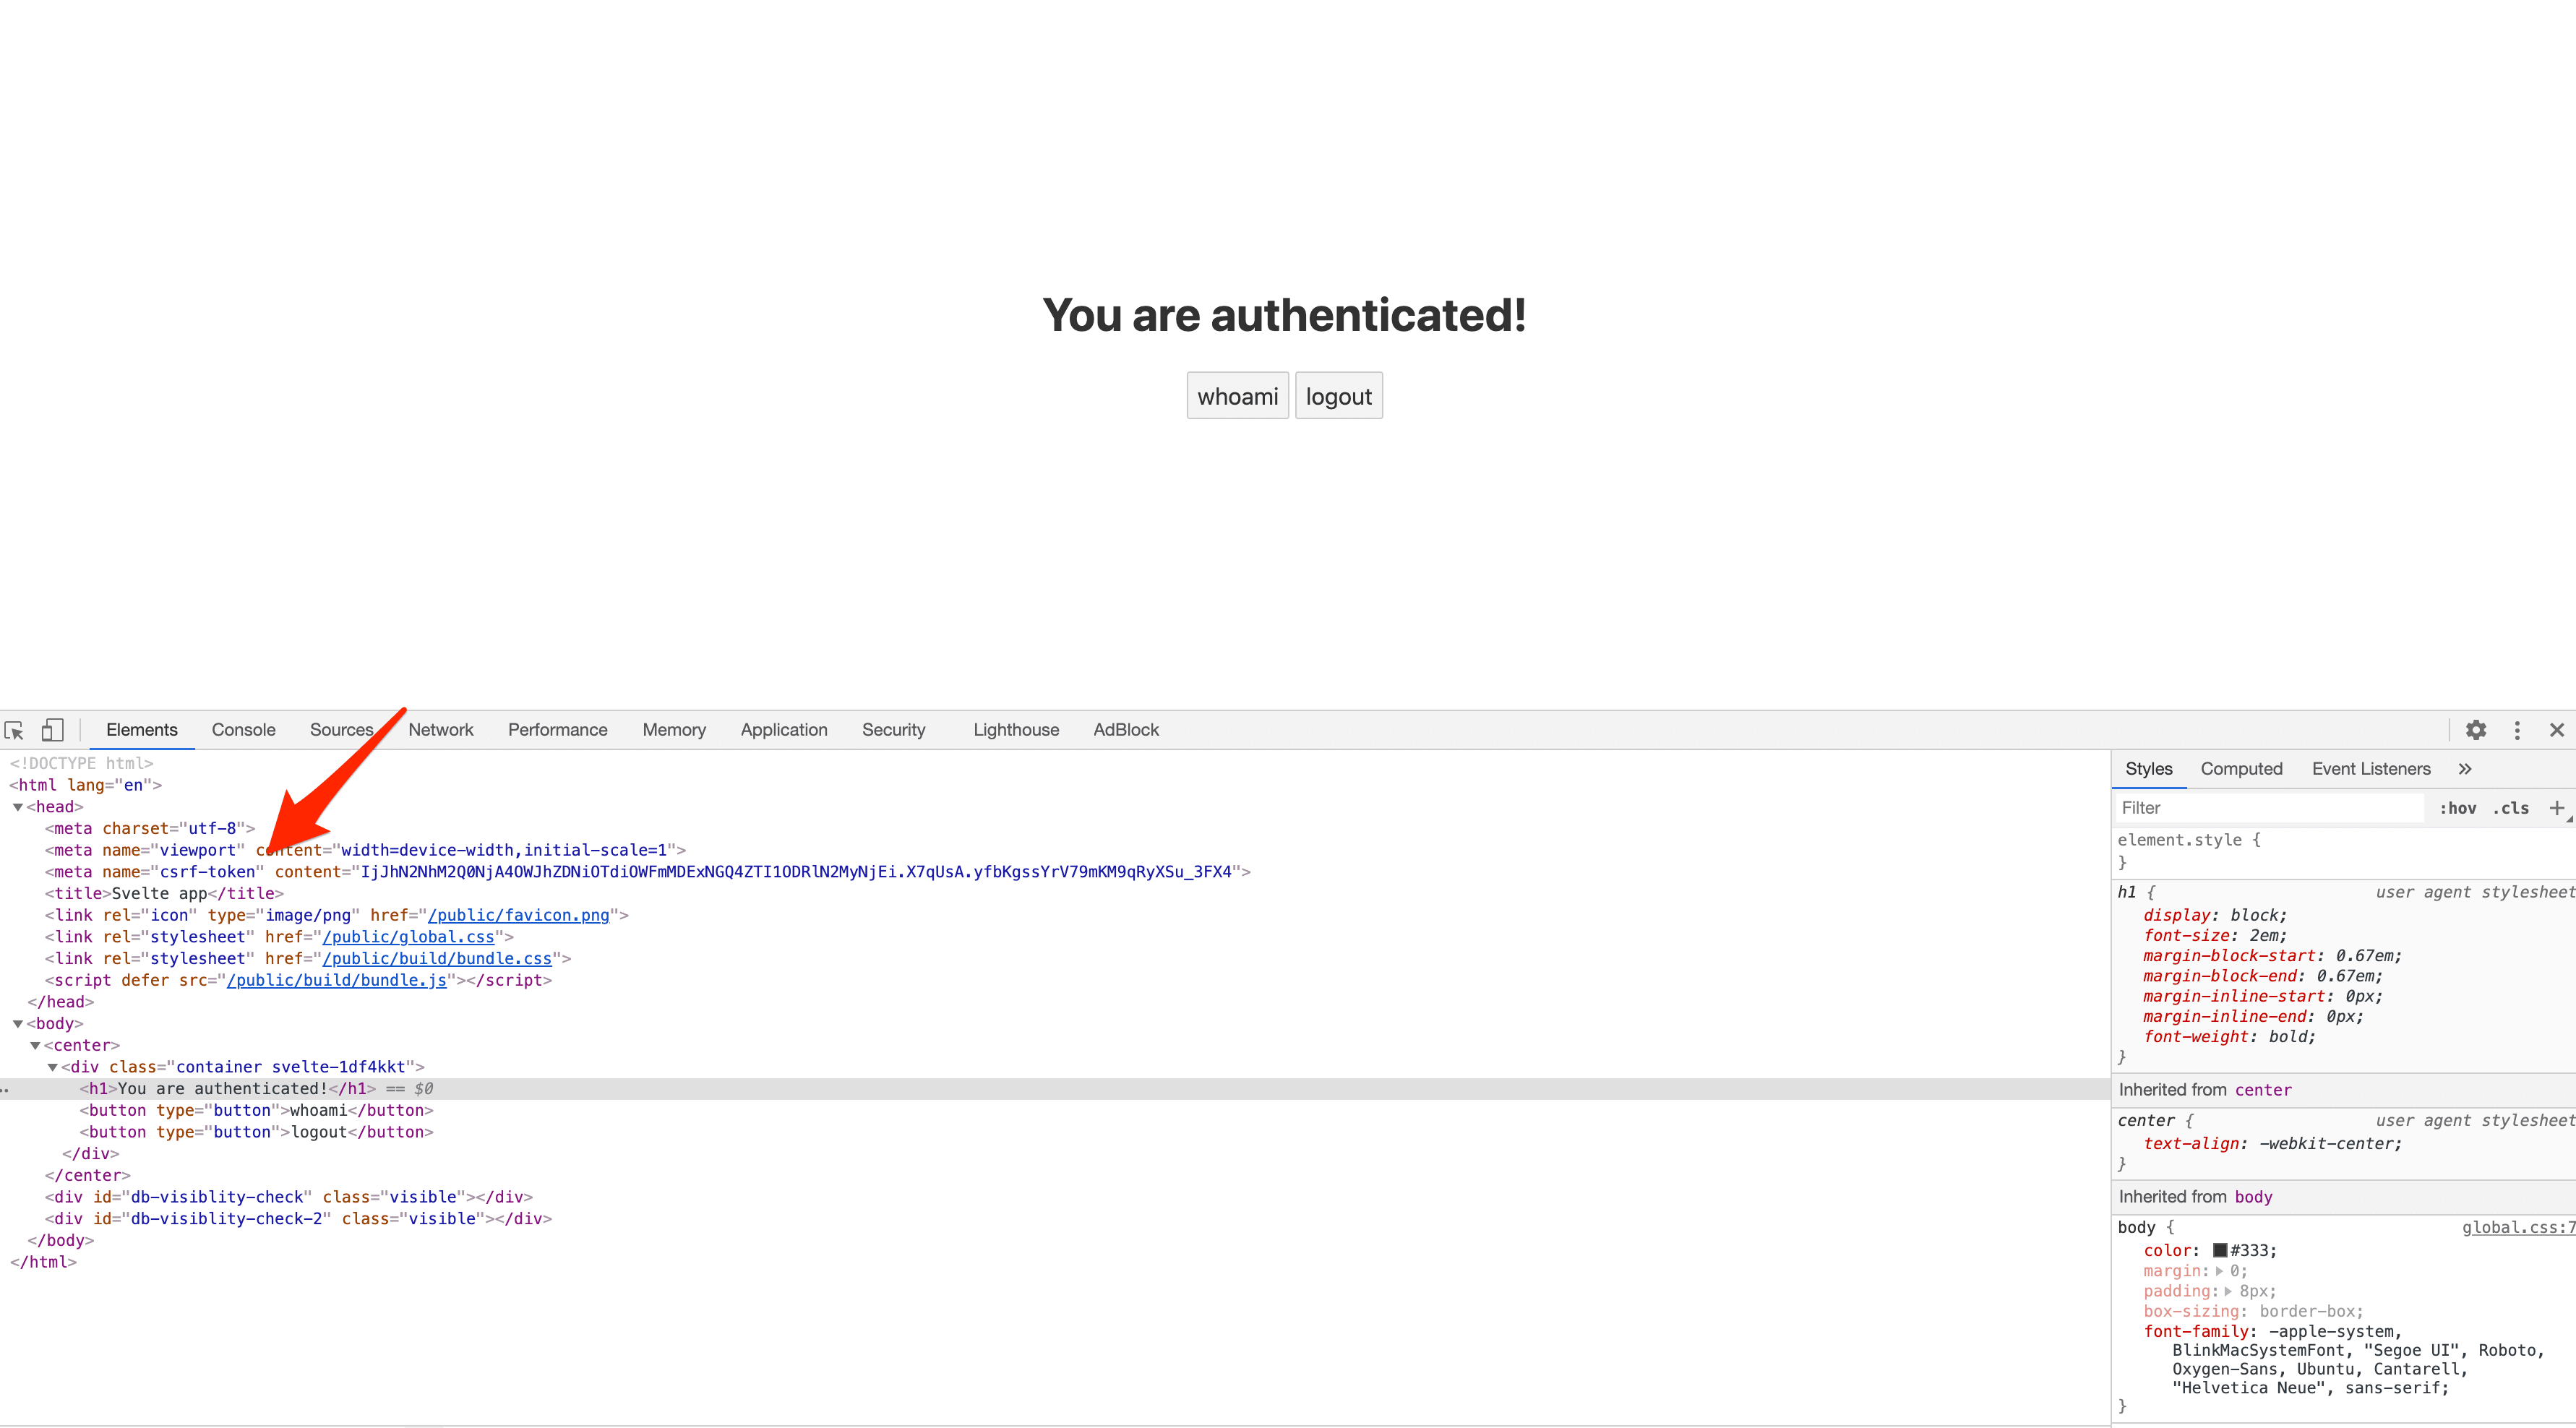
What happens if the session cookie is invalid?
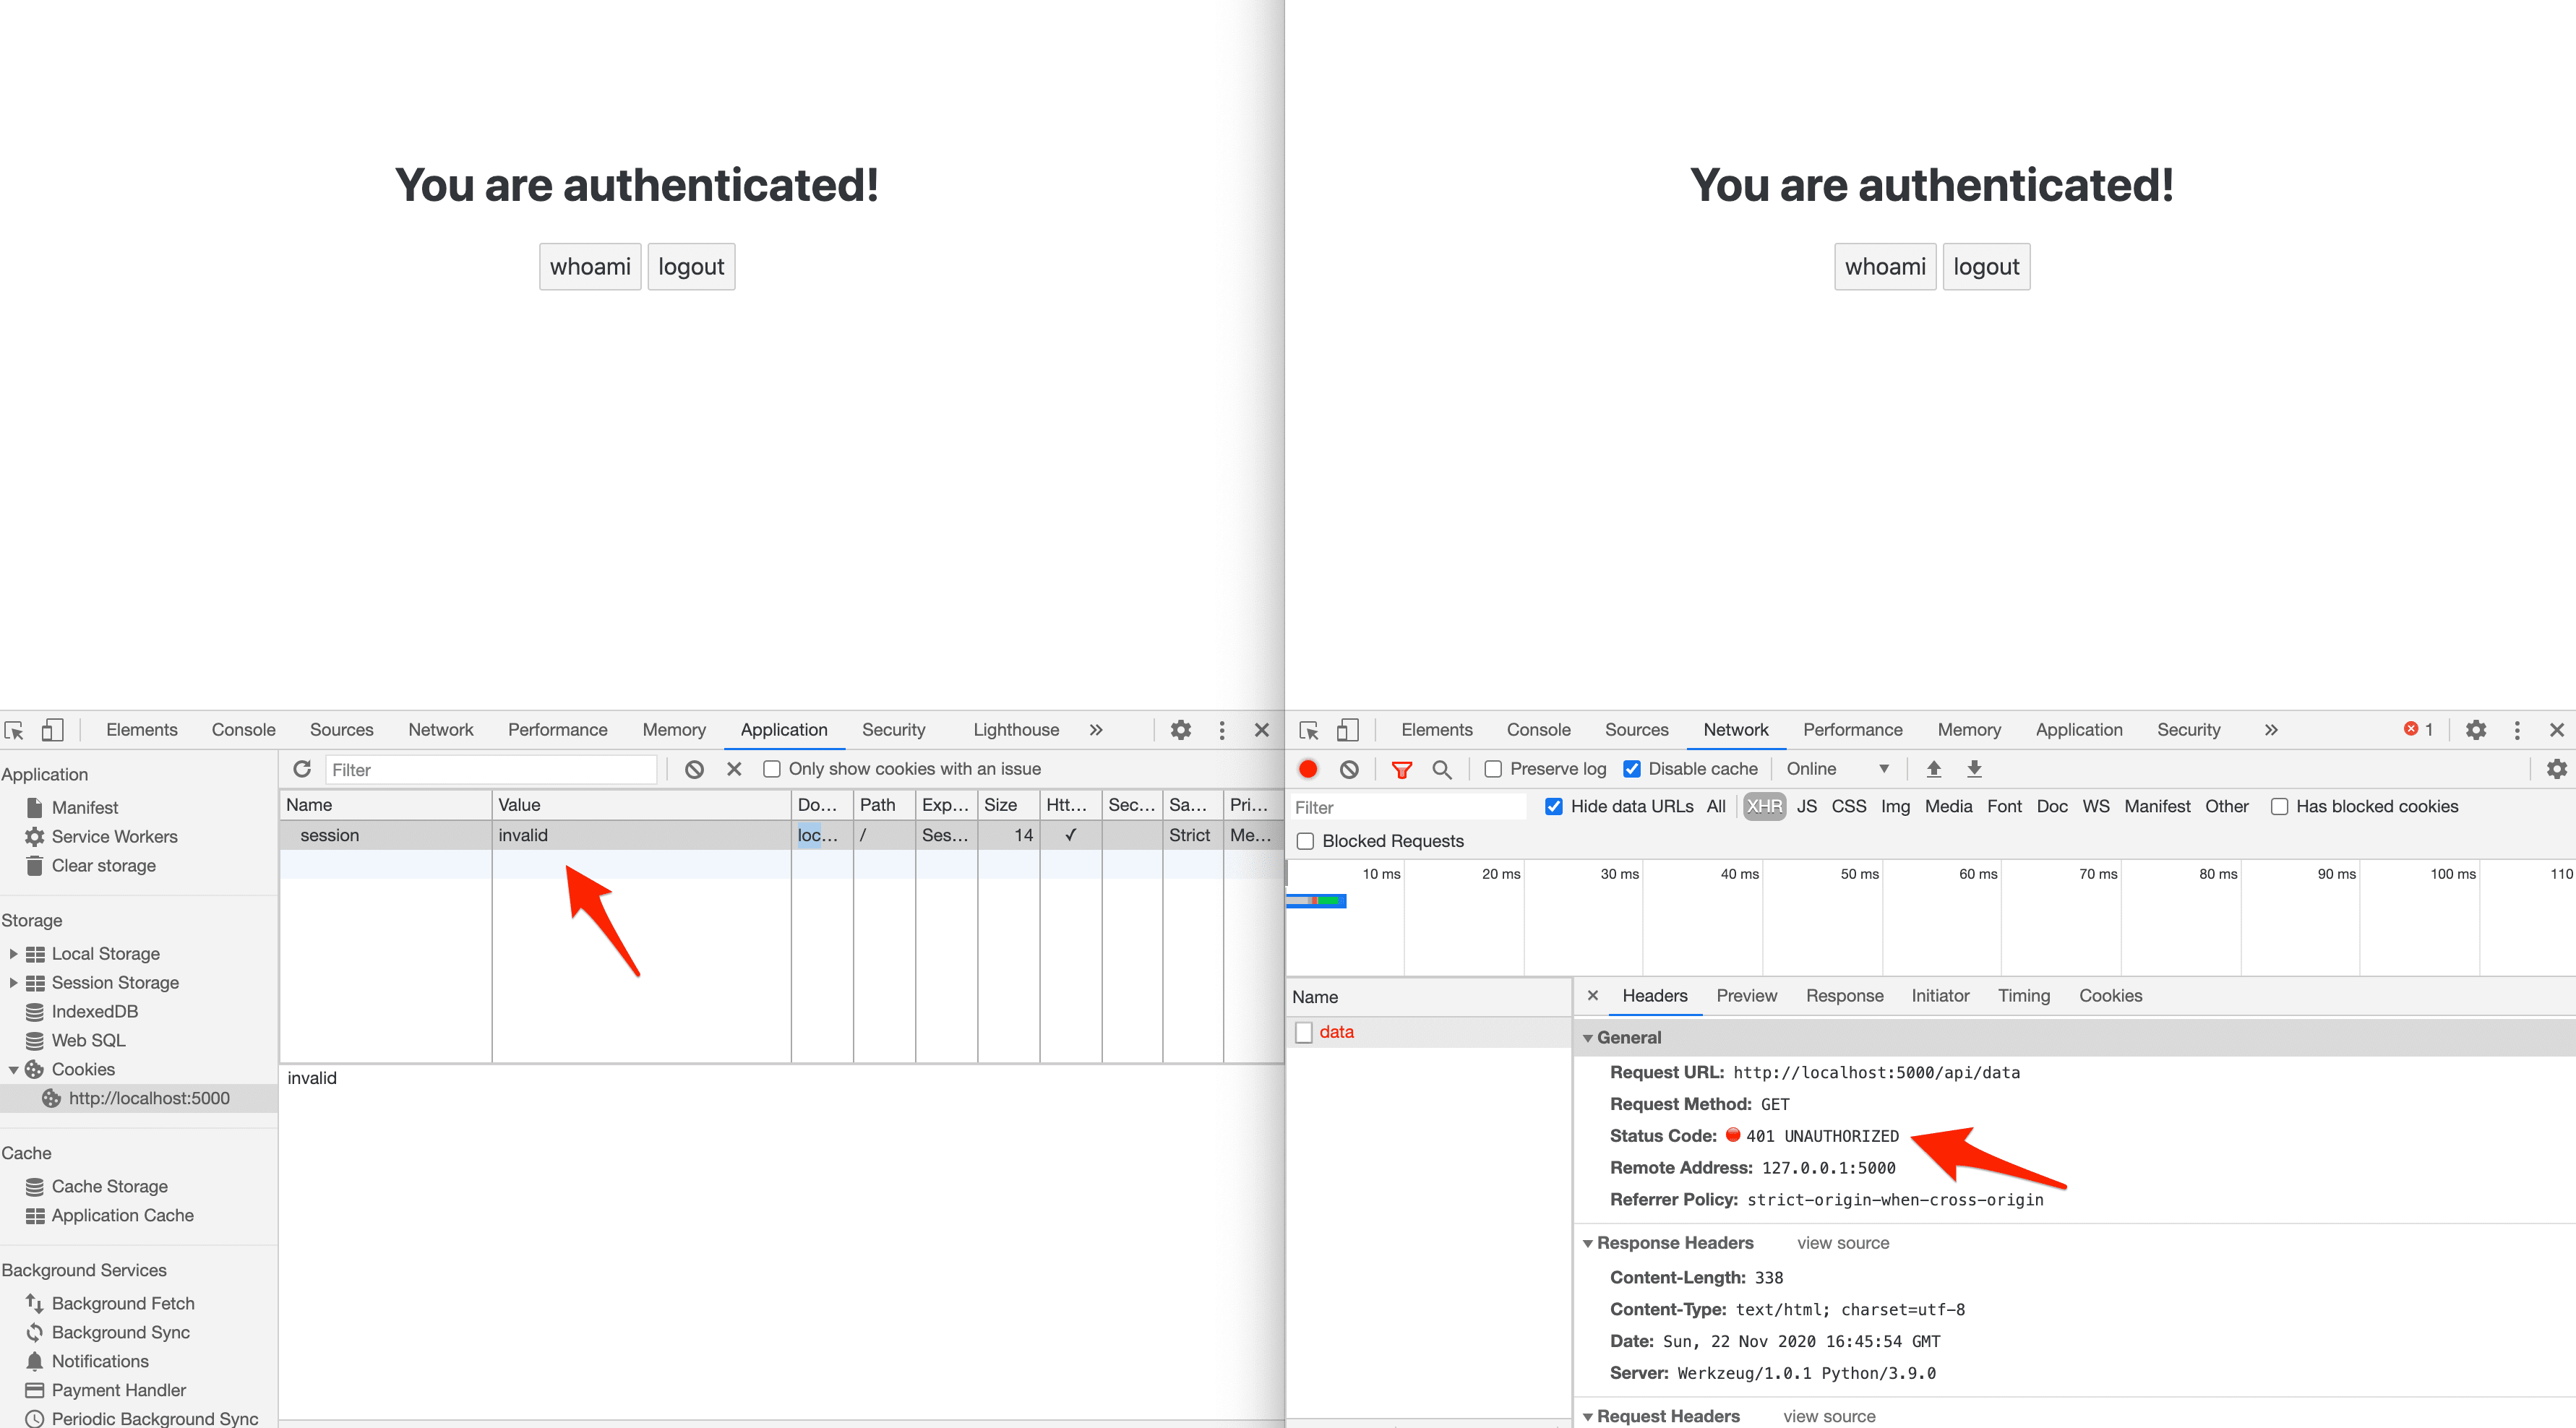
You can find the final code for this approach here.
Frontend Served Separately (Same domain)
With this approach, we'll build the frontend and serve it up separately from the Flask app on the same domain. We'll use Docker and Nginx to serve up both apps on the same domain locally.
The big difference with this approach over the Jinja approach is that you'll have to make an initial request to obtain a CSRF token since it won't get set automatically.
Start by creating a project directory:
$ mkdir flask-spa-same-origin && cd flask-spa-same-origin
Now, create a folder for the backend:
$ mkdir backend && cd backend
Create a file to hold the flask app called app.py:
$ touch app.py
Add a requirements.txt file as well to install Flask, Flask-Login, and Flask-WTF:
Flask==2.2.2
Flask-Login==0.6.2
Flask-WTF==1.0.1
Back in the project root, assuming, you have Node and npm installed, create a new project via the Svelte project template:
$ npx degit sveltejs/template frontend
$ cd frontend
Install the dependencies:
$ npm install
Your project structure should now look like this:
├── backend
│   ├── app.py
│   └── requirements.txt
└── frontend
    ├── .gitignore
    ├── README.md
    ├── package-lock.json
    ├── package.json
    ├── public
    │   ├── favicon.png
    │   ├── global.css
    │   └── index.html
    ├── rollup.config.js
    ├── scripts
    │   └── setupTypeScript.js
    └── src
        ├── App.svelte
        └── main.js
Flask Backend
The app has the following routes:
/api/pingserves a quick sanity check/api/getcsrfreturns a CSRF token in the response header/api/loginlogs a user in and generates a session/api/datafetches user data for an authenticated user/api/getsessionchecks whether a session exists/api/logoutlogs a user out
Grab the full code here and add it to the backend/app.py file.
Take note of:
@app.route("/api/getcsrf", methods=["GET"])
def get_csrf():
    token = generate_csrf()
    response = jsonify({"detail": "CSRF cookie set"})
    response.headers.set("X-CSRFToken", token)
    return response
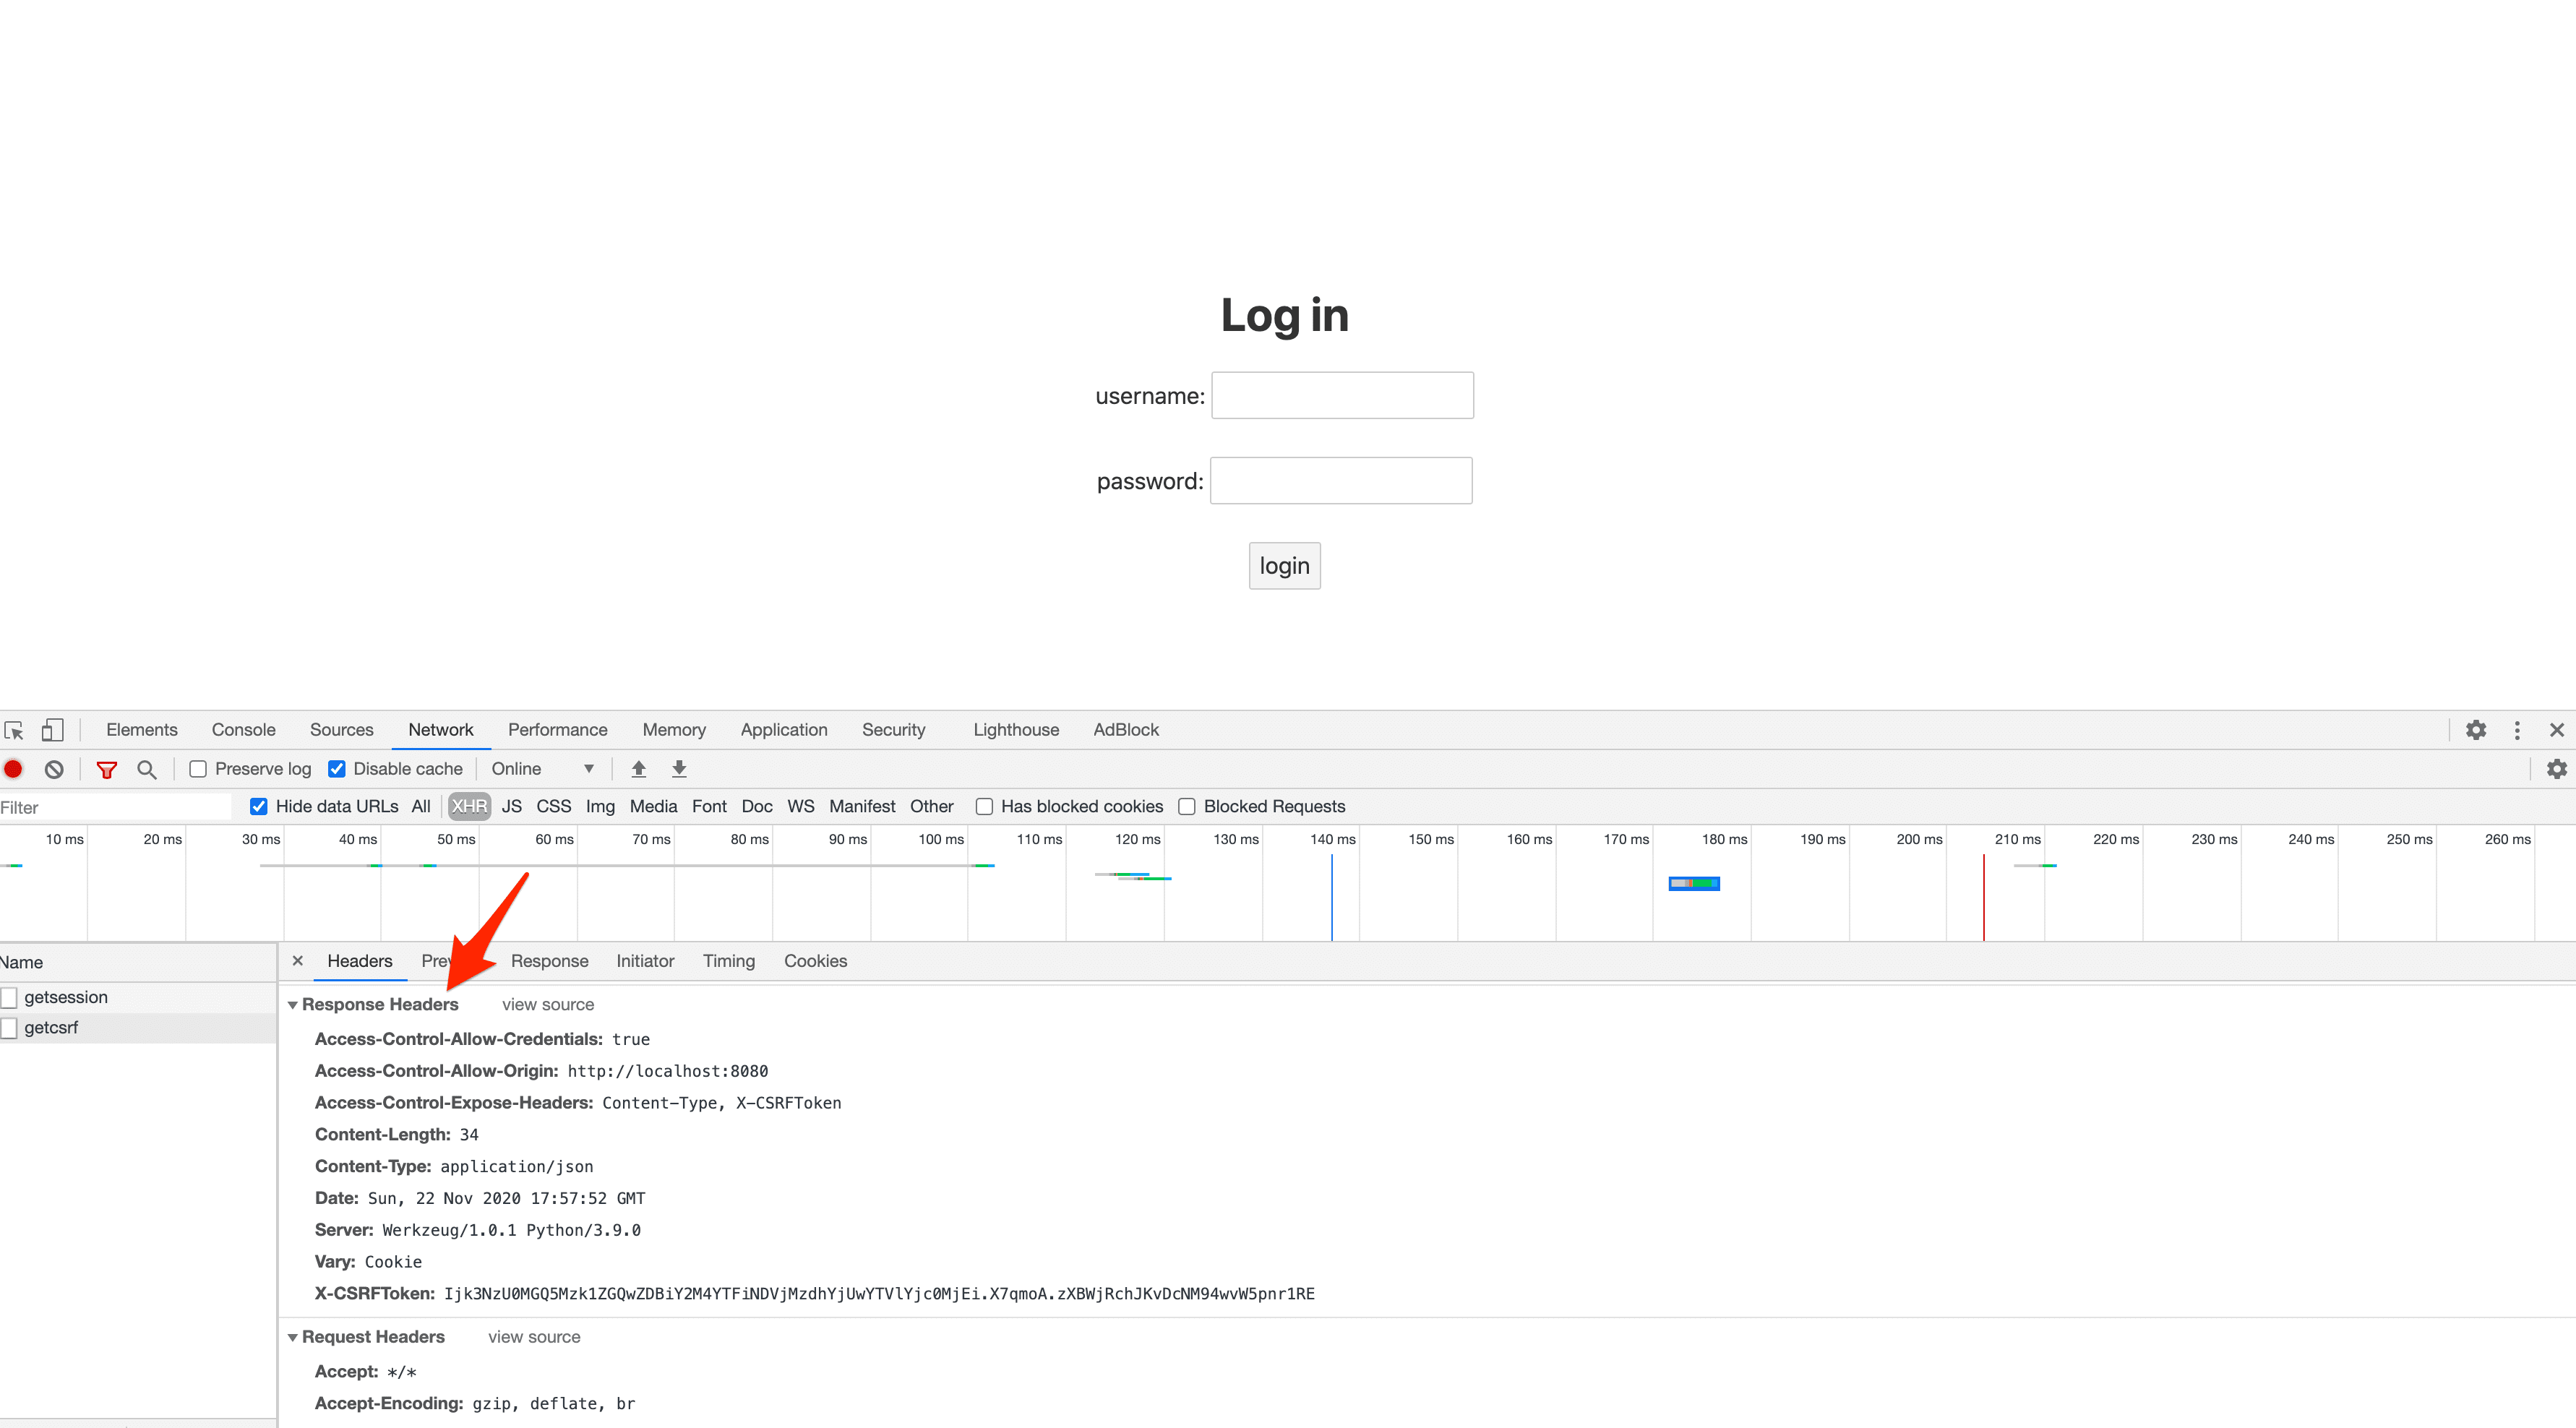
Here, we created a CSRF token and set it in the response header.
Svelte Frontend
The component again will display either a login form for unauthenticated users or a simple "You are authenticated!" message for authenticated users.
Grab the full code here and add it to the frontend/src/App.svelte file.
Since the backend and frontend are decoupled, we have to manually get the token from the backend, via the /api/getcsrf endpoint, and store it in memory:
const csrf = () => {
  fetch("/api/getcsrf", {
    credentials: "same-origin",
  })
  .then((res) => {
    csrfToken = res.headers.get(["X-CSRFToken"]);
    // console.log(csrfToken);
  })
  .catch((err) => {
    console.log(err);
  });
}
This function is called after the component mounts.
Next, update frontend/src/main.js:
import App from './App.svelte';

const app = new App({
  target: document.body,
});

export default app;
Docker
Next, let's Dockerize both apps.
Frontend and Backend
frontend/Dockerfile:
# pull the official base image
FROM node:lts-alpine

# set working directory
WORKDIR /usr/src/app

# add `/usr/src/app/node_modules/.bin` to $PATH
ENV PATH /usr/src/app/node_modules/.bin:$PATH
ENV HOST=0.0.0.0

# install and cache app dependencies
COPY package.json .
COPY package-lock.json .
RUN npm ci
RUN npm install [email protected] -g --silent

# start app
CMD ["npm", "run", "dev"]
backend/Dockerfile:
# pull the official base image
FROM python:3.10-slim-buster

# set the working directory
WORKDIR /usr/src/app

# set environment variables
ENV PYTHONDONTWRITEBYTECODE 1
ENV PYTHONUNBUFFERED 1

# install dependencies
RUN pip install --upgrade pip
COPY ./requirements.txt .
RUN pip install -r requirements.txt

# add app
COPY . .

# start app
CMD ["python", "app.py"]
Add a docker-compose.yml file to the project root to tie the two apps together:
version: "3.8"

services:
  backend:
    build: ./backend
    volumes:
      - ./backend:/usr/src/app
    expose:
      - 5000

  frontend:
    stdin_open: true
    build: ./frontend
    volumes:
      - ./frontend:/usr/src/app
      - /usr/src/app/node_modules
    expose:
      - 8080
    depends_on:
      - backend
Nginx
In order to run both apps on the same domain, let's add a container for Nginx that works as a reverse proxy. Create a new folder in the project root called "nginx".
nginx/Dockerfile:
FROM nginx:latest
COPY ./nginx.conf /etc/nginx/nginx.conf
Add a nginx/nginx.conf configuration file as well. You can find the code for it here.
Take note of the two location blocks:
location /api {
  proxy_pass              http://backend:5000;
  ...
}

location / {
  proxy_pass              http://frontend:8080;
  ...
}
Requests to / will be forwarded to the http://frontend:8080 (frontend is the name of the service from the Docker Compose file) while requests to /api will be forwarded to the http://backend:5000 (backend is the name of the service from the Docker Compose file).
Add the service to the docker_compose.yml file:
version: "3.8"

services:
  backend:
    build: ./backend
    volumes:
      - ./backend:/usr/src/app
    expose:
      - 5000

  frontend:
    stdin_open: true
    build: ./frontend
    volumes:
      - ./frontend:/usr/src/app
      - /usr/src/app/node_modules
    expose:
      - 8080
    depends_on:
      - backend

  reverse_proxy:
    build: ./nginx
    ports:
      - 81:80
    depends_on:
      - backend
      - frontend
Your project structure should now look like this:
├── backend
│   ├── Dockerfile
│   ├── app.py
│   └── requirements.txt
├── docker-compose.yml
├── frontend
│   ├── .gitignore
│   ├── Dockerfile
│   ├── README.md
│   ├── package-lock.json
│   ├── package.json
│   ├── public
│   │   ├── favicon.png
│   │   ├── global.css
│   │   └── index.html
│   ├── rollup.config.js
│   ├── scripts
│   │   └── setupTypeScript.js
│   └── src
│       ├── App.svelte
│       └── main.js
└── nginx
    ├── Dockerfile
    └── nginx.conf
Test
Build the images and run the containers:
$ docker-compose up -d --build
Navigate to http://localhost:81. You should see the login form.
Log in with:
- username:
test - password:
test
You can find the final code for this approach here.
Frontend Served Separately (cross-domain)
With this approach, we'll build the frontend and serve it up separately from the Flask app on a different domain. We'll have to relax the security a bit by allowing cross-domain requests from the frontend with Flask-CORS.
Start by creating a project directory:
$ mkdir flask-spa-cross-origin && cd flask-spa-cross-origin
Now, create a folder for the backend:
$ mkdir backend && cd backend
Create a file to hold the flask app called app.py:
$ touch app.py
Install Flask, Flask-Login, Flask-WTF, and Flask-CORS:
$ python3.9 -m venv env
$ source env/bin/activate
$ pip install Flask==2.2.2 Flask-Login==0.6.2 Flask-WTF==1.0.1 Flask-Cors==3.0.10
Back in the project root, assuming, you have Node and npm installed, create a new project via the Svelte project template:
$ npx degit sveltejs/template frontend
$ cd frontend
Install the dependencies:
$ npm install
Your project structure should now look like this:
├── backend
│   └── app.py
└── frontend
    ├── .gitignore
    ├── README.md
    ├── package-lock.json
    ├── package.json
    ├── public
    │   ├── favicon.png
    │   ├── global.css
    │   └── index.html
    ├── rollup.config.js
    ├── scripts
    │   └── setupTypeScript.js
    └── src
        ├── App.svelte
        └── main.js
Flask Backend
The app has the following routes:
/api/pingserves a quick sanity check/api/getcsrfreturns a CSRF token in the response header/api/loginlogs a user in and generates a session/api/datafetches user data for an authenticated user/api/getsessionchecks whether a session exists/api/logoutlogs a user out
Grab the full code here and add it to the backend/app.py file.
To enable CORS we had to configure the server to return the appropriate headers:
cors = CORS(
    app,
    resources={r"*": {"origins": "http://localhost:8080"}},
    expose_headers=["Content-Type", "X-CSRFToken"],
    supports_credentials=True,
)
Notes:
resources={r"*": {"origins": "http://localhost:8080"}}enables cross-domain requests for all routes and HTTP methods fromhttp://localhost:8080.expose_headers=["Content-Type", "X-CSRFToken"]indicates that theContent-TypeandX-CSRFTokenheaders can be exposed.supports_credentials=Trueallows cookies to be sent cross-domain.
Headers:
Access-Control-Allow-Origin: http://localhost:8080
Access-Control-Expose-Headers: Content-Type, X-CSRFToken
Access-Control-Allow-Credentials: true
Did you notice that SESSION_COOKIE_SAMESITE is set to Lax?
SESSION_COOKIE_SAMESITE="Lax",
If we had left it as Strict, no cookies would be sent from the frontend. As the name suggests, Lax loosens security a bit so that cookies will be sent cross-domain for the majority of requests.
Review Set-Cookie options from the Flask docs for more on this.
Svelte Frontend
Grab the full code here and add it to the frontend/src/App.svelte file.
The only change here from the same domain approach is that credentials: "same-origin" was changed to credentials: "include" so that cookies are still sent along even though the request URL is on different domain.
credentials: "include",
Next, update frontend/src/main.js:
import App from './App.svelte';

const app = new App({
  target: document.body,
});

export default app;
Test
Spin up the Flask app:
$ python app.py
Then, in a different terminal window, run Svelte:
$ npm run dev
Navigate to http://localhost:8080. You should see the login form.
Log in with:
- username:
test - password:
test
What happens if the session cookie is invalid?
You can find the final code for this approach here.
Conclusion
This article detailed how to set up session-based authentication for Single-Page Applications. Whether you use session cookies or tokens, it's good to use cookies for authentication when the client is a browser. While it's preferable to serve up both apps from the same domain, you can serve them on different domains by relaxing the cross-domain security settings.
We looked at three different approaches for combining Flask with a frontend framework with session-based auth:
| Approach | Frontend | Backend |
|---|---|---|
| Frontend Served From flask | Grab the CSRF token from the meta tag and use credentials: "same-origin" in the fetch request. |
Set SESSION_COOKIE_HTTPONLY and REMEMBER_COOKIE_HTTPONLY to True and SESSION_COOKIE_SAMESITE to "Strict". |
| Frontend Served Separately (same domain) | Obtain CSRF token and use credentials: "same-origin" in the fetch request. |
Add a route handler for generating the CSRF token that gets set in the response headers. Set SESSION_COOKIE_HTTPONLY and REMEMBER_COOKIE_HTTPONLY to True and SESSION_COOKIE_SAMESITE to "Strict". |
| Frontend Served Separately (cross-domain) | Obtain CSRF token and use credentials: "include" in the fetch request. |
Enable CORS and add a route handler for generating the CSRF token that gets set in the response headers. Set SESSION_COOKIE_HTTPONLY and REMEMBER_COOKIE_HTTPONLY to True and SESSION_COOKIE_SAMESITE to "Lax". |
Grab the code from the flask-spa-auth repo.