 Patrick Kennedy
This tutorial illustrates how to deploy a Flask application with a PostgreSQL database to production on Render.
Technologies used in this tutorial:
- Flask - Python web framework
- Flask-SQLAlchemy - Python package for interfacing with relational databases
- PostgreSQL - relational database
- Gunicorn - Python WSGI HTTP Server
- Render - web hosting service
Contents
Objectives
By the end of this tutorial, you'll be able to:
- Explain how to transition a Flask app from deployment to production
- Describe how a Flask app runs on Render
- Deploy a Flask app to Render
- Configure a Flask app to communicate with a PostgreSQL database on Render
Why Render?
Render is an easy-to-use Platform as a Service (PaaS) solution that's great for hosting Flask apps.
Plus, they have a free tier that allows you to easily test out their platform. Additionally, they have reasonably priced options for hosting apps and databases.
Since Heroku is discontinuing it's free tier on November 28th, 2022, I've toyed around with a number of Heroku alternatives and found that Render is the best. Render's developer experience is nice and the configuration steps are very intuitive for setting up web services and databases.
Free-Tier Limitations
There are some limitations when using the free tier services on Render:
- 90-day limit for PostgreSQL databases
- Slower build and deployment times
- No shell access for "Web Services"
The slower build and deploy times are to be expected, as you're sharing resources with other users.
It's worth noting that build and deploy times are fast for web services on the paid plan.
Flask Production Setup
Flask in Development
During the development phase of a project, the development server is typically used for running the app locally:
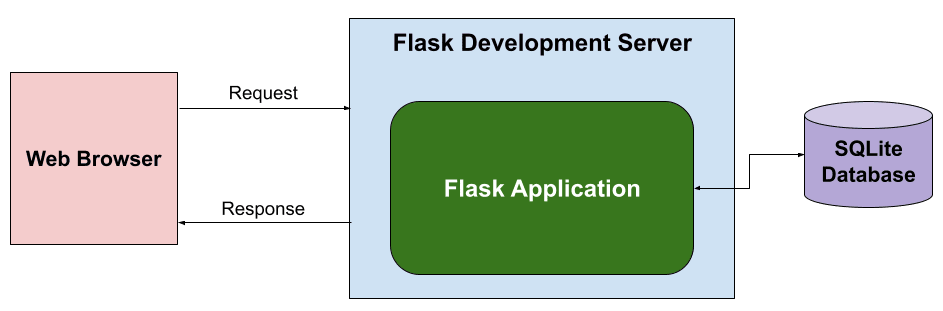
The Flask development server is run using:
$ flask --app app --debug run
Where --app specifies the file for the Flask app (app.py) and --debug enables the debug mode (interactive debugger and automatic reload when code is changed).
You can view the app by navigating to http://127.0.0.1:5000/ in your browser of choice.
Flask in Production
At a certain point when developing a Flask app, you'll want to deploy it app to production so that others can access it.
The Flask development server is great for serving up a Flask app locally. As the name suggests, the "development" server is not meant for production, though. Instead, you should use Gunicorn, a production-grade WSGI web app server.
WSGI, which stands for Web Server Gateway Interface, is an interface between a web server and a web app since a web server cannot talk directly to a Python app. For more, review WSGI.
The following diagram illustrates how the Flask app will be deployed to production using Render:
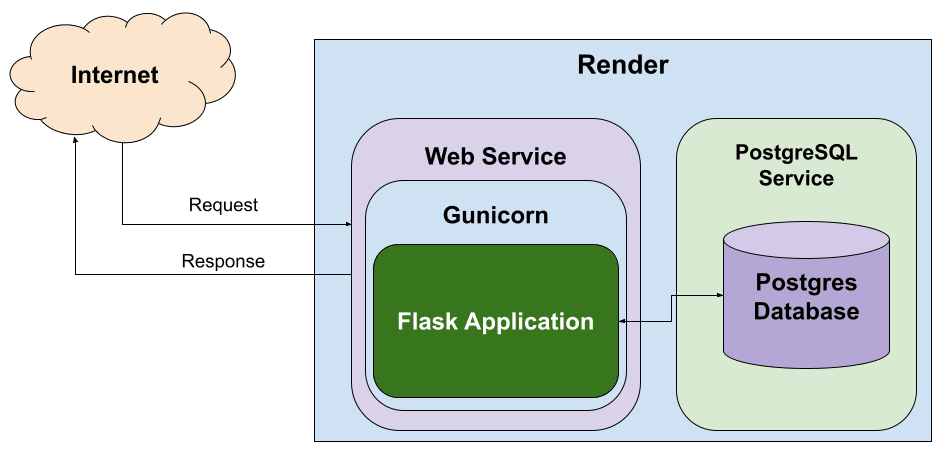
When deploying to Render, a "Web Service" will run the WSGI server (Gunicorn) and the Flask app. Render provides the web server, which will route HTTP traffic to Gunicorn. Additionally, the "PostgreSQL Service" will run the PostgreSQL database that the Flask app will interact with.
Prerequisites
There are several considerations when moving from a Flask app running on your local computer to deploying it to Render...
Gunicorn
In your virtual environment, install Gunicorn:
# pip
(venv)$ pip install gunicorn
(venv)$ pip freeze > requirements.txt
Feel free to swap out virtualenv and Pip for uv, Poetry, or Pipenv. For more, review Modern Python Environments.
If you're using pip, make sure to save the Python package dependencies in a requirements.txt file, as this file should be used in the "Build" step on Render.
PostgreSQL
SQLite is a great database for small projects and development efforts. However, once you transition to production, you'll want to use a production-level relational database, such as PostgreSQL.
Luckily, Flask-SQLAlchemy makes it easy to swap out SQLite for PostgreSQL.
To get started, there are two Python packages needed for interacting with a PostgreSQL database:
(venv)$ pip install psycopg2-binary
(venv)$ pip freeze > requirements.txt
psycopg2 is a PostgreSQL database adapter for Python.
Additionally, you need to make sure your Flask app utilizes an environment variable (such as DATABASE_URL) for determining the URI to the database:
class Config(object):
    ...
    # Since SQLAlchemy 1.4.x has removed support for the 'postgres://' URI scheme,
    # update the URI to the postgres database to use the supported 'postgresql://' scheme
    if os.getenv('DATABASE_URL'):
        SQLALCHEMY_DATABASE_URI = os.getenv('DATABASE_URL').replace("postgres://", "postgresql://", 1)
    else:
        SQLALCHEMY_DATABASE_URI = f"sqlite:///{os.path.join(BASEDIR, 'instance', 'app.db')}"
    ...
A key conversion to make is to update the URI to the PostgreSQL database to use the supported postgresql:// scheme instead of the postgres:// URI.
You can see a full example here.
Logging
When running a Flask app on Render, the console log will show all the log messages from the Gunicorn logger, but not from the Flask app.
However, the Flask app can be configured to utilize the Gunicorn logger:
if app.config['LOG_WITH_GUNICORN']:
    gunicorn_error_logger = logging.getLogger('gunicorn.error')
    app.logger.handlers.extend(gunicorn_error_logger.handlers)
    app.logger.setLevel(logging.DEBUG)
else:
    ... standard logging configuration ...
You can see a full example here.
Database Initialization
This section only applies when using the free tier "Web Service" on Render.
Typically, a CLI command should be created for initializing the database when the Flask app is first initialized:
@app.cli.command('init_db')
def initialize_database():
    """Initialize the database."""
    db.drop_all()
    db.create_all()
    echo('Initialized the database!')
However, the free tier "Web Service" on Render does not support access to a console to be able to run this CLI command.
Therefore, a solution to this problem is to check if the database needs to be initialized when the Flask app is created:
# Check if the database needs to be initialized
engine = sa.create_engine(app.config['SQLALCHEMY_DATABASE_URI'])
inspector = sa.inspect(engine)
if not inspector.has_table("users"):
    with app.app_context():
        db.drop_all()
        db.create_all()
        app.logger.info('Initialized the database!')
else:
    app.logger.info('Database already contains the users table.')
Assuming that an Application Factory Function is being used to create the Flask app, this block of code can be placed in the Application Factory Function after the Flask app has been instantiated and initialized.
You can see a full example here.
Render Deployment Steps
Web Service
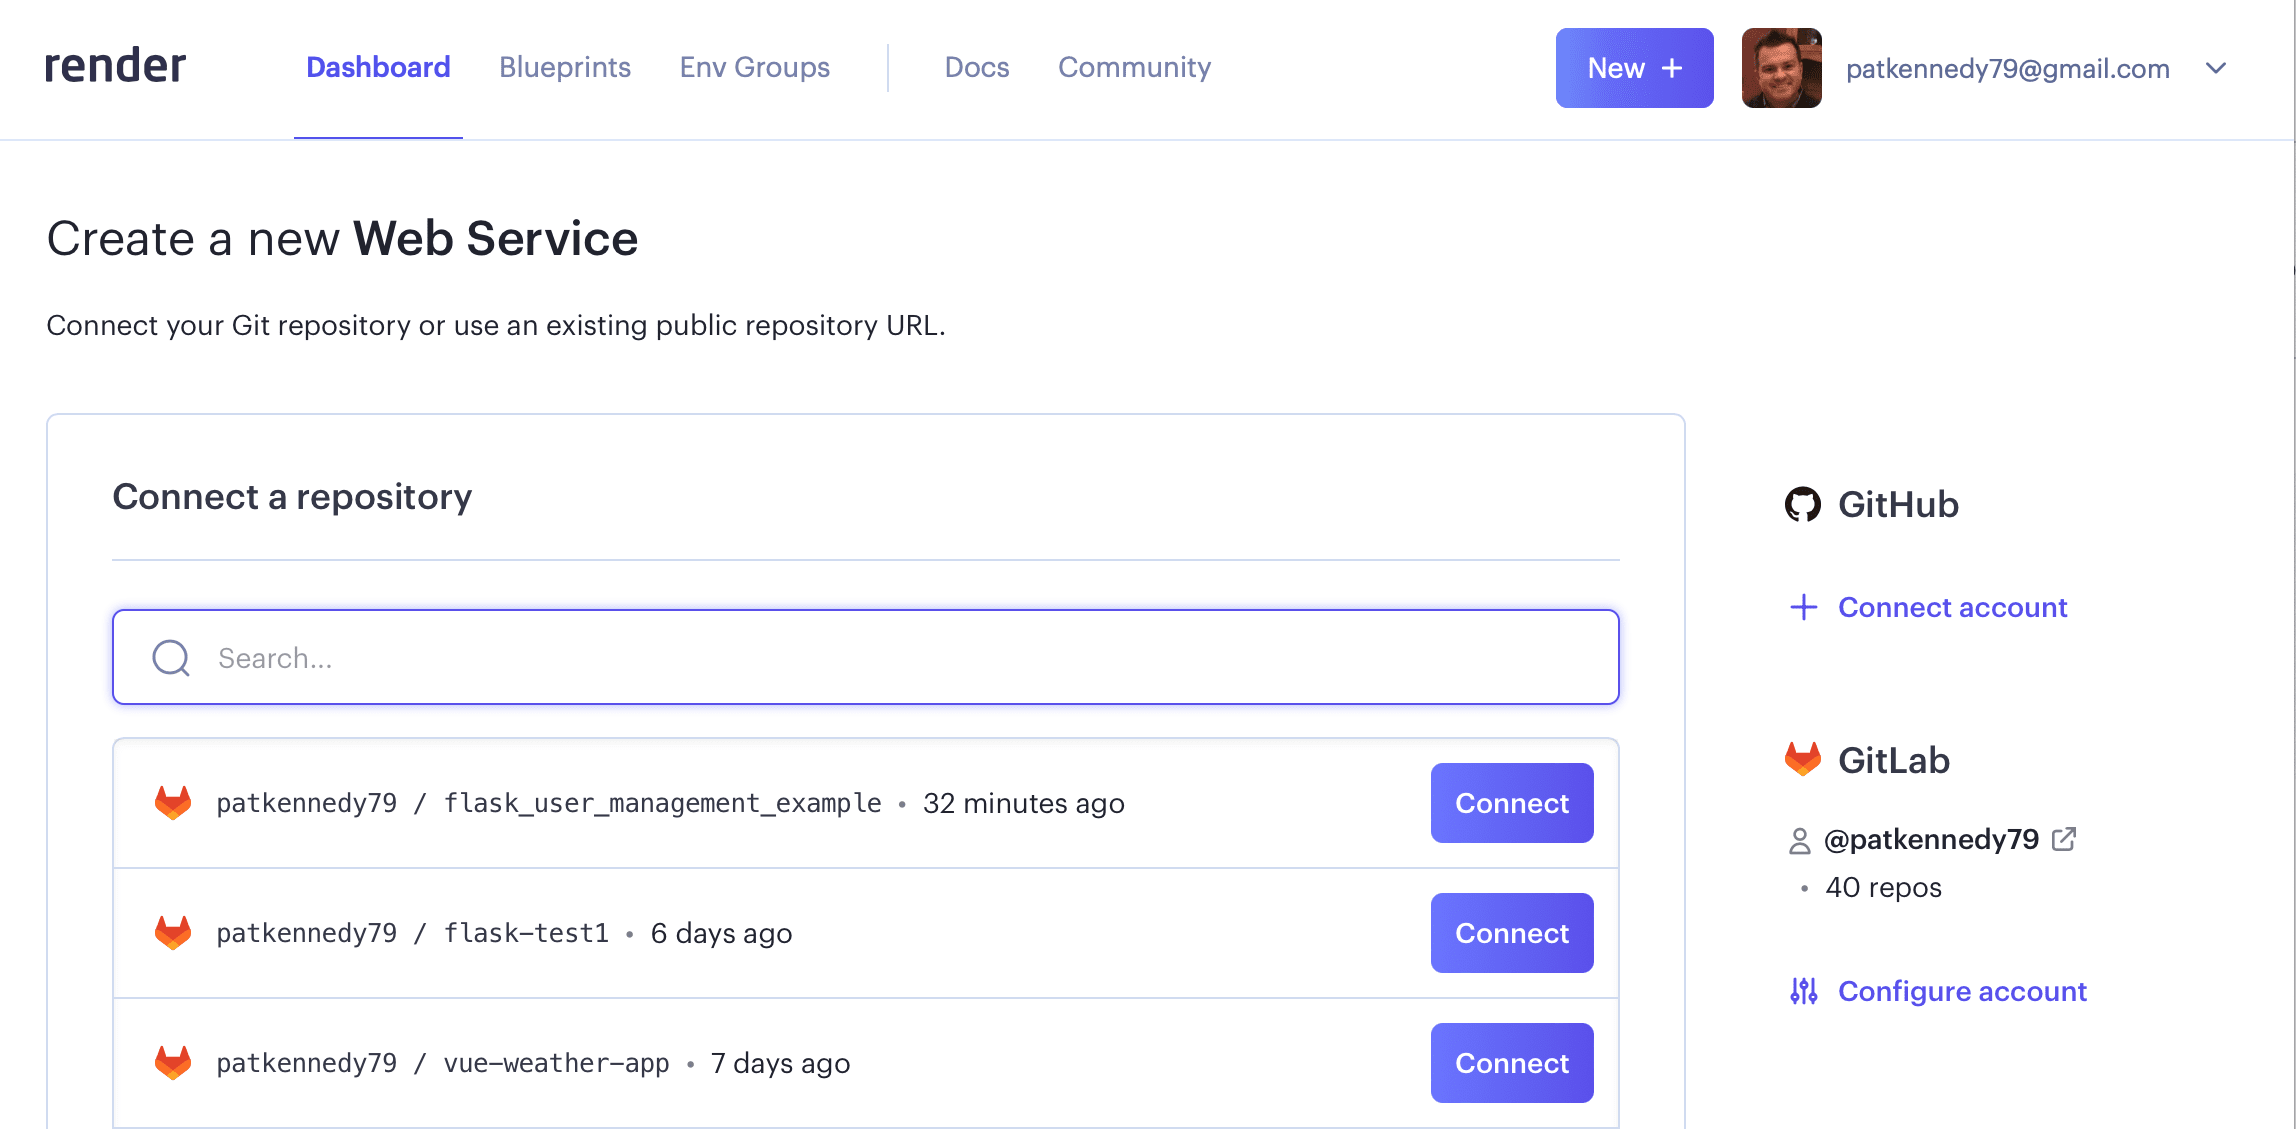
Start by creating a new account with Render (if you don't have one). Then, navigate to your dashboard, click on the "New +" button, and select "Web Service".
Connect your Render account to either your GitLab or GitHub account. Once connected, select the repository to deploy:
Fill out the configuration for deploying the Web Service:
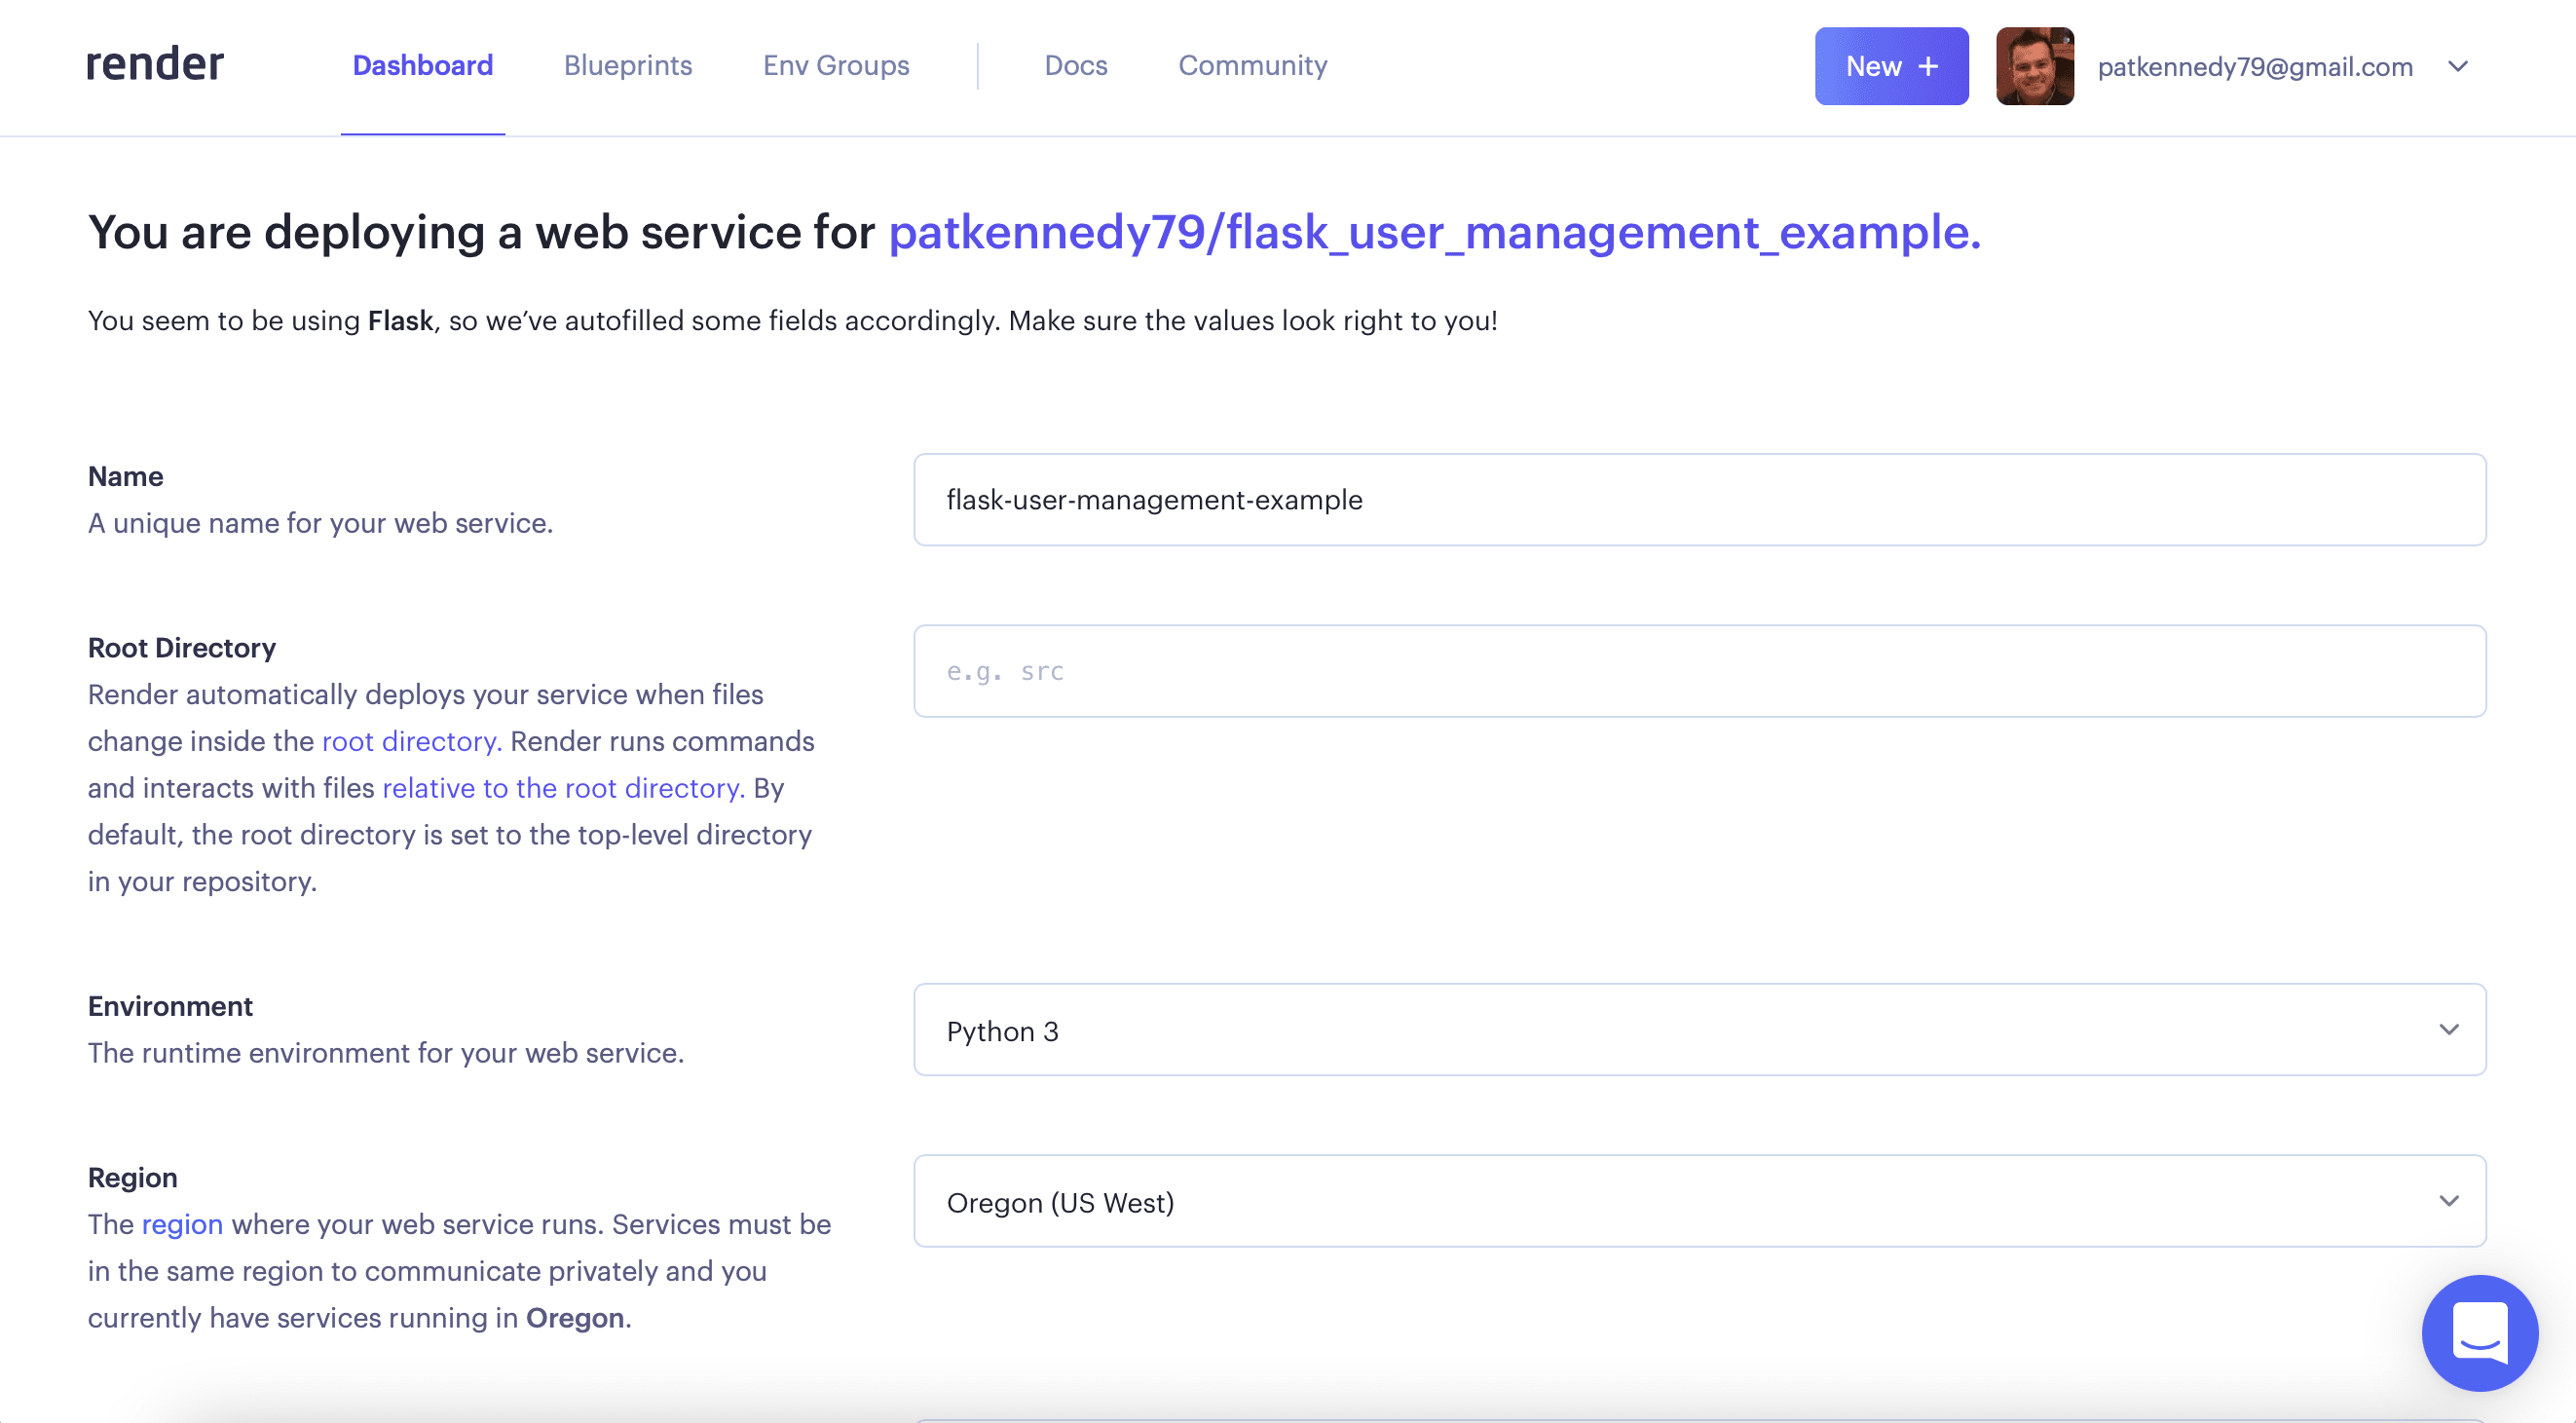
Fields:
- Name - select a unique name for the app, as this will be used for the URL
- Root Directory - the service's root directory (the default value is the top-level directory); all build commands will be run based on this root directory
- Environment - select "Python 3"
- Region - select the region closest to you
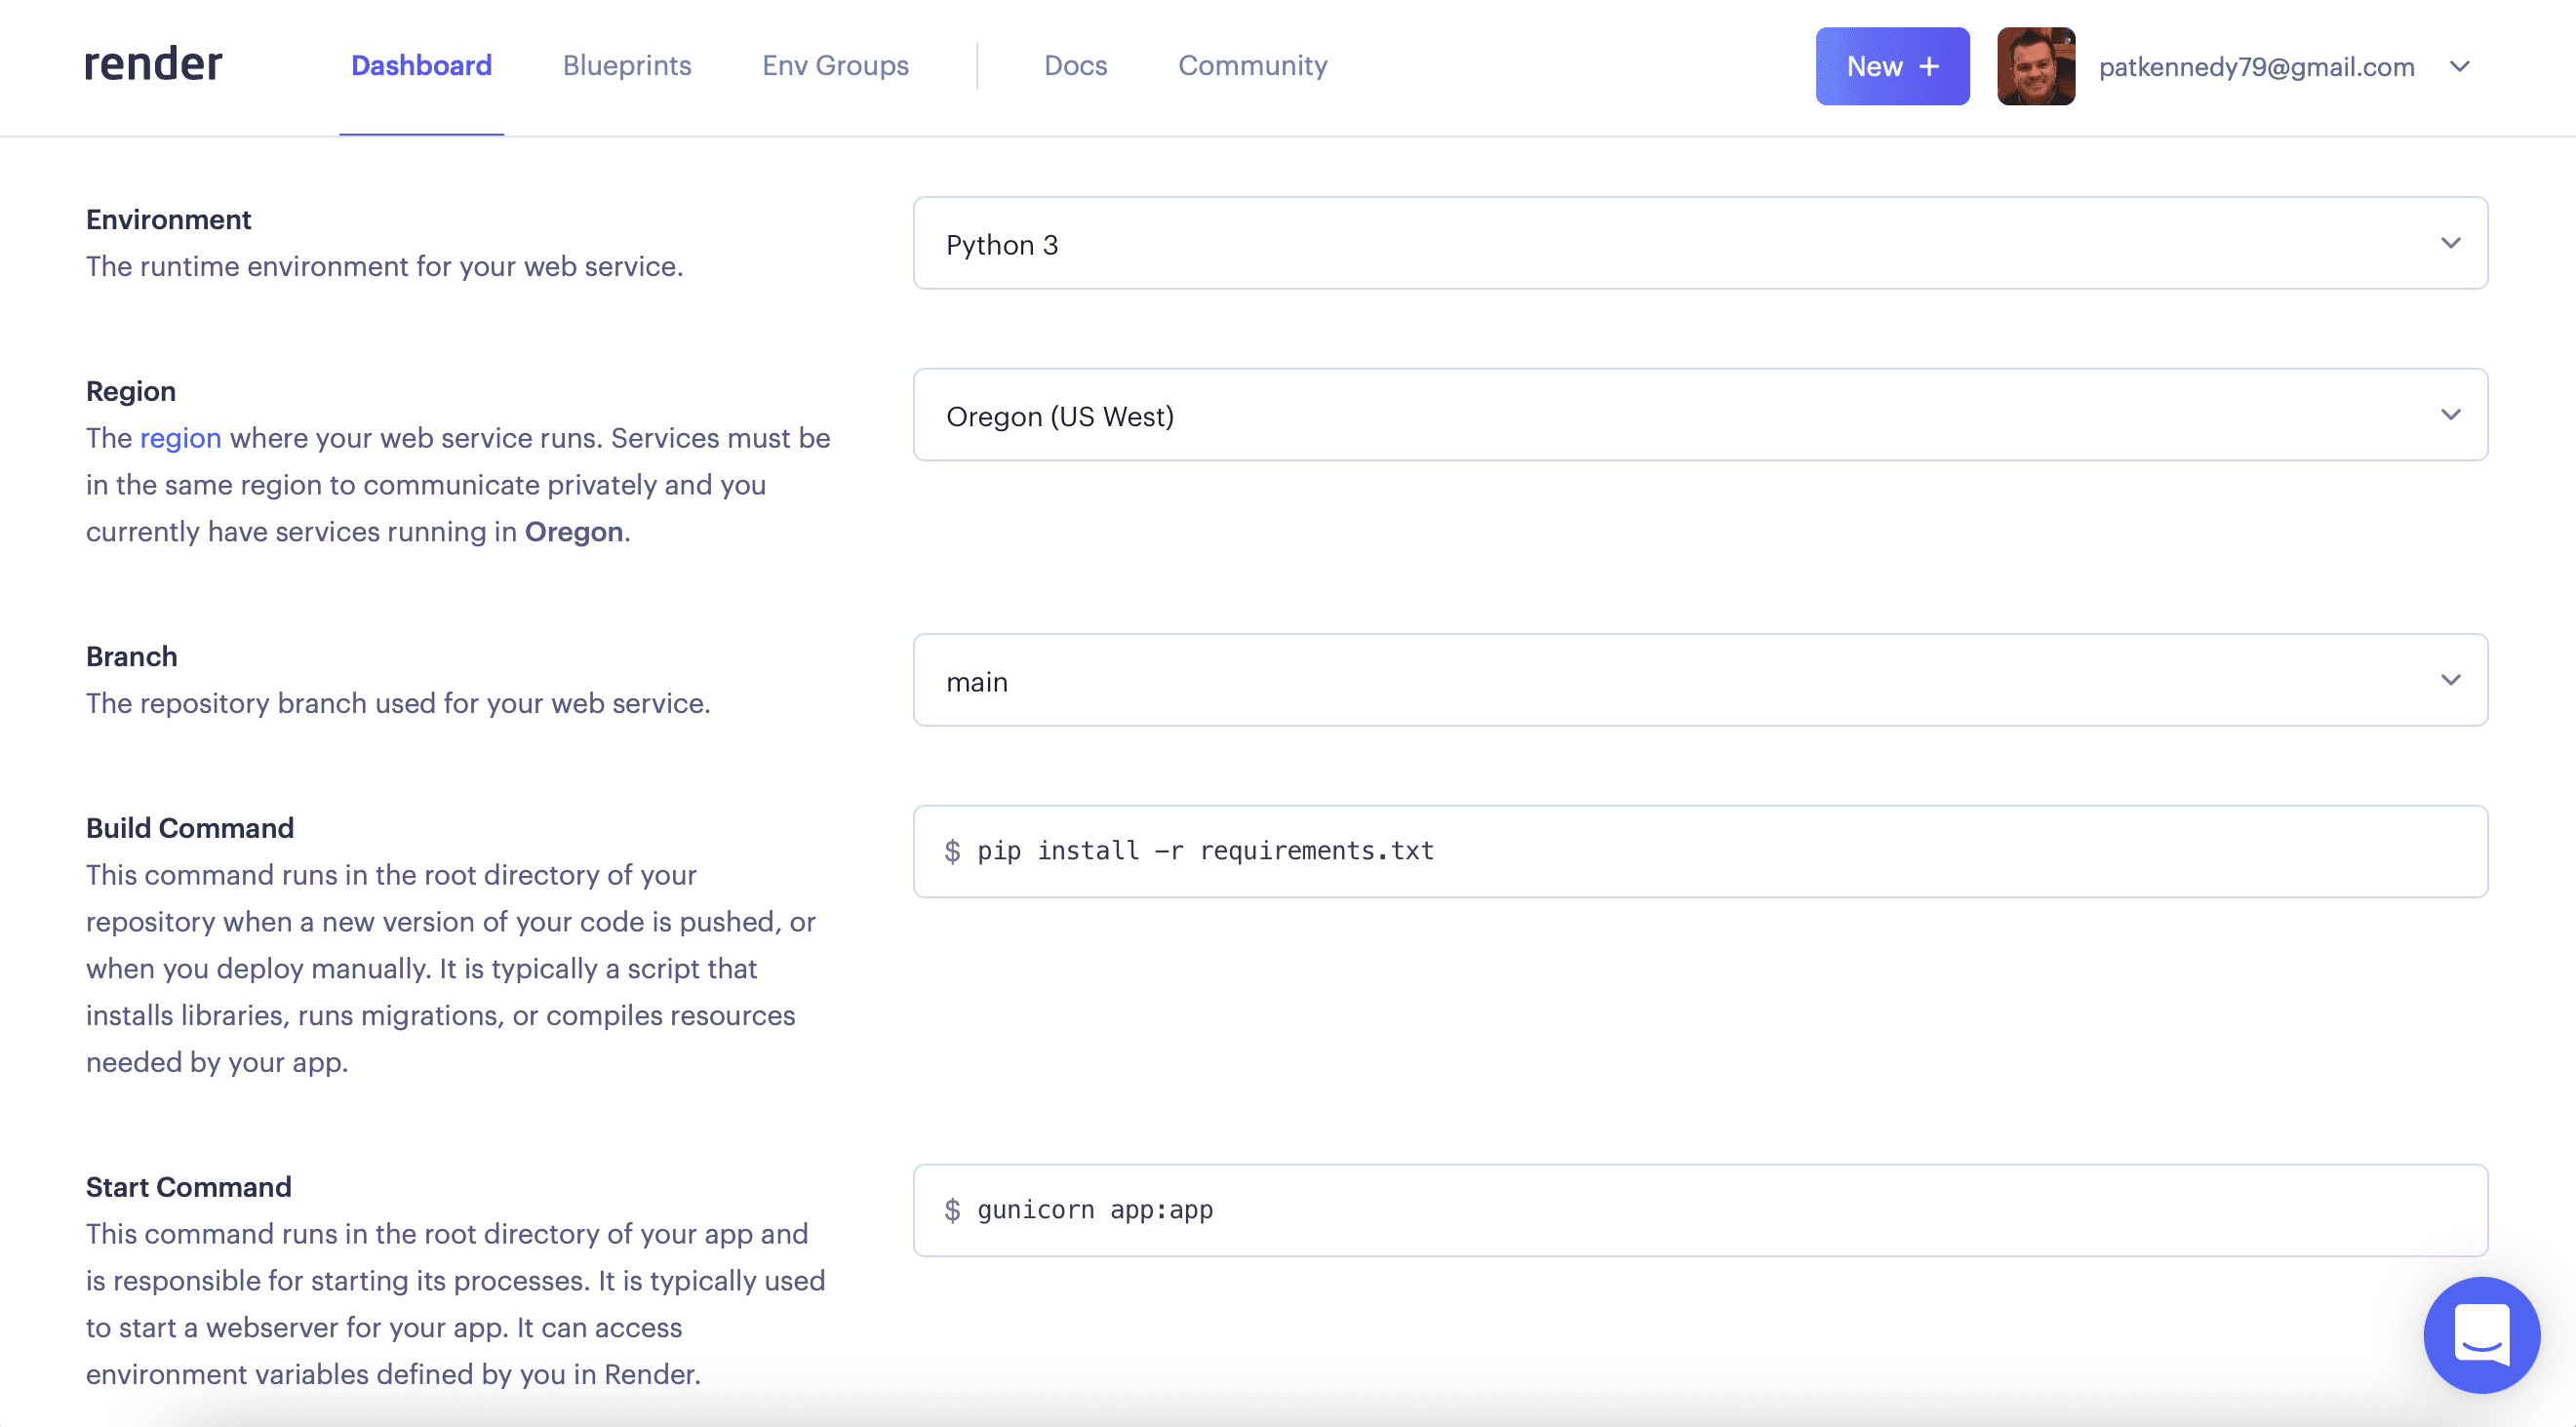
More fields:
- Branch - select the branch from your git repository to deploy from, typically "main" or "master"
- Build Command - command to get your application ready for production, such as installing the necessary Python packages -- e.g.,
pip install -r requirements.txt,poetry build, etc. - Start Command - use the default value of
gunicorn app:appor specify the number of workers and the log level usinggunicorn --workers=2 --log-level=info app:app
Select the Plan to use.
Next, you can set the specific version of Python to use via environment variables. To set environment variables, click on the "Advanced" button. Then, add an environment variable called "PYTHON_VERSION", specifying the Python version for your application -- e.g., "3.10.7".
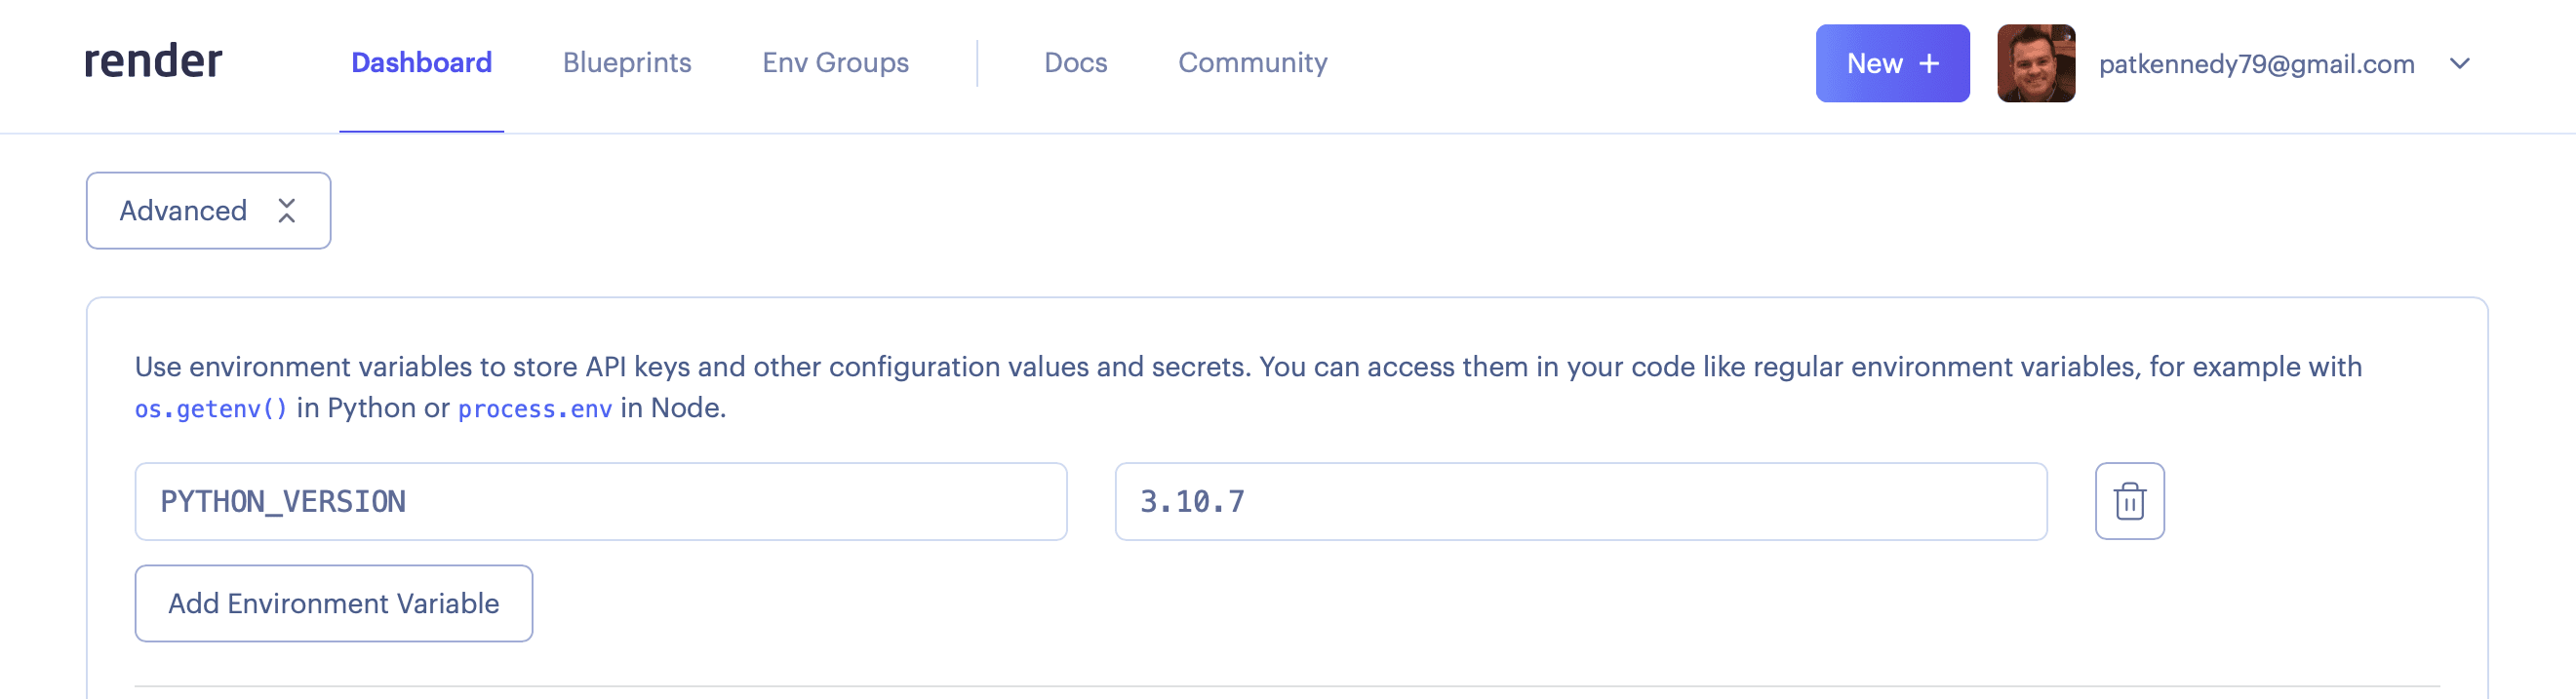
The "PYTHON_VERSION" environment variable must include the major, minor, and patch versions, so "3.10.7" is valid but "3.10" is not.
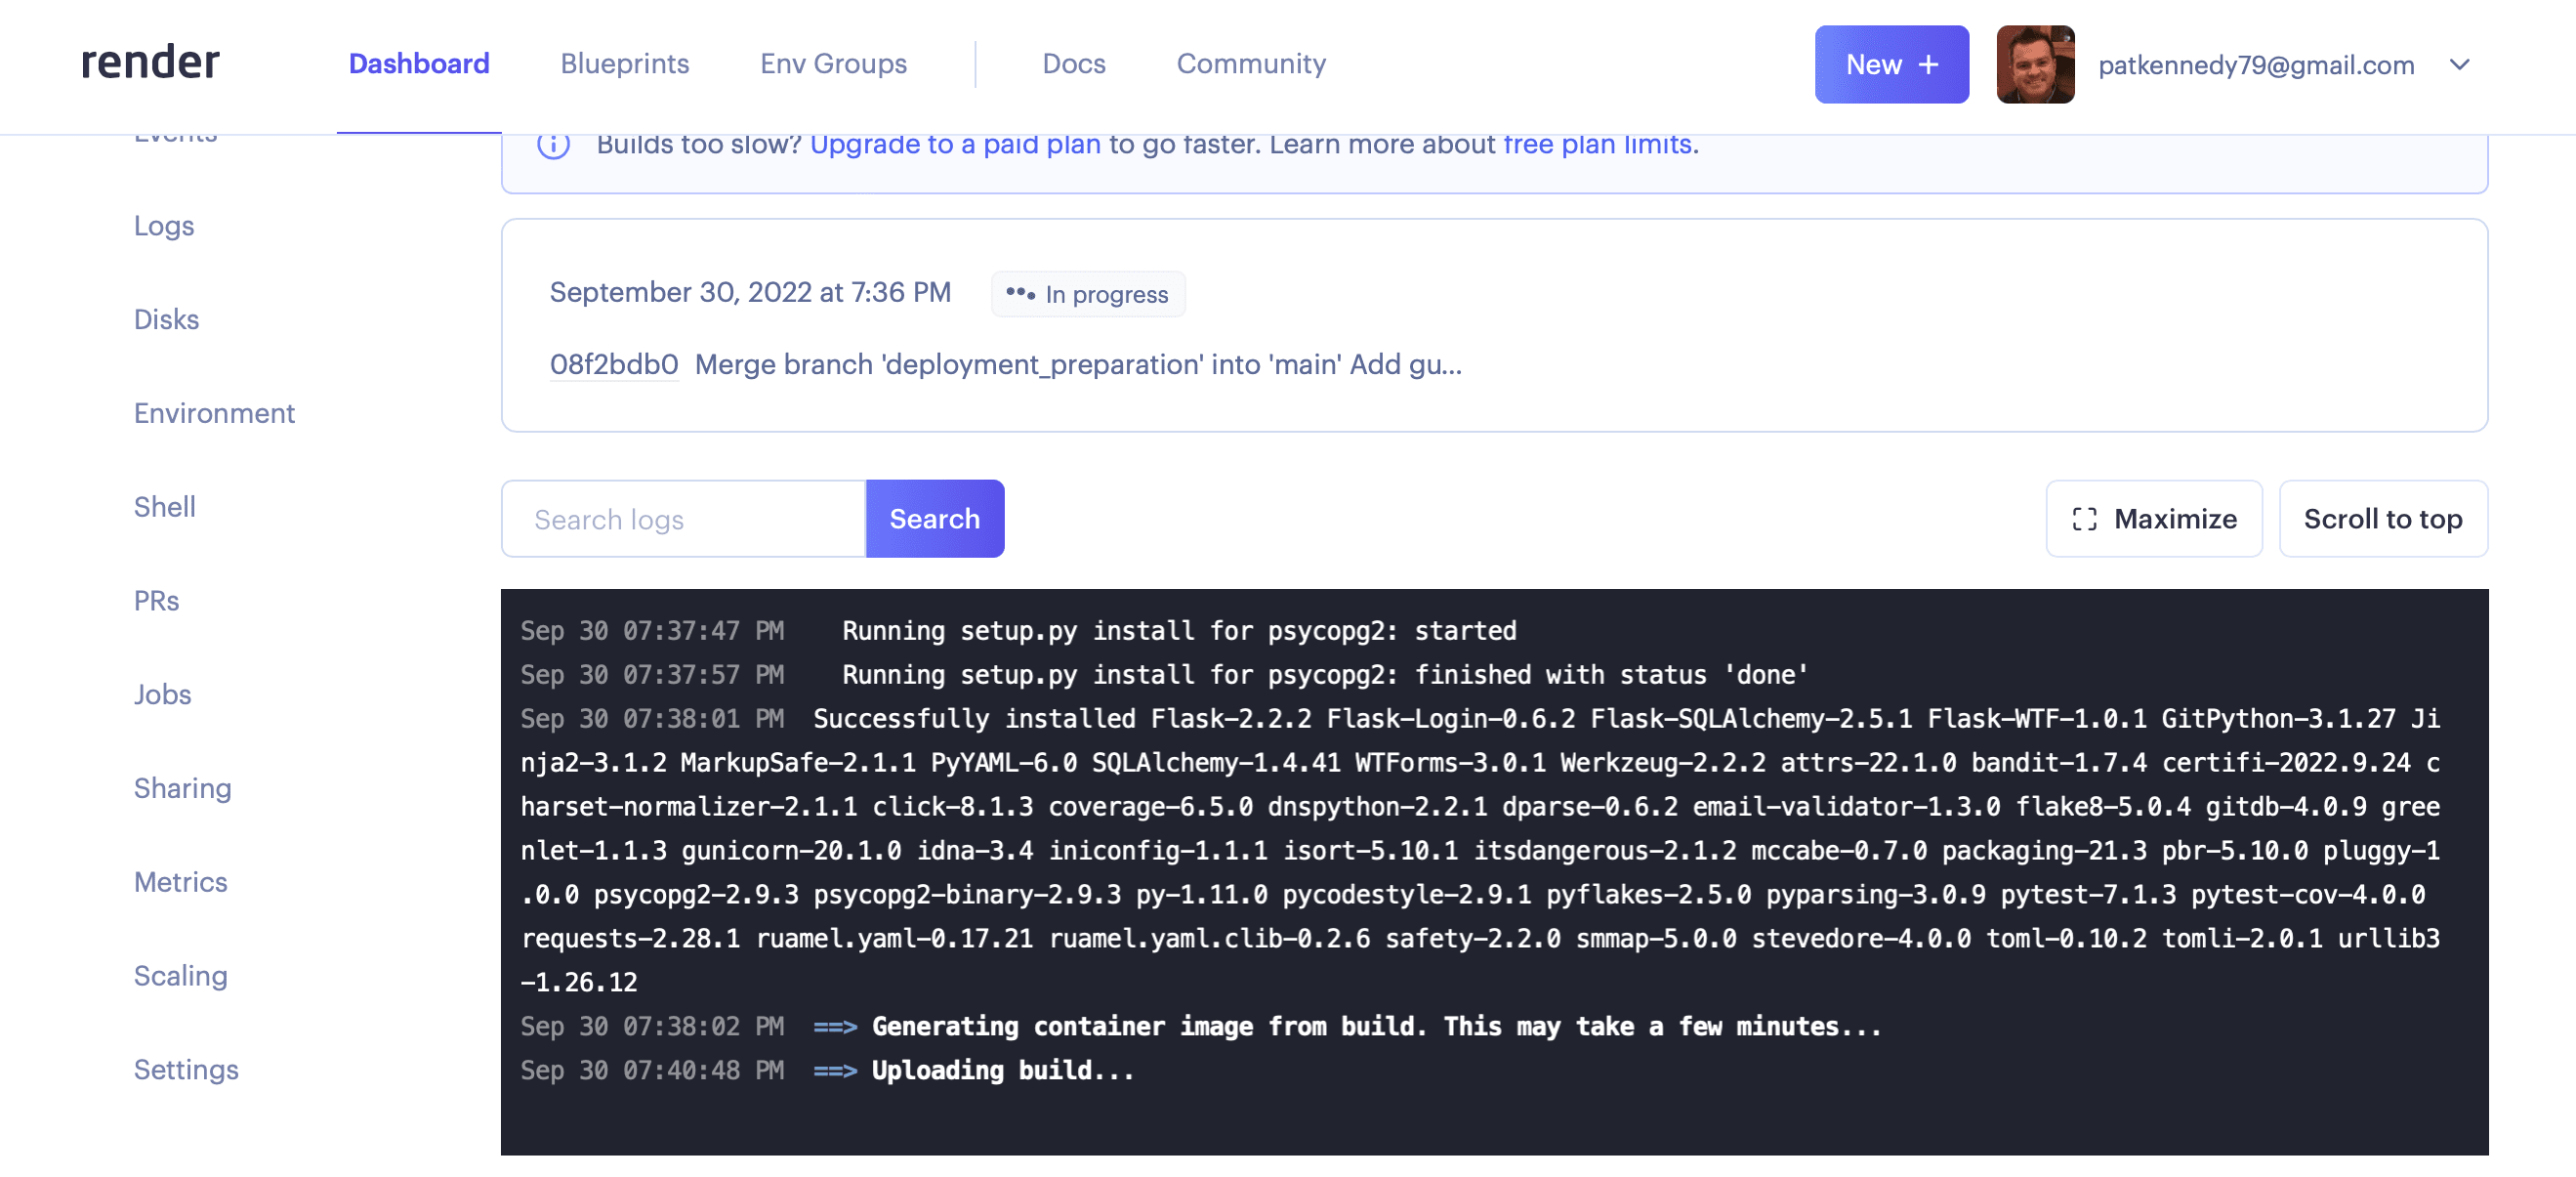
Finally, click on "Create Web Service" at the bottom of the page.
You'll then see all the Python packages from requirements.txt being installed:
Once the build is successful and deployed, you'll see something similar to:
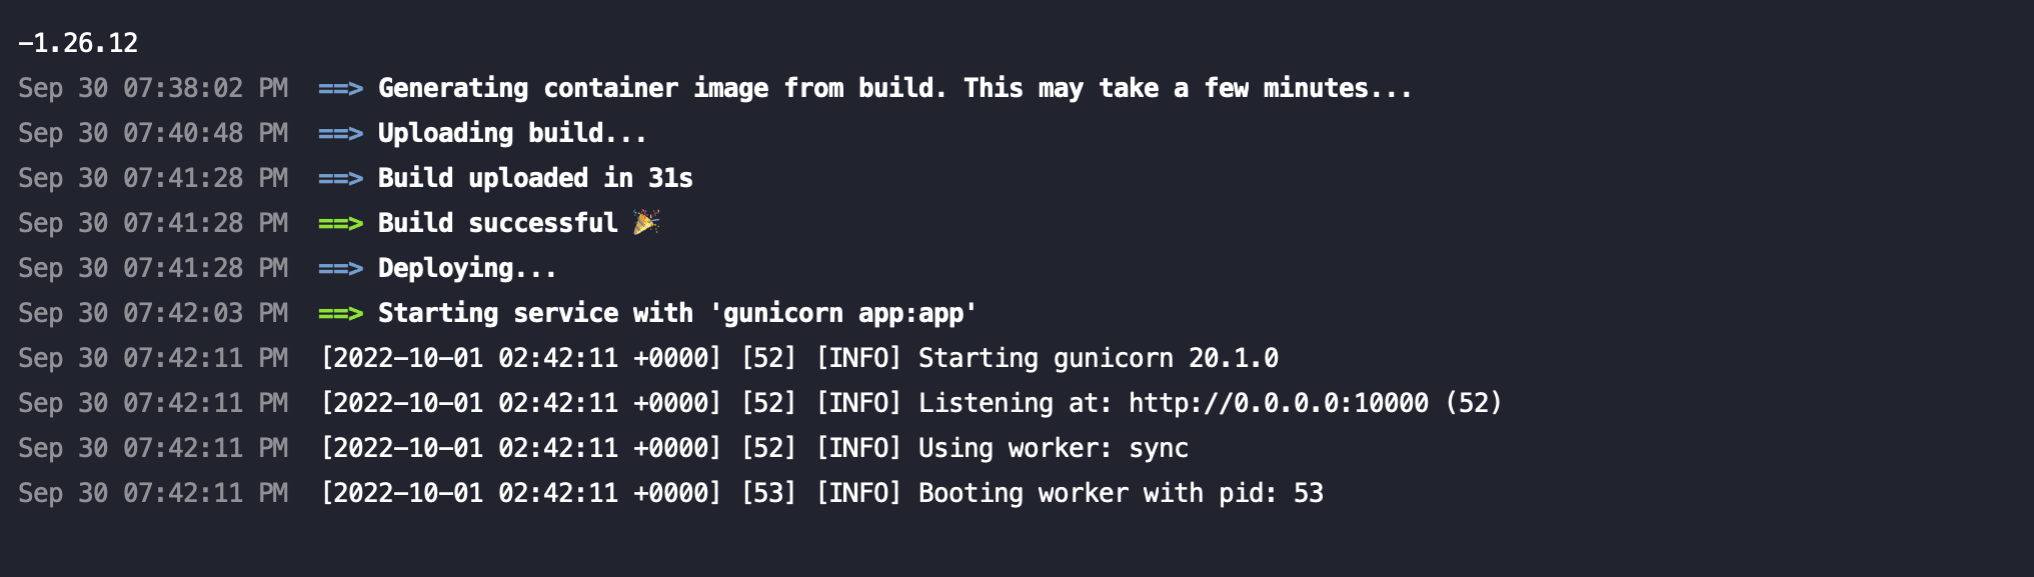
You can click on the "Logs" tab to see that Gunicorn is up and running:
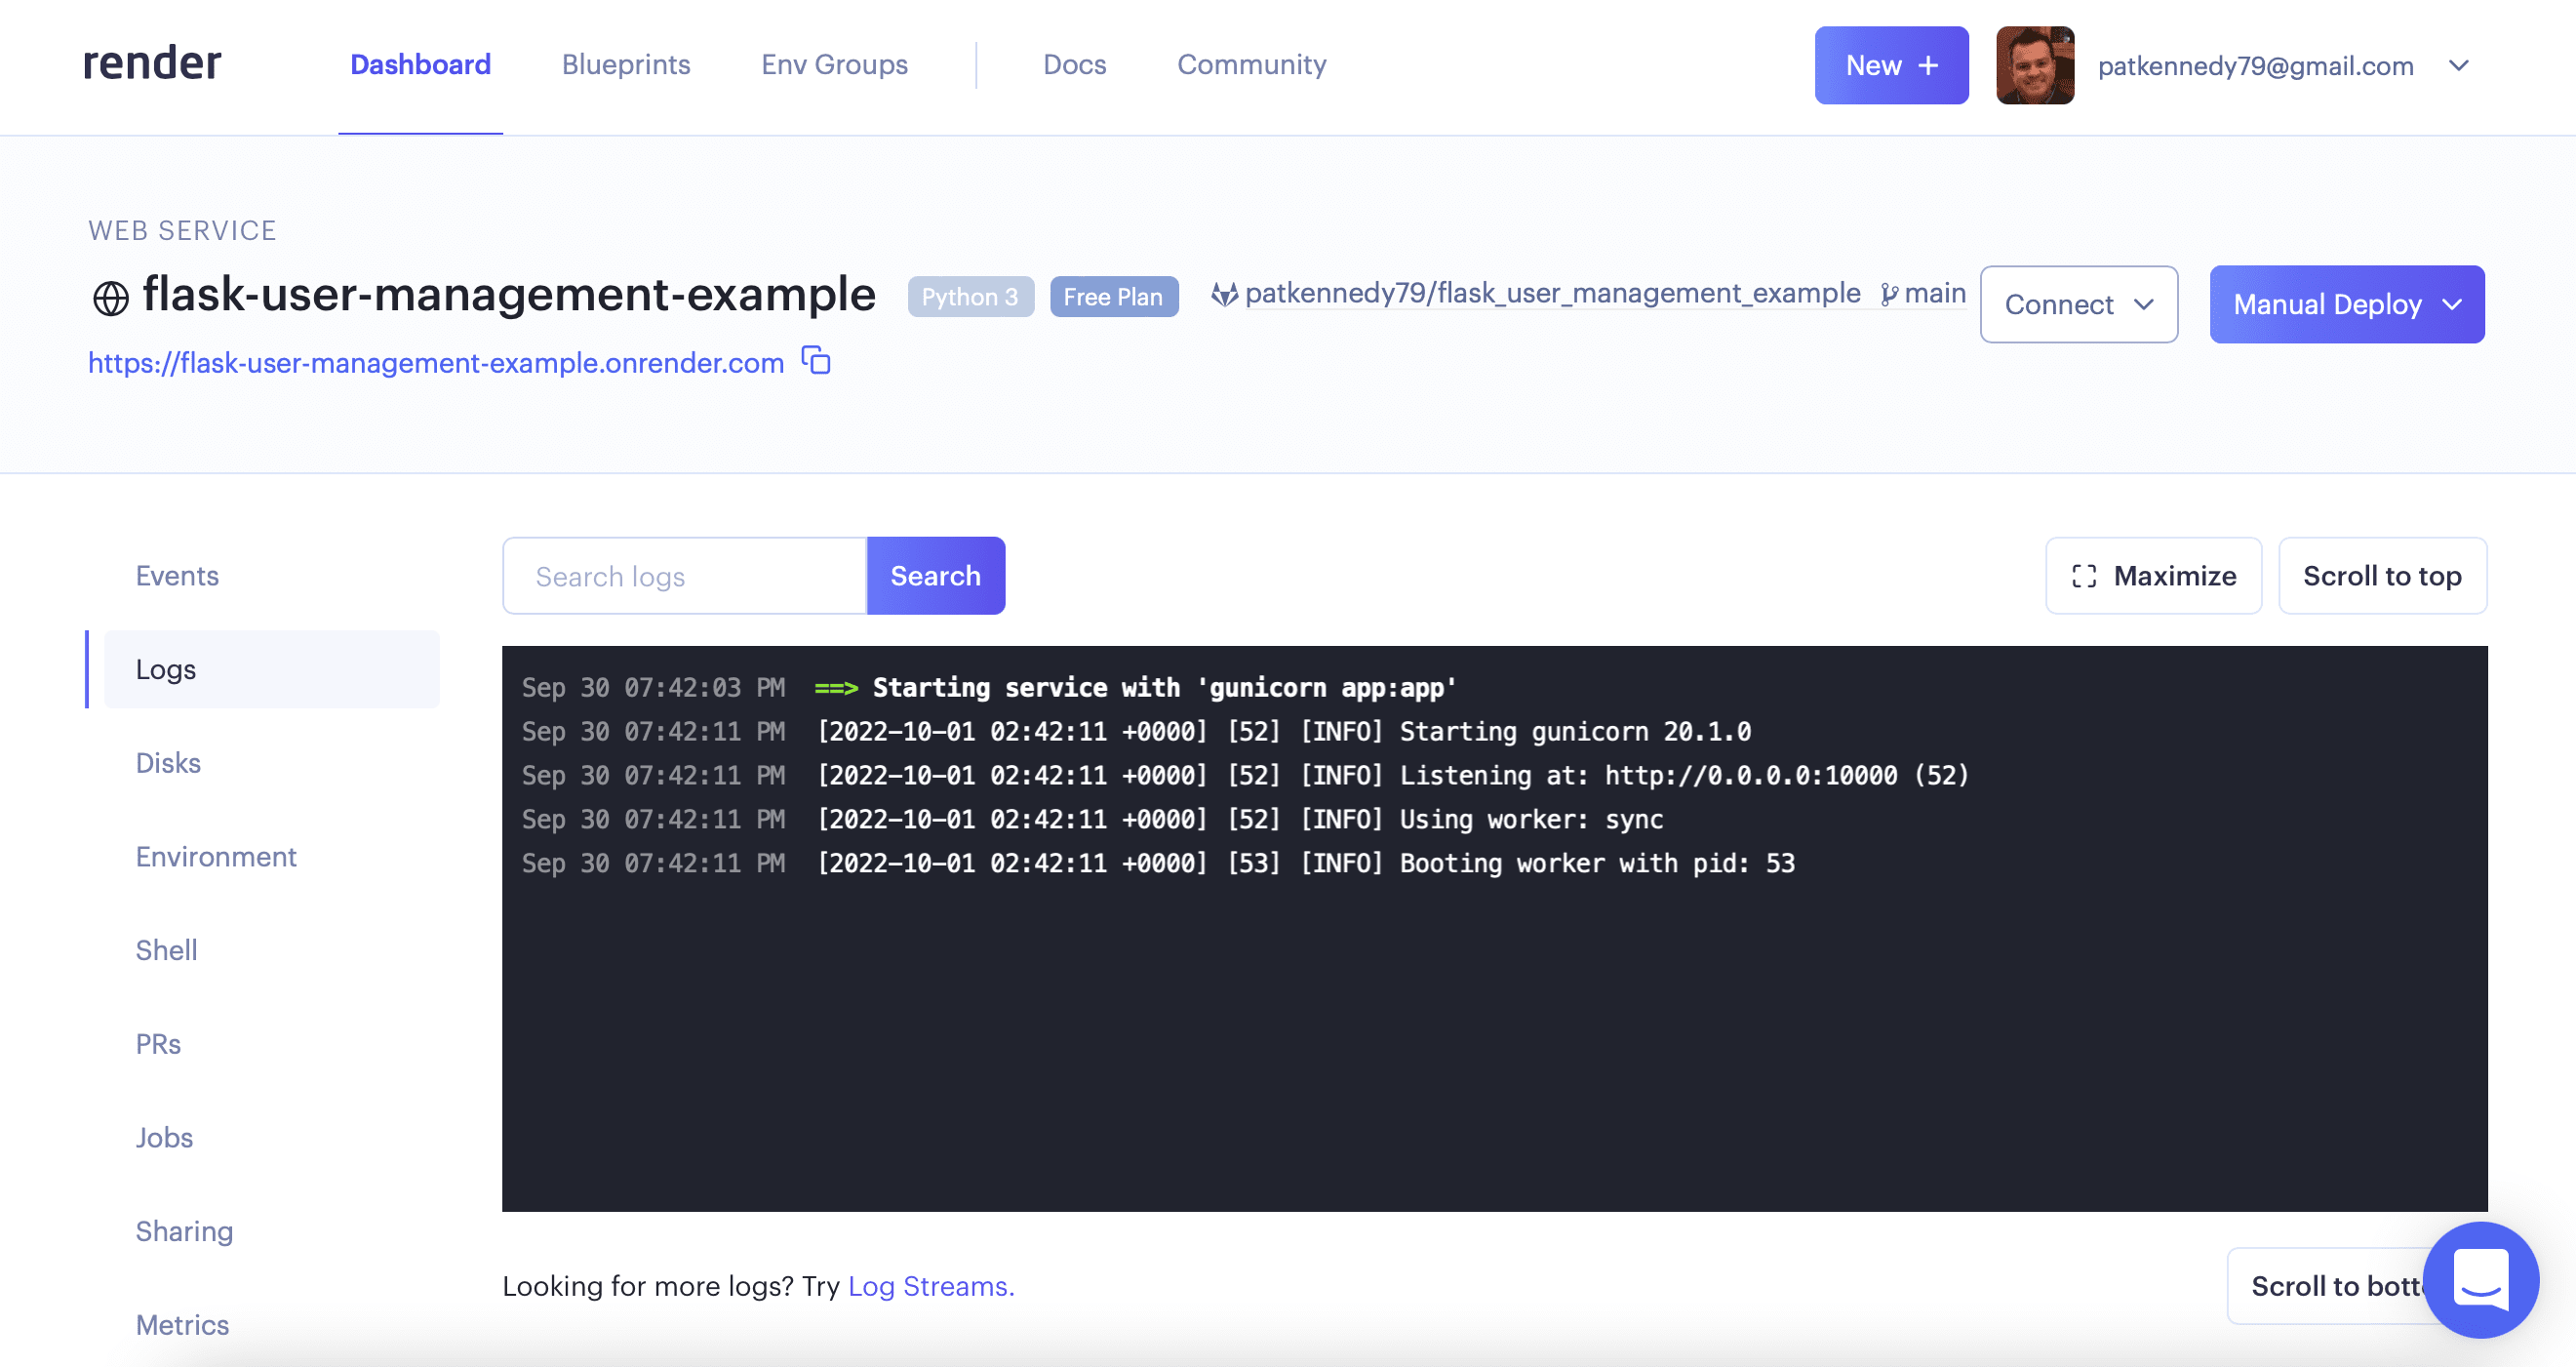
At this point, you can navigate to see the home page of the app. Just keep in mind that we still need to set up PostgreSQL!
PostgreSQL Service
To configure PostgreSQL, on your dashboard, click on the "New +" button again and select "PostgreSQL".
Configuration
Next, fill out the configuration for deploying the PostgreSQL database:
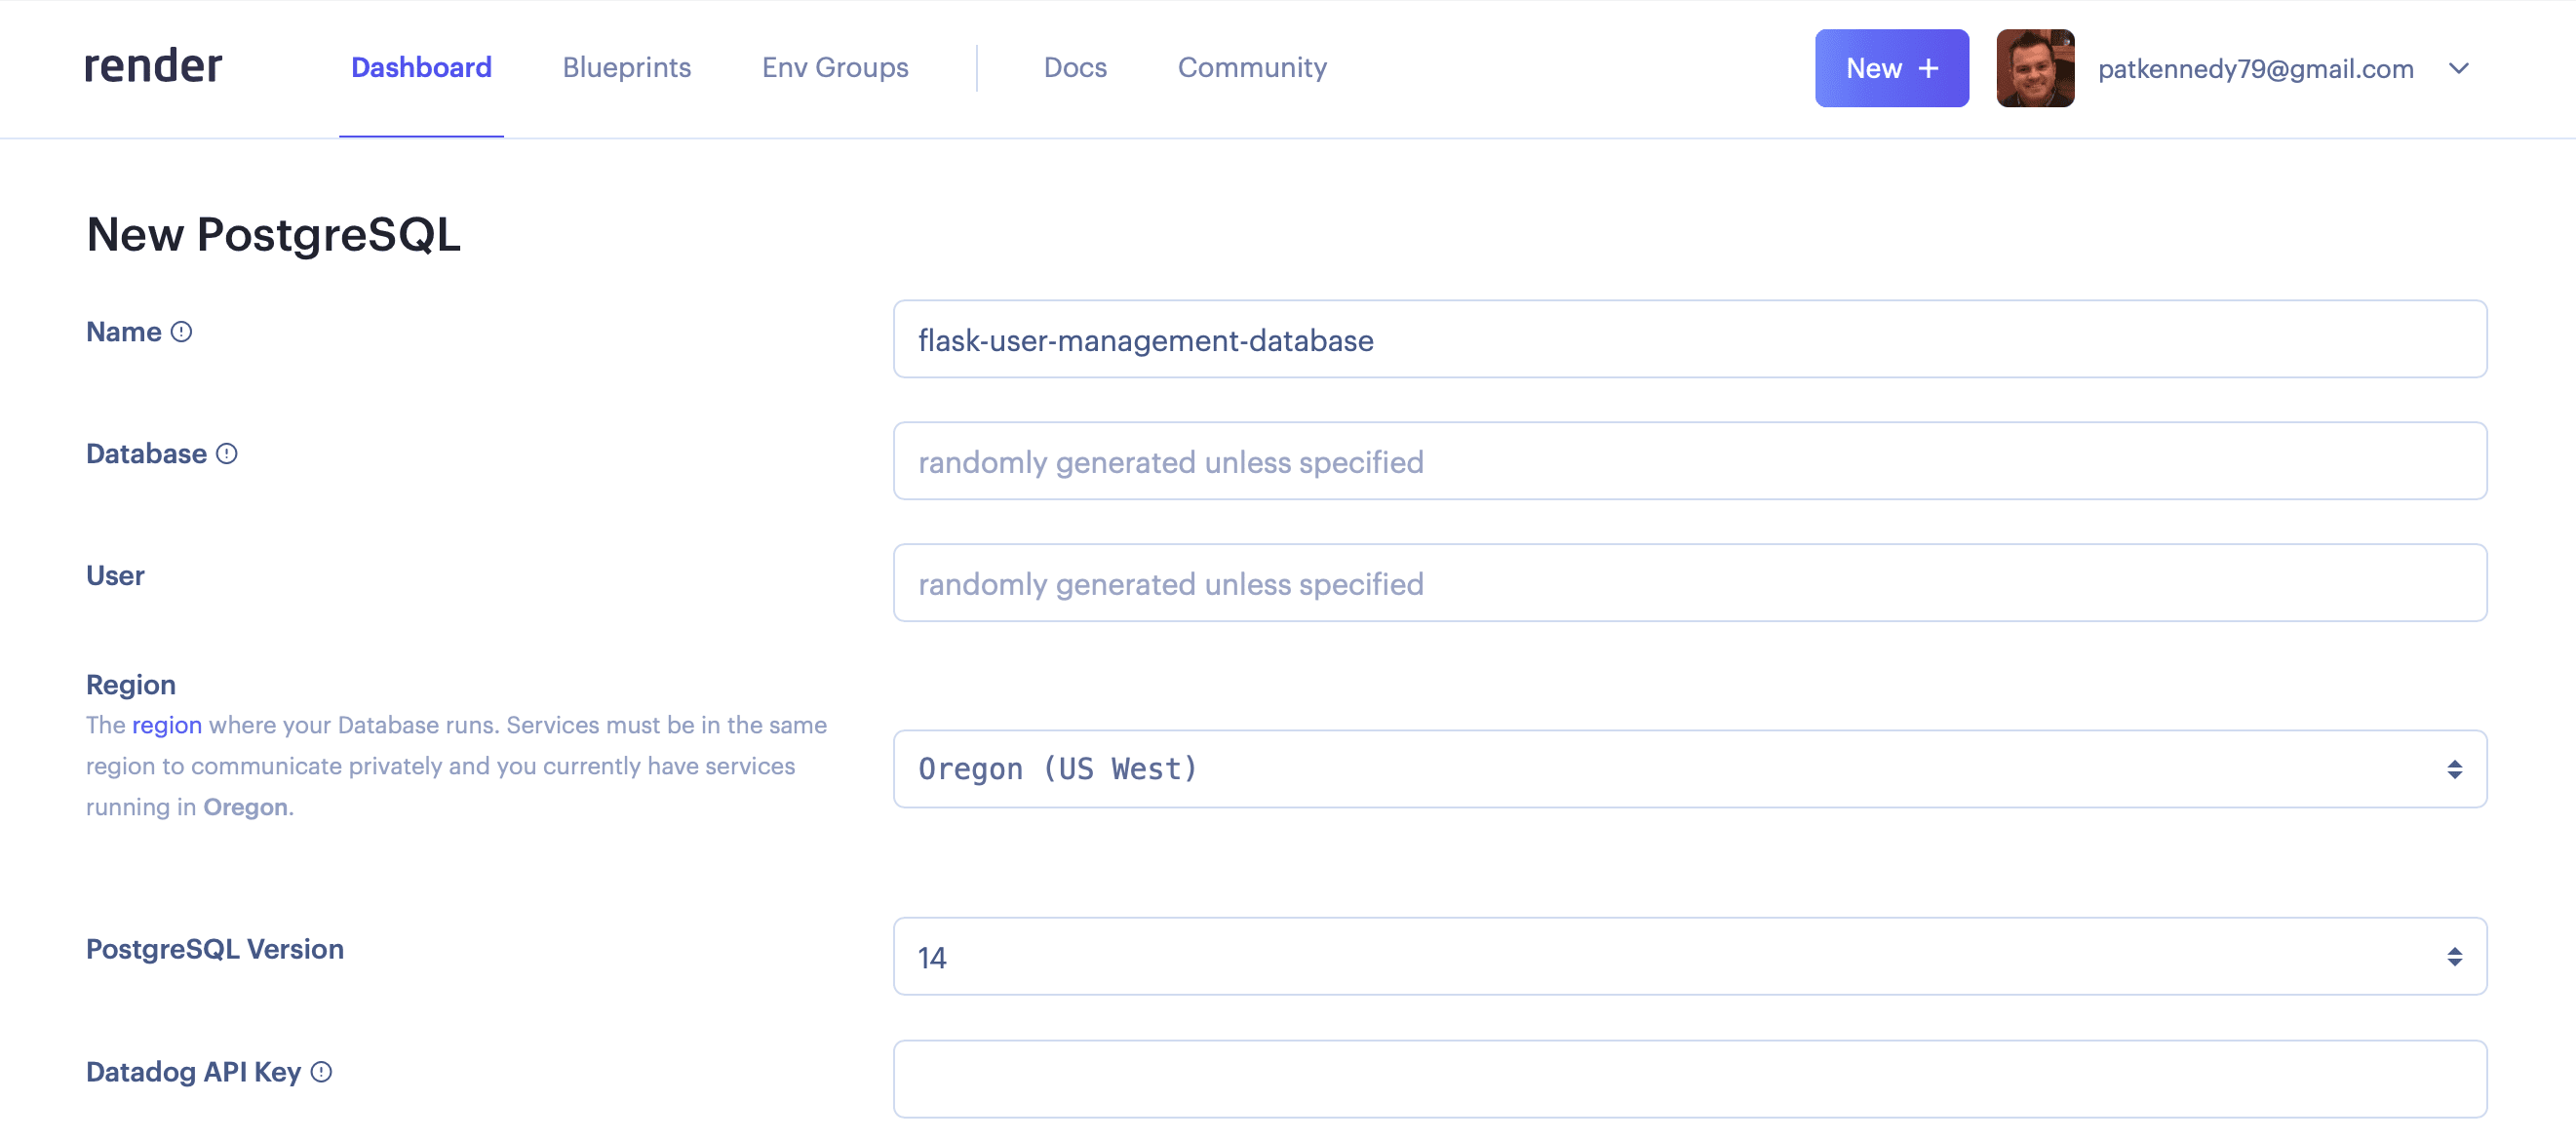
Fields:
- Name - enter a friendly (and unique) name for the database, which will be used to identify this database in the Render dashboard
- Database - enter a 'dbname' or leave blank to have it randomly generated
- User - enter a user name or leave blank to have automatically generated as
<Name>_user - Region - select the region closest to you
- PostgreSQL Version - select the required PostgreSQL version for your app ("14" is the default)
Select the Plan to use.
The free tier database will be destroyed after 90 days. Just keep that in mind. This plan is still a great option for experimenting with.
Click on "Create Database" at the bottom of the page.
When the database is done being created, you'll see the "Status" update to "Available":
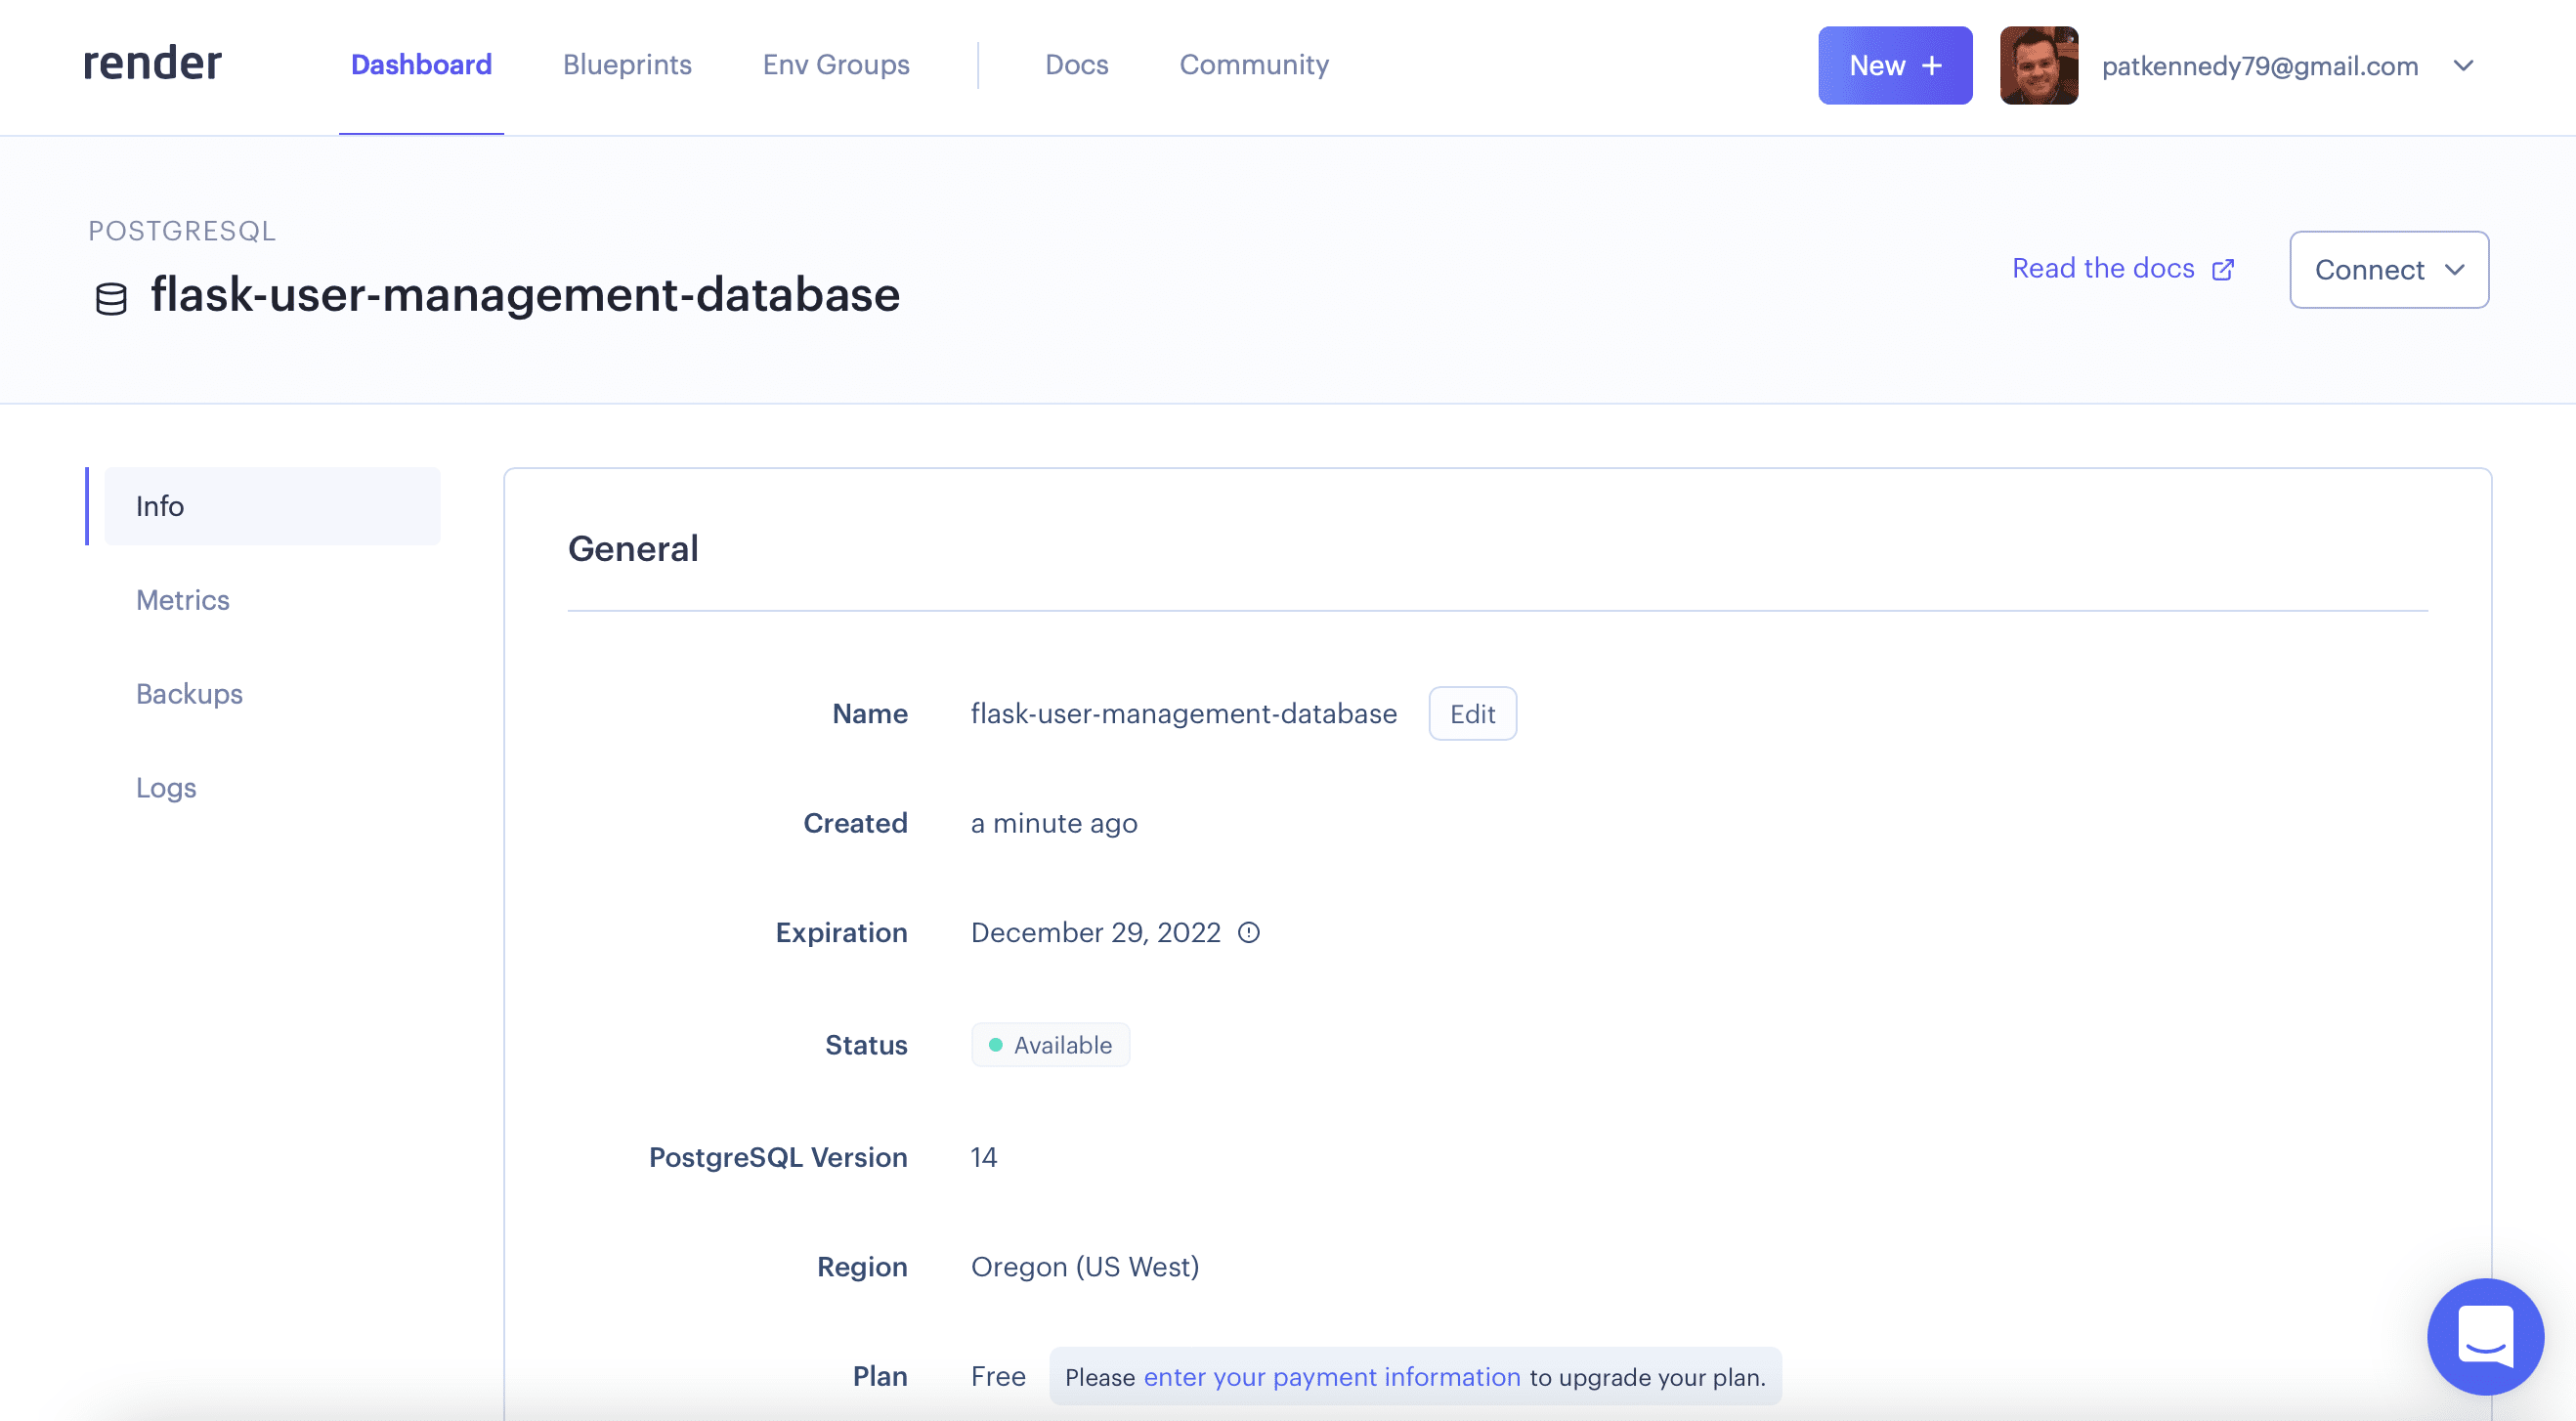
At this point, you'll need to scroll down to the "Connections" section and copy the "Internal Database URL":
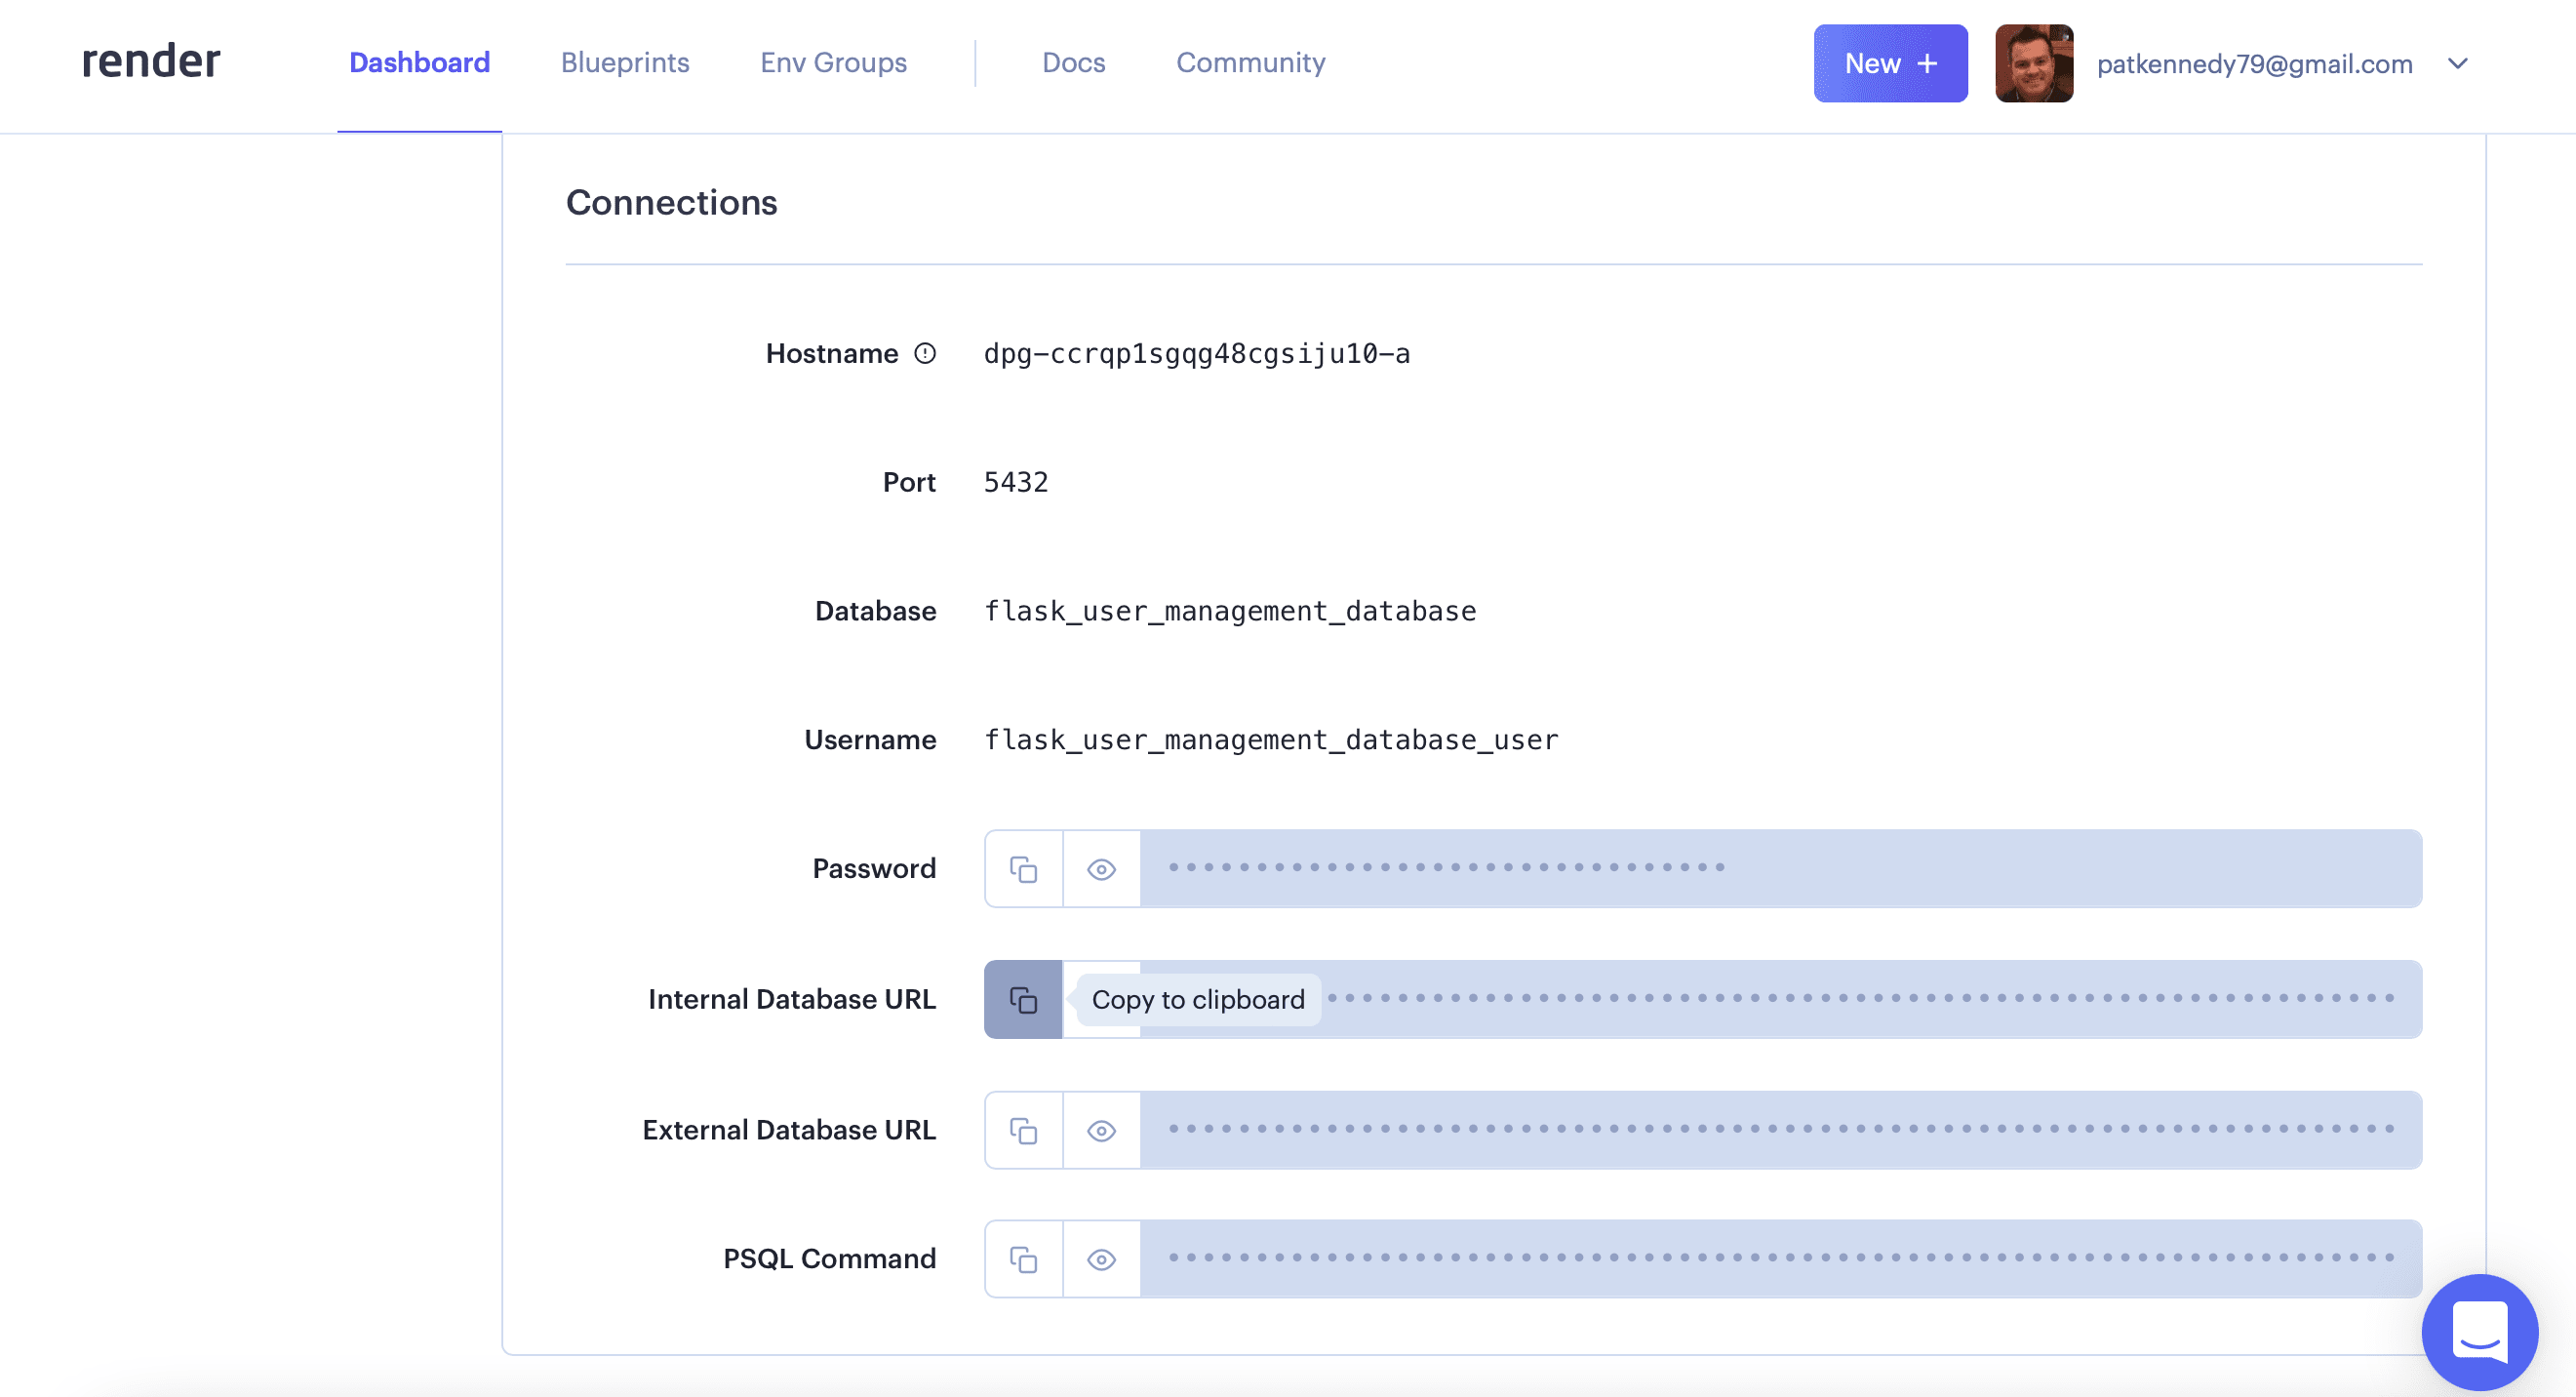
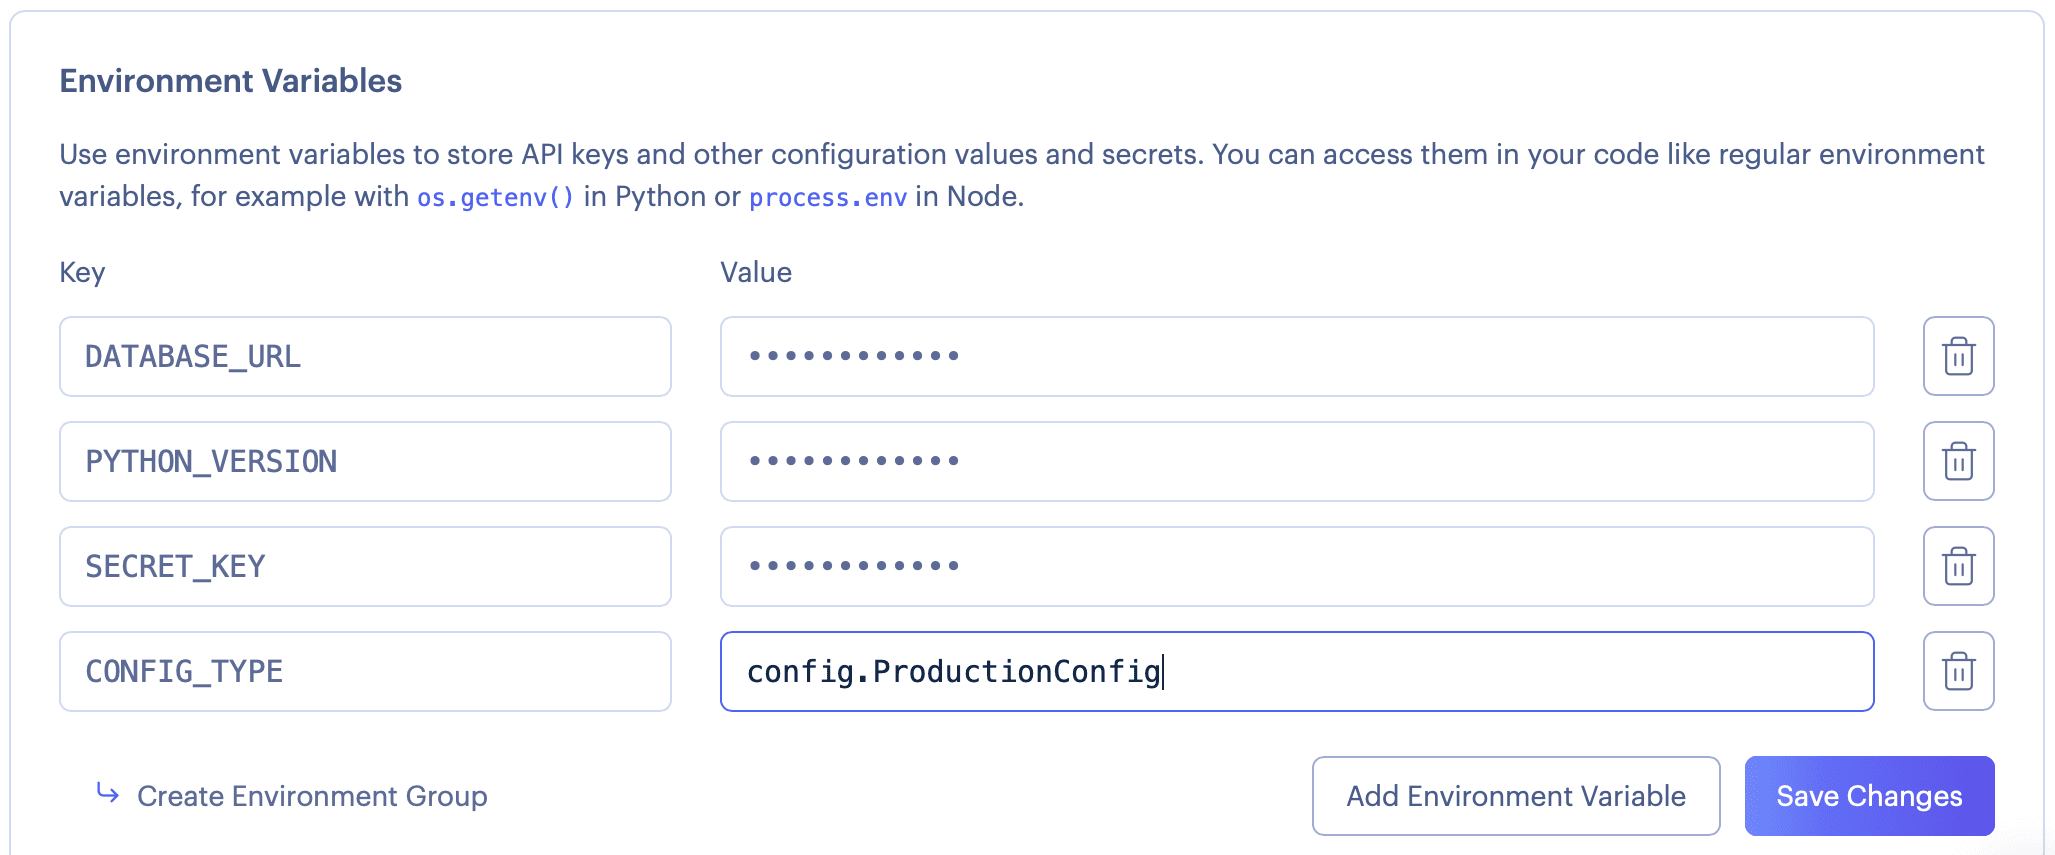
Update Environment Variables
Now, you'll want to set the database URL as an environment variable so you're application can use it.
Within the dashboard, select the "Web Service" you just created and then click the "Environment" tab.
You should see the "PYTHON_VERSION" environment variable, which we set earlier. Add the "DATABASE_URL" environment variable using the "Internal Database URL". Depending on how you configure your Flask app, you may need to add additional environment variables, such as "SECRET_KEY".
Check the deployment status by clicking on the "Events" tab:

You'll see that the "Deploy" is live once all the configuration changes are applied and the service is updated.
You can find the Flask app that I used for this tutorial at https://flask-user-management-app.onrender.com.
Conclusion
This tutorial provided a walk-through of deploying a Flask app with a PostgreSQL database to production using Render.
Render provides an excellent hosting solution for Flask apps. It’s a great experience to deploy an app and the free tier is great for experimenting with deploying.
If you're interested in learning more about Flask, check out my course on how to build, test, and deploy a Flask app: