 Abdulazeez Abdulazeez Adeshina
This tutorial will guide you through building a real-time inventory tracking dashboard using FastAPI, Postgres, and WebSockets. You'll learn how to stream live data updates from the backend to the frontend using Postgres' LISTEN/NOTIFY and FastAPI's WebSocket support.
Contents
Objectives
By the end of this tutorial, you should be able to:
- Develop a RESTful API with FastAPI for inventory management
- Implement real-time data updates using Postgres' LISTEN/NOTIFY
- Stream change events to the frontend via FastAPI WebSocket connections
- Track full document history of updated or deleted items using Postgres' triggers
- Build a responsive dashboard UI using HTML, CSS, and JavaScript
What Are We Building?
We'll create an inventory management API and a real-time dashboard that displays live inventory updates, quantity changes, and item deletions.
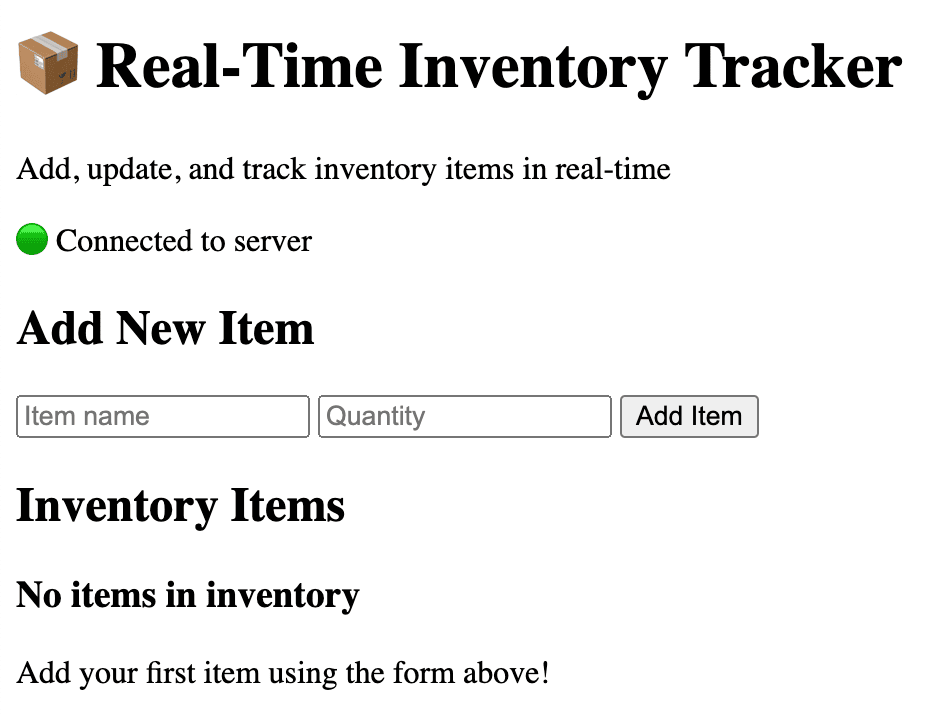
Final app:
Project Setup
We'll start by creating the project structure. The entire project will be housed in a single folder as we're making use of HTML, CSS, and JavaScript powered frontend.
Open your terminal and run:
$ mkdir fastapi-postgresql-realtime-tracker
$ cd fastapi-postgresql-realtime-tracker
Next, let's set up a virtual environment, create our base file and folder structure, and install the dependencies.
Start by creating and activating a virtual environment:
$ python -m venv venv
$ source venv/bin/activate
Create the following files and folders:
fastapi-postgresql-realtime-tracker
├── database.py
├── main.py
├── models.py
├── notify.py
├── requirements.txt
├── setup_database.sql
└── static
    ├── index.html
    └── index.js
Add the packages to the requirements.txt file:
asyncpg==0.30.0
fastapi==0.116.1
psycopg2-binary==2.9.10
pydantic==2.11.7
SQLAlchemy==2.0.41
uvicorn[standard]==0.35.0
websockets==15.0.1
Why these packages?
- fastapi and uvicorn power the web API.
- sqlalchemy is our ORM for database access.
- asyncpg and psycopg2-binary are Postgres drivers (async and sync).
- pydantic is for data validation.
- websockets is for WebSocket support.
Finally, install the packages:
(venv)$ pip install -r requirements.txt
Schema
Let's define the schema for our inventory data. This will determine how data is stored in Postgres and validated in our API.
Pydantic schemas are used for validating data along with serializing (JSON -> Python) and de-serializing (Python -> JSON).
Let's start by defining the SQLAlchemy Inventory model. In models.py, add the following:
from sqlalchemy import Column, Integer, String, DateTime
from sqlalchemy.sql import func

from database import Base


class Inventory(Base):
    __tablename__ = "inventory"

    id = Column(Integer, primary_key=True, index=True)
    name = Column(String, nullable=False)
    quantity = Column(Integer, nullable=False)
    updated_at = Column(DateTime(timezone=True), server_default=func.now(), onupdate=func.now())
In the code block above, we defined an inventory table, which will hold each record of an item created. The inventory model has four fields:
id: The unique ID of an item stored in the inventoryname: The name of the item. This field can not benull(empty)quantity: The quantity of the item stored in the inventory databaseupdated_at: A date time object to record the timestamp for updates made to the inventory item
With the inventory model in place, let's define the Pydantic schemas for API validation. Add the following to models.py:
class InventoryBase(BaseModel):
    name: str
    quantity: int


class InventoryCreate(InventoryBase):
    pass


class InventoryUpdate(BaseModel):
    quantity: int


class InventoryResponse(InventoryBase):
    id: int
    updated_at: datetime

    class Config:
        from_attributes = True
In the code block above, we defined four Pydantic schemas:
InventoryBase: TheInventoryBaseschema serves as the parent schema for our API validation. It has two required fields,nameof the item andquantityof the item.InventoryCreate: TheInventoryCreateschema is a child schema inheriting from theInventoryBaseschema. This will be used in the route for creating a new inventory item.InventoryUpdate: TheInventoryUpdateschema is a standalone schema. It has a non-nullable fieldquantity, indicating that only thequantityfield of the inventory item can be updated.InventoryResponse: TheInventoryResponseschema represents how the inventory data is rendered from the database to the user. It is a child schema of theInventoryBaseschema. TheConfigclass withfrom_attributes = Trueallows Pydantic to work seamlessly with SQLAlchemy models.
Don't forget to update the imports:
from datetime import datetime

from pydantic import BaseModel
from sqlalchemy import Column, Integer, String, DateTime
from sqlalchemy.sql import func

from database import Base
Database Setup
Now that we have our schema in place, let's set up Postgres and configure our application to communicate with it. Then, we'll configure the database connection and set up our tables and triggers for real-time notifications.
Step 1: Install Postgres
If you don't have Postgres installed, follow the official installation guide. Once installed, start the Postgres service and verify it's running:
$ psql postgres
You should see the Postgres prompt. You can also check the version:
$ psql --version
This tutorial uses Postgres v15.4, but any recent version should work.
Step 2: Configure the Database Connection
In database.py, add the following:
import os

from sqlalchemy import create_engine
from sqlalchemy.ext.asyncio import create_async_engine, AsyncSession
from sqlalchemy.ext.declarative import declarative_base
from sqlalchemy.orm import sessionmaker


# Database configuration
DATABASE_URL = os.getenv("DATABASE_URL", "postgresql://localhost/inventory_db")
ASYNC_DATABASE_URL = os.getenv("ASYNC_DATABASE_URL", "postgresql+asyncpg://localhost/inventory_db")

# Synchronous engine for migrations and initial setup
engine = create_engine(DATABASE_URL)
SessionLocal = sessionmaker(autocommit=False, autoflush=False, bind=engine)

# Asynchronous engine for FastAPI
async_engine = create_async_engine(ASYNC_DATABASE_URL)
async_session = sessionmaker(async_engine, class_=AsyncSession, expire_on_commit=False)

Base = declarative_base()
In the code block above, we start by importing the create_engine and create_async_engine method from SQLAlchemy to allow us create a synchronous and asynchronous engine object to facilitate database communication to our Postgres instance. The sessionmaker is imported to create a session object for use within the application using the database URL set for both the synchronous and asynchronous instances. The synchronous instance is for migrations and initial setup, and the asynchronous instance is for our FastAPI application.
Next, add the following helper functions to get database sessions:
def get_db():
    """Dependency to get database session"""
    db = SessionLocal()
    try:
        yield db
    finally:
        db.close()


async def get_async_db():
    """Dependency to get async database session"""
    async with async_session() as session:
        yield session
In the code block above, we define the methods to yield active sessions for both synchronous (get_db) and asynchronous (get_async_db). These functions will be used as dependencies in our FastAPI routes to provide database sessions.
Step 3: Create the Database Setup Script
In the previous step, we initialized the variables and methods necessary for interacting with our database from the application. Now, we'll create a SQL script to set up our database tables and create the trigger function for notifications. Create a file called setup_database.sql, in the project root, and add the following SQL commands:
-- Create the inventory table
CREATE TABLE IF NOT EXISTS inventory (
    id SERIAL PRIMARY KEY,
    name TEXT NOT NULL,
    quantity INTEGER NOT NULL,
    updated_at TIMESTAMPTZ DEFAULT NOW()
);
In the code block above, we created the inventory table and defined its associated fields: id, name, quantity and updated_at.
Next, add the following to the same file to create a trigger function to send a real-time notification whenever a row in the inventory table is inserted, updated, or deleted:
-- Create the trigger function for notifications
CREATE OR REPLACE FUNCTION notify_inventory_changes() RETURNS trigger AS $$
DECLARE
  payload JSON;
BEGIN
  IF (TG_OP = 'DELETE') THEN
    payload = json_build_object('event', TG_OP, 'data', row_to_json(OLD));
  ELSE
    payload = json_build_object('event', TG_OP, 'data', row_to_json(NEW));
  END IF;
  PERFORM pg_notify('inventory_channel', payload::text);
  RETURN COALESCE(NEW, OLD);
END;
$$ LANGUAGE plpgsql;
Let's understand what the code above does:
- Line 1 defines a new trigger function,
notify_inventory_changes, that will be used in a table trigger. The function will return atriggertype, as required for Postgres triggers. - In lines 2 - 3, we defined a variable called
payloadof typeJSON. The variable will hold the notification data to be sent. - Lines 4 - 12 hold the core logic for the notification trigger:
- Line 4 begins the main function logic, and lines 5 - 7 builds the
payloadfrom old row data if the database operation is of typeDELETE. - Lines 8 - 10 builds up the
payloadfrom new row data if the database operation type is anINSERTor anUPDATE. - Line 11 sends the payload as a notification on the
inventory_channelusing Postgres'pg_notifyfunction. - Line 12 returns either the new or old row, as required by trigger functions. This ensures the trigger works for all operation types.
- Line 4 begins the main function logic, and lines 5 - 7 builds the
- Line 13 specifies that the function is written in Postgres' procedural language.
Next, let's create the trigger:
-- Create the trigger
DROP TRIGGER IF EXISTS inventory_trigger ON inventory;
CREATE TRIGGER inventory_trigger
AFTER INSERT OR UPDATE OR DELETE ON inventory
FOR EACH ROW EXECUTE FUNCTION notify_inventory_changes();
Here, we removed the old trigger if it doesn't exist and created a new trigger. We then specified that the trigger fires after an INSERT, UPDATE, or DELETE on the inventory table, for each row affected.
Routes
Now let's create the API routes to add, update, and delete inventory items. These routes will trigger changes in the database, which in turn will generate real-time notifications.
Step 1: WebSocket Connection Manager
WebSockets provide a persistent, full-duplex communication channel between a client and server over a single TCP connection, enabling real-time data exchange. Unlike traditional HTTP, WebSockets allow both the client and server to send messages to each other at any time without repeatedly reopening connections.
Let's start by configuring the WebSocket connection manager that'll broadcast events from the database in real-time. In main.py, add the following:
import asyncio
import logging
import json
from contextlib import asynccontextmanager
from typing import List

from fastapi import FastAPI, Depends, HTTPException, WebSocket, WebSocketDisconnect
from fastapi.responses import HTMLResponse
from fastapi.staticfiles import StaticFiles
from sqlalchemy import select
from sqlalchemy.ext.asyncio import AsyncSession
from sqlalchemy.orm import Session

from database import get_db, get_async_db, engine, Base, ASYNC_DATABASE_URL
from models import Inventory, InventoryCreate, InventoryUpdate, InventoryResponse
from notify import PostgresNotifier


# Configure logging
logging.basicConfig(level=logging.INFO)
logger = logging.getLogger(__name__)


# WebSocket connection manager
class ConnectionManager:
    def __init__(self):
        self.active_connections: List[WebSocket] = []

    async def connect(self, websocket: WebSocket):
        await websocket.accept()
        self.active_connections.append(websocket)
        logger.info(f"WebSocket connected. Total connections: {len(self.active_connections)}")

    def disconnect(self, websocket: WebSocket):
        self.active_connections.remove(websocket)
        logger.info(f"WebSocket disconnected. Total connections: {len(self.active_connections)}")

    async def broadcast(self, message: dict):
        disconnected = []
        for connection in self.active_connections:
            try:
                await connection.send_text(json.dumps(message))
            except Exception as e:
                logger.error(f"Error sending message to WebSocket: {e}")
                disconnected.append(connection)
        # Remove disconnected connections
        for connection in disconnected:
            self.active_connections.remove(connection)
Here, we defined the ConnectionManager class with three methods:
connect(): This method accepts a new WebSocket connection and adds it to the list of active connections.disconnect(): This method removes a WebSocket connection from the active list when the client disconnects or the connection is closed.broadcast(): This method sends a message to all connection clients and cleans up any disconnected clients.
Step 2: Application Lifecycle and WebSocket Notification Handling
Now, let's set up the application lifecycle and the logic for handling Postgres notifications and broadcasting them to WebSocket clients.
Add the following to main.py:
# Global instances
manager = ConnectionManager()
notifier = None


async def handle_postgres_notification(data: dict):
    """Handle PostgreSQL notifications and broadcast to WebSocket clients"""
    await manager.broadcast(data)
So, we defined a-
- Global instance of the WebSocket
ConnectionManagerclass handle_postgres_notification()function to handle Postgres notifications and broadcast to WebSocket clients
Next, add the following lifespan function that runs on our FastAPI startup to main.py:
@asynccontextmanager
async def lifespan(app: FastAPI):
    global notifier

    # Create tables
    Base.metadata.create_all(bind=engine)
    logger.info("Database tables created")

    # Start PostgreSQL listener
    notifier = PostgresNotifier(ASYNC_DATABASE_URL.replace("+asyncpg", ""))
    notifier.add_listener(handle_postgres_notification)

    # Start listening in background
    task = asyncio.create_task(start_postgres_listener())

    yield

    # Shutdown
    task.cancel()
    if notifier:
        await notifier.disconnect()
In the lifespan function above, we instructed our FastAPI application to:
- Create tables on startup.
- Start the the Postgres listener
PostgresNotifier. We'll define this in the next section. - Create a background task for the listener to eavesdrop on all database interactions.
- Cancel the task and shutdown the notifier once the FastAPI application is shut down.
Next, create an asynchronous function to start the listener:
async def start_postgres_listener():
    """Start the PostgreSQL listener"""
    try:
        await notifier.listen_to_channel('inventory_channel')
        await notifier.start_listening()
    except Exception as e:
        logger.error(f"Error in PostgreSQL listener: {e}")
Step 3: FastAPI App and Static Files
In the previous step, we designed the application lifecycle and WebSocket notification handling. Now, create the FastAPI app and mount the static files for the frontend in main.py:
app = FastAPI(title="Real-Time Inventory Tracker", lifespan=lifespan)

# Mount static files
app.mount("/static", StaticFiles(directory="static"), name="static")
Next, we'll define the API routes.
Step 4: API Routes
Define the following API routes in main.py:
@app.get("/")
async def read_root():
    """Serve the main page"""
    with open("static/index.html", "r") as f:
        html_content = f.read()
    return HTMLResponse(content=html_content)


@app.get("/api/inventory", response_model=List[InventoryResponse])
async def get_inventory(db: AsyncSession = Depends(get_async_db)):
    """Get all inventory items"""
    result = await db.execute(select(Inventory).order_by(Inventory.updated_at.desc()))
    items = result.scalars().all()
    return items


@app.post("/api/inventory", response_model=InventoryResponse)
async def create_inventory_item(
    item: InventoryCreate,
    db: AsyncSession = Depends(get_async_db)
):
    """Create a new inventory item"""
    db_item = Inventory(**item.dict())
    db.add(db_item)
    await db.commit()
    await db.refresh(db_item)
    return db_item


@app.put("/api/inventory/{item_id}", response_model=InventoryResponse)
async def update_inventory_item(
    item_id: int,
    item_update: InventoryUpdate,
    db: AsyncSession = Depends(get_async_db)
):
    """Update an inventory item's quantity"""
    result = await db.execute(select(Inventory).where(Inventory.id == item_id))
    db_item = result.scalar_one_or_none()

    if not db_item:
        raise HTTPException(status_code=404, detail="Item not found")

    db_item.quantity = item_update.quantity
    await db.commit()
    await db.refresh(db_item)
    return db_item


@app.delete("/api/inventory/{item_id}")
async def delete_inventory_item(
    item_id: int,
    db: AsyncSession = Depends(get_async_db)
):
    """Delete an inventory item"""
    result = await db.execute(select(Inventory).where(Inventory.id == item_id))
    db_item = result.scalar_one_or_none()

    if not db_item:
        raise HTTPException(status_code=404, detail="Item not found")

    await db.delete(db_item)
    await db.commit()
    return {"message": "Item deleted successfully"}
In the code above, we defined the routes to create, update, and delete inventory items using the asynchronous session we created. Let's add the WebSocket endpoint in the next step to allow us to broadcast changes from the database to connected clients.
Step 5: WebSocket Endpoint
Add the WebSocket endpoint to main.py:
@app.websocket("/ws")
async def websocket_endpoint(websocket: WebSocket):
    """WebSocket endpoint for real-time updates"""
    await manager.connect(websocket)
    try:
        while True:
            # Keep connection alive
            await websocket.receive_text()
    except WebSocketDisconnect:
        manager.disconnect(websocket)
Here, we defined the WebSocket route to accept WebSocket connections from clients and remove disconnected clients from the connection manager.
Database Listener
To receive real-time updates from Postgres, we need a listener that reacts to LISTEN/NOTIFY events.
Add the following code to notify.py:
import asyncio
import json
import logging
from typing import Callable

import asyncpg


logger = logging.getLogger(__name__)


class PostgresNotifier:
    def __init__(self, database_url: str):
        self.database_url = database_url
        self.connection = None
        self.listeners = []

    async def connect(self):
        """Connect to PostgreSQL"""
        try:
            self.connection = await asyncpg.connect(self.database_url)
            logger.info("Connected to PostgreSQL for notifications")
        except Exception as e:
            logger.error(f"Failed to connect to PostgreSQL: {e}")
            raise

    async def disconnect(self):
        """Disconnect from PostgreSQL"""
        if self.connection:
            await self.connection.close()
            logger.info("Disconnected from PostgreSQL")
We defined the PostgresNotifier class, which takes the database_url as an argument. The connect() method, as the name implies, connects to the database URL provided. Similarly, the disconnect() method closes the connection from the Postgres database.
Next, let's add the methods to add a listener and listen to a channel:
def add_listener(self, callback: Callable):
    """Add a callback function to handle notifications"""
    self.listeners.append(callback)

async def listen_to_channel(self, channel: str):
    """Listen to a specific PostgreSQL channel"""
    if not self.connection:
        await self.connect()

    await self.connection.add_listener(channel, self._handle_notification)
    logger.info(f"Listening to channel: {channel}")
Here, we defined two new methods:
add_listenerappends a callback function to handle notifications from the triggers.listen_to_channellistens to a specific Postgres channel for changes. For our application, we'll be listening to theinventory_channel.
Next, let's define methods to handle incoming notifications and control the listening:
async def _handle_notification(self, connection, pid, channel, payload):
    """Handle incoming notifications"""
    try:
        data = json.loads(payload)
        logger.info(f"Received notification: {data}")

        # Notify all registered listeners
        for listener in self.listeners:
            await listener(data)
    except Exception as e:
        logger.error(f"Error handling notification: {e}")

async def start_listening(self):
    """Start the listening loop"""
    if not self.connection:
        await self.connect()

    try:
        while True:
            await asyncio.sleep(0.1)  # Keep the connection alive
    except asyncio.CancelledError:
        logger.info("Listening cancelled")
    except Exception as e:
        logger.error(f"Error in listening loop: {e}")
    finally:
        await self.disconnect()
Notes:
- The
_handle_notifications()method takes the connection, process ID, channel name, and payload. The method parses thepayloadand notifies all registered listeners. - The
start_listening()method keeps the Postgres connection alive and ensures the process continues to receive connections until the connection to the database is terminated.
Creating the Frontend
With the backend in place, let's build a simple frontend that updates in real-time as inventory items are created, updated, or deleted.
Step 1: HTML Structure
Add the following to static/index.html:
<!DOCTYPE html>
<html lang="en">
<head>
    <meta charset="UTF-8">
    <meta name="viewport" content="width=device-width, initial-scale=1.0">
    <title>Real-Time Inventory Tracker</title>
    <!-- Styles omitted for brevity, use the styles from the original tutorial -->
</head>
<body>
    <div class="container">
        <div class="header">
            <h1>📦 Real-Time Inventory Tracker</h1>
            <p>Add, update, and track inventory items in real-time</p>
        </div>
        <div class="card">
            <div id="connection-status" class="status disconnected">
                🔴 Disconnected from server
            </div>
            <div class="form-section">
                <h2>Add New Item</h2>
                <form id="add-item-form">
                    <div class="form-group">
                        <input type="text" id="item-name" placeholder="Item name" required>
                        <input type="number" id="item-quantity" placeholder="Quantity" min="0" required>
                        <button type="submit" class="btn">Add Item</button>
                    </div>
                </form>
            </div>
            <div class="inventory-list">
                <h2>Inventory Items</h2>
                <div id="inventory-container">
                    <div class="loading">Loading inventory...</div>
                </div>
            </div>
        </div>
    </div>
    <script src="static/index.js"></script>
</body>
</html>
This code sets up the structure for the inventory dashboard, including a form for adding new items and a container for displaying the inventory list.
Step 2: JavaScript Application Logic
Next, add the following code to static/index.js:
class InventoryApp {
    constructor() {
        this.websocket = null;
        this.inventoryItems = new Map();
        this.isConnected = false;
        this.pendingUpdates = new Set();
        this.init();
    }
    init() {
        this.setupEventListeners();
        this.connectWebSocket();
        this.loadInitialData();
    }
    setupEventListeners() {
        const form = document.getElementById('add-item-form');
        form.addEventListener('submit', (e) => this.handleAddItem(e));
    }
    connectWebSocket() {
        const protocol = window.location.protocol === 'https:' ? 'wss:' : 'ws:';
        const wsUrl = `${protocol}//${window.location.host}/ws`;
        this.websocket = new WebSocket(wsUrl);
        this.websocket.onopen = () => {
            this.updateConnectionStatus(true);
        };
        this.websocket.onmessage = (event) => {
            try {
                const data = JSON.parse(event.data);
                this.handleWebSocketMessage(data);
            } catch (error) {
                console.error('Error parsing WebSocket message:', error);
            }
        };
        this.websocket.onclose = () => {
            this.updateConnectionStatus(false);
            setTimeout(() => this.connectWebSocket(), 3000);
        };
        this.websocket.onerror = (error) => {
            console.error('WebSocket error:', error);
        };
    }
    updateConnectionStatus(connected) {
        this.isConnected = connected;
        const statusElement = document.getElementById('connection-status');
        if (connected) {
            statusElement.className = 'status connected';
            statusElement.textContent = '🟢 Connected to server';
        } else {
            statusElement.className = 'status disconnected';
            statusElement.textContent = '🔴 Disconnected from server';
        }
    }
    async loadInitialData() {
        try {
            const response = await fetch('/api/inventory');
            if (response.ok) {
                const items = await response.json();
                this.inventoryItems.clear();
                items.forEach(item => {
                    this.inventoryItems.set(item.id, item);
                });
                this.renderInventory();
            }
        } catch (error) {
            this.showError('Failed to load inventory data');
        }
    }
    handleWebSocketMessage(data) {
        const {event, data: itemData} = data;
        switch (event) {
            case 'INSERT':
                this.inventoryItems.set(itemData.id, itemData);
                this.renderInventory();
                this.showNotification(`Added: ${itemData.name}`, 'success');
                break;
            case 'UPDATE':
                this.inventoryItems.set(itemData.id, itemData);
                this.renderInventory();
                this.showNotification(`Updated: ${itemData.name}`, 'info');
                break;
            case 'DELETE':
                this.inventoryItems.delete(itemData.id);
                this.renderInventory();
                this.showNotification(`Deleted: ${itemData.name}`, 'warning');
                break;
            default:
                break;
        }
    }
    async handleAddItem(event) {
        event.preventDefault();
        const nameInput = document.getElementById('item-name');
        const quantityInput = document.getElementById('item-quantity');
        const name = nameInput.value.trim();
        const quantity = parseInt(quantityInput.value);
        if (!name || quantity < 0) {
            this.showError('Please enter a valid item name and quantity');
            return;
        }
        try {
            const response = await fetch('/api/inventory', {
                method: 'POST',
                headers: {'Content-Type': 'application/json'},
                body: JSON.stringify({name, quantity}),
            });
            if (response.ok) {
                nameInput.value = '';
                quantityInput.value = '';
            } else {
                const error = await response.json();
                this.showError(error.detail || 'Failed to add item');
            }
        } catch (error) {
            this.showError('Failed to add item');
        }
    }
    async updateItemQuantity(id, newQuantity) {
        if (this.pendingUpdates.has(id)) return;
        this.pendingUpdates.add(id);
        const item = this.inventoryItems.get(id);
        if (item) {
            const originalQuantity = item.quantity;
            item.quantity = newQuantity;
            this.renderInventory();
            try {
                const response = await fetch(`/api/inventory/${id}`, {
                    method: 'PUT',
                    headers: {'Content-Type': 'application/json'},
                    body: JSON.stringify({quantity: newQuantity}),
                });
                if (!response.ok) {
                    item.quantity = originalQuantity;
                    this.renderInventory();
                    const error = await response.json();
                    this.showError(error.detail || 'Failed to update item');
                }
            } catch (error) {
                item.quantity = originalQuantity;
                this.renderInventory();
                this.showError('Failed to update item');
            } finally {
                this.pendingUpdates.delete(id);
            }
        }
    }
    async deleteItem(id) {
        if (!confirm('Are you sure you want to delete this item?')) return;
        const itemElement = document.querySelector(`[data-item-id="${id}"]`);
        if (itemElement) itemElement.style.opacity = '0.5';
        try {
            const response = await fetch(`/api/inventory/${id}`, {method: 'DELETE'});
            if (!response.ok) {
                if (itemElement) itemElement.style.opacity = '1';
                const error = await response.json();
                this.showError(error.detail || 'Failed to delete item');
            }
        } catch (error) {
            if (itemElement) itemElement.style.opacity = '1';
            this.showError('Failed to delete item');
        }
    }
    renderInventory() {
        const container = document.getElementById('inventory-container');
        if (this.inventoryItems.size === 0) {
            container.innerHTML = `
                <div class="empty-state">
                    <h3>No items in inventory</h3>
                    <p>Add your first item using the form above!</p>
                </div>
            `;
            return;
        }
        const sortedItems = Array.from(this.inventoryItems.values())
            .sort((a, b) => new Date(b.updated_at) - new Date(a.updated_at));
        container.innerHTML = sortedItems.map(item => this.renderInventoryItem(item)).join('');
    }
    renderInventoryItem(item) {
        const updatedAt = new Date(item.updated_at).toLocaleString();
        const isUpdating = this.pendingUpdates.has(item.id);
        return `
            <div class="inventory-item ${isUpdating ? 'updating' : ''}" data-item-id="${item.id}">
                <div class="item-info">
                    <div class="item-name">${this.escapeHtml(item.name)}</div>
                    <div class="item-meta">Last updated: ${updatedAt}</div>
                </div>
                <div class="item-actions">
                    <input
                        type="number"
                        class="quantity-input"
                        value="${item.quantity}"
                        min="0"
                        onchange="app.updateItemQuantity(${item.id}, parseInt(this.value))"
                        ${isUpdating ? 'disabled' : ''}
                    >
                    <button
                        class="btn btn-danger btn-small"
                        onclick="app.deleteItem(${item.id})"
                        ${isUpdating ? 'disabled' : ''}
                    >
                        Delete
                    </button>
                </div>
            </div>
        `;
    }
    escapeHtml(text) {
        const div = document.createElement('div');
        div.textContent = text;
        return div.innerHTML;
    }
    showNotification(message, type = 'info') {
        const notification = document.createElement('div');
        notification.className = `notification ${type}`;
        notification.textContent = message;
        notification.style.cssText = `
            position: fixed;
            top: 20px;
            right: 20px;
            padding: 12px 20px;
            border-radius: 6px;
            color: white;
            font-weight: 600;
            z-index: 1000;
            animation: slideIn 0.3s ease;
            max-width: 300px;
        `;
        switch (type) {
            case 'success':
                notification.style.background = '#28a745';
                break;
            case 'warning':
                notification.style.background = '#ffc107';
                notification.style.color = '#212529';
                break;
            case 'error':
                notification.style.background = '#dc3545';
                break;
            default:
                notification.style.background = '#17a2b8';
        }
        document.body.appendChild(notification);
        setTimeout(() => {
            notification.style.animation = 'slideOut 0.3s ease';
            setTimeout(() => {
                if (notification.parentNode) {
                    notification.parentNode.removeChild(notification);
                }
            }, 300);
        }, 3000);
    }
    showError(message) {
        this.showNotification(message, 'error');
    }
}

// Add CSS animations for notifications
const style = document.createElement('style');
style.textContent = `
    @keyframes slideIn {
        from {
            transform: translateX(100%);
            opacity: 0;
        }
        to {
            transform: translateX(0);
            opacity: 1;
        }
    }
    @keyframes slideOut {
        from {
            transform: translateX(0);
            opacity: 1;
        }
        to {
            transform: translateX(100%);
            opacity: 0;
        }
    }
`;
document.head.appendChild(style);

// Initialize the app
const app = new InventoryApp();
We defined a InventoryApp class to power our real-time inventory dashboard. It manages WebSocket connections to receive live updates, fetches and displays inventory items, and handles adding, updating, and deleting items. The UI is updated instantly as changes occur, and users receive notifications for each action, ensuring a responsive and interactive experience.
Real-time Inventory Dashboard
With both the backend and frontend set up, you can now run your application and see real-time updates in action.
Step 1: Set Up the Database
First, make sure your Postgres database is running. Then, create the database and run the setup script:
$ createdb inventory_db
$ psql -d inventory_db -f setup_database.sql
Step 2: Start the FastAPI Application
Start the FastAPI app using Uvicorn:
(venv)$ uvicorn main:app --reload
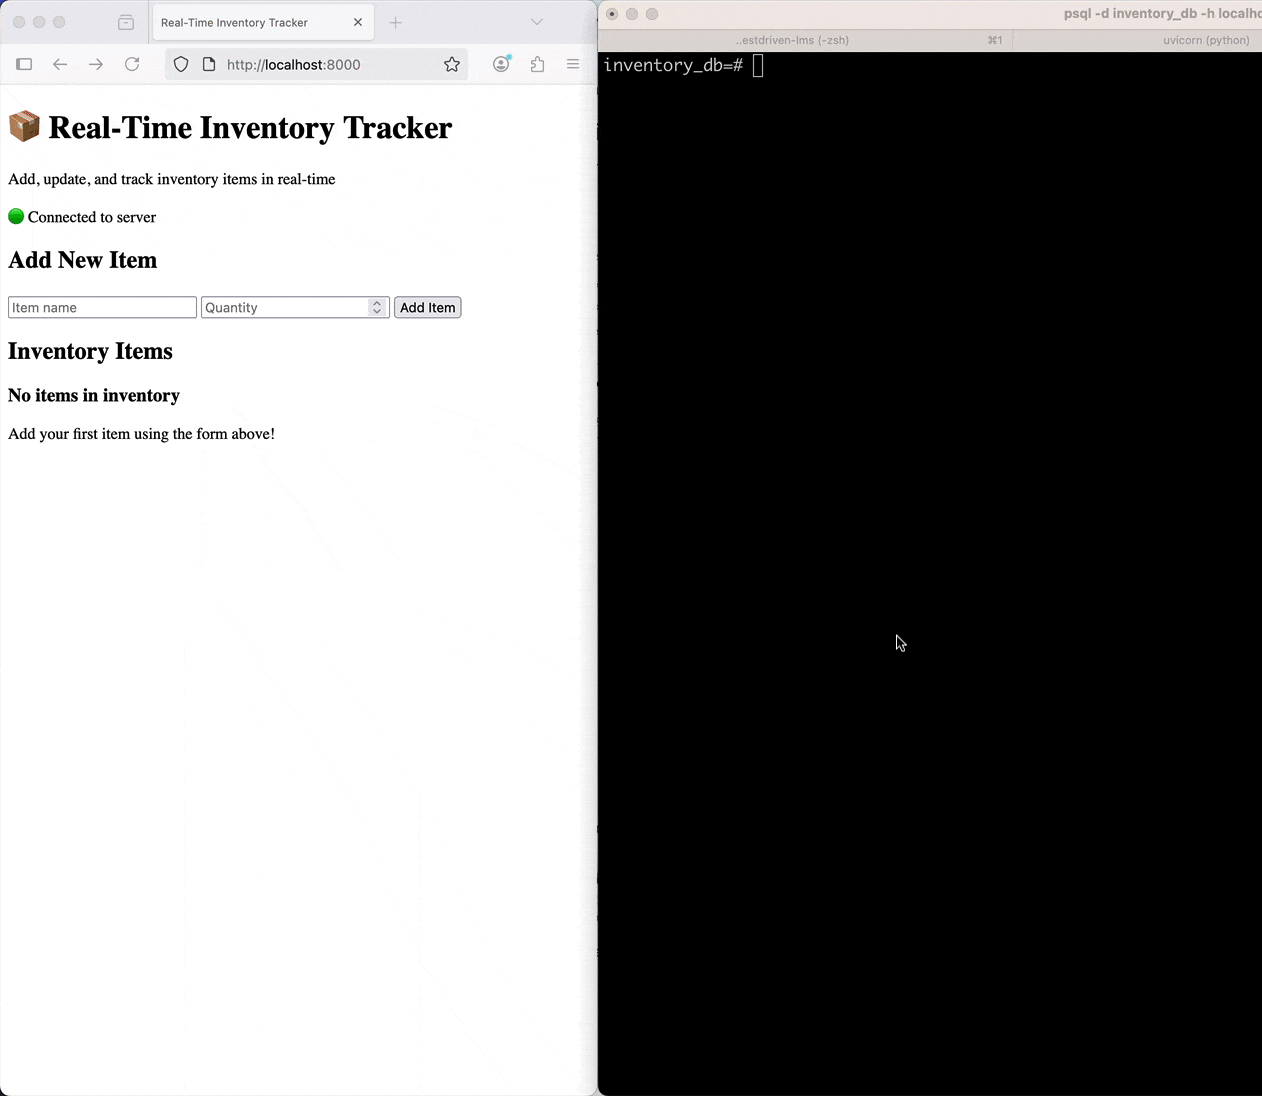
Visit http://localhost:8000 in your browser. You should see the dashboard page with a connection status indicator and a form to add new inventory items.
Try adding, updating, or deleting items using the web interface or by making API requests. All changes will be reflected in real-time across all connected browser tabs.
Conclusion
In this tutorial, you built a real-time inventory tracking dashboard using FastAPI, Postgres, and WebSockets. You learned how to:
- Create a RESTful API with FastAPI for inventory management
- Use Postgres triggers and LISTEN/NOTIFY for real-time updates
- Stream change events to the frontend via WebSockets
- Build a responsive dashboard UI with live event visualization
The key components that make this system work in real-time are:
- Postgres Triggers: Automatically emit NOTIFY events on data changes
- asyncpg Integration: Listen to Postgres notifications asynchronously
- WebSocket Broadcasting: Push updates to all connected clients instantly
- Event-driven Frontend: React to real-time events and update the UI
Looking for more?
- Add authentication and user management to track who makes changes
- Add data visualization charts to show inventory trends over time
Check out the Test-Driven Development with FastAPI and Docker course to learn more about testing and setting up CI/CD for a FastAPI app.
This tutorial provides a complete foundation for building real-time applications with FastAPI and Postgres. The combination of database triggers, WebSockets, and a modern frontend creates a responsive and scalable inventory tracking system.
Cheers!