 Amal Shaji
This tutorial looks at how to add social auth (also known as social login or social signon) to a Django application with Django Allauth. You'll also configure GitHub and Twitter auth as well as regular auth with username and password.
Social login is a form of single sign-on using existing information from a social networking service such as Facebook, Twitter or Google, to sign in to a third-party website instead of creating a new login account specifically for that website. It is designed to simplify logins for end-users and provide more reliable demographic information to web developers.
- Wikipedia
Using a social auth has its advantages. You won't need to set up auth for your web application, since it's handled by the third-party, OAuth provider. Also, since providers like Google, Facebook, and GitHub perform extensive checks to prevent unauthorized access to their services, leveraging social auth instead of rolling your own auth mechanism can boost your application's security.
Contents
OAuth
Social auth is most often implemented with OAuth -- an open standard protocol for authorization -- where a third-party auth provider verifies a user's identity.
Typical flow:
- A user attempts to log in to your app using their account from a third-party auth provider
- They are redirected to the auth provider for verification
- After verification, they are then redirected back to your app
- They are then logged in so they can access the protected resources
For more on OAuth, review An Introduction to OAuth 2.
Why would you want to leverage OAuth over rolling your own auth?
Pros:
- Improved security.
- Easier and faster log-in flows since there's no need to create and remember a username or password.
- In case of a security breach, no third-party damage will occur, as the authentication is passwordless.
Cons:
- Your application now depends on another app outside of your control. If the provider is down, users won't be able to log in.
- People often tend to ignore the permissions requested by OAuth providers.
- Users that don't have accounts on one of the providers that you have configured won't be able to access your application. The best approach is to implement both -- username and password and social auth -- and let the user choose.
Django Allauth vs. Python Social Auth
Django Allauth and Python Social Auth are the two most popular packages for implementing social authentication in Django. Which one should you use?
Django Allauth
Pros:
- Django Allauth is one of the most popular Django packages.
- It supports over 50 authentication providers (e.g., GitHub, Twitter, Google).
- Along with social auth, it also provides regular auth with username and password.
- Django Allauth makes it easy to customize the forms used during the auth flow.
Cons:
- Despite the package's popularity, the documentation is poorly structured and not meant for beginners.
- There's quite a bit of initial setup required to register an OAuth provider, which can be difficult for beginners.
- There's 310+ issues on GitHub (as of writing).
Python Social Auth
Pros:
- Python Social Auth provides support for several Python web frameworks like Django, Flask, Webpy, Pyramid, and Tornado.
- It supports almost 50 OAuth providers.
- It supports the Django ORM and MongoEngine ODM.
-
It provides a storage interface to allow users to add more ORMs.
For example, to see how the storage interface is used to work with the SQLAlchemy ORM, review the code here. Check out the official documentation for more on how to use the storage interface.
Cons:
- The documentation is a bit simpler, but it could still use some work with regard to the organization.
- Again, there's quite a bit of initial setup required to register an OAuth provider, which can be difficult for beginners.
- There's close to 125 open issues on GitHub (as of writing).
Both packages have their ups and downs. However, this tutorial focuses on Django Allauth as it's much more popular and supports social auth and regular auth via username and password.
Django Setup
Let's create a new Django project and configure Django Allauth.
Create a new Django project
Start by creating a virtual environment and installing Django:
$ mkdir django-social-auth && cd django-social-auth
$ python3.11 -m venv .venv
$ source .venv/bin/activate
(.venv)$ pip install Django==4.1.3
Feel free to swap out venv and Pip for Poetry or Pipenv. For more, review Modern Python Environments.
Now create a new project, apply the migrations, and run the server:
(.venv)$ django-admin startproject social_app .
(.venv)$ python manage.py migrate
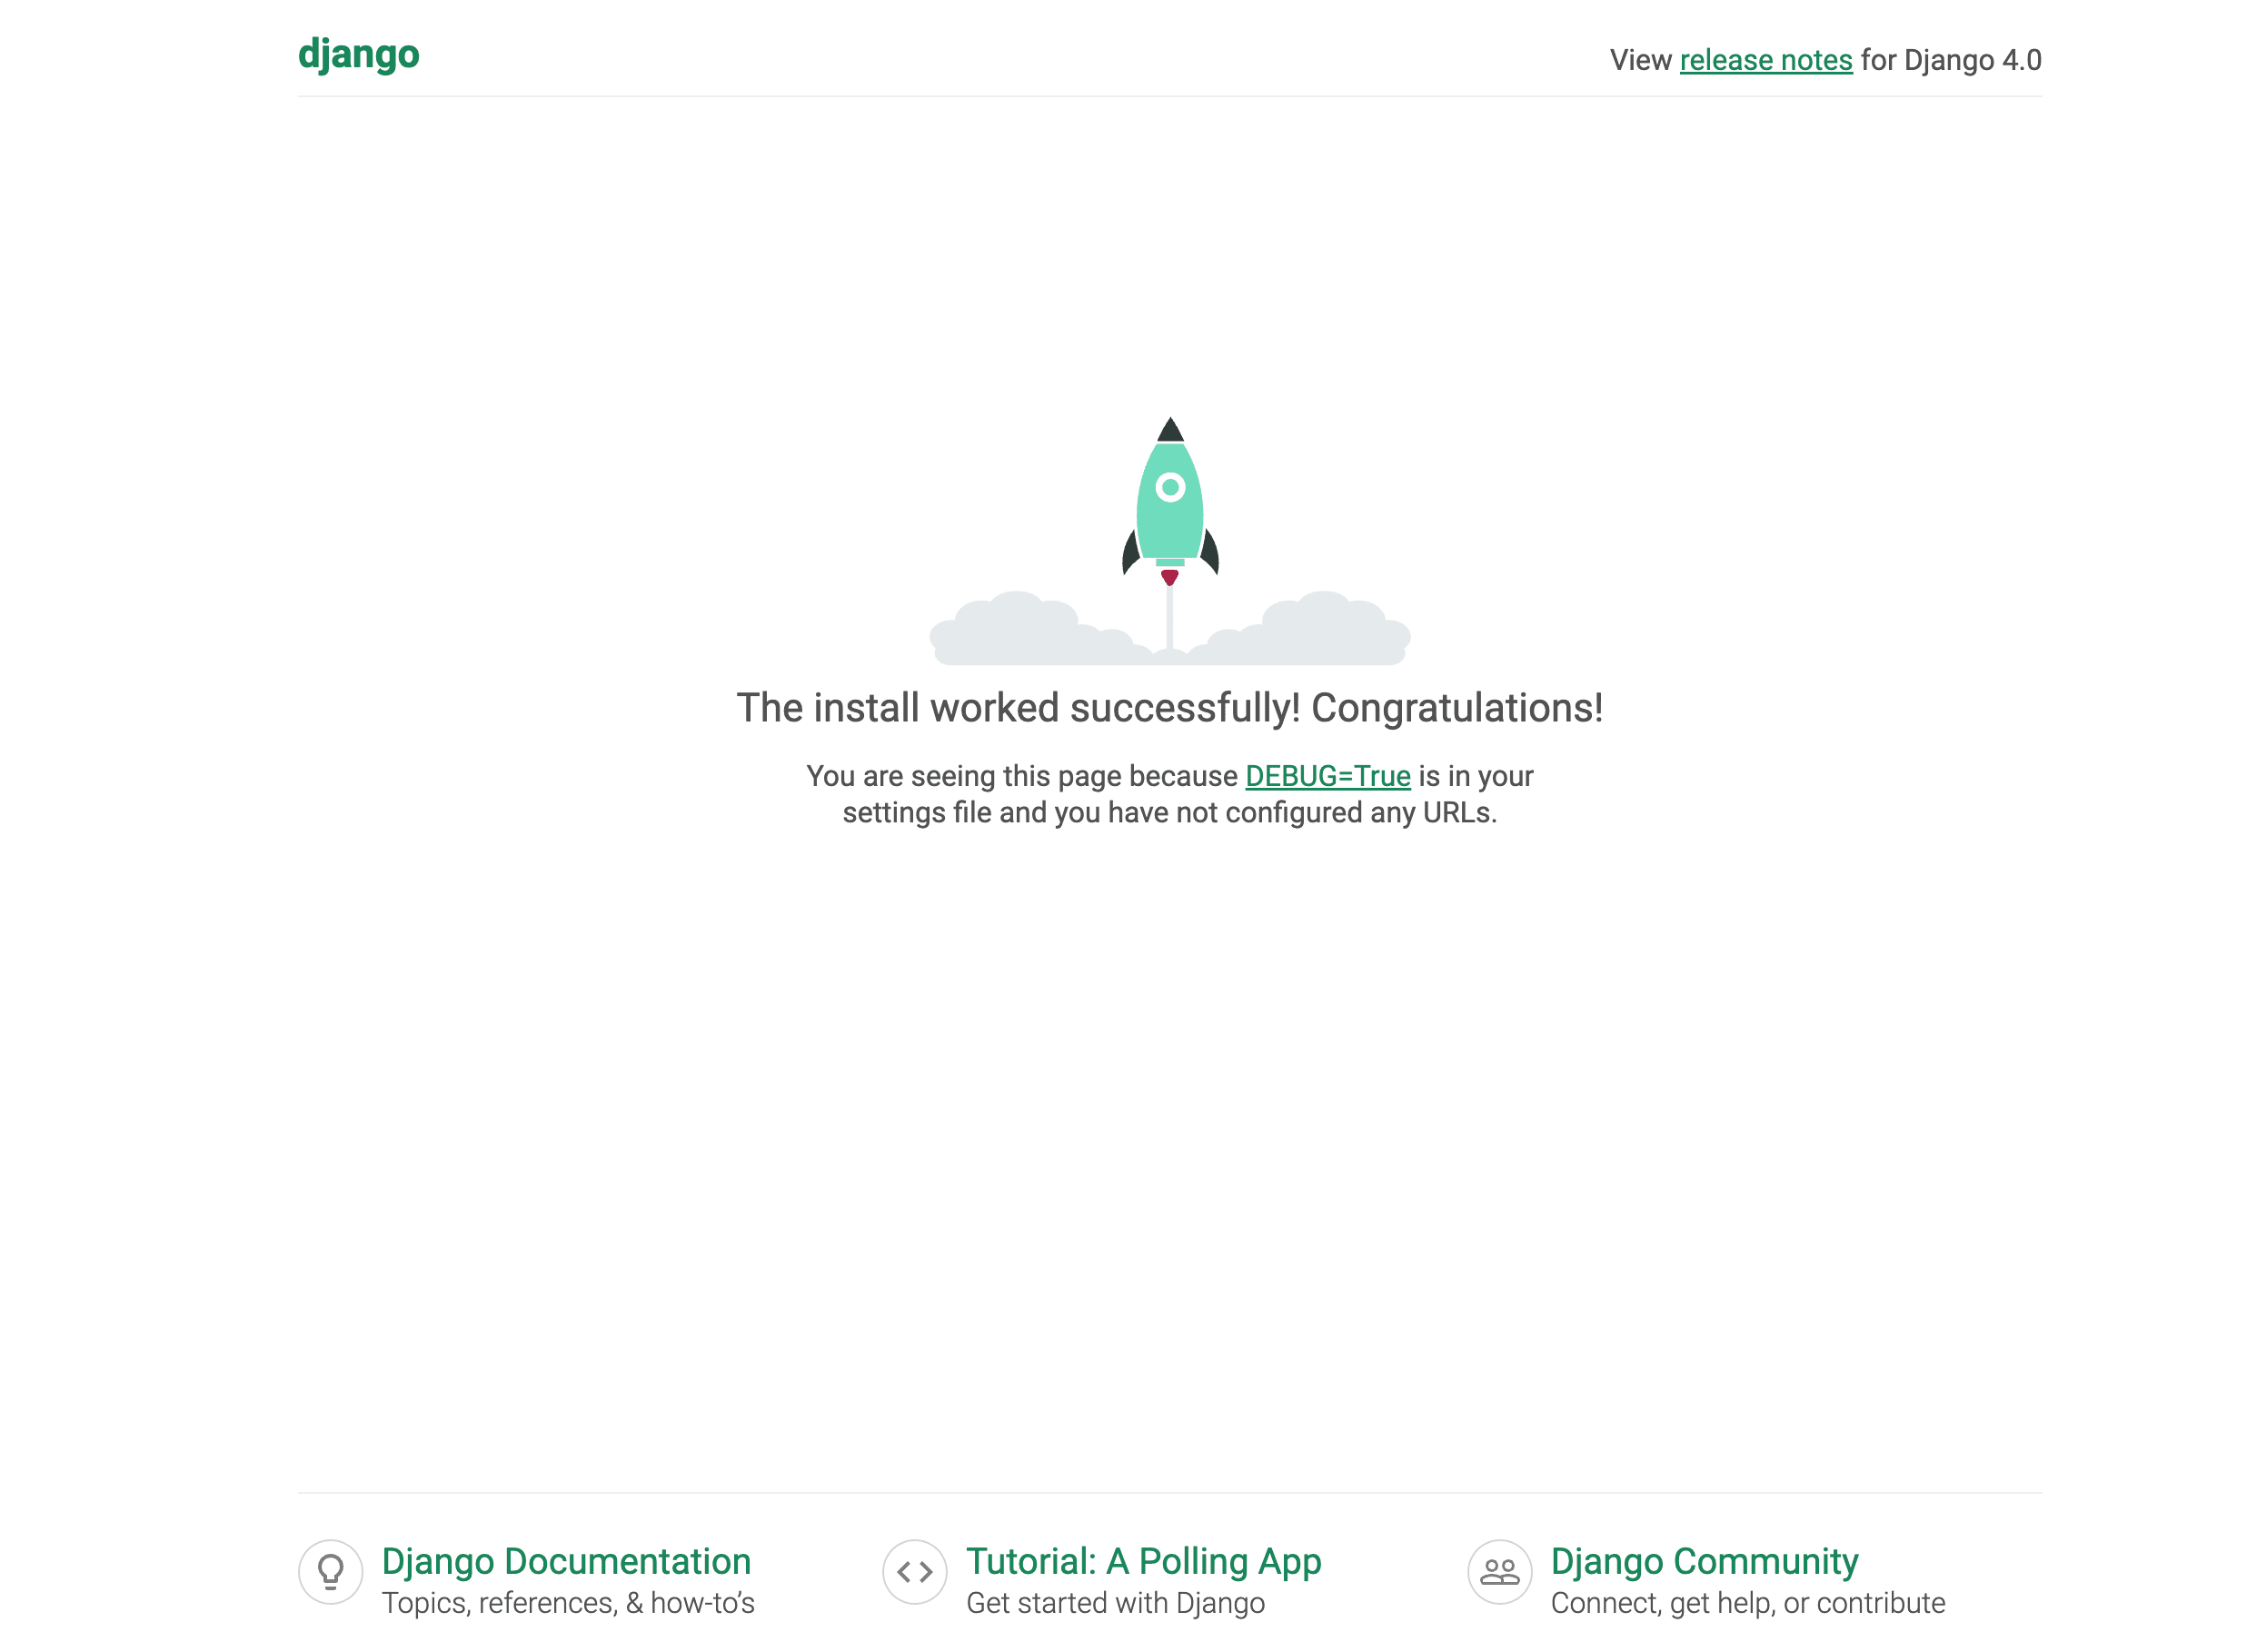
(.venv)$ python manage.py runserver
Navigate to http://127.0.0.1:8000. You should see the following screen:
Configure Django Allauth
Next, let's set up Django Allauth for our Django app.
(.venv)$ pip install django-allauth==0.51.0
For Django Allauth to work with our Django app, update INSTALLED_APPS inside the settings.py file like so:
# social_app/settings.py

INSTALLED_APPS = [
    "django.contrib.admin",
    "django.contrib.auth",
    "django.contrib.contenttypes",
    "django.contrib.sessions",
    "django.contrib.messages",
    "django.contrib.staticfiles",
    "django.contrib.sites",  # new
    # 3rd party
    "allauth", # new
    "allauth.account", # new
    "allauth.socialaccount", # new
    # social providers
    "allauth.socialaccount.providers.github", # new
    "allauth.socialaccount.providers.twitter", # new
]
First, we added the Django "sites" framework, which is required for Allauth to work properly. We then added the core Allauth apps: allauth, allauth.account, and allauth.socialaccount.
Now add the following to the bottom of settings.py:
# social_app/settings.py

AUTHENTICATION_BACKENDS = (
    "allauth.account.auth_backends.AuthenticationBackend",
)

SITE_ID = 1
ACCOUNT_EMAIL_VERIFICATION = "none"
LOGIN_REDIRECT_URL = "home"
ACCOUNT_LOGOUT_ON_GET = True
Here, we defined the following:
- We added
allauthas the authentication backend. All logging in and out (via OAuth or regular username and password) will now be handled by Allauth. SITE_ID, which is required for Django Allauth to function.ACCOUNT_EMAIL_VERIFICATION = "none"turns off verification emails. Django automatically sets up an email verification workflow. We do not need this functionality right now.LOGIN_REDIRECT_URL = "home"redirects the user to the homepage after a successful login.ACCOUNT_LOGOUT_ON_GET = Truedirectly logs the user out when the logout button is clicked via a GET request. This skips the confirm logout page.
Update the urls.py to include Django Allauth:
from django.contrib import admin
from django.urls import path, include # new


urlpatterns = [
    path("admin/", admin.site.urls),
    path("accounts/", include("allauth.urls")), # new
]
Apply the migration files associated with Django Allauth:
(.venv)$ python manage.py migrate
Migrations are important here since a number of new tables are required by Allauth. Don't forget this step!
Create a superuser:
(.venv)$ python manage.py createsuperuser
Templates
Create a new folder called "templates", and add two files to it called _base.html and home.html:
(.venv)$ mkdir templates && cd templates
(.venv)$ touch _base.html home.html
Update TEMPLATES in settings.py so that Django knows where to find the templates:
# social_app/settings.py

TEMPLATES = [
    {
        ...
        "DIRS": [str(BASE_DIR.joinpath("templates"))],
        ...
    },
]
templates/_base.html:
<!DOCTYPE html>
<html lang="en">
  <head>
    <meta charset="UTF-8" />
    <link
      href="https://cdn.jsdelivr.net/npm/[email protected]/dist/css/bootstrap.min.css"
      rel="stylesheet"
    />
    <link
      rel="stylesheet"
      href="https://stackpath.bootstrapcdn.com/font-awesome/4.7.0/css/font-awesome.min.css"
    />
    <meta name="viewport" content="width=device-width, initial-scale=1.0" />
    <title>Django Social Login</title>
  </head>
  <body>
    {% block content %} {% endblock content %}
  </body>
</html>
templates/home.html
{% extends '_base.html' %} {% load socialaccount %}

{% block content %}

<div class="container" style="text-align: center; padding-top: 10%;">
  <h1>Django Social Login</h1>

  <br /><br />

  {% if user.is_authenticated %}
    <h3>Welcome {{ user.username }} !!!</h3>
    <br /><br />
    <a href="{% url 'account_logout' %}" class="btn btn-danger">Logout</a>
  {% endif %}
</div>

{% endblock content %}
Create a view to serve up the home.html template:
# social_app/views.py

from django.views.generic import TemplateView


class Home(TemplateView):
    template_name = "home.html"
Add the new URL:
# social_app/urls.py

from django.contrib import admin
from django.urls import path, include

from .views import Home # new


urlpatterns = [
    path("admin/", admin.site.urls),
    path("accounts/", include("allauth.urls")),
    path("", Home.as_view(), name="home"), # new
]
That's it! Django Allauth is configured and ready to test. You should now be able to log in via username and password. Run the server. Navigate to http://127.0.0.1:8000/accounts/login/. Make sure you can log in with your superuser credentials.
You'll probably want to override the default templates to apply CSS style and what not. Review the Templates page from the official docs for more.
GitHub Provider
Now that both Django and Django Allauth are ready let's wire up our first social auth provider: GitHub.
App
First, we need to create an OAuth app and get the OAuth keys from GitHub. Log in to your GitHub account, and then navigate to https://github.com/settings/applications/new to create a new OAuth application:
Application name: Testing Django Allauth
Homepage URL: http://127.0.0.1:8000
Callback URL: http://127.0.0.1:8000/accounts/github/login/callback
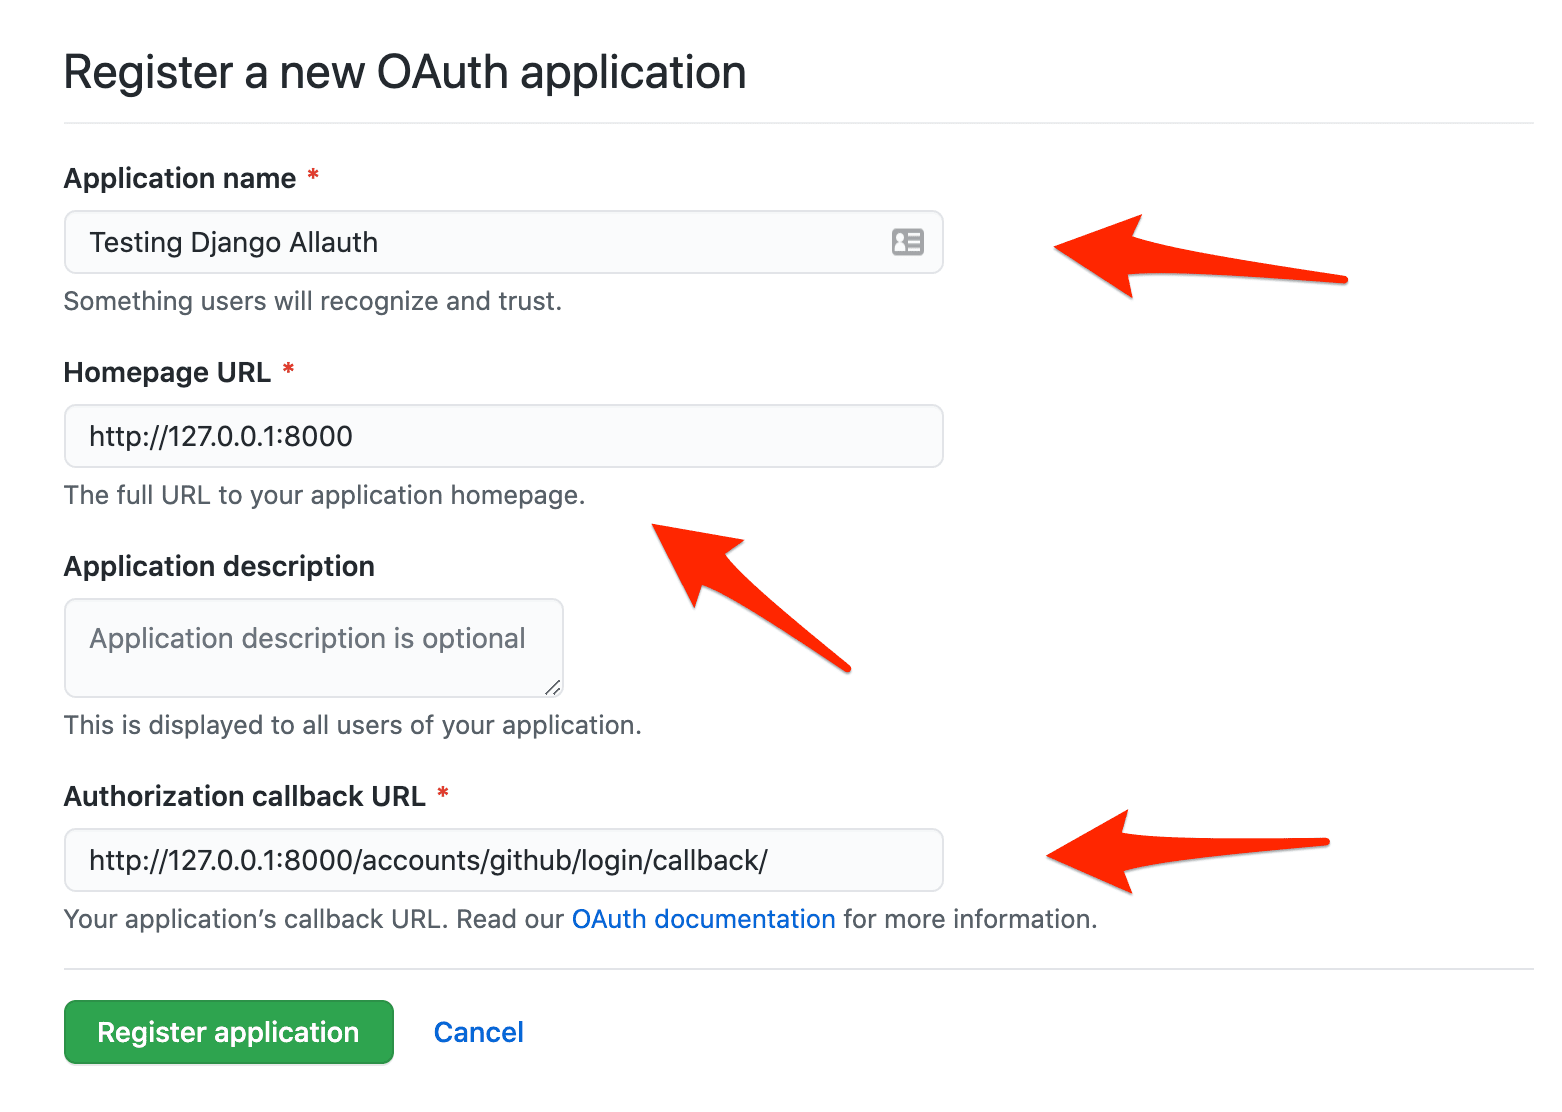
Click "Register application". You'll be redirected to your app. Take note of the Client ID and Client Secret:
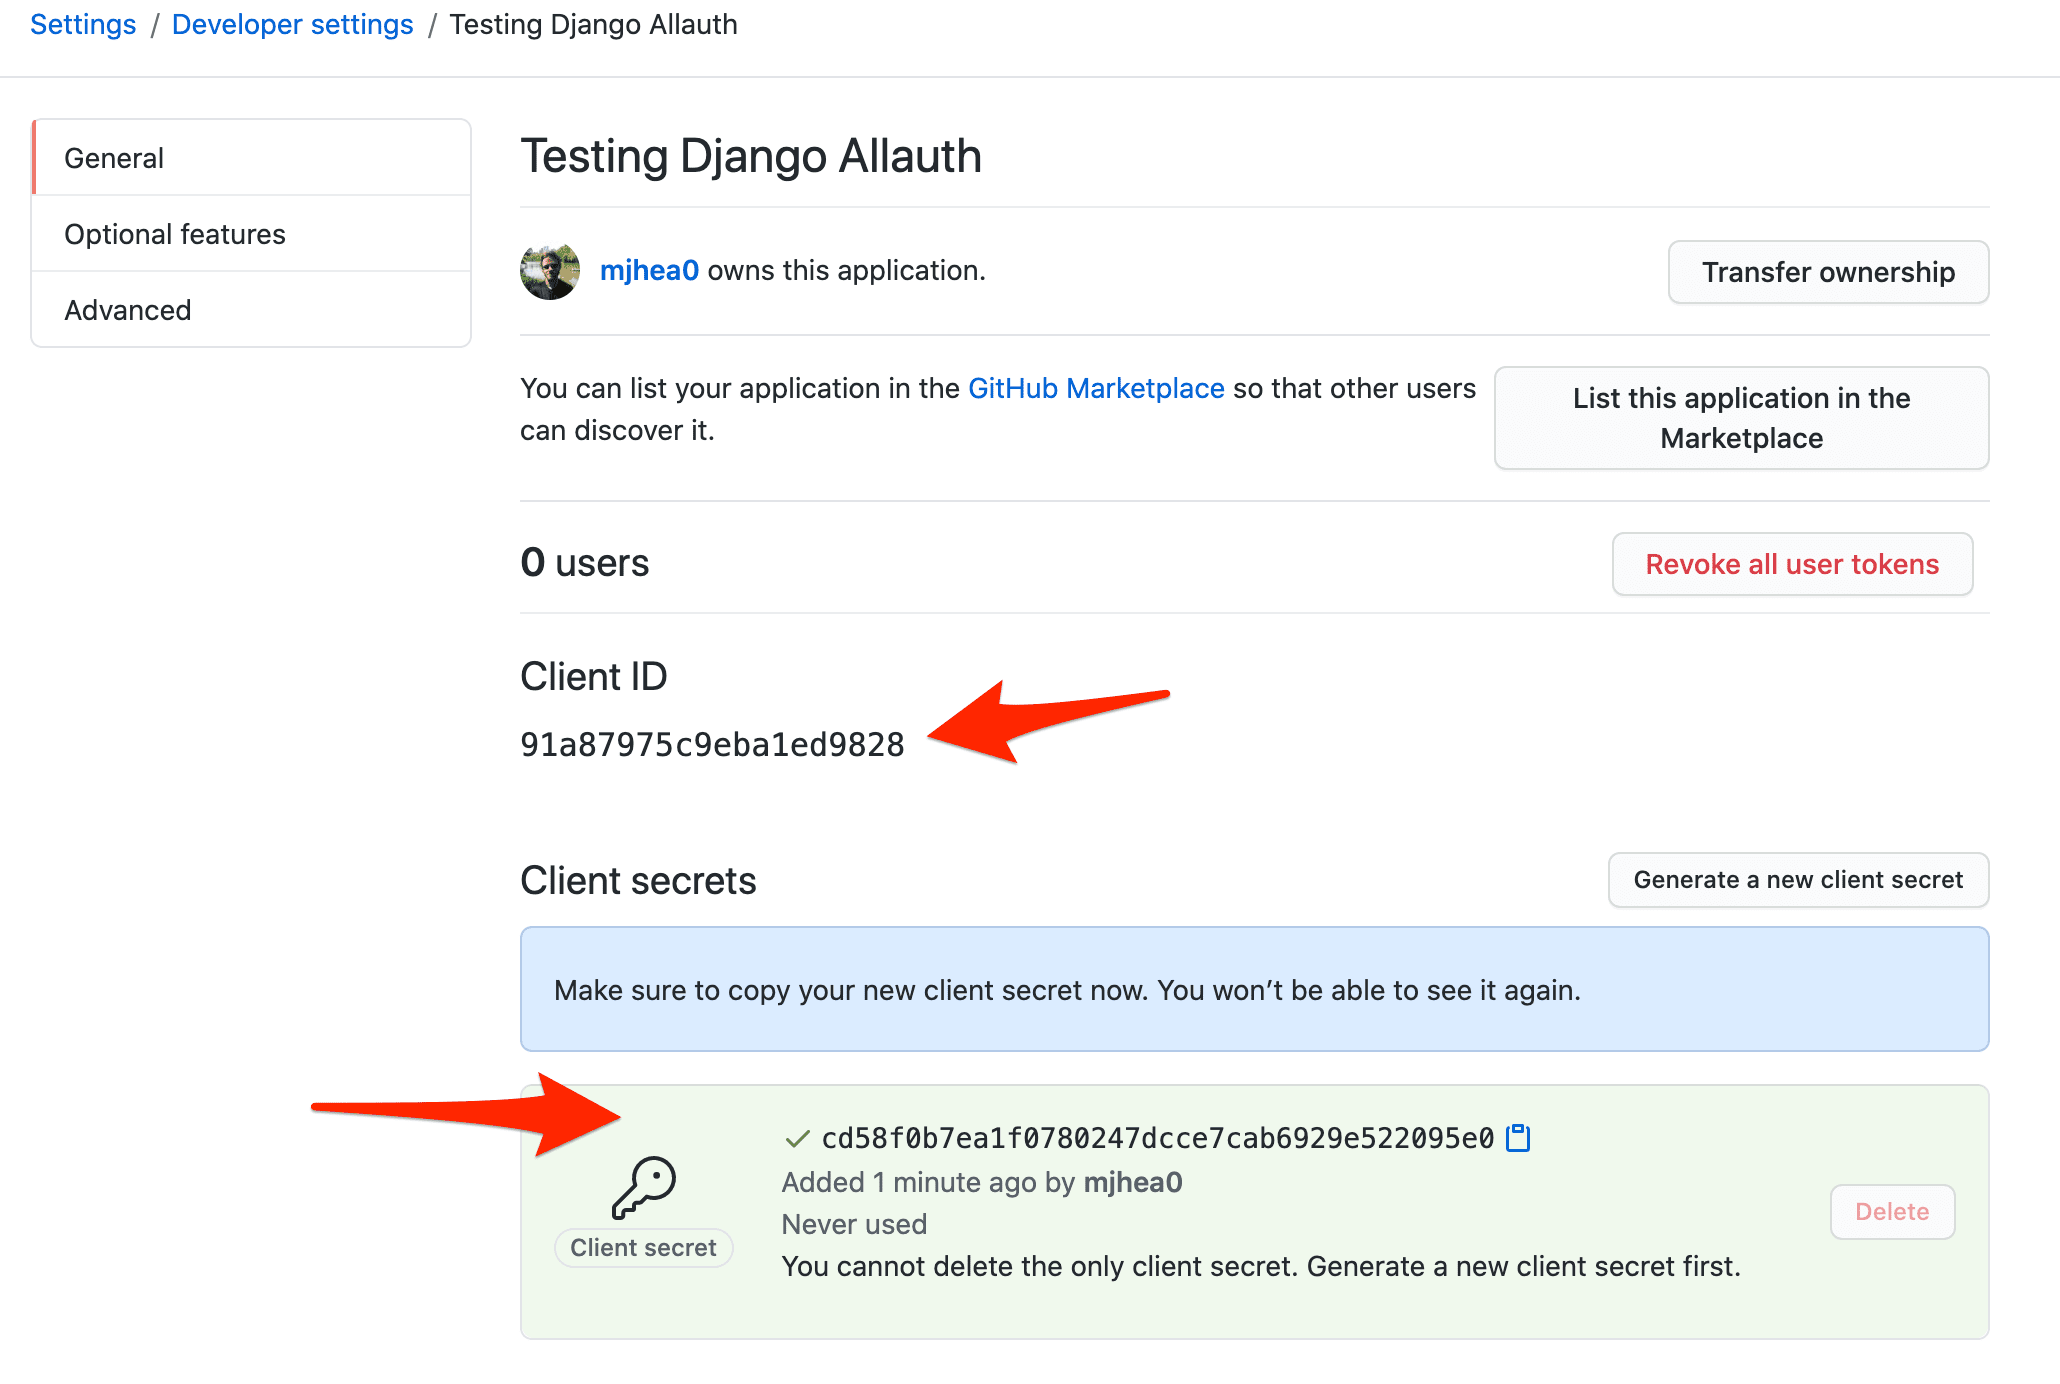
If a Client Secret wasn't generated, click "Generate a new client secret".
Next, we need to add the GitHub provider in the Django admin panel.
Run the server:
(.venv)$ python manage.py runserver
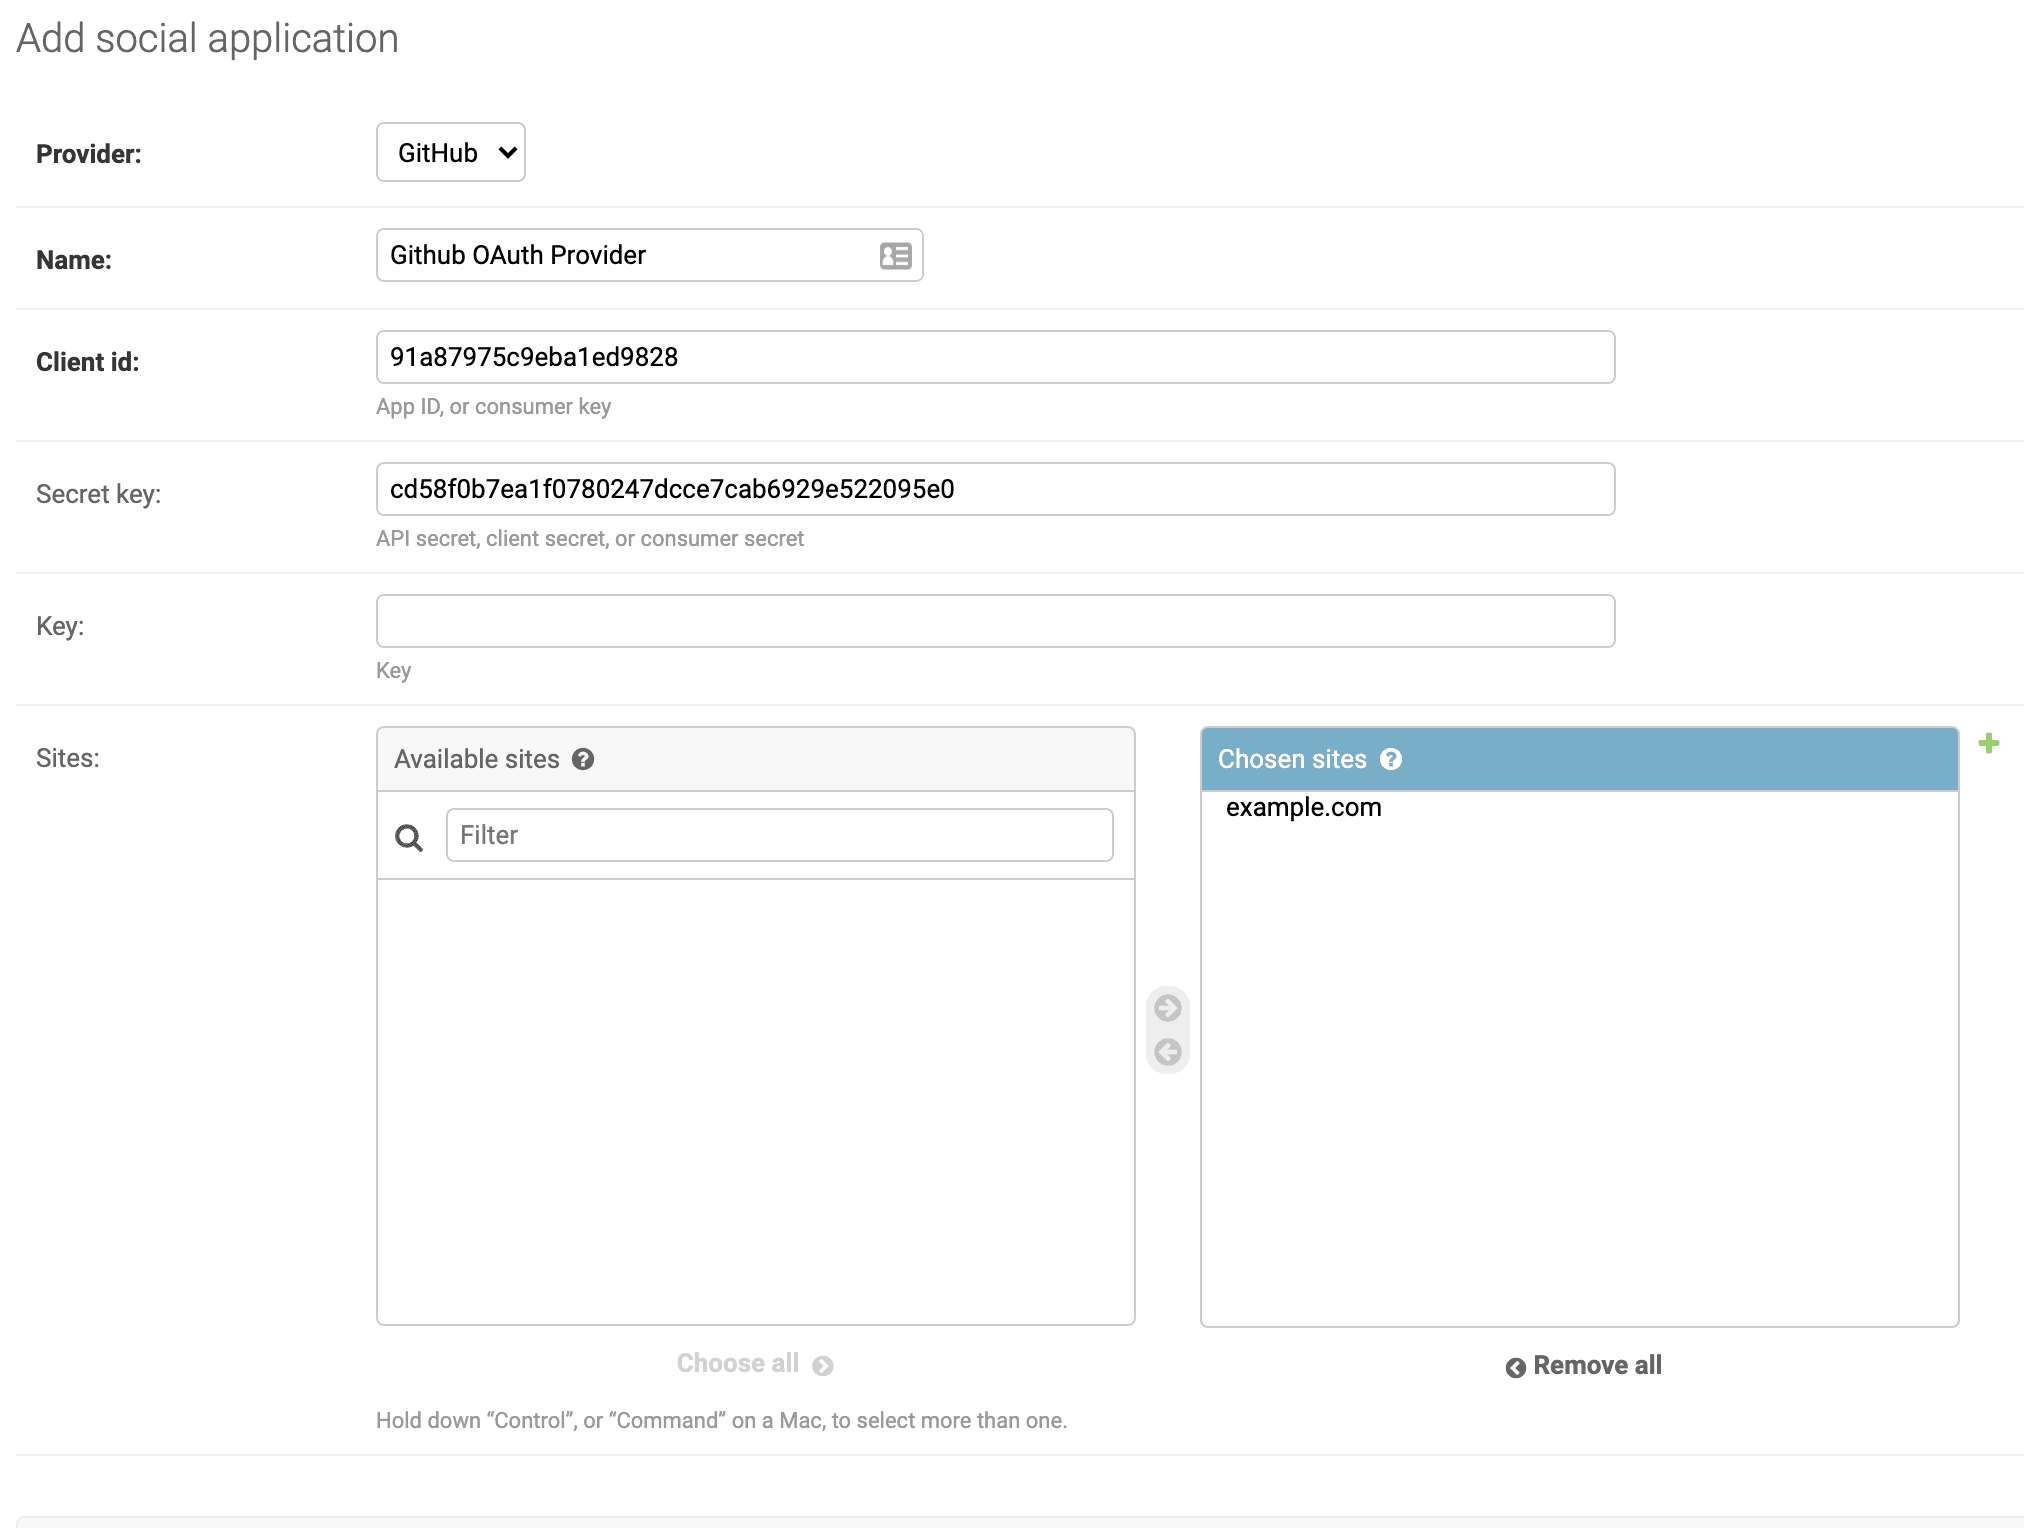
Log in to the admin at http://127.0.0.1:8000/admin. Then, under "Social applications", click "Add Social Application":
- Choose GitHub as the Provider
- Add a name
- Add the Client ID and Client Secret (to Secret key) obtained earlier
- Add example.com as one of the Chosen Sites
We've successfully integrated GitHub as a social auth provider. With that, let's update the templates/home.html template to test it out:
{% extends '_base.html' %} {% load socialaccount %}

{% block content %}

<div class="container" style="text-align: center; padding-top: 10%;">
  <h1>Django Social Login</h1>

  <br /><br />

  {% if user.is_authenticated %}
    <h3>Welcome {{ user.username }} !!!</h3>
    <br /><br />
    <a href="{% url 'account_logout' %}" class="btn btn-danger">Logout</a>
  {% else %}
    <!-- GitHub button starts here -->
    <a href="{% provider_login_url 'github' %}" class="btn btn-secondary">
      <i class="fa fa-github fa-fw"></i>
      <span>Login with GitHub</span>
    </a>
    <!-- GitHub button ends here -->
  {% endif %}
</div>

{% endblock content %}
Run the app. You should now be able to log in via GitHub.

After logging in, you should see the user at http://127.0.0.1:8000/admin/auth/user/ as well as the associated social account at http://127.0.0.1:8000/admin/socialaccount/socialaccount/. If you view the social account, you'll see all the public data associated with the GitHub account. This data (which is called scope) can be used for your user profile on Django. It's recommended to use a custom User Model for this. For more, review Creating a Custom User Model in Django.
Do you need to read or write access to user info beyond Allauth's default scope? Review Changing provider scopes from the official docs.
Twitter Provider
Setting up the Twitter provider is similar to GitHub:
- Create an OAuth app on Twitter
- Register the provider in the Django admin
- Update the home.html template
Start by applying for a Twitter developer account. Once created, navigate to Projects and Apps and click "Create App".
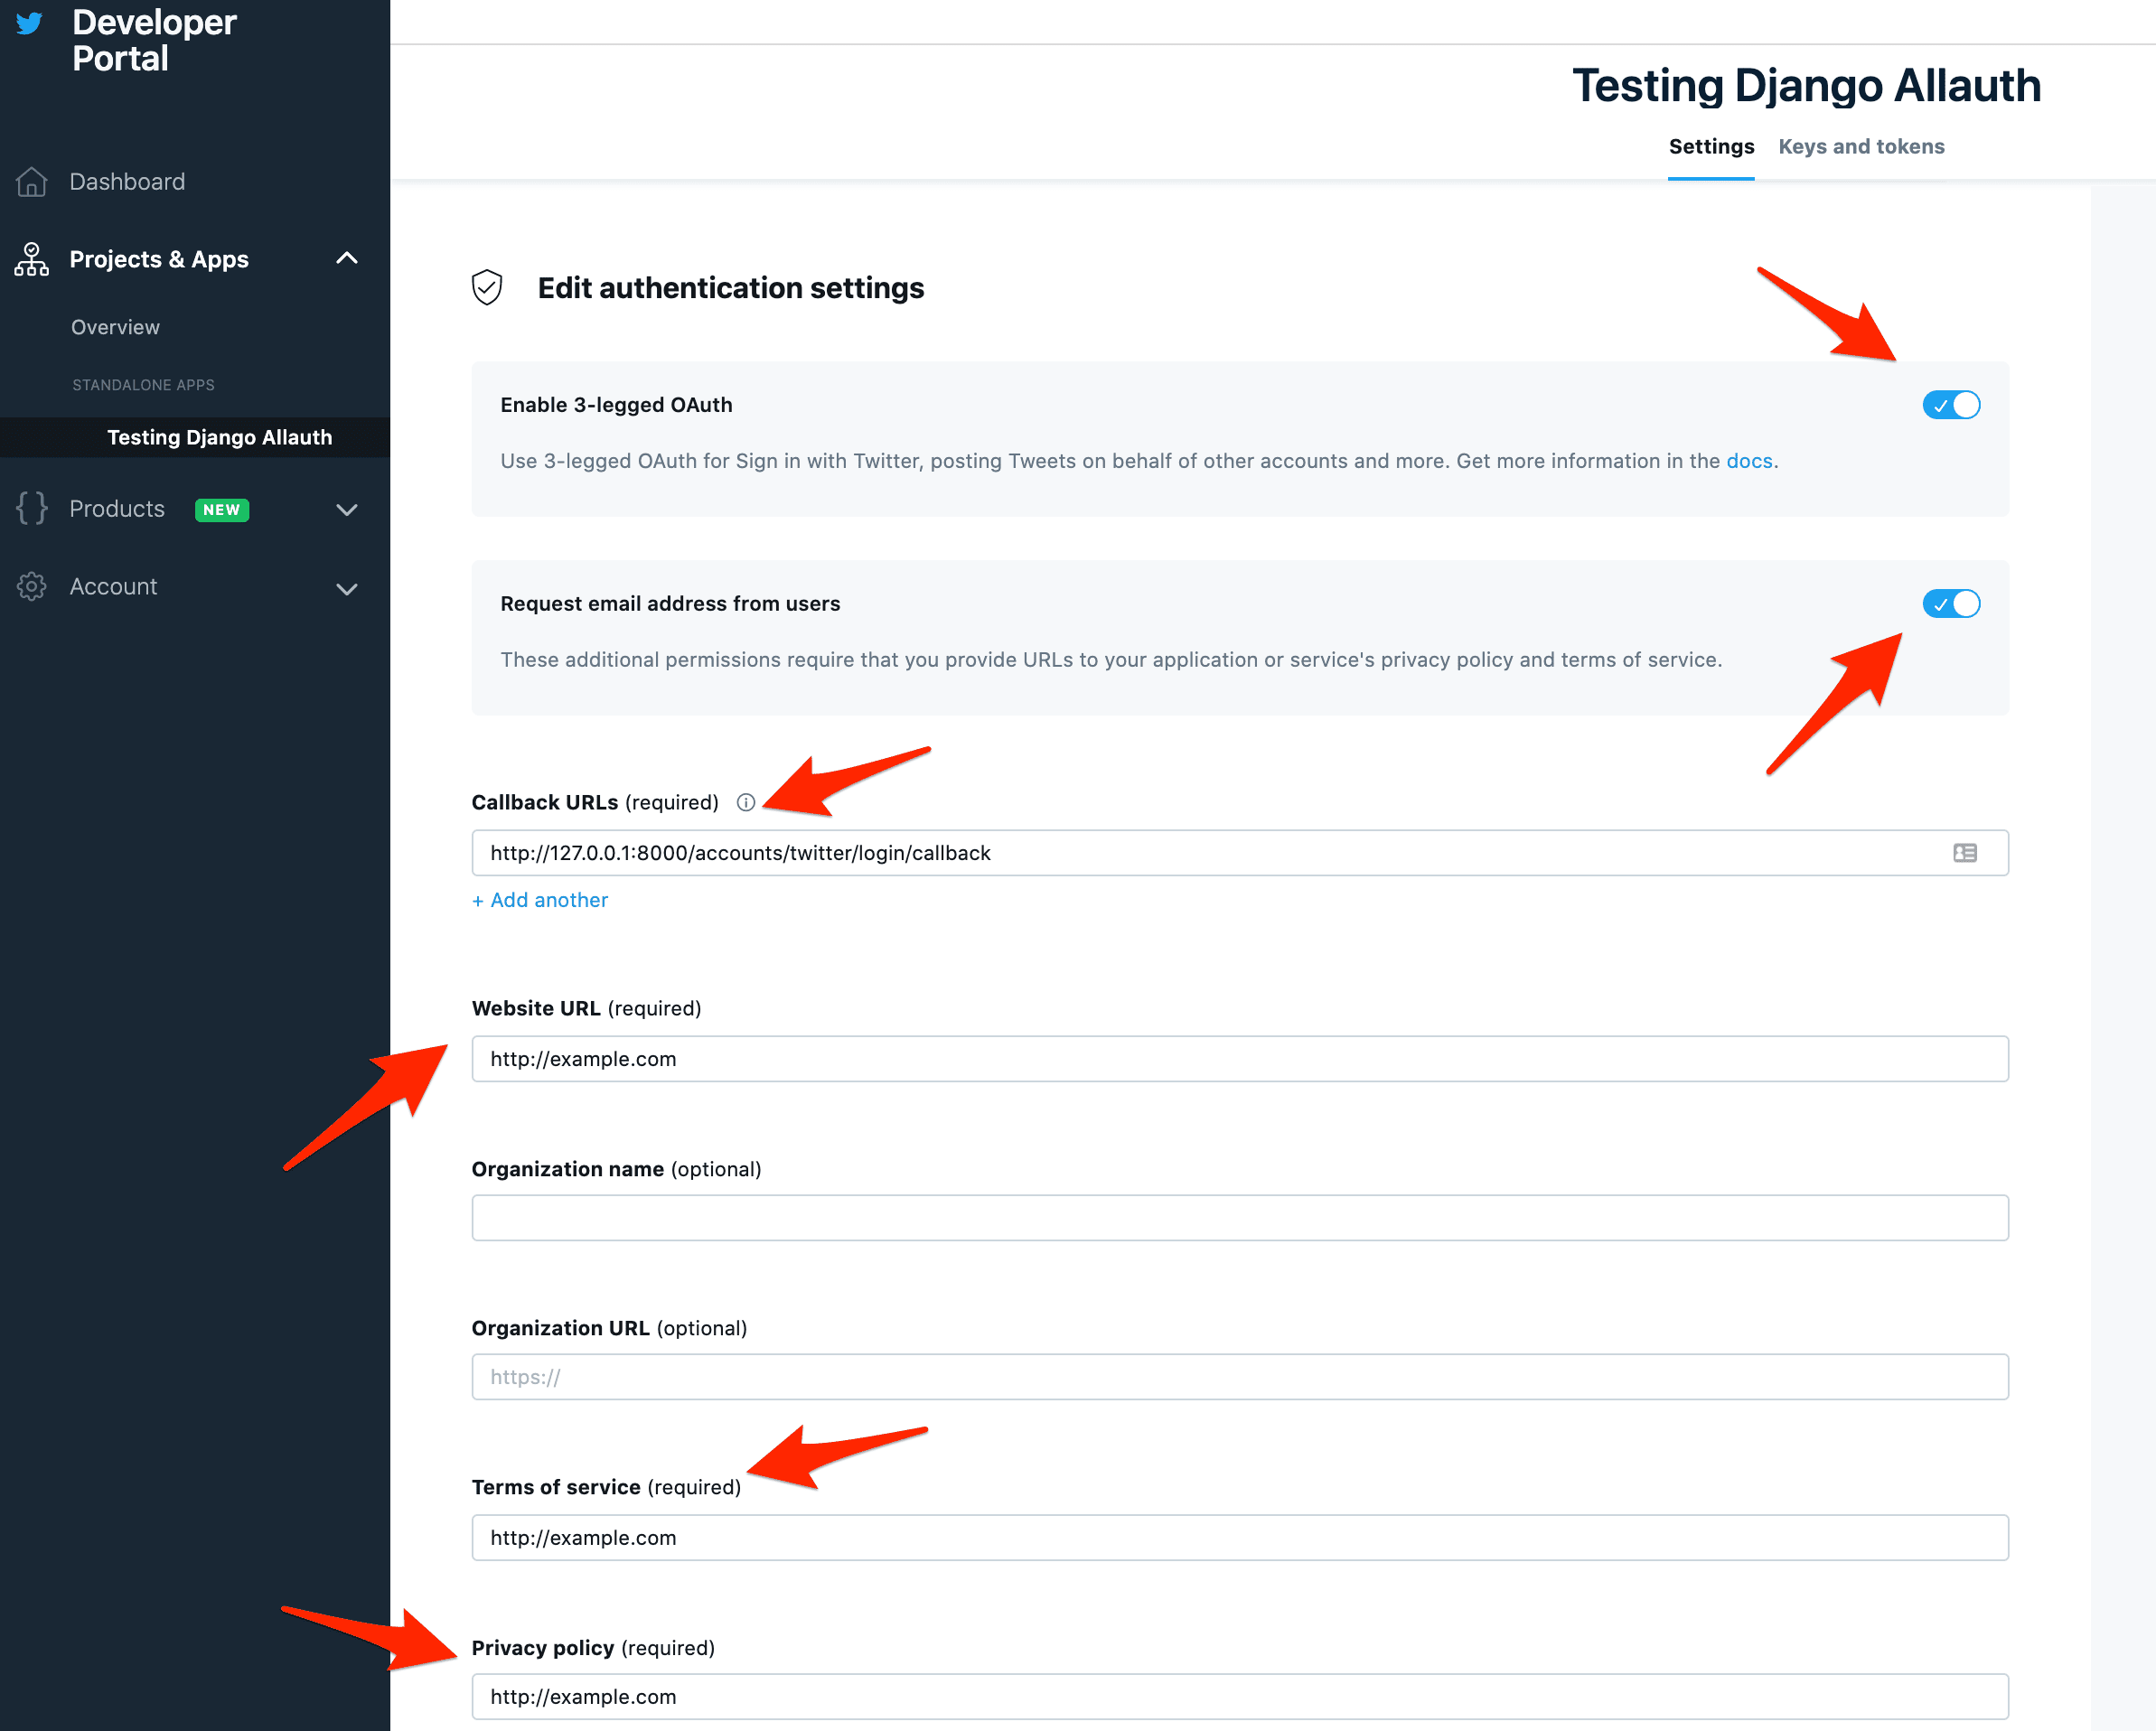
Give the app a name, and take note of the API key and API secret key. Then, under "Authentication Settings", turn on "Enable 3-legged OAuth" and "Request email address from users". Add the Callback, Website, Terms of service, and Privacy policy URLs as well:
Callback URL: http://127.0.0.1:8000/accounts/twitter/login/callback
Website URL: http://example.com
Terms of service: http://example.com
Privacy policy: http://example.com
Let's add the provider in the Django Admin.
Run the server:
(.venv)$ python manage.py runserver
Log in to the admin at http://127.0.0.1:8000/admin. Then, under "Social applications", click "Add Social Application":
- Choose Twitter as the Provider
- Add a name
- Add the API key (to Client id) and API secret key (to Secret key) obtained earlier
- Add example.com as one of the Chosen Sites

Remember to safeguard your API keys and tokens.
Finally, add a "Login with Twitter" button to templates/home.html:
{% extends '_base.html' %} {% load socialaccount %}

{% block content %}

<div class="container" style="text-align: center; padding-top: 10%;">
  <h1>Django Social Login</h1>

  <br /><br />

  {% if user.is_authenticated %}
    <h3>Welcome {{ user.username }} !!!</h3>
    <br /><br />
    <a href="{% url 'account_logout' %}" class="btn btn-danger">Logout</a>
  {% else %}

    ...

    <!-- Twitter button starts here -->
      </a>
      <a href="{% provider_login_url 'twitter' %}" class="btn btn-primary">
        <i class="fa fa-twitter fa-fw"></i>
        <span>Login with Twitter</span>
      </a>
    <!-- Twitter button ends here -->
  {% endif %}
</div>

{% endblock content %}
Navigate to http://127.0.0.1:8000 to test out the auth workflow.
Conclusion
This tutorial detailed how to set up social auth with Django and Django Allauth. You should now have a solid understanding of how to wire up new social auth providers:
- Add the appropriate Allauth app to
INSTALLED_APPSin the settings file - Create an OAuth app on the provider's developer site and take note of the tokens/keys/secret
- Register the app in the Django Admin
- Add the URL to the template
Although this tutorial focused on Django Allauth, it doesn't necessarily mean it should be used over Python Social Auth in every scenario. Explore both packages. Try implementing custom forms and linking multiple social accounts.
Grab the code from django-social-auth repository on GitHub.