 Michael Herman
Let's look at how to configure a containerized Django app running on an EC2 instance to send logs to Amazon CloudWatch.
Steps:
- Create IAM Role
- Attach IAM Role to the EC2 instance
- Create CloudWatch Log Group
- Install the CloudWatch Logs Agent on the EC2 instance
- Configure Django Logging
- Update Docker Compose

Contents
Create IAM Role
Start by creating a new IAM role and attach the CloudWatchAgentServerPolicy policy for the Docker daemon to use in order to write to CloudWatch.
From the IAM console, select "Roles" and click "Create role". Select the "EC2" service under "Common use cases":
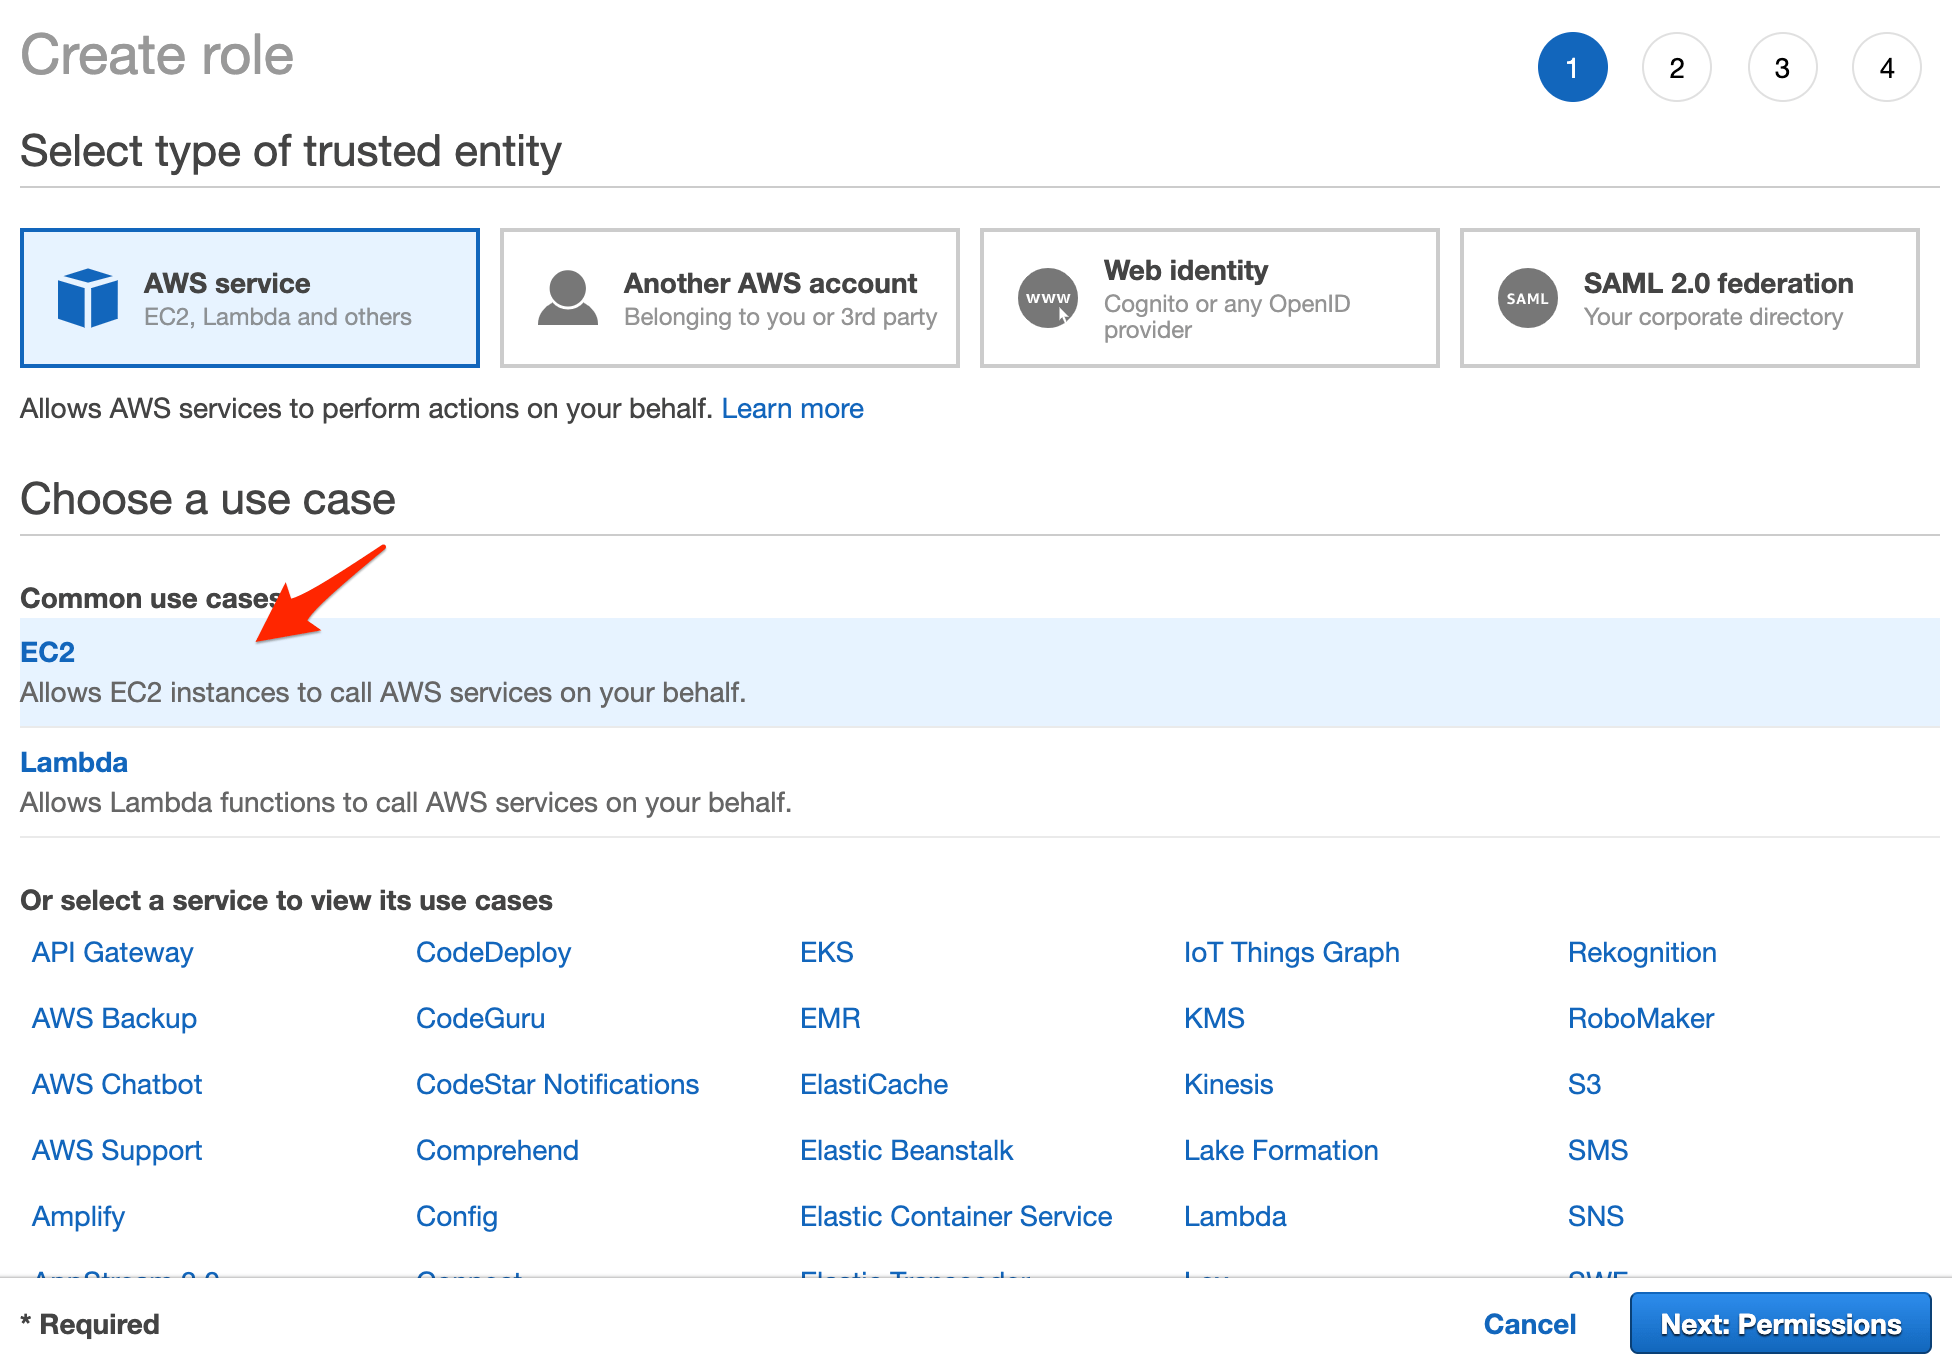
Click the next button.
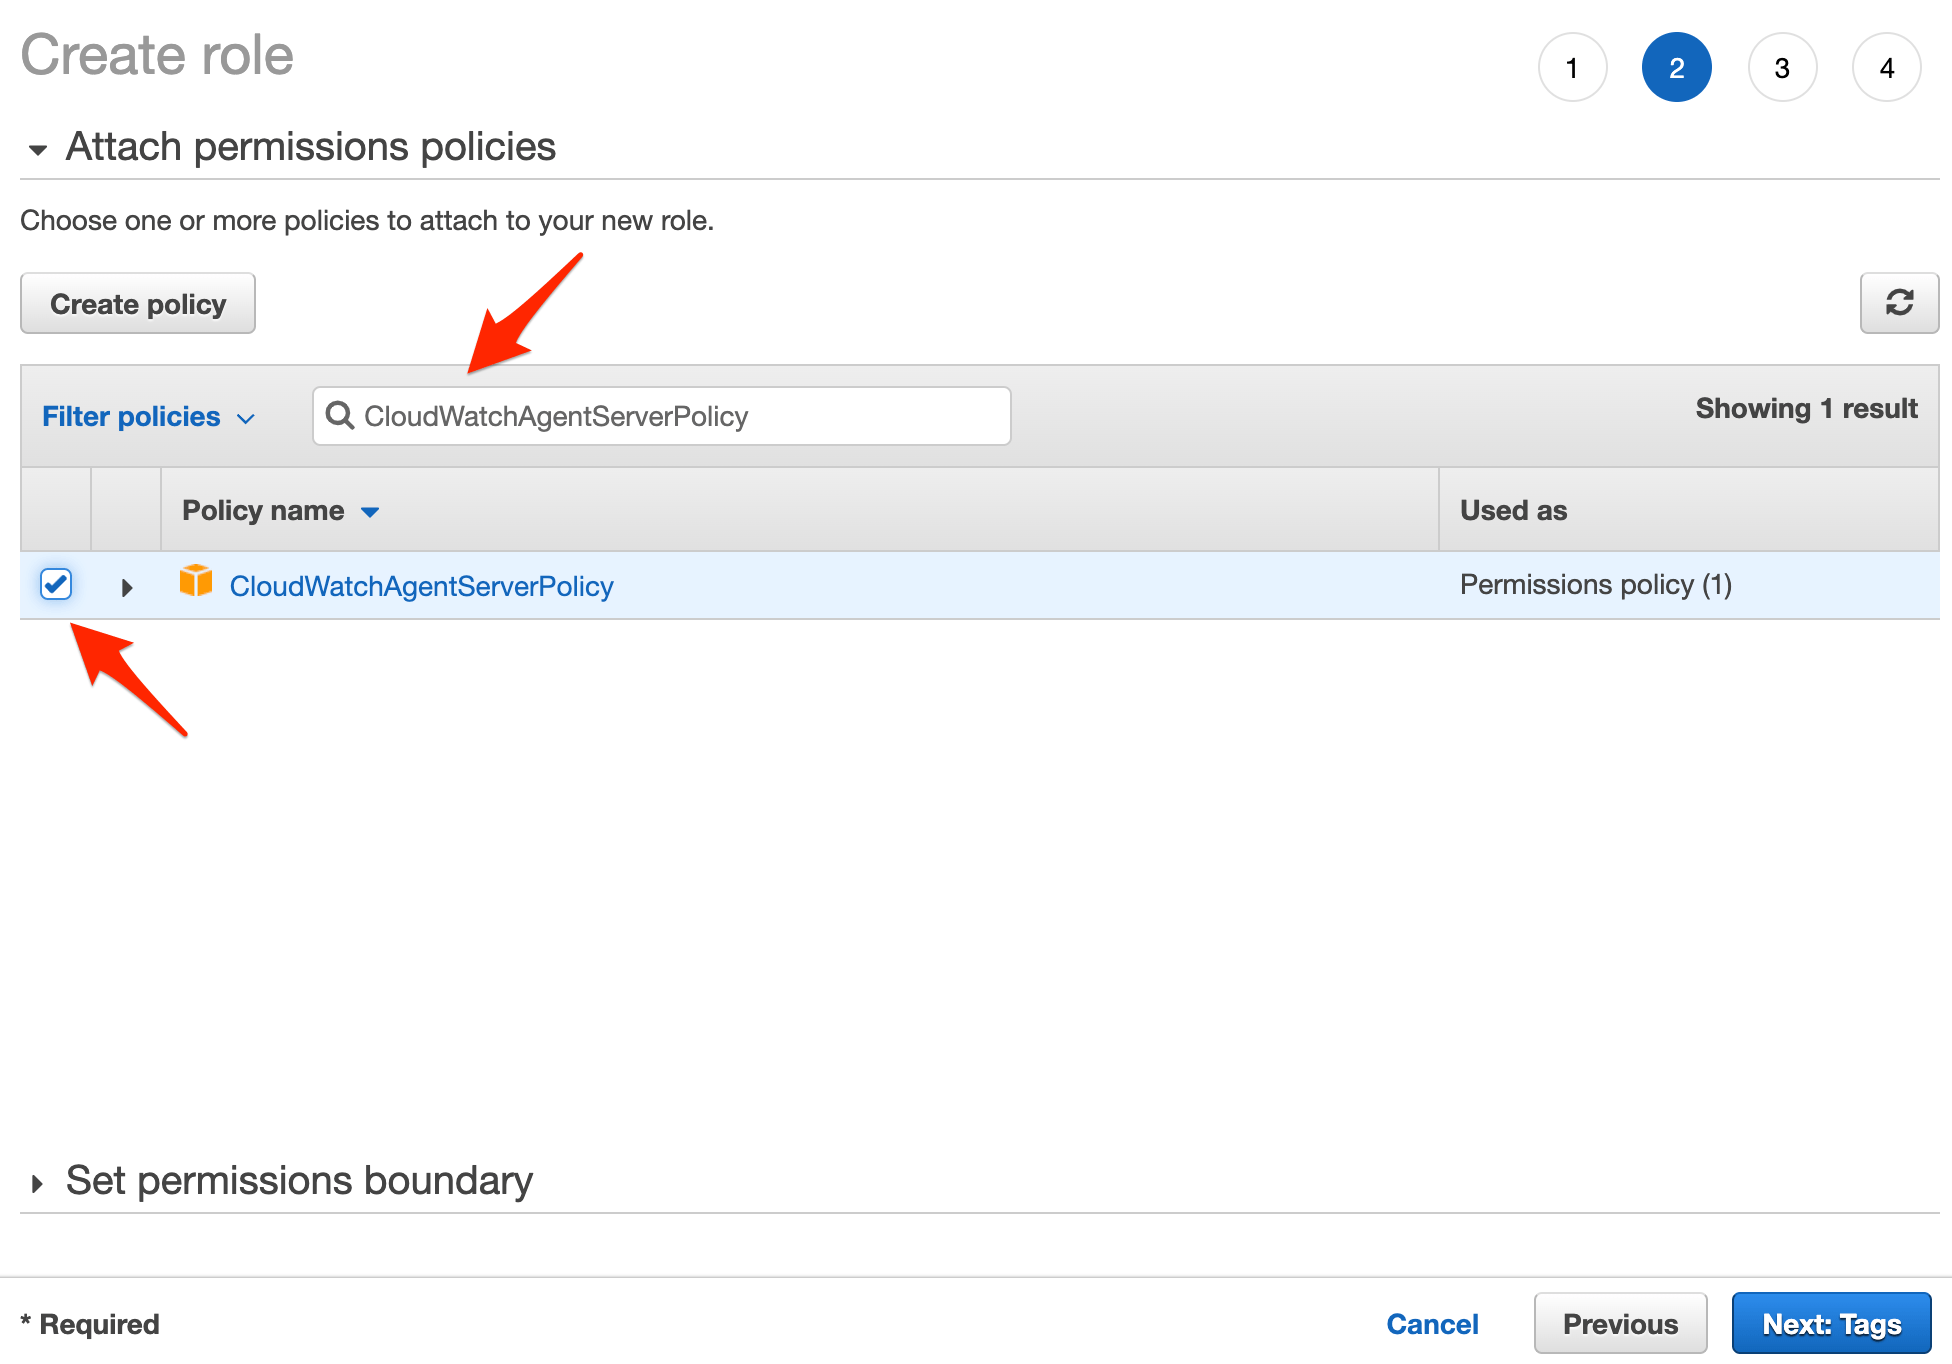
On the permissions page, search for the "CloudWatchAgentServerPolicy" policy and check the checkbox to attach it:
Click next a few times. On the review page, enter a role name -- i.e., CloudWatchAgentRole -- and then create the role.
Attach IAM Role
To attach the role to the EC2 instance, navigate to the EC2 dashboard and select the instance. Click the "Actions" dropdown, select "Instance Settings", and click "Attach/Replace IAM Role":

Search for and select the IAM role that you just created and click "Apply".
You can also attach the role from the command line like so:
$ aws ec2 associate-iam-instance-profile \
    --instance-id <YOUR_INSTANCE_ID> \
    --iam-instance-profile Name=CloudWatchAgentRole
Create CloudWatch Log Group
Now that the Docker daemon has permission to write to CloudWatch, let's create a log group to write to. Within the CloudWatch console, create a new log group. Add a new log stream to that newly created group as well.
Install the CloudWatch Logs Agent
SSH into the EC2 instance and download and install the CloudWatch Logs Agent directly from S3.
Example:
# download
$ curl https://s3.amazonaws.com/amazoncloudwatch-agent/ubuntu/amd64/latest/amazon-cloudwatch-agent.deb

# install
$ sudo dpkg -i -E ./amazon-cloudwatch-agent.deb
Configure Django Logging
Since Docker containers emit logs to the stdout and stderr output streams, you'll want to configure Django logging to log everything to stderr via the StreamHandler.
For example:
LOGGING = {
    'version': 1,
    'disable_existing_loggers': False,
    'handlers': {
        'console': {
            'class': 'logging.StreamHandler'
        },
    },
    'loggers': {
        '': {
            'handlers': ['console'],
            'level': 'DEBUG',
        },
    },
}
Update Docker Compose
Finally, we can use Docker's awslogs logging driver within the individual containers.
For example:
version: "3.8"

services:
  api:
    build: ./project
    command: gunicorn core.wsgi:application --bind 0.0.0.0:8000 --log-level=debug
    logging:
      driver: "awslogs"
      options:
        awslogs-region: "us-east-1"
        awslogs-group: "your-log-group"
        awslogs-stream: "your-log-stream"
Not using compose? Assuming you've already built and tagged the image, spin up the container like so:
$ docker run \
    --log-driver="awslogs" \
    --log-opt awslogs-region="use-east-1" \
    --log-opt awslogs-group="your-log-group" \
    --log-opt awslogs-stream="your-log-group" \
    your-image-tag