 Nik Tomazic
In this tutorial, we'll look at how to securely deploy a Django app to Google App Engine.
Contents
Objectives
By the end of this tutorial, you should be able to:
- Explain what Google App Engine is and how it works.
- Deploy a Django application to Google App Engine.
- Spin up a Postgres instance on Cloud SQL.
- Utilize Secret Manager to handle environment variables and secrets.
- Set up persistent storage for static and media files with Cloud Storage.
- Link a domain name to your app and serve your app on HTTPS.
What is Google App Engine?
Google App Engine (GAE) is a fully managed, serverless platform for developing and hosting web applications at scale. It has a powerful built-in auto-scaling feature, which automatically allocates more/fewer resources based on demand. GAE natively supports applications written in Python, Node.js, Java, Ruby, C#, Go, and PHP. Alternatively, it provides support for other languages via custom runtimes or Dockerfiles.
It has powerful application diagnostics, which you can combine with Cloud Monitoring and Logging to monitor the health and the performance of your app. Additionally, GAE allows your apps to scale to zero, which means that you don't pay anything if no one uses your service.
At the time of writing, Google offers $300 free credits for new users to try out their platform. The credits expire in 90 days.
Project Setup
In this tutorial, we'll be deploying a simple image hosting application called django-images.
Check your understanding by deploying your own Django application as you follow along with the tutorial.
First, grab the code from the repository on GitHub:
$ git clone [email protected]:duplxey/django-images.git
$ cd django-images
Create a new virtual environment and activate it:
$ python3 -m venv venv && source venv/bin/activate
Install the requirements and migrate the database:
(venv)$ pip install -r requirements.txt
(venv)$ python manage.py migrate
Run the server:
(venv)$ python manage.py runserver
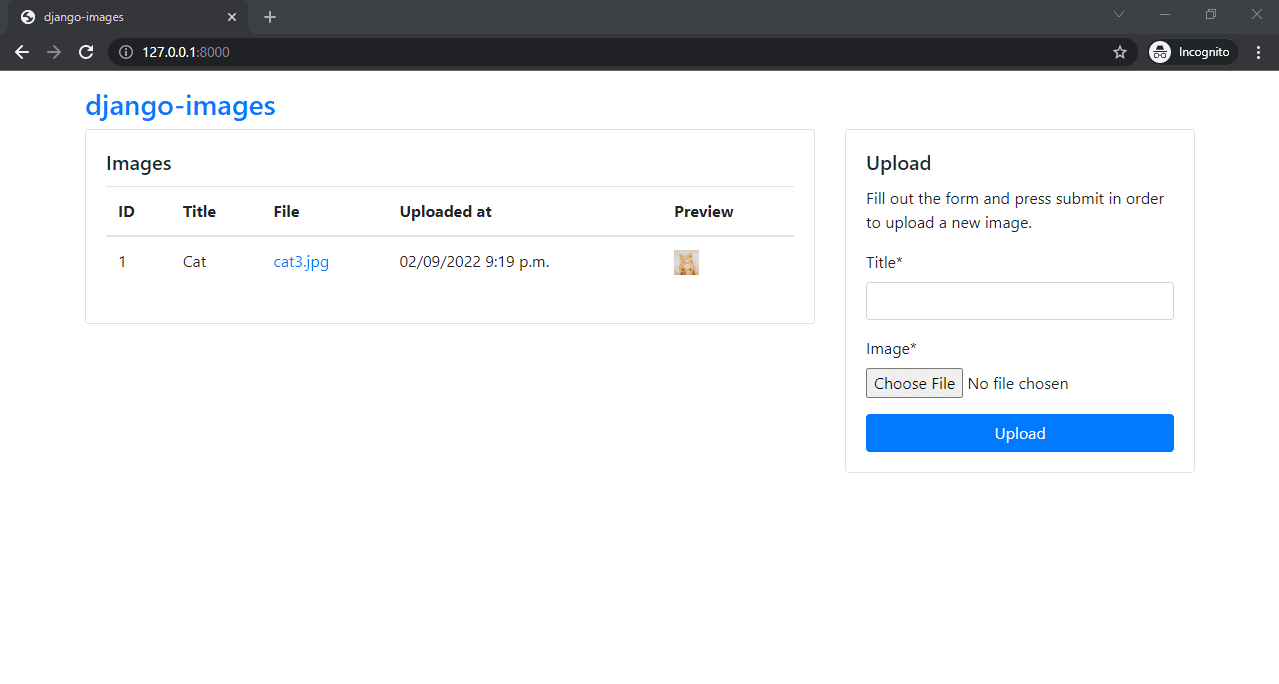
Open your favorite web browser and navigate to http://localhost:8000. Make sure everything works correctly by using the form on the right to upload an image. After you upload an image, you should see it displayed in the table:
Install Google Cloud CLI
To work with Google Cloud Platform (GCP), start by installing the Google Cloud CLI (gcloud CLI). The gcloud CLI allows you to create and manage your Google Cloud resources and services.
The installation process differs depending on your operating system and processor architecture. Go ahead and follow the official installation guide for your OS and CPU.
To verify the installation has been successful, run:
$ gcloud version

Google Cloud SDK 415.0.0
bq 2.0.84
core 2023.01.20
gcloud-crc32c 1.0.0
gsutil 5.18
Configure Django Project
In this section of the tutorial, we'll configure the Django project to work with GAE.
Environment variables
We shouldn't store secrets in the source code, so let's utilize environment variables. The easiest way to do this is to use a third-party Python package called django-environ. Start by adding it to requirements.txt:
django-environ==0.9.0
I recommend you to stick with django-environ since it's specialized for Django and supports Unix socket paths in the database URL.
For Django to initialize the environment change, update the top of settings.py like so:
# core/settings.py

import os
import environ

from pathlib import Path

# Build paths inside the project like this: BASE_DIR / 'subdir'.
BASE_DIR = Path(__file__).resolve().parent.parent

env = environ.Env(DEBUG=(bool, False))
env_file = os.path.join(BASE_DIR, '.env')
env.read_env(env_file)
Next, load SECRET_KEY and DEBUG from the environment:
# core/settings.py

# SECURITY WARNING: keep the secret key used in production secret!
SECRET_KEY = env('SECRET_KEY')

# SECURITY WARNING: don't run with debug turned on in production!
DEBUG = env('DEBUG')
To set ALLOWED_HOSTS and CSRF_TRUSTED_ORIGINS, we can use the following code snippet from the GAE docs:
# core/settings.py

APPENGINE_URL = env('APPENGINE_URL', default=None)
if APPENGINE_URL:
    # ensure a scheme is present in the URL before it's processed.
    if not urlparse(APPENGINE_URL).scheme:
        APPENGINE_URL = f'https://{APPENGINE_URL}'

    ALLOWED_HOSTS = [urlparse(APPENGINE_URL).netloc]
    CSRF_TRUSTED_ORIGINS = [APPENGINE_URL]
    SECURE_SSL_REDIRECT = True
else:
    ALLOWED_HOSTS = ['*']
This code fetches APPENGINE_URL from the environment and automatically configures ALLOWED_HOSTS and CSRF_TRUSTED_ORIGINS. Additionally, it enables SECURE_SSL_REDIRECT to enforce HTTPS.
Don't forget to add the import at the top of the file:
from urllib.parse import urlparse
Database
To use Postgres instead of SQLite, we first need to install the database adapter.
Add the following line to requirements.txt:
psycopg2-binary==2.9.5
Spinning up a Postgres instance later in the tutorial will give us the details required to form a Twelve-Factor App inspired database URL. The DATABASE_URL will be in the following format:
postgres://USER:PASSWORD@//cloudsql/PROJECT_ID:REGION:INSTANCE_NAME/DATABASE_NAME
To utilize DATABASE_URL with Django, we can use django-environ's db() method like so:
# core/settings.py

DATABASES = {'default': env.db()}
Gunicorn
Moving along, let's install Gunicorn, a production-grade WSGI server that will to be used in production instead of Django's development server.
Add it to requirements.txt:
gunicorn==20.1.0
app.yaml
Google App Engine's app.yaml config file is used to configure your web application's runtime environment. The app.yaml file contains information such as the runtime, URL handlers, and environment variables.
Start by creating a new file called app.yaml in the project root with the following contents:
# app.yaml

runtime: python39
env: standard
entrypoint: gunicorn -b :$PORT core.wsgi:application

handlers:
- url: /.*
  script: auto

runtime_config:
  python_version: 3
Notes:
- We defined the
entrypointcommand that starts the WSGI server. - There are two options for env:
standardandflexible. We picked standard since it is easier to get up and running, is appropriate for smaller apps, and supports Python 3.9 out of the box. - Lastly,
handlersdefine how different URLs are routed. We'll define handlers for static and media files later in the tutorial.
For more information about app.yaml, review the docs.
.gcloudignore
A .gcloudignore file allows you to specify the files you don't want to upload to GAE when deploying an application. It works similarly to a .gitignore file.
Go ahead and create a .gcloudignore file in the project root with the following contents:
# .gcloudignore

.gcloudignore

# Ignore local .env file
.env

# If you would like to upload your .git directory, .gitignore file, or files
# from your .gitignore file, remove the corresponding line
# below:
.git
.gitignore

# Python pycache:
__pycache__/

# Ignore collected static and media files
mediafiles/
staticfiles/

# Ignore the local DB
db.sqlite3

# Ignored by the build system
/setup.cfg
venv/

# Ignore IDE files
.idea/
Deploy App
In this section of the tutorial, we'll deploy the app to Google App Engine.
Project Initialization
Go ahead and initialize the gcloud CLI if you haven't already:
$ gcloud init
The CLI will open your browser and ask you to log in and accept a few permissions.
After that, you're going to have to pick your project. I suggest that you create a new project since deleting a project is easier than individually deleting all the services and resources.
For the region, pick the one that is closest to you.
Create App
To create an App Engine app go to your project root and run:
$ gcloud app create

You are creating an app for project [indigo-griffin-376011].
WARNING: Creating an App Engine application for a project is irreversible and the region
cannot be changed.

Please choose the region where you want your App Engine application located:

 ...
 [13] europe-west3  (supports standard and flexible and search_api)
 [14] europe-west6  (supports standard and flexible and search_api)
 [15] northamerica-northeast1 (supports standard and flexible and search_api)
 [16] southamerica-east1 (supports standard and flexible and search_api)
 [17] us-central    (supports standard and flexible and search_api)
 [18] us-east1      (supports standard and flexible and search_api)
 ...
 [24] cancel
Please enter your numeric choice:  13

Creating App Engine application in project [indigo-griffin-376011] and region [europe-west3]....done.
Success! The app is now created. Please use `gcloud app deploy` to deploy your first app.
Again, pick the region that's the closest to you.
Database
Provision
Navigate to the Cloud SQL dashboard and create a new Postgres instance with the following parameters:
- Instance ID: mydb-instance
- Password: Enter a custom password or generate it
- Database version: PostgreSQL 14
- Configuration: Up to you
- Region: The same region as your app
- Zonal availability: Up to you
You might also need to enable "Compute Engine API" to create a SQL instance.
It will take a few minutes to provision the database. In the meantime go ahead and enable the Cloud SQL Admin API by searching for "Cloud SQL Admin API" and clicking "Enable". We'll need this enabled to test the database connection.
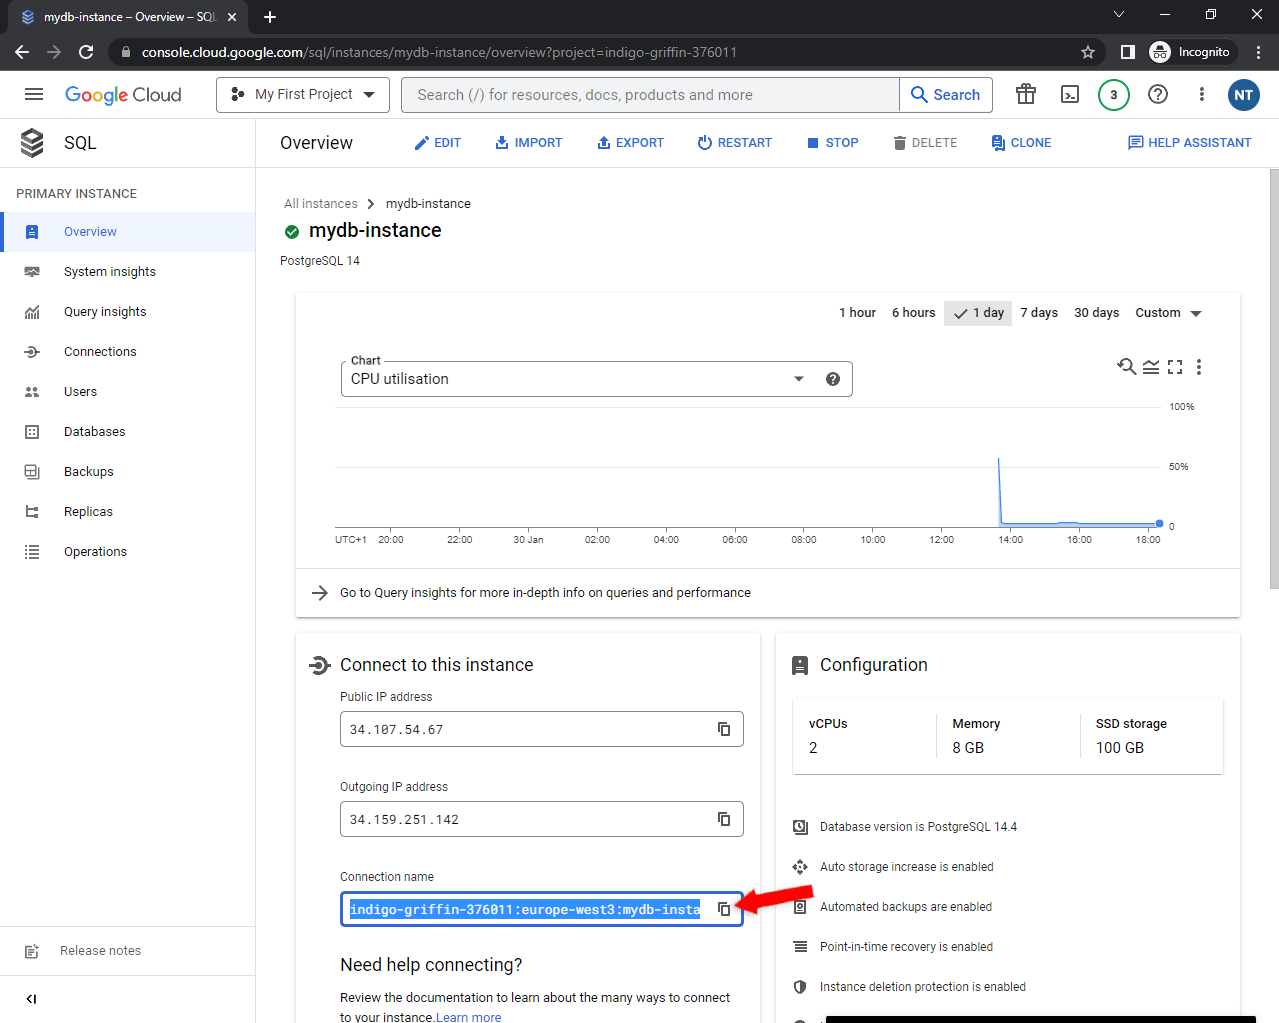
Once the database has been provisioned, you should get redirected to the database details. Take note of the "Connection name":
Next, select "Databases" on the sidebar and create a new database.
Lastly, select "Users" on the sidebar and create a new user. Generate a password and take note of it.
That's it. The database is now ready!
Cloud SQL Proxy
To test the database connection and migrate the database we'll use Cloud SQL Auth proxy. The Cloud SQL Auth proxy provides secure access to your Cloud SQL instance without the need for authorized networks or for configuring SSL.
First, authenticate and acquire credentials for the API:
$ gcloud auth application-default login
Next, download Cloud SQL Auth Proxy and make it executable:
$ wget https://dl.google.com/cloudsql/cloud_sql_proxy.linux.amd64 -O cloud_sql_proxy
$ chmod +x cloud_sql_proxy
If you're not on Linux follow the installation guide to install Cloud SQL proxy.
After the installation is complete open a new terminal window and start the proxy with your connection details like so:
$ ./cloud_sql_proxy.exe -instances="PROJECT_ID:REGION:INSTANCE_NAME"=tcp:5432

# Example:
# cloud_sql_proxy.exe -instances="indigo-35:europe-west3:mydb-instance"=tcp:5432

2023/01/30 13:45:22 Listening on 127.0.0.1:5432 for indigo-35:europe-west3:mydb-instance
2023/01/30 13:45:22 Ready for new connections
2023/01/30 13:45:22 Generated RSA key in 110.0168ms
You can now connect to localhost:5432 the same way you would if you had Postgres running on your local machine.
Migrate the database
Since GAE doesn't allow us to execute commands on the server, we'll have to migrate the database from our local machine.
If you haven't already, go ahead and install the requirements:
(venv)$ pip install -r requirements.txt
Next, create a .env file in the project root, with the required environment variables:
# .env

DEBUG=1
SECRET_KEY=+an@of0zh--q%vypb^9x@vgecoda5o!m!l9sqno)vz^n!euncl
DATABASE_URL=postgres://DB_USER:DB_PASS@localhost/DB_NAME

# Example `DATABASE_URL`:
# DATABASE_URL=postgres://django-images:password@localhost/mydb
Make sure to replace
DB_USER,DB_PASS, andDB_NAMEwith your actual credentials.
Lastly, migrate the database:
(venv)$ python manage.py migrate
Operations to perform:
  Apply all migrations: admin, auth, contenttypes, images, sessions
Running migrations:
  Applying contenttypes.0001_initial... OK
  Applying auth.0001_initial... OK
  ...
  Applying auth.0011_update_proxy_permissions... OK
  Applying auth.0012_alter_user_first_name_max_length... OK
  Applying images.0001_initial... OK
  Applying sessions.0001_initial... OK
Create superuser
To create a superuser, run:
(venv)$ python manage.py createsuperuser
And follow the prompts.
Secret Manager
To securely manage our secrets and environment files we'll use Secret Manager.
Navigate to the Secret Manager dashboard and enable the API if you haven't already. Next, create a secret named django_settings with the following content:
DEBUG=1
SECRET_KEY=+an@of0zh--q%vypb^9x@vgecoda5o!m!l9sqno)vz^n!euncl
DATABASE_URL=postgres://DB_USER:DB_PASS@//cloudsql/PROJECT_ID:REGION:INSTANCE_NAME/DB_NAME
GS_BUCKET_NAME=django-images-bucket

# Example `DATABASE_URL`:
# postgres://django-images:password@//cloudsql/indigo-35:europe-west3:mydb-instance/mydb
Make sure to change
DATABASE_URLaccordingly.PROJECT_ID:REGION:INSTANCE_NAMEequals your database connection details.You don't have to worry about
GS_BUCKET_NAME. This is just the name of a bucket we're going to create and use later.
Go back to your project and add the following to requirements.txt:
google-cloud-secret-manager==2.15.1
To load the environment variables from Secret Manager we can use the following official code snippet:
# core/settings.py

# Build paths inside the project like this: BASE_DIR / 'subdir'.
BASE_DIR = Path(__file__).resolve().parent.parent

env = environ.Env(DEBUG=(bool, False))
env_file = os.path.join(BASE_DIR, '.env')

if os.path.isfile(env_file):
    # read a local .env file
    env.read_env(env_file)
elif os.environ.get('GOOGLE_CLOUD_PROJECT', None):
    # pull .env file from Secret Manager
    project_id = os.environ.get('GOOGLE_CLOUD_PROJECT')

    client = secretmanager.SecretManagerServiceClient()
    settings_name = os.environ.get('SETTINGS_NAME', 'django_settings')
    name = f'projects/{project_id}/secrets/{settings_name}/versions/latest'
    payload = client.access_secret_version(name=name).payload.data.decode('UTF-8')

    env.read_env(io.StringIO(payload))
else:
    raise Exception('No local .env or GOOGLE_CLOUD_PROJECT detected. No secrets found.')
Don't forget to import io and secretmanager at the top of the file:
import io
from google.cloud import secretmanager
Great! It's finally time to deploy our app. To do so, run:
$ gcloud app deploy

Services to deploy:

descriptor:                  [C:\Users\Nik\PycharmProjects\django-images-new\app.yaml]
source:                      [C:\Users\Nik\PycharmProjects\django-images-new]
target project:              [indigo-griffin-376011]
target service:              [default]
target version:              [20230130t135926]
target url:                  [https://indigo-griffin-376011.ey.r.appspot.com]


Do you want to continue (Y/n)?  y

Beginning deployment of service [default]...
#============================================================#
#= Uploading 21 files to Google Cloud Storage               =#
#============================================================#
File upload done.
Updating service [default]...done.
Setting traffic split for service [default]...done.
Deployed service [default] to [https://indigo-griffin-376011.ey.r.appspot.com]

You can stream logs from the command line by running:
  $ gcloud app logs tail -s default
Open your web app in your browser and test if it works:
$ gcloud app browse
If you get a
502 Bad Gatewayerror, you can navigate to Logs Explorer to see your logs.If there's a
403 Permission 'secretmanager.versions.access' deniederror, navigate todjango_settingssecret permissions and make sure the default App Engine service account has access to this secret. See solution on StackOverflow.
If you try uploading an image, you should see the following error:
[Errno 30] Read-only file system: '/workspace/mediafiles'
This is because GAE files are read-only. Don't worry about it. We'll fix it in the next section.
Persistent Storage
Google App Engine (as well as many other similar services like Heroku) offers an ephemeral filesystem. This means that your data isn’t persistent and might vanish when your application shuts down or is redeployed. Additionally, GAE files are read-only, which prevents you from uploading media files directly to GAE.
Because of this, we'll set up persistent storage with Cloud Storage.
Service Account
To use Cloud Storage, we first need to create a dedicated service account with sufficient permissions to read/write and sign files in Cloud Storage.
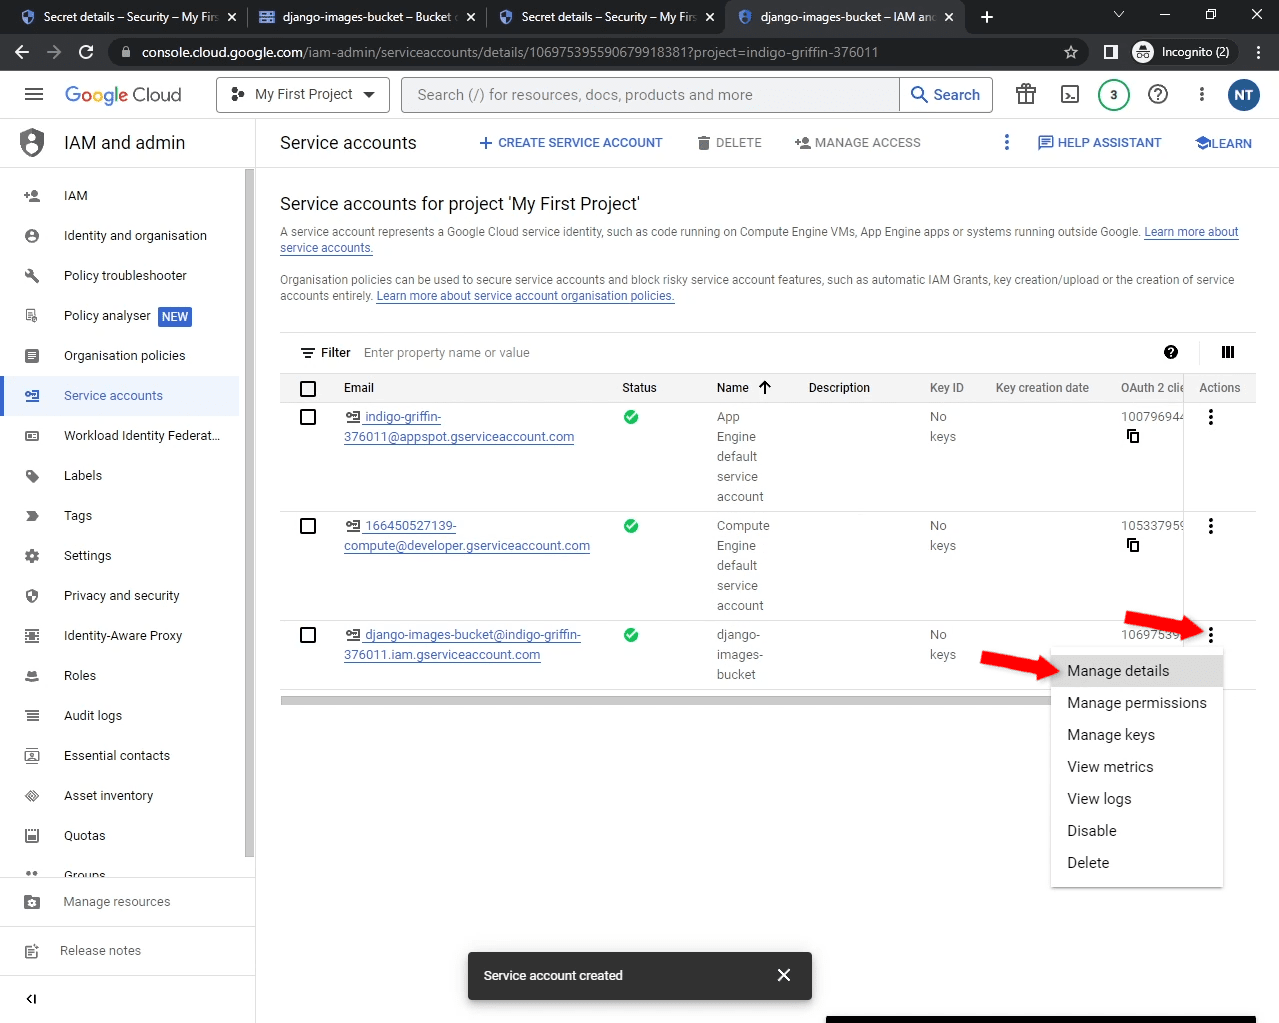
Navigate to the Service accounts dashboard and click on "Create service account". Name it "django-images-bucket" and leave everything else as default. Once you've submitted the form, you should see a new service account displayed in the table. Take note of your new service account's email.
Next, click on the three dots next to your service account and then "Manage details":
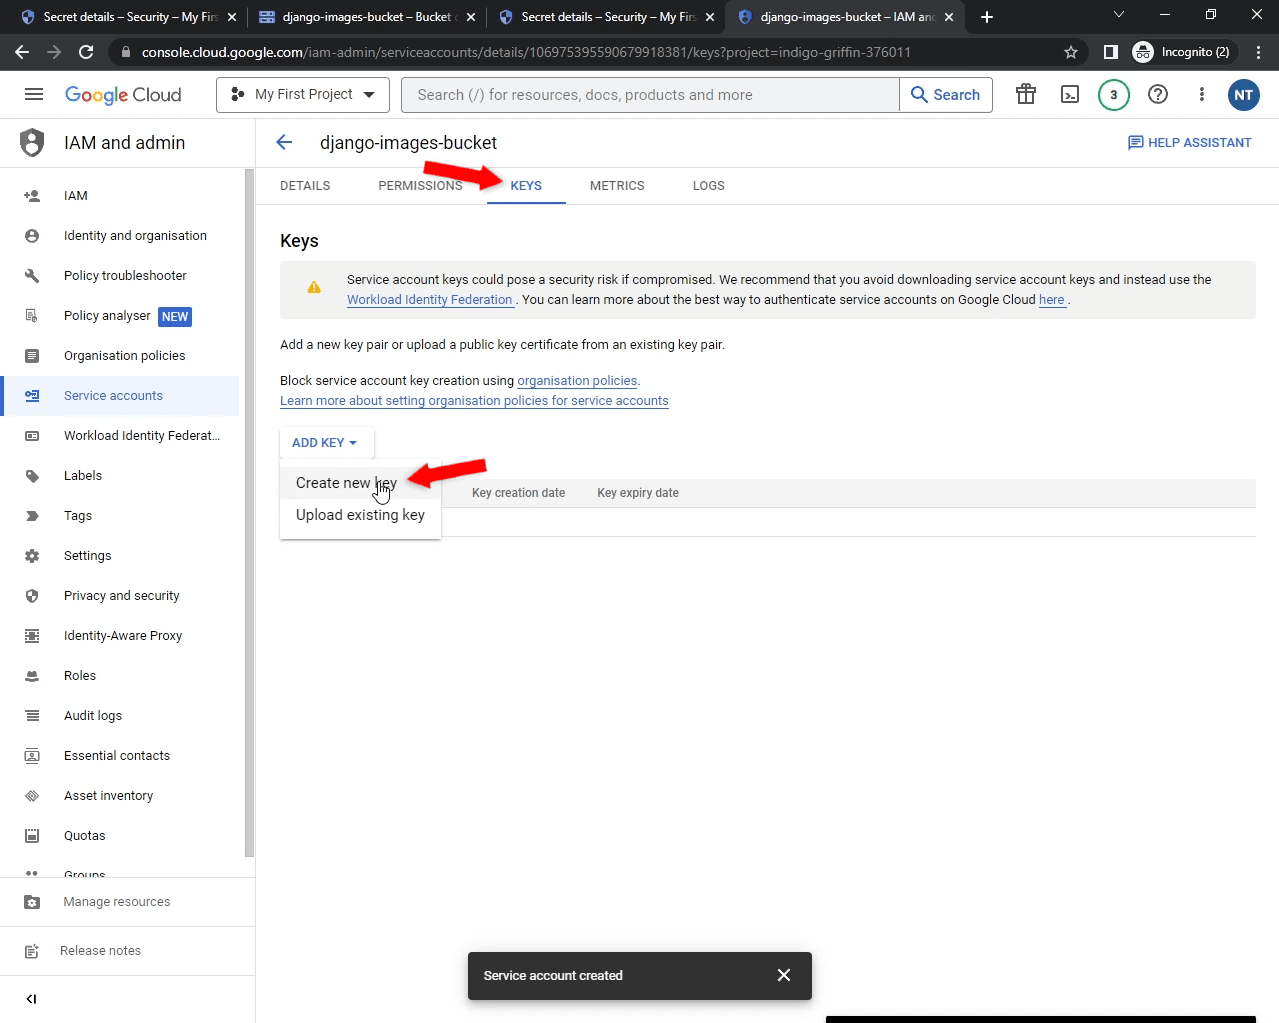
Select "Keys" in the navigation and "Create a new key". Export it as JSON.
Once the JSON key has been downloaded, give it a more-readable name like gcpCredentials.json and place it in your project root.
Make sure to add this file to your .gitignore to prevent accidentally leaking your service account credentials to version control.
Bucket
Navigate to your Cloud Storage Buckets and create a new bucket with the following details:
- Name: django-images-bucket
- Location type: Region
- Location: The same region as your app
Leave everything else as default and click "Create".
If you get a message saying "Public access will be prevented", untick the "Enforce public access prevention on this bucket" and "Confirm". We have to allow public access since we're deploying an image hosting site and want the uploaded images to be accessible to everyone.
For more, review Public access prevention.
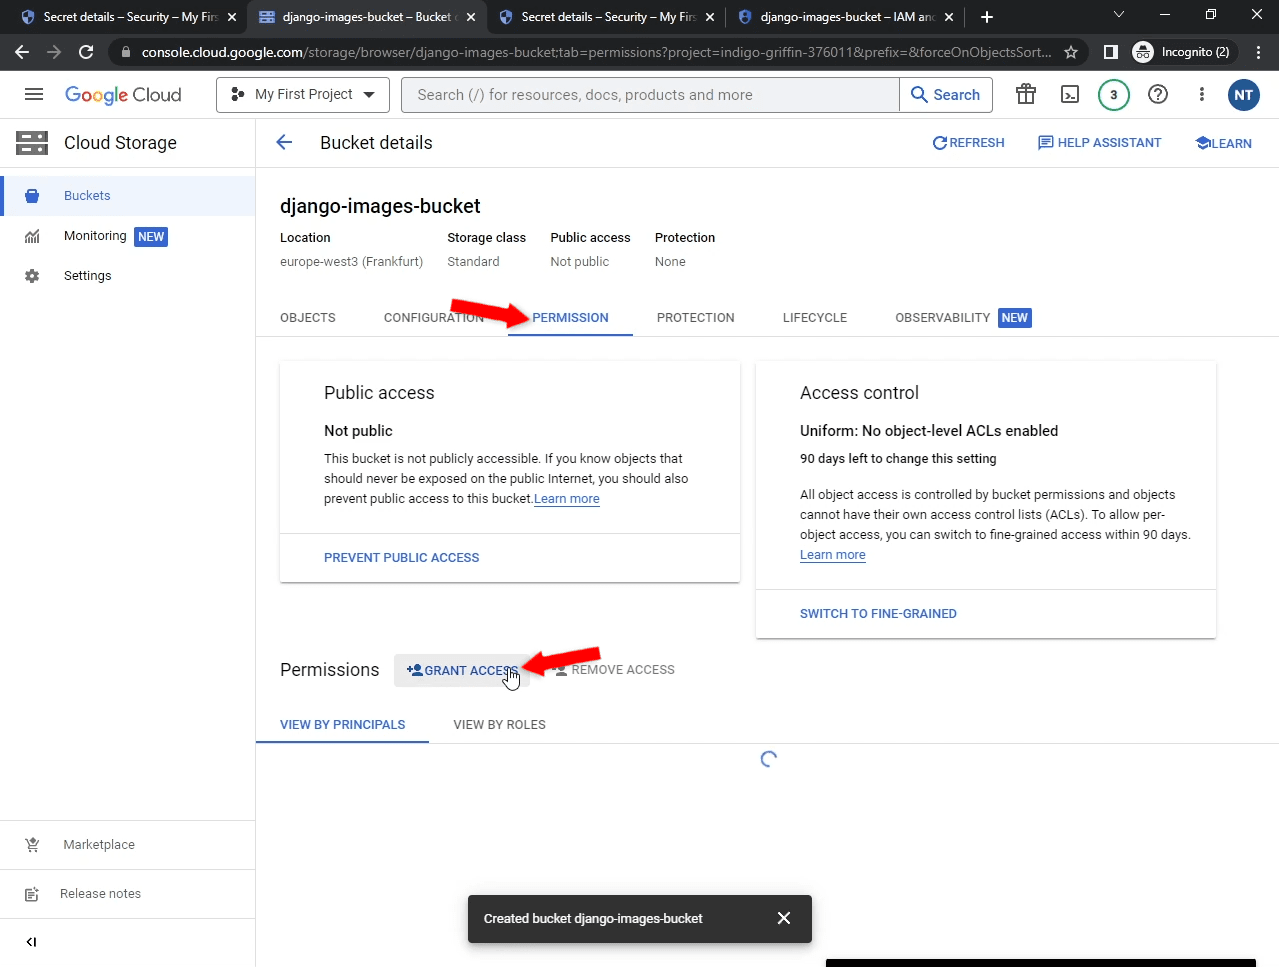
To grant our new service account permissions to the bucket, view your bucket details and then select "Permission" in the navigation. After that, click "Grant access":
Add a new principal:
- Email: Your service account email
- Roles: Cloud Storage > Storage Admin
Great! We now have a bucket and a service account that can use the bucket.
Configure Django
To utilize Cloud Storage with Django we'll use a third-party package called django-storages.
Install the packages locally and add the following two lines to requirements.txt:
django-storages[google]==1.13.2
google-cloud-storage==2.7.0
Next, configure django-storages to use Cloud Storage and your service account:
# core/settings.py

GS_CREDENTIALS = service_account.Credentials.from_service_account_file(
    os.path.join(BASE_DIR, 'gcpCredentials.json')
)

DEFAULT_FILE_STORAGE = 'storages.backends.gcloud.GoogleCloudStorage'
STATICFILES_STORAGE = 'storages.backends.gcloud.GoogleCloudStorage'
GS_BUCKET_NAME = env('GS_BUCKET_NAME')
Don't forget the import:
from google.oauth2 import service_account
Use handlers in app.yaml to make App Engine serve static and media files:
# app.yaml

handlers:
- url: /static              # new
  static_dir: staticfiles/  # new
- url: /media               # new
  static_dir: mediafiles/   # new
- url: /.*
  script: auto
Make sure they are placed before /.*.
If you're deploying your own app, make sure your
STATIC_URL,STATIC_ROOT,MEDIA_URL, andMEDIA_ROOTare set up correctly (example).
Collect the static files to GAE:
(venv)$ python manage.py collectstatic

You have requested to collect static files at the destination
location as specified in your settings.

This will overwrite existing files!
Are you sure you want to do this?

Type 'yes' to continue, or 'no' to cancel: yes

141 static files copied.
Redeploy your app:
$ gcloud app deploy
Open your app in the browser:
$ gcloud app browse
Navigate to /admin and make sure the static files have been collected and loaded.
Custom Domain
To link a custom domain to your web app, first navigate to the App Engine Dashboard. Select "Settings" in the sidebar and then "Custom Domains". Lastly, click "Add a custom domain".
Select a domain you'd like to use or add and verify a new domain. In case you add a new domain, make sure to enter the bare domain name. Example:
testdriven.io       <-- good
app.testdriven.io   <-- bad
Click "Continue" and enter the domain and subdomain names you'd like to map to your GAE app. Then click "Save mappings".
Next, go to your domain registrar's DNS settings and add a new "CNAME Record" pointing to ghs.googlehosted.com like so:
+----------+--------------+----------------------------+-----------+
| Type     | Host         | Value                      | TTL       |
+----------+--------------+----------------------------+-----------+
| CNAME    | <some host>  | ghs.googlehosted.co        | Automatic |
+----------+--------------+----------------------------+-----------+
Example:
+----------+--------------+----------------------------+-----------+
| Type     | Host         | Value                      | TTL       |
+----------+--------------+----------------------------+-----------+
| CNAME    | app          | ghs.googlehosted.com       | Automatic |
+----------+--------------+----------------------------+-----------+
Go back to your custom domain settings and click on "Done".
You've successfully added a custom domain name. Wait for the DNS changes to propagate and for Google to issue an SSL certificate. Be patient... it sometimes takes up to 24 hours.
After you've verified that your app is accessible over HTTPS, add the following to the end of app.yaml:
# app.yaml

env_variables:
  APPENGINE_URL: <the domain you mapped>

# Example:
# env_variables:
#   APPENGINE_URL: app.testdriven.io
This adds a new environment variable, which is used by settings.py to configure ALLOWED_HOSTS, CSRF_TRUSTED_ORIGINS, and enforce SSL redirect.
Lastly, redeploy your app once again:
$ gcloud app deploy
Conclusion
In this tutorial, we've successfully deployed a Django app to Google App Engine. We've taken care of the Postgres database, static and media files, added a custom domain name, and enabled HTTPS. You should now be able to deploy your own apps to App Engine.
Grab the final source code from the django-app-engine repo.
If you wish to delete all the services and resources we've created throughout the tutorial, take a look at the Clean Up resource from the docs.
Future steps
- Set
DEBUG=0in Secret Manager to disable debug mode. - Take a look at How Instances are Managed to better understand GAE scaling.
- Learn how to use Logs Explorer.