 Nik Tomazic
In this tutorial, we'll look at how to securely deploy a Django application to Dokku on a DigitalOcean droplet.
Contents
Objectives
By the end of this tutorial, you should be able to:
- Explain what Dokku is and how it works
- Create a DigitalOcean droplet and install Dokku on it
- Deploy a Django application to Dokku via git
- Create a Dokku-managed Postgres database
- Configure Dokku to persist storage
- Configure Nginx to serve static and media files
- Obtain a TLS certificate with Let's Encrypt and serve your application on HTTPS
What is Dokku?
Dokku is an open-source platform-as-a-service (PaaS) that allows you to build and manage the lifecycle of applications from building to scaling. It's basically a mini-Heroku that you can self-host on your Linux machine. Since it uses Heroku's buildpacks, it allows you to deploy everything that can be deployed on Heroku. Dokku is powered by Docker and integrates well with git.
Dokku is extremely lightweight. Its only system requirements are:
- Ubuntu 18.04/20.04/22.04 or Debian 10+ operating system
- 1 GB of system memory (in case you don't have it, you can use this workaround)
Due to its low system requirements, you can host it on DigitalOcean droplet for as little as $6 per month.
Why Dokku?
- Completely free and open-source
- Allows you to easily deploy your applications
- Rich command-line interface
- Supports a variety of community plugins
- Lightweight
Dokku offers a premium plan called Dokku PRO, which simplifies things even further and comes with a user-friendly interface. You can learn more about it on their official website.
Project Setup
In this tutorial, we'll be deploying a simple image hosting application called django-images.
Check your understanding by deploying your own Django application as you follow along with the tutorial.
First, grab the code from the repository on GitHub:
$ git clone [email protected]:duplxey/django-images.git
$ cd django-images
Create a new virtual environment and activate it:
$ python3 -m venv venv && source venv/bin/activate
Install the requirements and migrate the database:
(venv)$ pip install -r requirements.txt
(venv)$ python manage.py migrate
Run the server:
(venv)$ python manage.py runserver
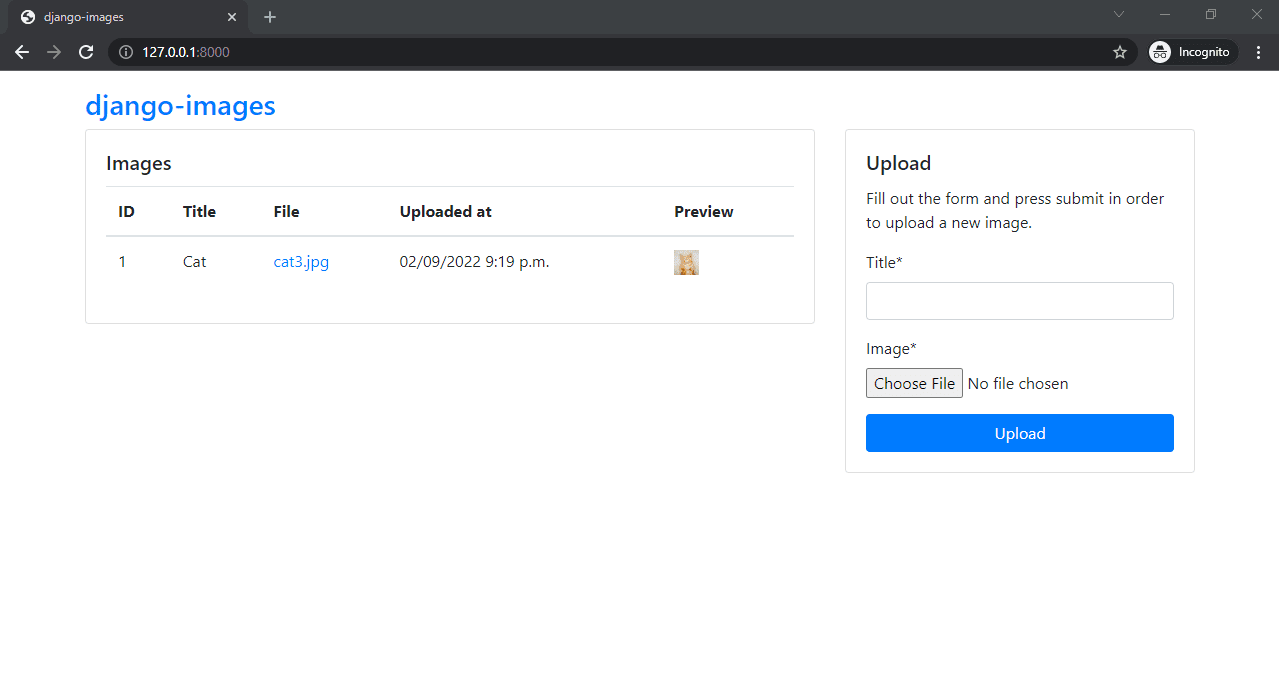
Open your favorite web browser and navigate to http://localhost:8000. Make sure everything works correctly by using the form on the right to upload an image. After you upload an image, you should see it displayed in the table:
DigitalOcean
Let's create a droplet on DigitalOcean.
First, you'll need to sign up for a DigitalOcean account (if you don't already have one), and then generate an access token so you can access the DigitalOcean API.
Add the generated token to your environment:
$ export DIGITAL_OCEAN_ACCESS_TOKEN=<your_digital_ocean_token>
Create a Droplet
Let's create a 2 GB droplet since our Django app requires some memory and Dokku requires 1 GB of system memory to work.
Create a droplet:
$ curl -X POST -H 'Content-Type: application/json' \
     -H 'Authorization: Bearer '$DIGITAL_OCEAN_ACCESS_TOKEN'' -d \
    '{"name":"django-dokku","region":"fra1","size":"s-1vcpu-2gb","image":"ubuntu-20-04-x64"}' \
    "https://api.digitalocean.com/v2/droplets"
This command creates a droplet with 2 GB of RAM hosted in the
frankfurt-1region. Feel free to pick better system specs and change the region. If you don't know the DigitalOcean identifiers, you can use this site.
It'll take about 3-5 minutes for DigitalOcean to spin up a droplet.
Check its status:
$ curl \
    -H 'Content-Type: application/json' \
    -H 'Authorization: Bearer '$DIGITAL_OCEAN_ACCESS_TOKEN'' \
    "https://api.digitalocean.com/v2/droplets?name=django-dokku"
If you have jq installed, you can parse the JSON response like so:
$ curl \
    -H 'Content-Type: application/json' \
    -H 'Authorization: Bearer '$DIGITAL_OCEAN_ACCESS_TOKEN'' \
    "https://api.digitalocean.com/v2/droplets?name=django-dokku" \
    | jq '.droplets[0].status'
Once the droplet becomes available you'll receive an email that contains the droplet's IP address and password. Use that information to SSH into the server.
As you SSH into the droplet for the first time you'll be forced to change the password due to security reasons. You can pick a really strong password since we're going to enable passwordless SSH login in the next step.
To generate the SSH keys run:
$ ssh-keygen -t rsa
Save the key to /root/.ssh/id_rsa and don't set the passphrase. This will generate a public and private key -- id_rsa and id_rsa.pub, respectively. To set up passwordless SSH login, copy the public key over to the authorized_keys file and set the proper permissions:
$ cat ~/.ssh/id_rsa.pub
$ vi ~/.ssh/authorized_keys
$ chmod 600 ~/.ssh/authorized_keys
$ chmod 600 ~/.ssh/id_rsa
Copy the contents of the private key:
$ cat ~/.ssh/id_rsa
Exit from the SSH session, and then set the key as an environment variable on your local machine:
export PRIVATE_KEY='-----BEGIN RSA PRIVATE KEY-----
MIIEpAIBAAKCAQEA04up8hoqzS1+APIB0RhjXyObwHQnOzhAk5Bd7mhkSbPkyhP1
...
iWlX9HNavcydATJc1f0DpzF0u4zY8PY24RVoW8vk+bJANPp1o2IAkeajCaF3w9nf
q/SyqAWVmvwYuIhDiHDaV2A==
-----END RSA PRIVATE KEY-----'
Add the key to the ssh-agent:
$ ssh-add - <<< "${PRIVATE_KEY}"
To test, run:
$ ssh -o StrictHostKeyChecking=no root@<droplet_ip_address> whoami

root
Install Dokku
WARNING: Dokku bootstrap script is supposed to be run on a fresh Linux install.
To install the latest stable Dokku version, first SSH back into the droplet and then navigate to Installing the latest stable version and copy the bootstrap command. At the time of writing it looks like this:
wget https://raw.githubusercontent.com/dokku/dokku/v0.28.1/bootstrap.sh
sudo DOKKU_TAG=v0.28.1 bash bootstrap.sh
This script will install Docker, Dokku, and all other dependencies. The installation will take about 5 to 10 minutes, so feel free to go grab a cup of coffee in the meantime.
Once the installation is complete check the Dokku version:
$ dokku version

dokku version 0.28.1
Dokku's deployments are handled via git. Each time you push your code to the remote repo you'll need to authenticate yourself by either entering the dokku user's password or by using an SSH key.
To avoid password-based authentication add your SSH key to Dokku:
$ cat ~/.ssh/authorized_keys | dokku ssh-keys:add admin
If you get a message saying
Duplicate ssh public key specifiedit means that Dokku already has your SSH key added. Feel free to ignore this warning.
Create Dokku App
To create a Dokku app, run:
$ dokku apps:create django-dokku

-----> Creating django-dokku...
Check if the app has been successfully created:
$ dokku apps:list

=====> My Apps
django-dokku
If you ever get stuck or forget a command when working with Dokku, you can append
:helpafter the command to see what the command does and its attributes.For example:
dokku apps:help.
Next, link your droplet's IP address to your Dokku app:
$ dokku domains:add django-dokku <your_droplet_ip>
Dokku Database Setup
For Django to work we'll also need a database. We could theoretically use the default SQLite database, but let's swap it for a production-ready database: Postgres.
By default, Dokku doesn't provide datastores -- e.g., MySQL, Postgres -- on a newly created app. To create a database service with Dokku you first need to install a community plugin -- e.g., dokku-postgres, dokku-mysql -- and then link it to the app.
Start by installing dokku-postgres:
$ sudo dokku plugin:install https://github.com/dokku/dokku-postgres.git postgres
Next to create a Postgres service named mydb, run:
$ dokku postgres:create mydb

       Waiting for container to be ready
       Creating container database
       Securing connection to database
=====> Postgres container created: mydb
=====> mydb postgres service information
       Config dir:          /var/lib/dokku/services/postgres/mydb/data
       Config options:
       Data dir:            /var/lib/dokku/services/postgres/mydb/data
       Dsn:                 postgres://postgres:88e242667bf9579a47c4cf5895524b8c@dokku-postgres-mydb:5432/mydb
       Exposed ports:       -
       Id:                  7f8274383725b8dca9e64f0d7e3835ae4e6a16a3f5bc9bf015ff9bd32b6c5895
       Internal ip:         172.17.0.3
       Links:               -
       Service root:        /var/lib/dokku/services/postgres/mydb
       Status:              running
       Version:             postgres:14.4
Dokku will spin up a new Docker container with Postgres installed.
Check Docker containers:
$ docker ps

CONTAINER ID   IMAGE           COMMAND                  CREATED        STATUS        PORTS      NAMES
7f8274383725   postgres:14.4   "docker-entrypoint.s…"   1 hour ago     Up 1 hour     5432/tcp   dokku.postgres.mydb
Lastly, link the Postgres service to the Dokku app:
$ dokku postgres:link mydb django-dokku

-----> Setting config vars
       DATABASE_URL:  postgres://postgres:88e242667bf9579a47c4cf5895524b8c@dokku-postgres-mydb:5432/mydb
-----> Restarting app django-dokku
 !     App image (dokku/django-dokku:latest) not found
This will set a new environment variable named DATABASE_URL. This variable is a Twelve-Factor App inspired URL that will later allow us to connect to the database.
postgres://postgres:88e242667bf9579a47c4cf5895524b8c@dokku-postgres-mydb:5432/mydb

syntax:
protocol://username:password@host:port/dbname
Great! Our database is now running in a Docker container and it's linked to the Dokku app.
To learn more about dokku-postgres refer to the repository's README.
Configure Django Project
In this part of the tutorial, we'll prepare our Django app for deployment with Dokku.
Environment variables
We shouldn't store secrets in the source code, so let's utilize environment variables. The easiest way to do this is to use a third-party Python package called python-dotenv. Start by adding it to requirements.txt:
python-dotenv==0.21.0
Feel free to use a different package for handling environment variables like django-environ or python-decouple.
Then, import and initialize python-dotenv at the top of core/settings.py like so:
# core/settings.py

from pathlib import Path

from dotenv import load_dotenv  # new

# Build paths inside the project like this: BASE_DIR / 'subdir'.
BASE_DIR = Path(__file__).resolve().parent.parent

load_dotenv(BASE_DIR / '.env')  # new
Next, load SECRET_KEY, DEBUG, and ALLOWED_HOSTS from the environment:
# core/settings.py

# SECURITY WARNING: keep the secret key used in production secret!
SECRET_KEY = os.getenv('SECRET_KEY')

# SECURITY WARNING: don't run with debug turned on in production!
DEBUG = os.getenv('DEBUG', '0').lower() in ['true', 't', '1']

ALLOWED_HOSTS = os.getenv('ALLOWED_HOSTS').split(' ')
Don't forget the import:
import os
Database
To use Postgres instead of SQLite, we first need to install the database adapter.
Add the following line to requirements.txt:
psycopg2==2.9.3
Remember the DATABASE_URL that has been added as an environment variable? To utilize it with Django, we can use a package called dj-database-url. This package transforms the URL into Django database parameters.
Add it to requirements.txt like so:
dj-database-url==1.0.0
Next, go to core/settings.py and change DATABASES like so:
# core/settings.py

DATABASES = {
    'default': dj_database_url.parse(os.environ.get('DATABASE_URL'), conn_max_age=600),
}
Don't forget to import dj-database-url at the top of the file:
import dj_database_url
Gunicorn
Moving along, let's install Gunicorn, a production-grade WSGI server that's going to be used in production instead of Django's development server.
Add it to requirements.txt:
gunicorn==20.1.0
Procfile
Like Heroku, Dokku also uses a Procfile to specify the commands that are executed by the app on startup.
Create a Procfile in the project root and populate it:
web: gunicorn core.wsgi:application

release: django-admin migrate --no-input && django-admin collectstatic --no-input
All the languages and frameworks using Heroku’s Buildpacks declare a web process type, which starts the application server. The release step migrates the database and collects static files during the release phase.
runtime.txt
To specify the Python version Dokku should use for your application, create a new file called runtime.txt in the project root. Then populate it like so:
python-3.10.7
To see a list of all supported Python runtimes take a look at the Heroku Python Support.
Our app is now ready to be deployed. Let's add all the files and commit them to git:
$ git add -A
$ git commit -m "prepared the app for Dokku deployment"
Deploy App
Before we can deploy the app, back on the droplet, we need to add environment variables to Dokku that we used in Django's settings:
$ dokku config:set --no-restart django-dokku SECRET_KEY=h8710y7yaaaqopvbxtyxebdmtcewi_vuf1ah4gaxyjj4goij0u
$ dokku config:set --no-restart django-dokku DEBUG=1
$ dokku config:set --no-restart django-dokku ALLOWED_HOSTS=*
To make debugging a bit easier, we'll temporarily enable debug mode and set ALLOWED_HOSTS to *. This is a bad security practice because it allows your Django site to serve over any host/domain and makes you vulnerable to HTTP Host header attacks.
Don't worry, we'll change both of the settings later.
We added the
--no-restartflag to prevent Dokku from restarting the django-dokku app after each new environment variable is added.
Additionally, add DJANGO_SETTINGS_MODULE, which is required to use the django-admin command:
$ dokku config:set --no-restart django-dokku DJANGO_SETTINGS_MODULE=core.settings
Check the environment variables to make sure everything has been added correctly:
$ dokku config:show django-dokku

=====> django-dokku env vars
ALLOWED_HOSTS:           *
DATABASE_URL:            postgres://postgres:3ec113c78389c03cdde35ca3686b859c@dokku-postgres-mydb:5432/mydb
DEBUG:                   1
DJANGO_SETTINGS_MODULE:  core.settings
DOKKU_PROXY_PORT:        80
DOKKU_PROXY_PORT_MAP:    http:80:5000
SECRET_KEY:              h8710y7yaaaqopvbxtyxebdmtcewi_vuf1ah4gaxyjj4goij0u
That's it.
Now, let's go back to our local dev environment.
Add a new remote to our git repository and push the code to the droplet:
$ git remote add dokku dokku@<your_droplet_ip_address>:django-dokku
$ git push dokku master
When you create a new Dokku app, a git repository should be created as well.
In case you get a "<APP_NAME> does not appear to be a git repository" error, SSH into your droplet and run:
dokku git:initialize django-dokku.
You should see a really long output in your terminal. Essentially, Dokku is:
- Cleaning up the environment
- Setting environment variables
- Installing all the requirements from requirements.txt
- Collecting static files and migrating the database
- Creating and configuring an Nginx instance
- Shuting down the old container and spinning up a new one
Once Dokku is done deploying you can SSH into your droplet and check the app's status:
$ dokku ps:report
Lastly, go to your droplet's IP address in the browser and test the application to see if it works.
http://<your_droplet_ip_address>/
Nice! Your app is now deployed to Dokku. Every time you want to update your deployed app, commit your changes and push to the dokku origin.
Dokku Storage Setup
Dokku apps run within containers. Because of that, if a container is destroyed your files and other data are also going to be destroyed. To persist the data beyond the life of a container, we'll need to configure storage via Dokku's persistent storage plugin.
Persist storage
To persist the storage, we first need to create a storage directory. Dokku recommends to use /var/lib/dokku/data/storage/<app_name>.
So, back on the droplet, run:
$ mkdir /var/lib/dokku/data/storage/django-dokku/
$ chown -R dokku:dokku /var/lib/dokku/data/storage/django-dokku/
Next, let's mount the directories. The command takes two arguments:
- An app name
- A
host-path:container-pathordocker-volume:container-pathcombination
$ dokku storage:mount django-dokku /var/lib/dokku/data/storage/django-dokku/staticfiles:/app/staticfiles
$ dokku storage:mount django-dokku /var/lib/dokku/data/storage/django-dokku/mediafiles:/app/mediafiles
Redeploy the Dokku app to make sure the files get collected:
$ dokku ps:restart django-dokku
List the directory:
$ ls /var/lib/dokku/data/storage/django-dokku

mediafiles  staticfiles
Great, our static and media files have been collected.
Serve Static and Media Files with Nginx
At the moment we have DEBUG=1 and are serving our static and media files via Django:
# core/urls.py

if settings.DEBUG:
    urlpatterns += static(settings.MEDIA_URL, document_root=settings.MEDIA_ROOT)
    urlpatterns += static(settings.STATIC_URL, document_root=settings.STATIC_ROOT)
Let's disable the debug mode and learn how to serve them via Nginx.
$ dokku config:set django-dokku DEBUG=0
Your server will restart. If you visit the web app you'll no longer be able to see any images.
To configure Nginx to serve static and media files in production, create a new directory named "nginx.conf.d" in the Dokku app files. Then create a new file within that directory named static.conf.
$ mkdir -p /home/dokku/django-dokku/nginx.conf.d
$ vi /home/dokku/django-dokku/nginx.conf.d/static.conf
Put the following contents into static.conf:
location /static/ {
    alias /var/lib/dokku/data/storage/django-dokku/staticfiles/;
}

location /media/ {
    alias /var/lib/dokku/data/storage/django-dokku/mediafiles/;
}
Directory structure:
└── nginx.conf.d
    └── static.conf
This creates two routes, one for serving static files from storage and the other for media files.
Make the dokku user the owner of the config, and restart the app:
$ chown -R dokku:dokku /home/dokku/django-dokku/nginx.conf.d
$ dokku ps:restart django-dokku
Once the app restarts, visit it in your browser and check if the media files are back.
Django Admin Access
To access the Django administration panel we need to create a superuser. We have two options:
- Use
dokku runto execute a command. - Create a Django command that creates a superuser and add it to Procfile.
Since it's a one-off task, we'll use the first approach:
$ dokku run django-dokku python manage.py createsuperuser
Follow the prompts and you're done.
To make sure the superuser has been successfully created navigate to the admin dashboard and log in.
http://<your_droplet_ip_address>/admin
Add Domain
This part of the tutorial requires that you have a domain name.
Need a cheap domain to practice with? Several domain registrars have specials on '.xyz' domains. Alternatively, you can create a free domain at Freenom.
In Dokku, there are two types of domains:
- Global domains allow you to use a wildcard to access specific apps. For example, if your domain is testdriven.io and your app is named myapp, you'll be able to access your app at myapp.testdriven.io.
- App domains lead directly to a specific app. So, if your domain is testdriven.io then you'll be able to access your app at testdriven.io.
To learn more on how Dokku domains work, refer to the official documentation.
Since we only have one app, we'll utilize an app domain. Check the current app domain settings:
$ dokku domains:report django-dokku

=====> django-dokku domains information
       Domains app enabled:           true
       Domains app vhosts:            165.227.135.236
       Domains global enabled:        true
       Domains global vhosts:         django-dokku
To add a domain, go to your domain's registrar > DNS settings and create a new "A Record" pointing to your droplet's IP address like so:
+----------+--------------+----------------------------+-----------+
| Type     | Host         | Value                      | TTL       |
+----------+--------------+----------------------------+-----------+
| A Record | <some host>  | <your_droplet_ip_address>  | Automatic |
+----------+--------------+----------------------------+-----------+
Example:
+----------+--------------+----------------------------+-----------+
| Type     | Host         | Value                      | TTL       |
+----------+--------------+----------------------------+-----------+
| A Record | django-dokku | 159.89.24.5                | Automatic |
+----------+--------------+----------------------------+-----------+
If you don't want to use a subdomain, you can follow the same steps but just change the DNS host to
@and configure Dokku accordingly.
Lastly, add the domain to Dokku:
$ dokku domains:set django-dokku django-dokku.testdriven.io

-----> Set django-dokku.testdriven.io for django-dokku
-----> Configuring django-dokku.testdriven.io...(using built-in template)
-----> Creating http nginx.conf
       Reloading nginx
Make sure to replace django-dokku.testdriven.io with your domain or subdomain.
Dokku will configure everything (including the Nginx configuration) to work with the domain.
Check the domain report again and you'll see a new app virtual host:
$ dokku domains:report django-dokku

=====> django-dokku domains information
       Domains app enabled:           true
       Domains app vhosts:            django-dokku.testdriven.io
       Domains global enabled:        true
       Domains global vhosts:         django-dokku
Try to visit your web app via the domain to see if it works.
HTTPS with Let's Encrypt
In this final section, we'll use Let's Encrypt to obtain a TLS certificate and then serve the web application via HTTPS.
First, install another Dokku community plugin called dokku-letsencrypt:
$ sudo dokku plugin:install https://github.com/dokku/dokku-letsencrypt.git
Before obtaining a certificate, you'll need to add an env variable with your email address:
$ dokku config:set --no-restart django-dokku DOKKU_LETSENCRYPT_EMAIL=<your_email>

-----> Setting config vars
       DOKKU_LETSENCRYPT_EMAIL:  youremail
This email is used to issue the certificate and notify you about expiration.
Next, run the plugin command to enable HTTPS:
$ sudo dokku letsencrypt:enable django-dokku
This command will retrieve the certificate, install it, automagically configure Nginx, create a redirect from HTTP to HTTPS, and set up HSTS headers.
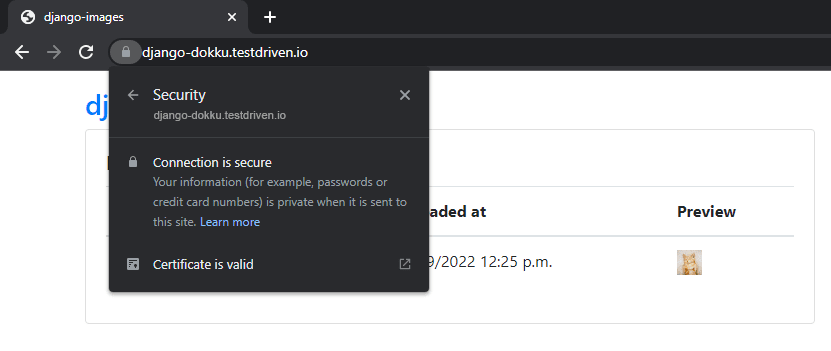
Try visiting your website via HTTP and you should be redirected to HTTPS.
To set up an automatic certificate renewal, run:
$ dokku letsencrypt:cron-job --add
This will run checks every day and renew any certificates that are due to be renewed.
Lastly, configure Django's ALLOWED_HOSTS to allow website access only via HTTPS:
$ dokku config:set django-dokku "ALLOWED_HOSTS=localhost 127.0.0.1 [::1] <your_domain>"
Make sure to replace <your_domain> with your actual domain.
Wait for the server to restart -- and that's it!
Conclusion
In this tutorial, we've successfully deployed a Django application to Dokku on a DigitalOcean droplet. You should now have a fair understanding of how Dokku works and be able to deploy your own Django applications.
Grab the final code from the django-dokku-digitalocean repo.
What's next?
- You should make your droplet more secure by enabling and configuring a firewall.
- It's bad practice to host your database in a container. Consider switching to a DigitalOcean Managed Database or a similar service.
- For media files consider switching to AWS S3 since it's more secure and cheaper.