 Michael Herman
DigitalOcean's App Platform is a Platform-as-a-Service (PaaS) offering, which (much like Heroku) allows you to deploy an application from a git repository.
This article looks at how to deploy a Django application to DigitalOcean's App Platform.
Contents
Why Use DigitalOcean's App Platform?
The goal of DigitalOcean's App Platform is to simplify deployment so you can focus on application development instead of managing infrastructure. It's perfect for your everyday, run-of-the-mill Django app with Postgres (or MySQL) for persistence, and Redis for your Celery message broker. That said, if your app does require you to have access to the underlying infrastructure, you'll probably want to steer away from App Platform and use an Infrastructure-as-a-Service (IaaS) solution like a DigitalOcean Droplet instead.
Positives:
- Immutable deploys
- Zero downtime deployments
- Built in continuous deployment
- Cloudflare CDN by default
- Vertical and horizontal scaling (no auto scaling yet)
- Supports Docker
Negatives:
- The documentation needs work (it's gotten a lot better since this article was originally published)
- Compared to Heroku, it has few extensions (like logging and monitoring services)
Yes, it's more expensive than an IaaS solution, but if your app doesn't have complex infrastructure requirements then you'll save time and money since you won't need to hire an ops engineer.
Project Setup
We'll be deploying a basic Django app. If you'd like to follow along you can use either a pre-created demo app or your own app.
Demo App
Feel free to clone down the demo app from the v1 branch of the digitalocean-app-platform-django repo:
$ git clone https://github.com/testdrivenio/digitalocean-app-platform-django --branch v1
$ cd digitalocean-app-platform-django
$ git checkout -b main
Make sure to create a new GitHub repo and push the code up to the main branch.
Your App
If you have your own Django app that you'd like to deploy, for simplicity's sake, update the following config in your settings.py file:
SECRET_KEY = 'please-change-me'
DEBUG = True
ALLOWED_HOSTS = ['*']
After the initial deploy, we'll look at how to change each of these so your app is more secure.
Also, add the following static asset config:
STATIC_URL = '/static/'
STATIC_ROOT = Path(BASE_DIR).joinpath('staticfiles')
STATICFILES_DIRS = (Path(BASE_DIR).joinpath('static'),)
DigitalOcean
Let's set up DigitalOcean to work with our application.
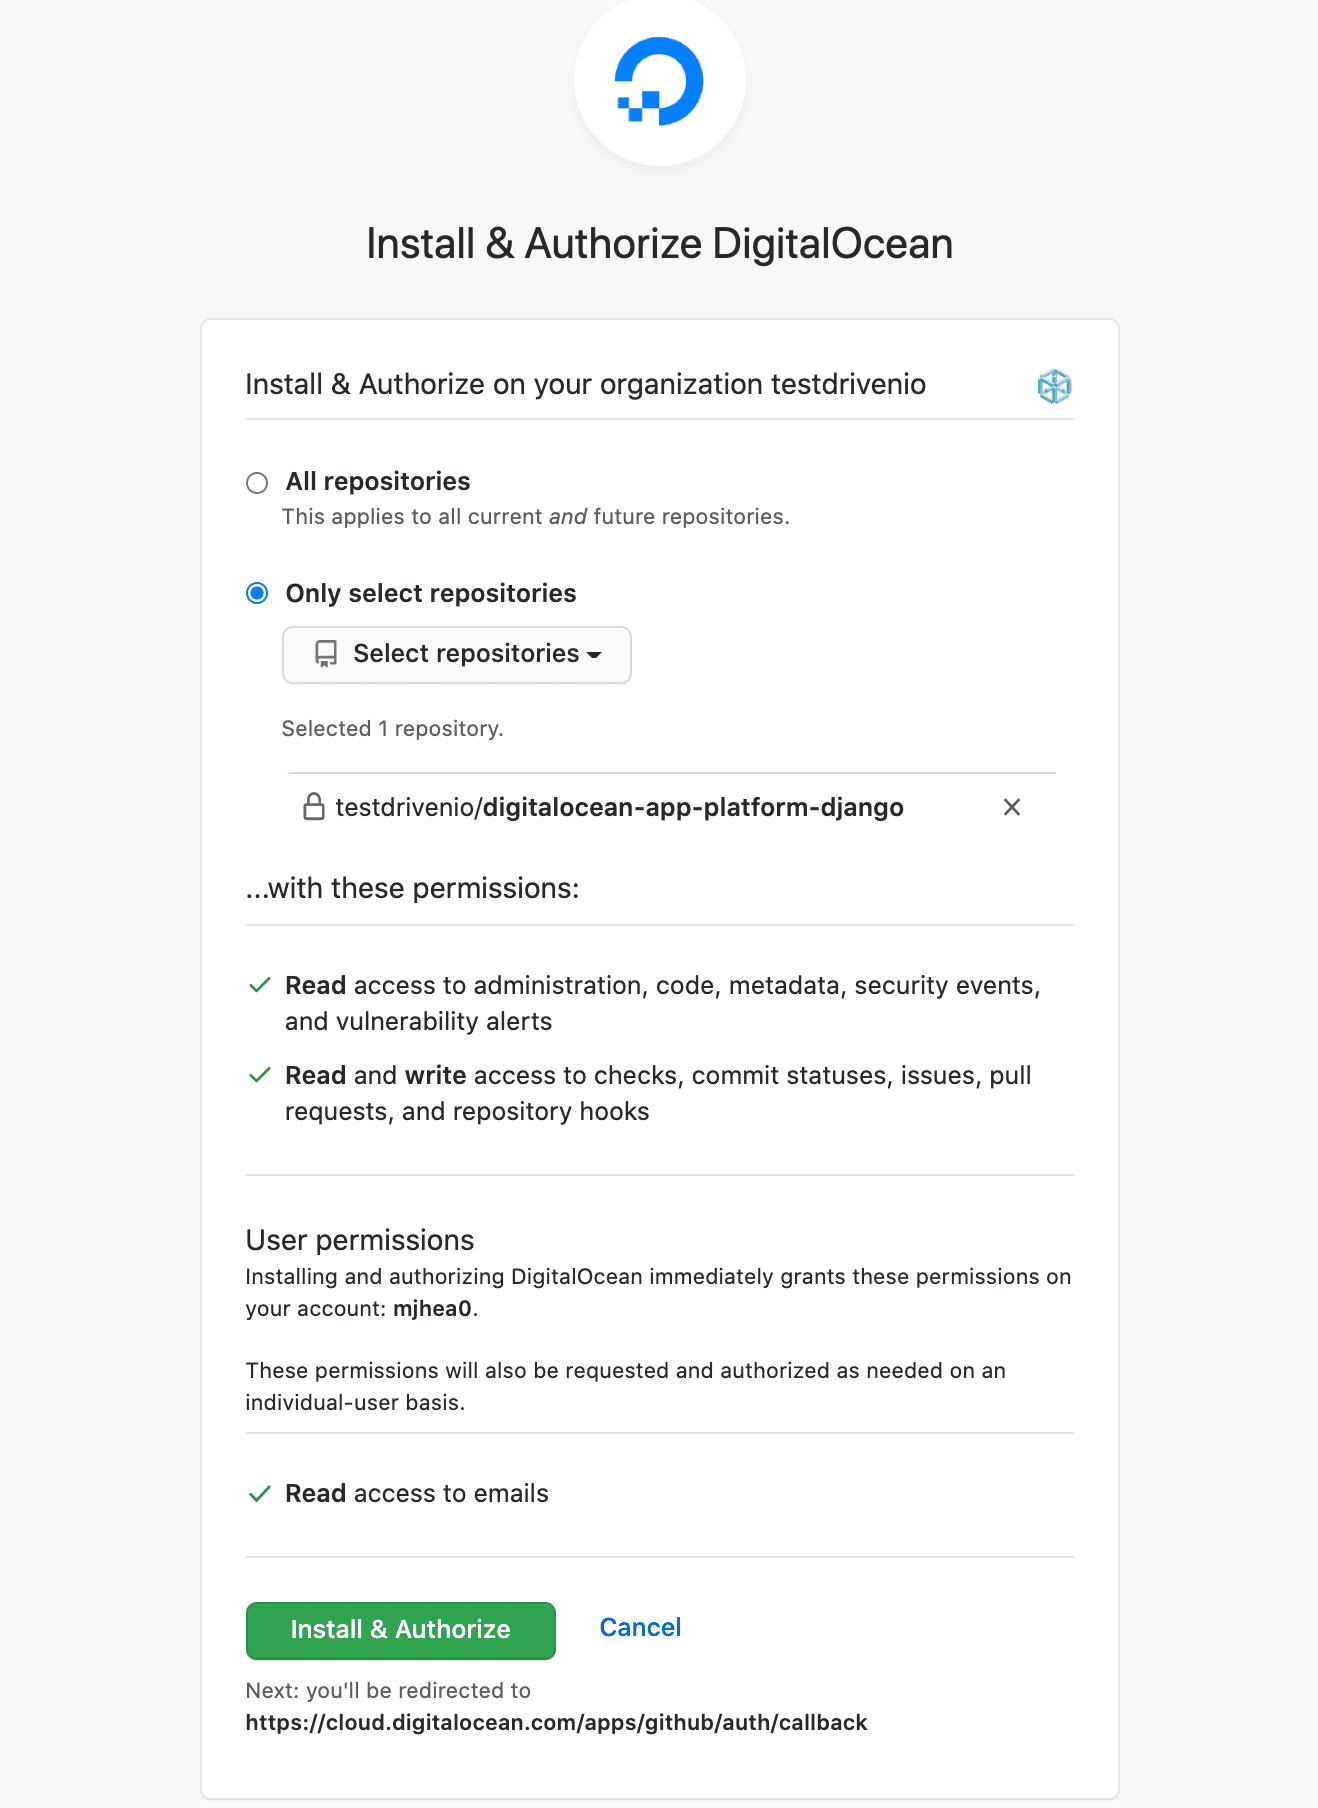
First, you'll need to sign up for a DigitalOcean account (if you don't already have one). Next, from the DigitalOcean dashboard, click on the link for "Apps" in the sidebar, click "Create App, and then link your GitHub account. You'll probably want to grant access to only the single repo created earlier in this article rather than for all repos:
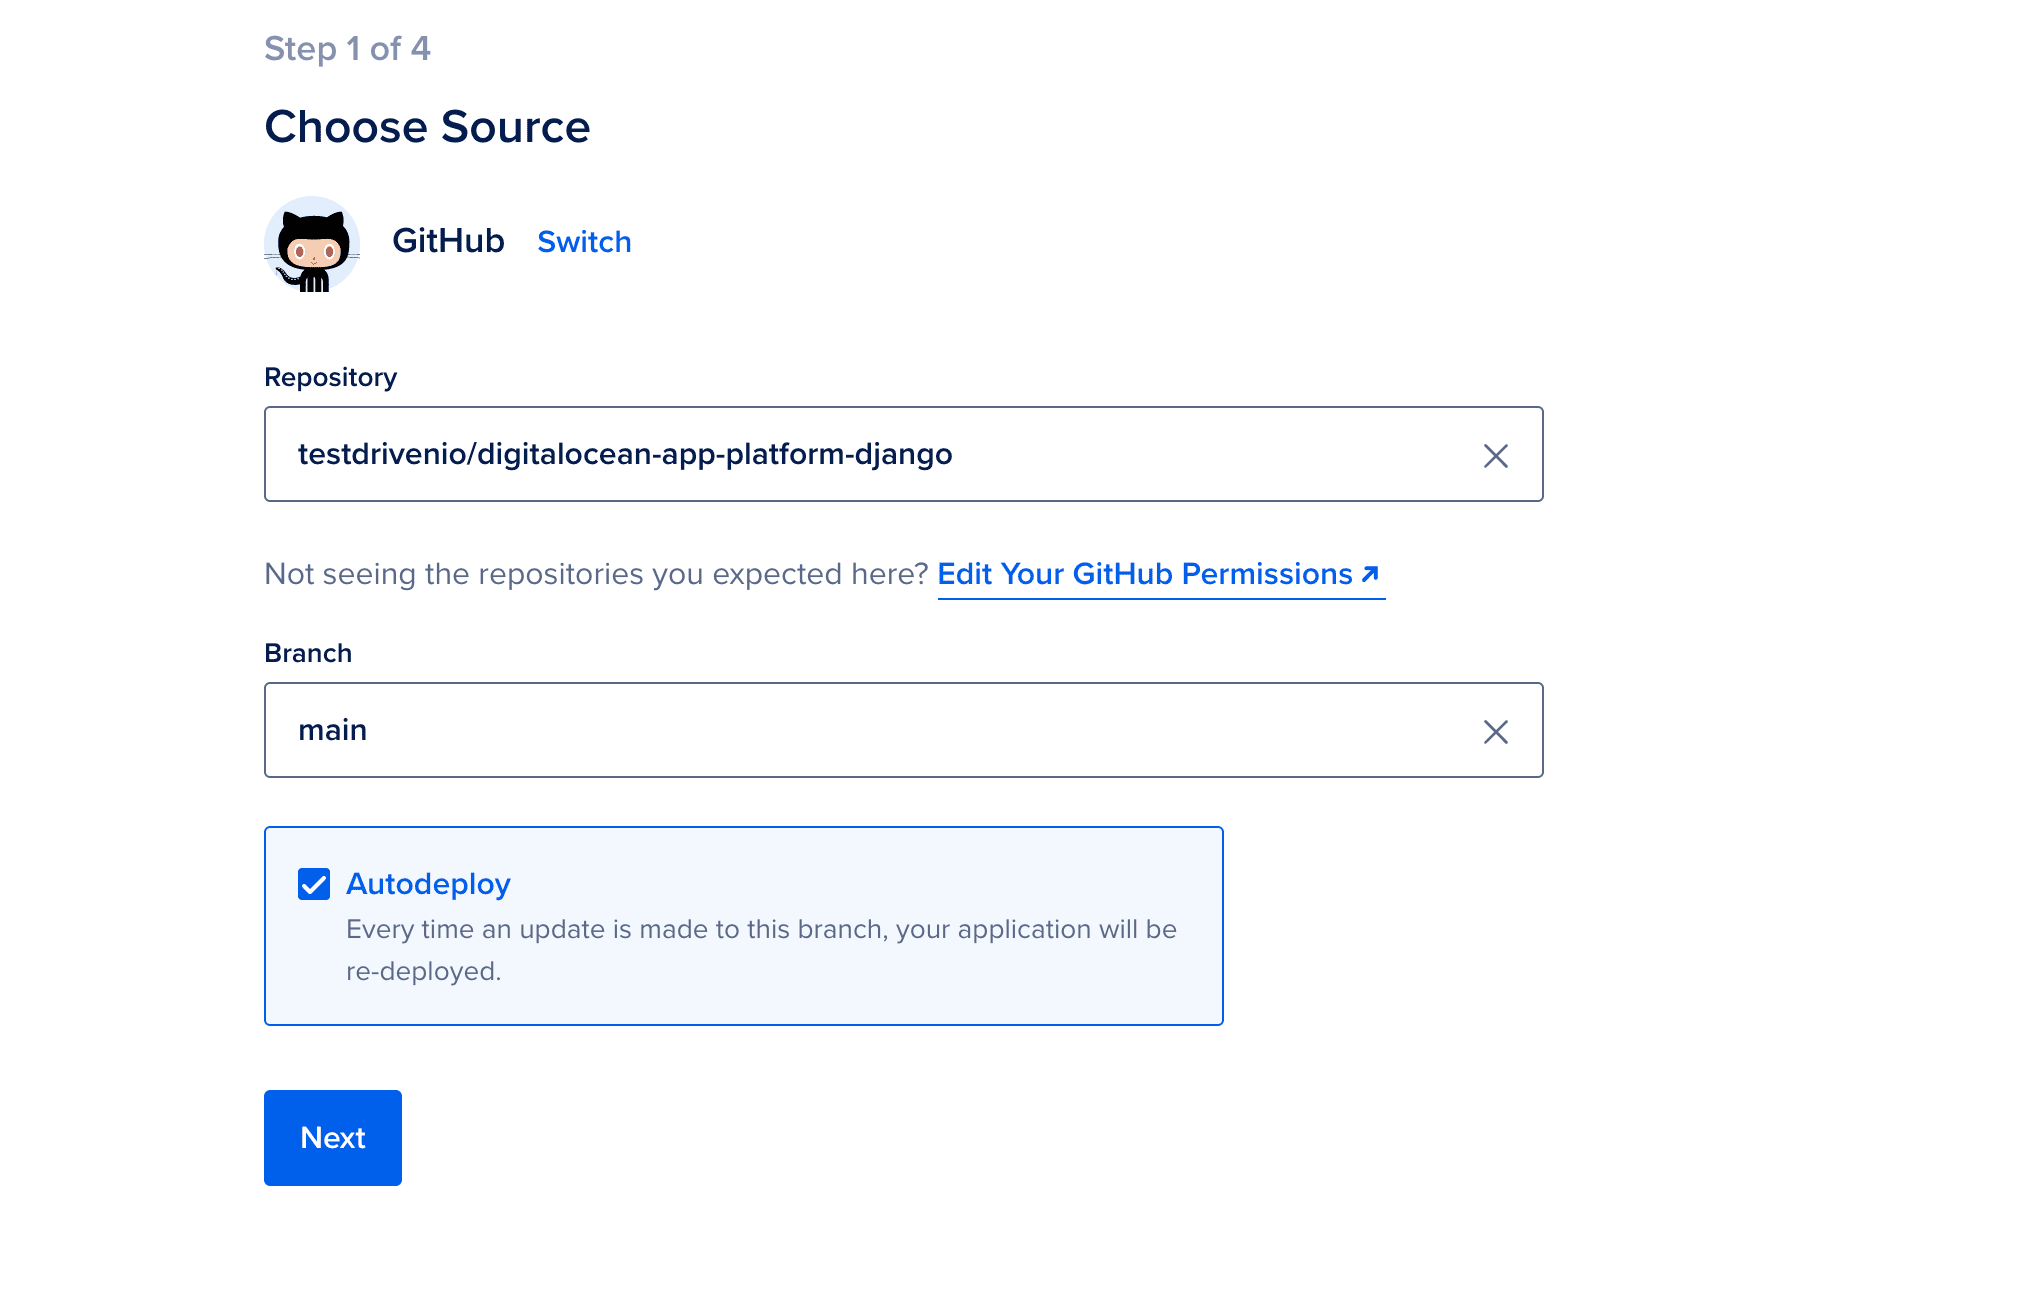
Once done, select the repo, keep "Autodeploy" checked for continuous deployment, and click "Next":
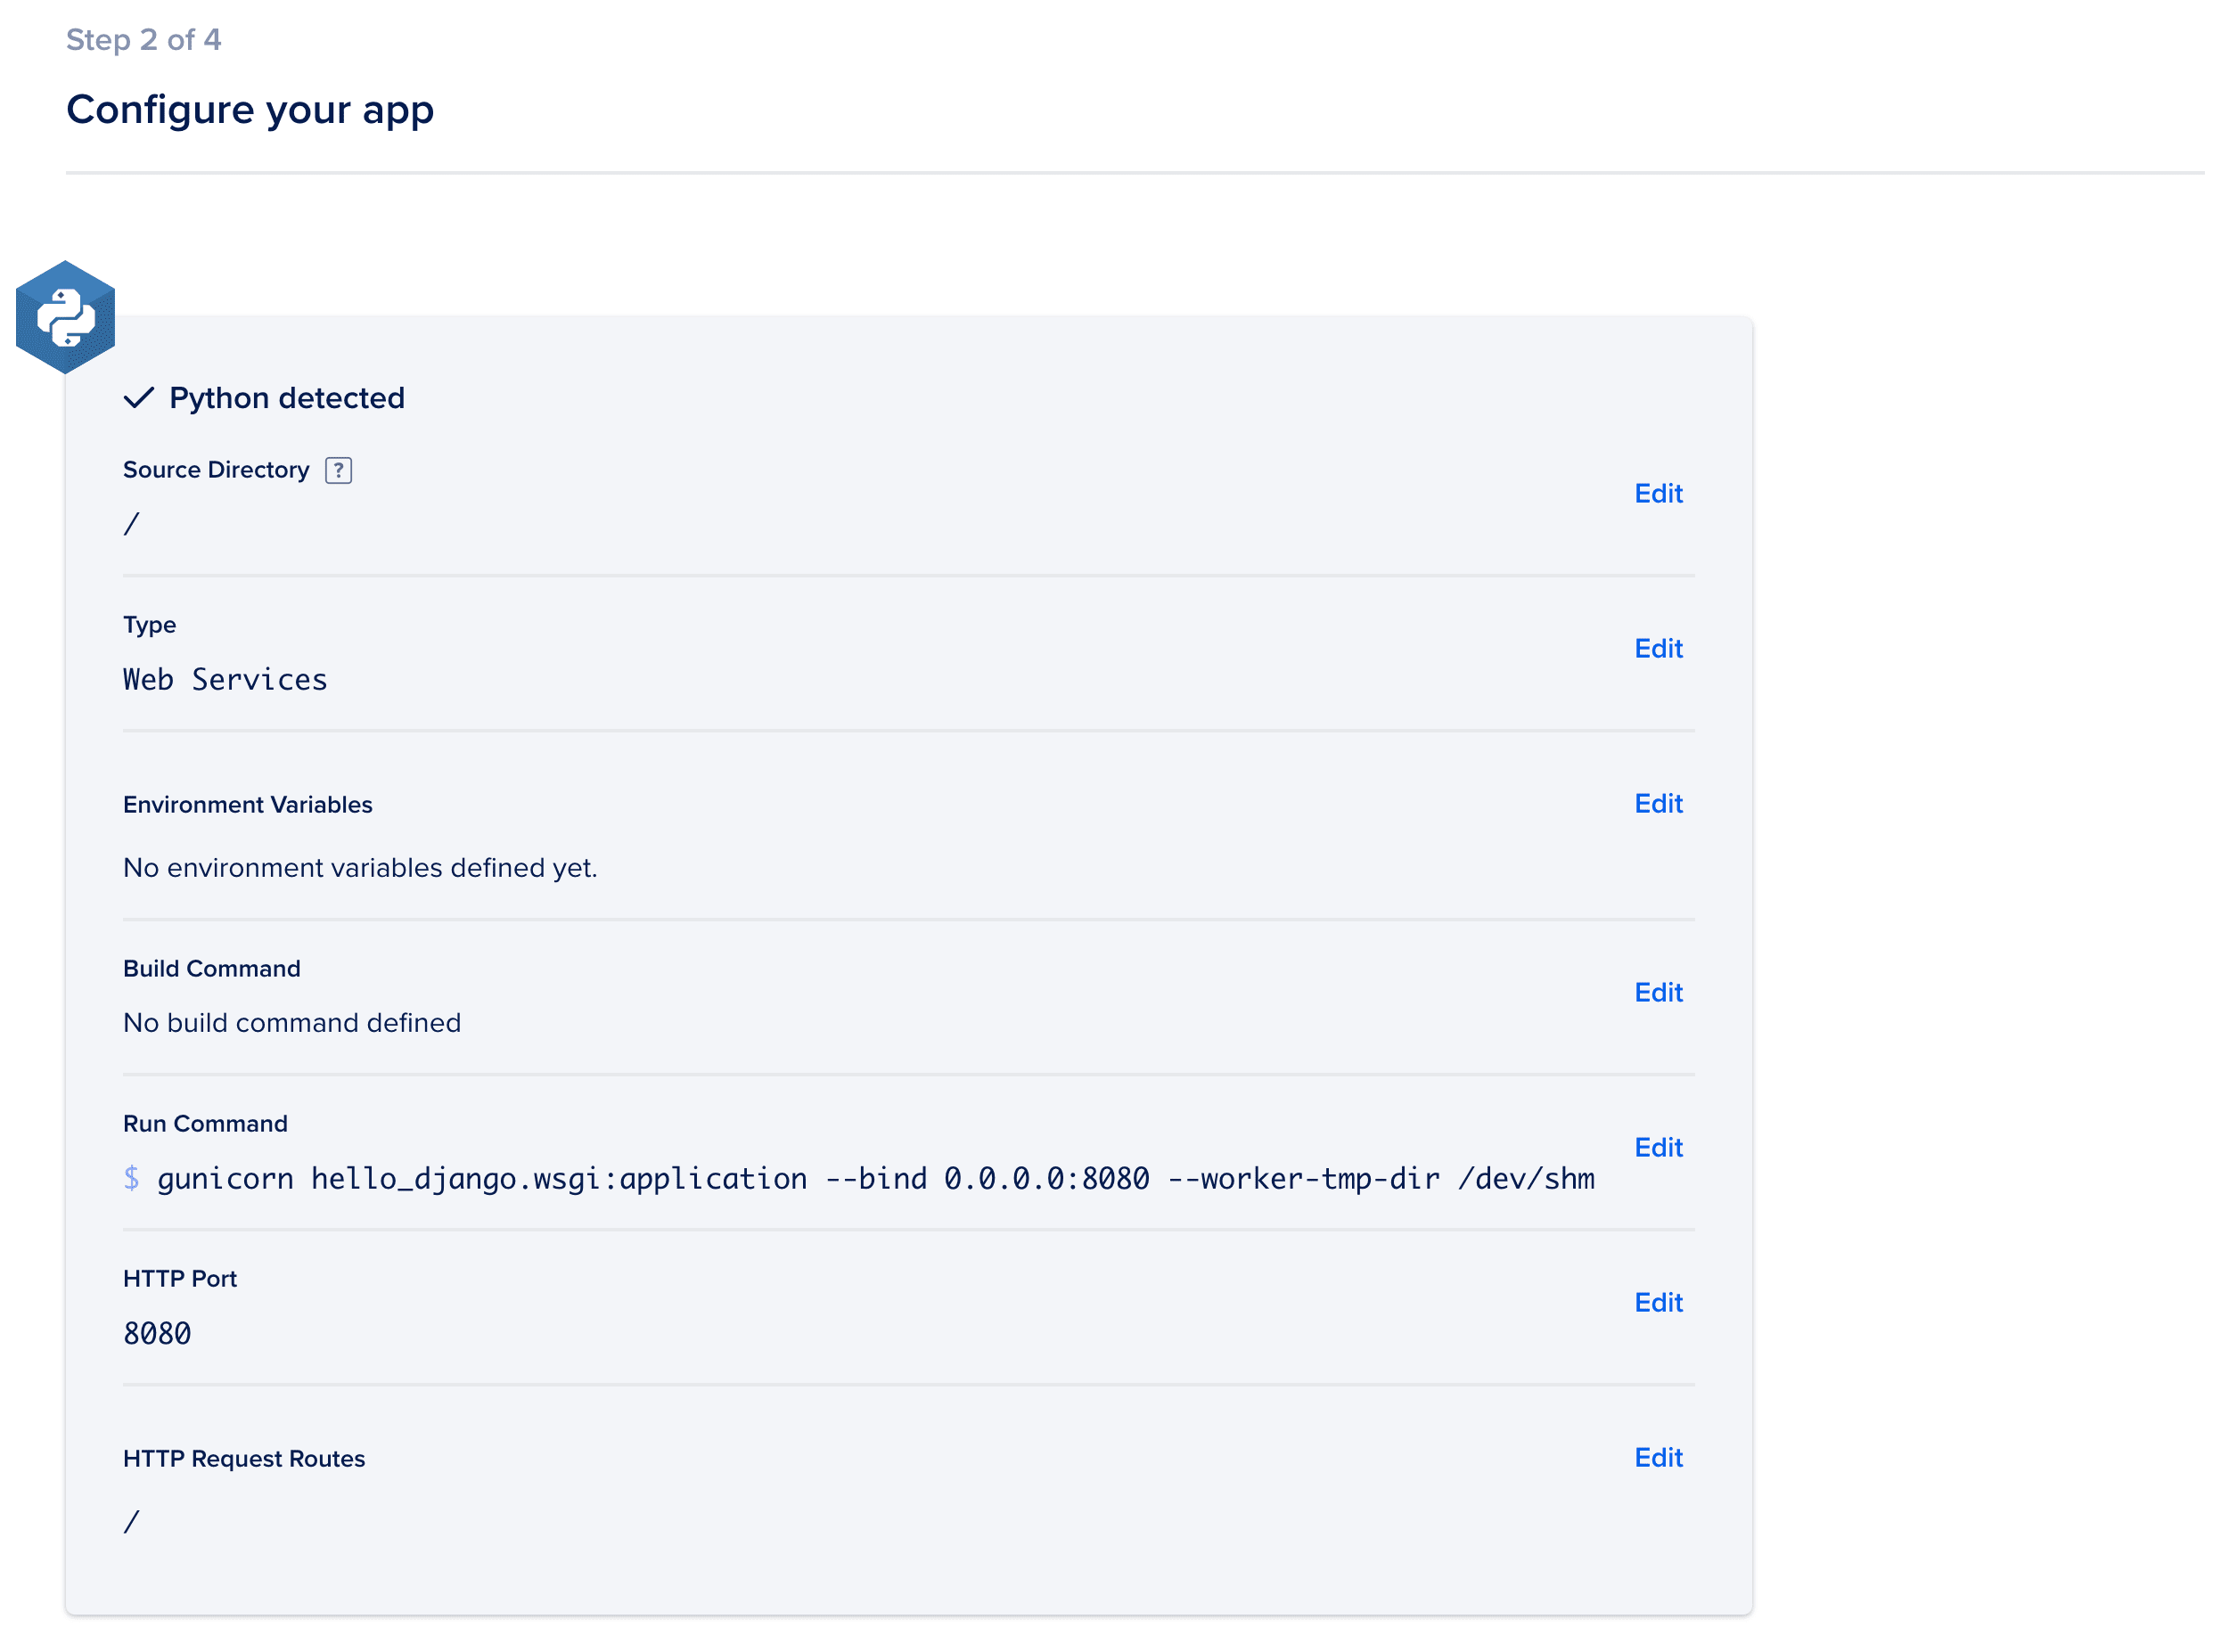
On the app configuration page, DigitalOcean should have already detected that the app is Python-based (based on the presence of the requirements.txt file).
Under the hood, DigitalOcean uses Cloud Native Buildpacks to run your application.
Change the run command to gunicorn hello_django.wsgi:application --bind 0.0.0.0:8080 --worker-tmp-dir /dev/shm and click "Next":
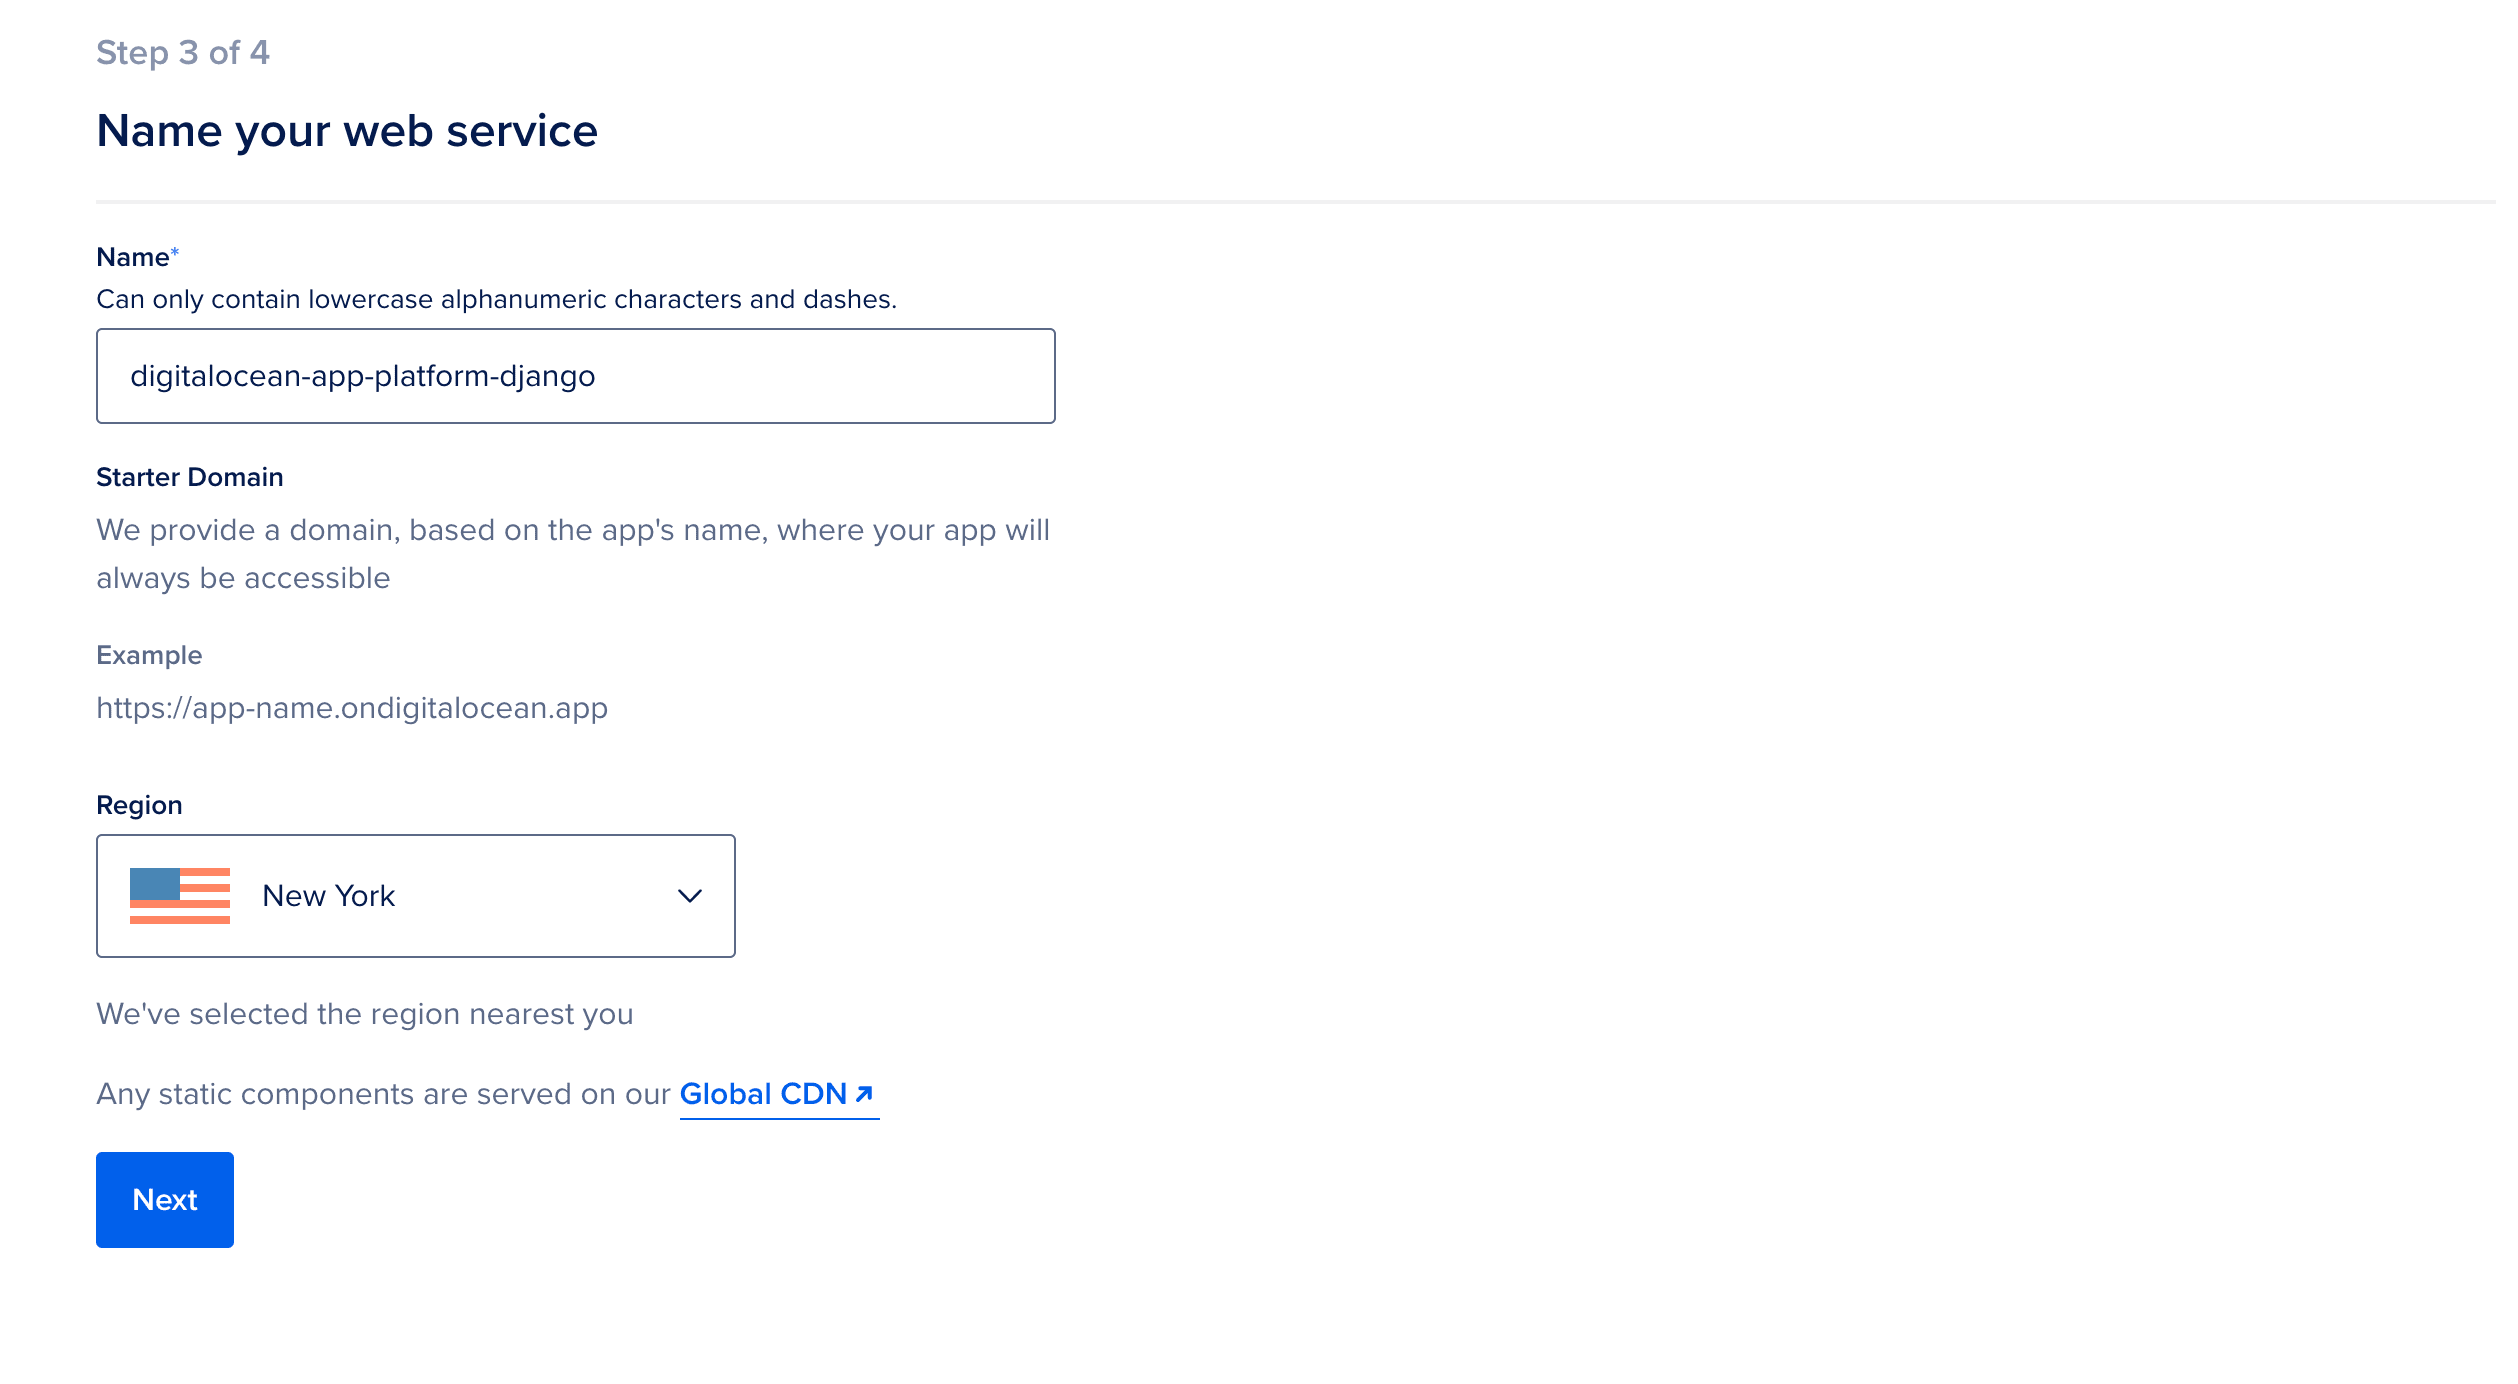
Give your app a name and select the region. Feel free to stick with the defaults -- repo name and New York, respectively.
Click "Next".
Stick with the "Basic" plan and launch the app.
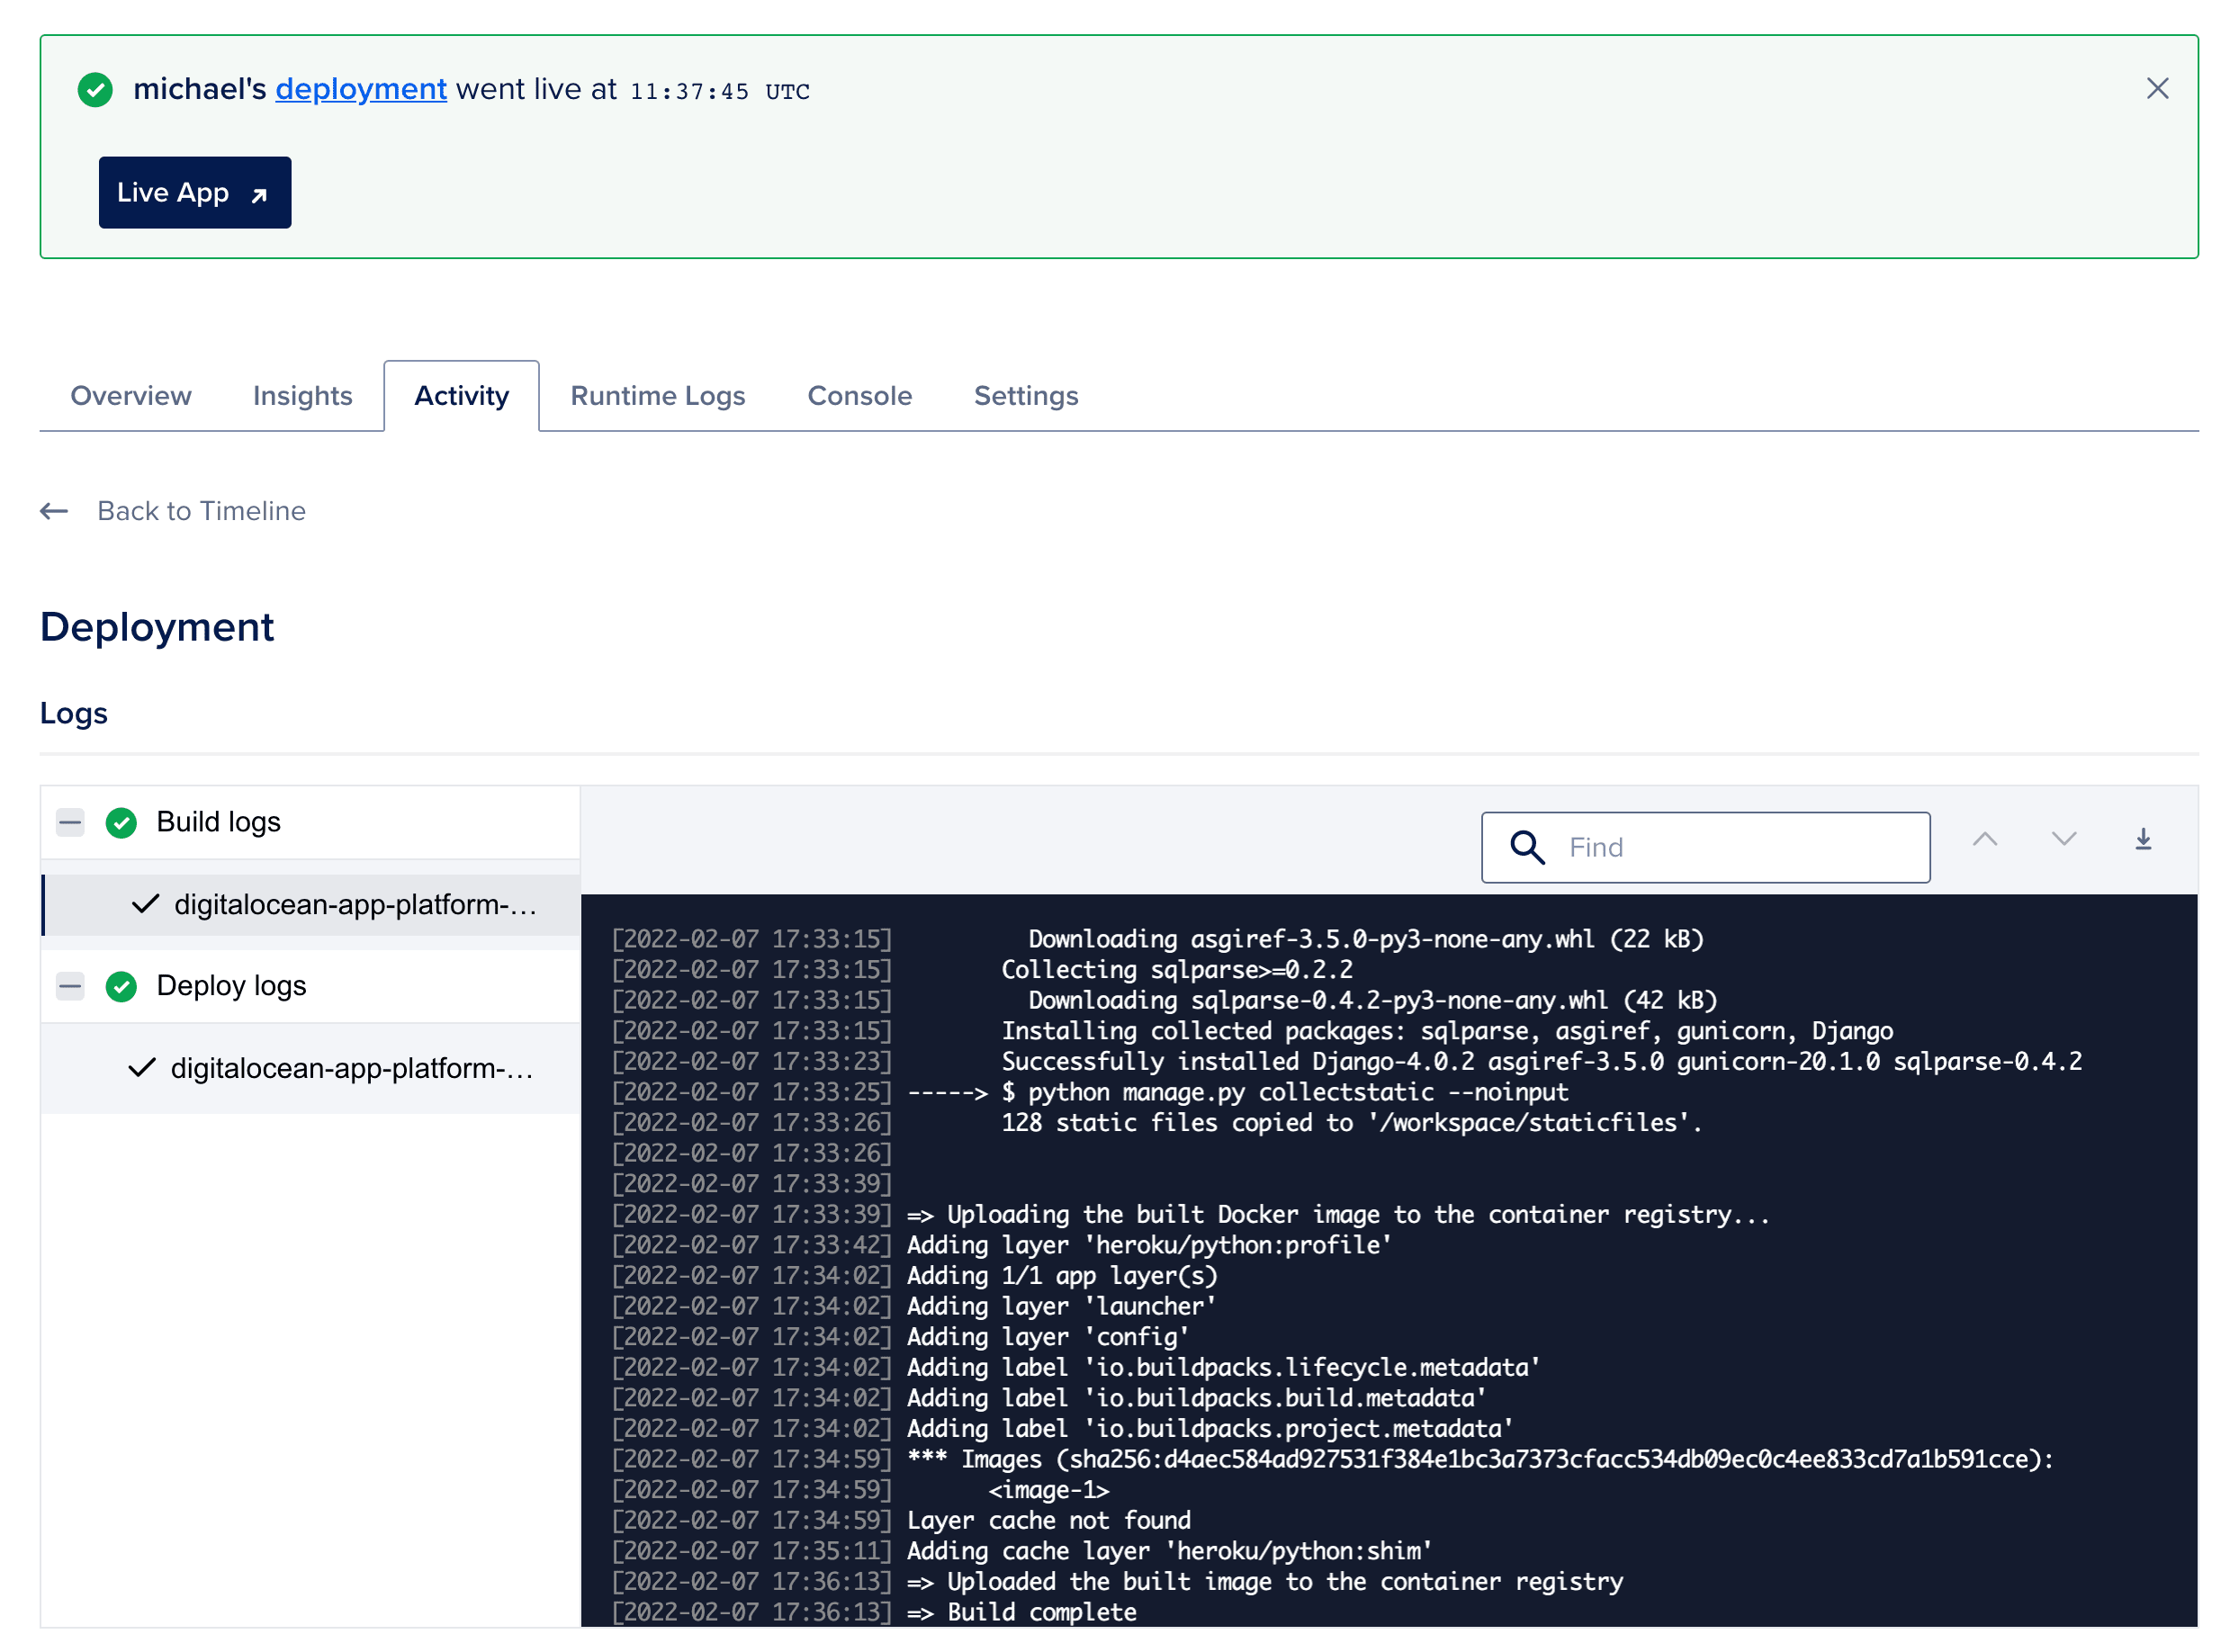
On the next screen, click the "Go to Build Logs" button to view the live deployment logs:
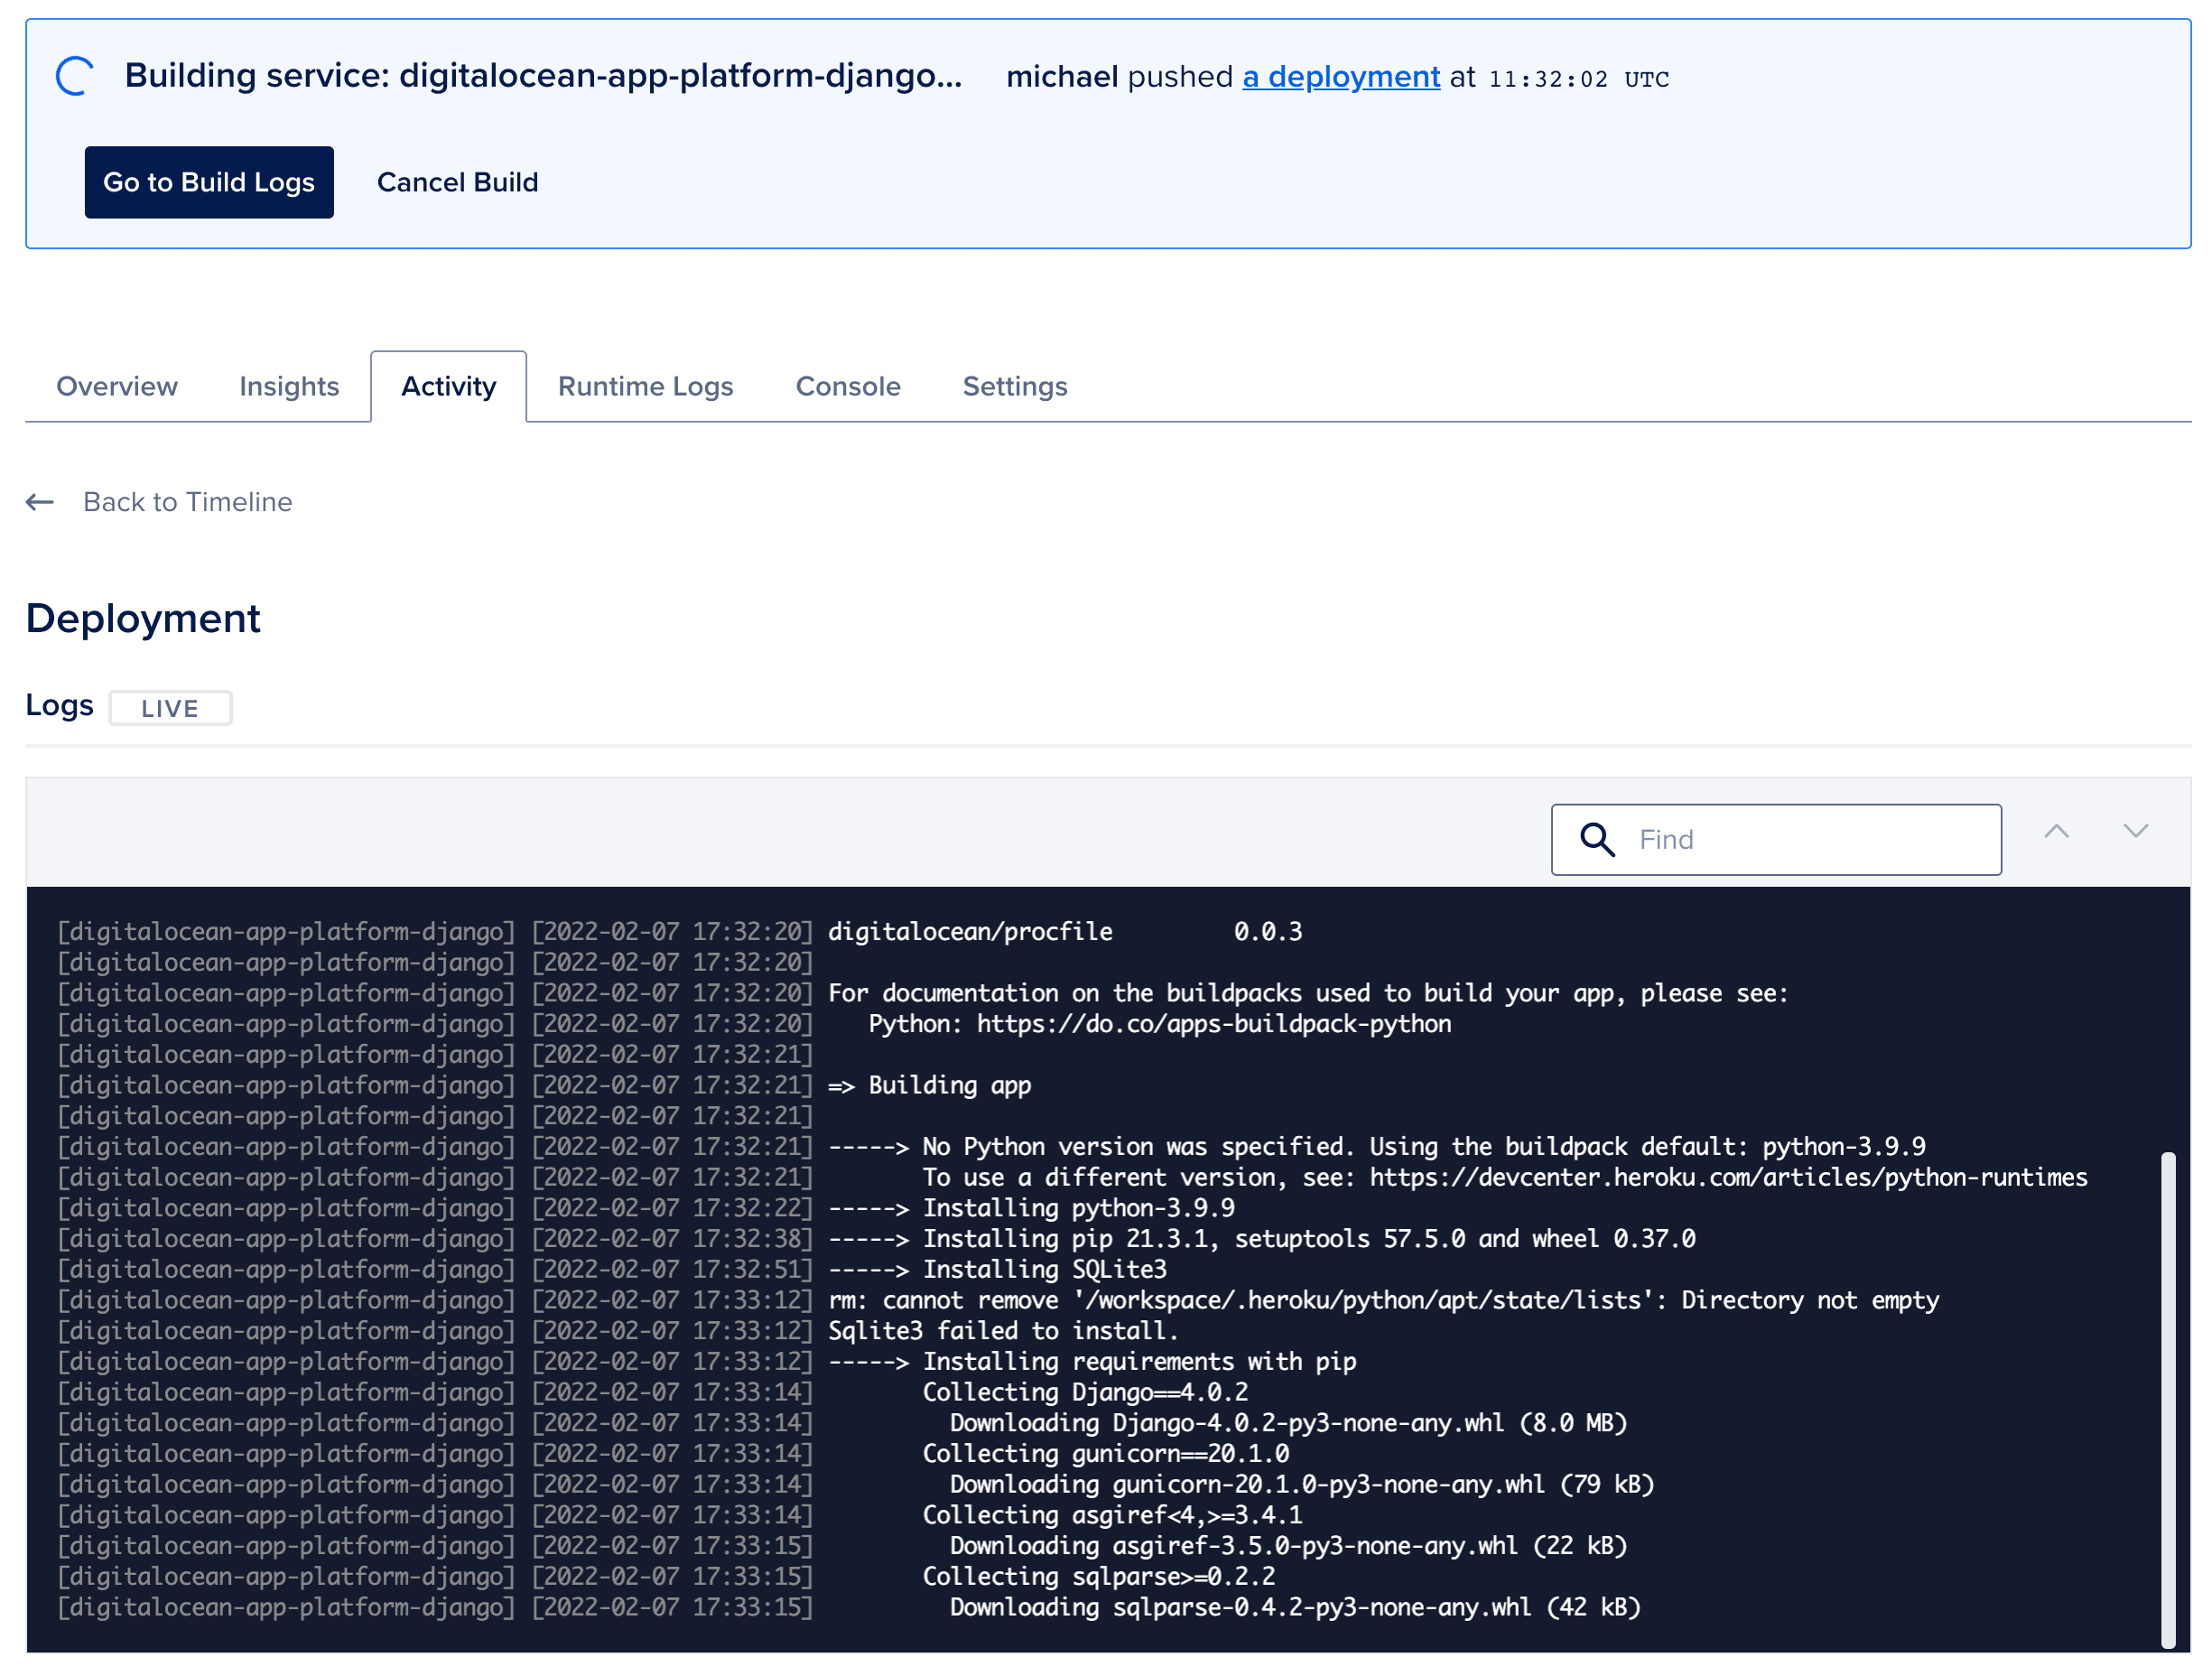
It should take a few minutes to build and deploy. Once complete, click the "Live App" link in the splash message to open your running app in a new browser tab:
You should see:
{
  "hello": "world!"
}
Database
Next, rather than using SQLite, let's configure Postgres.
From your app's dashboard, click the "Actions" dropdown and the select "Create/Attach Database". Stick with the default "Dev Database" named "db". Click "Create and Attach".
This will automatically configure a DATABASE_URL environment variable and redeploy the app. This will take around ten minutes since the database needs to be configured. Once the deployment is done, you can view the environment variable from your console:
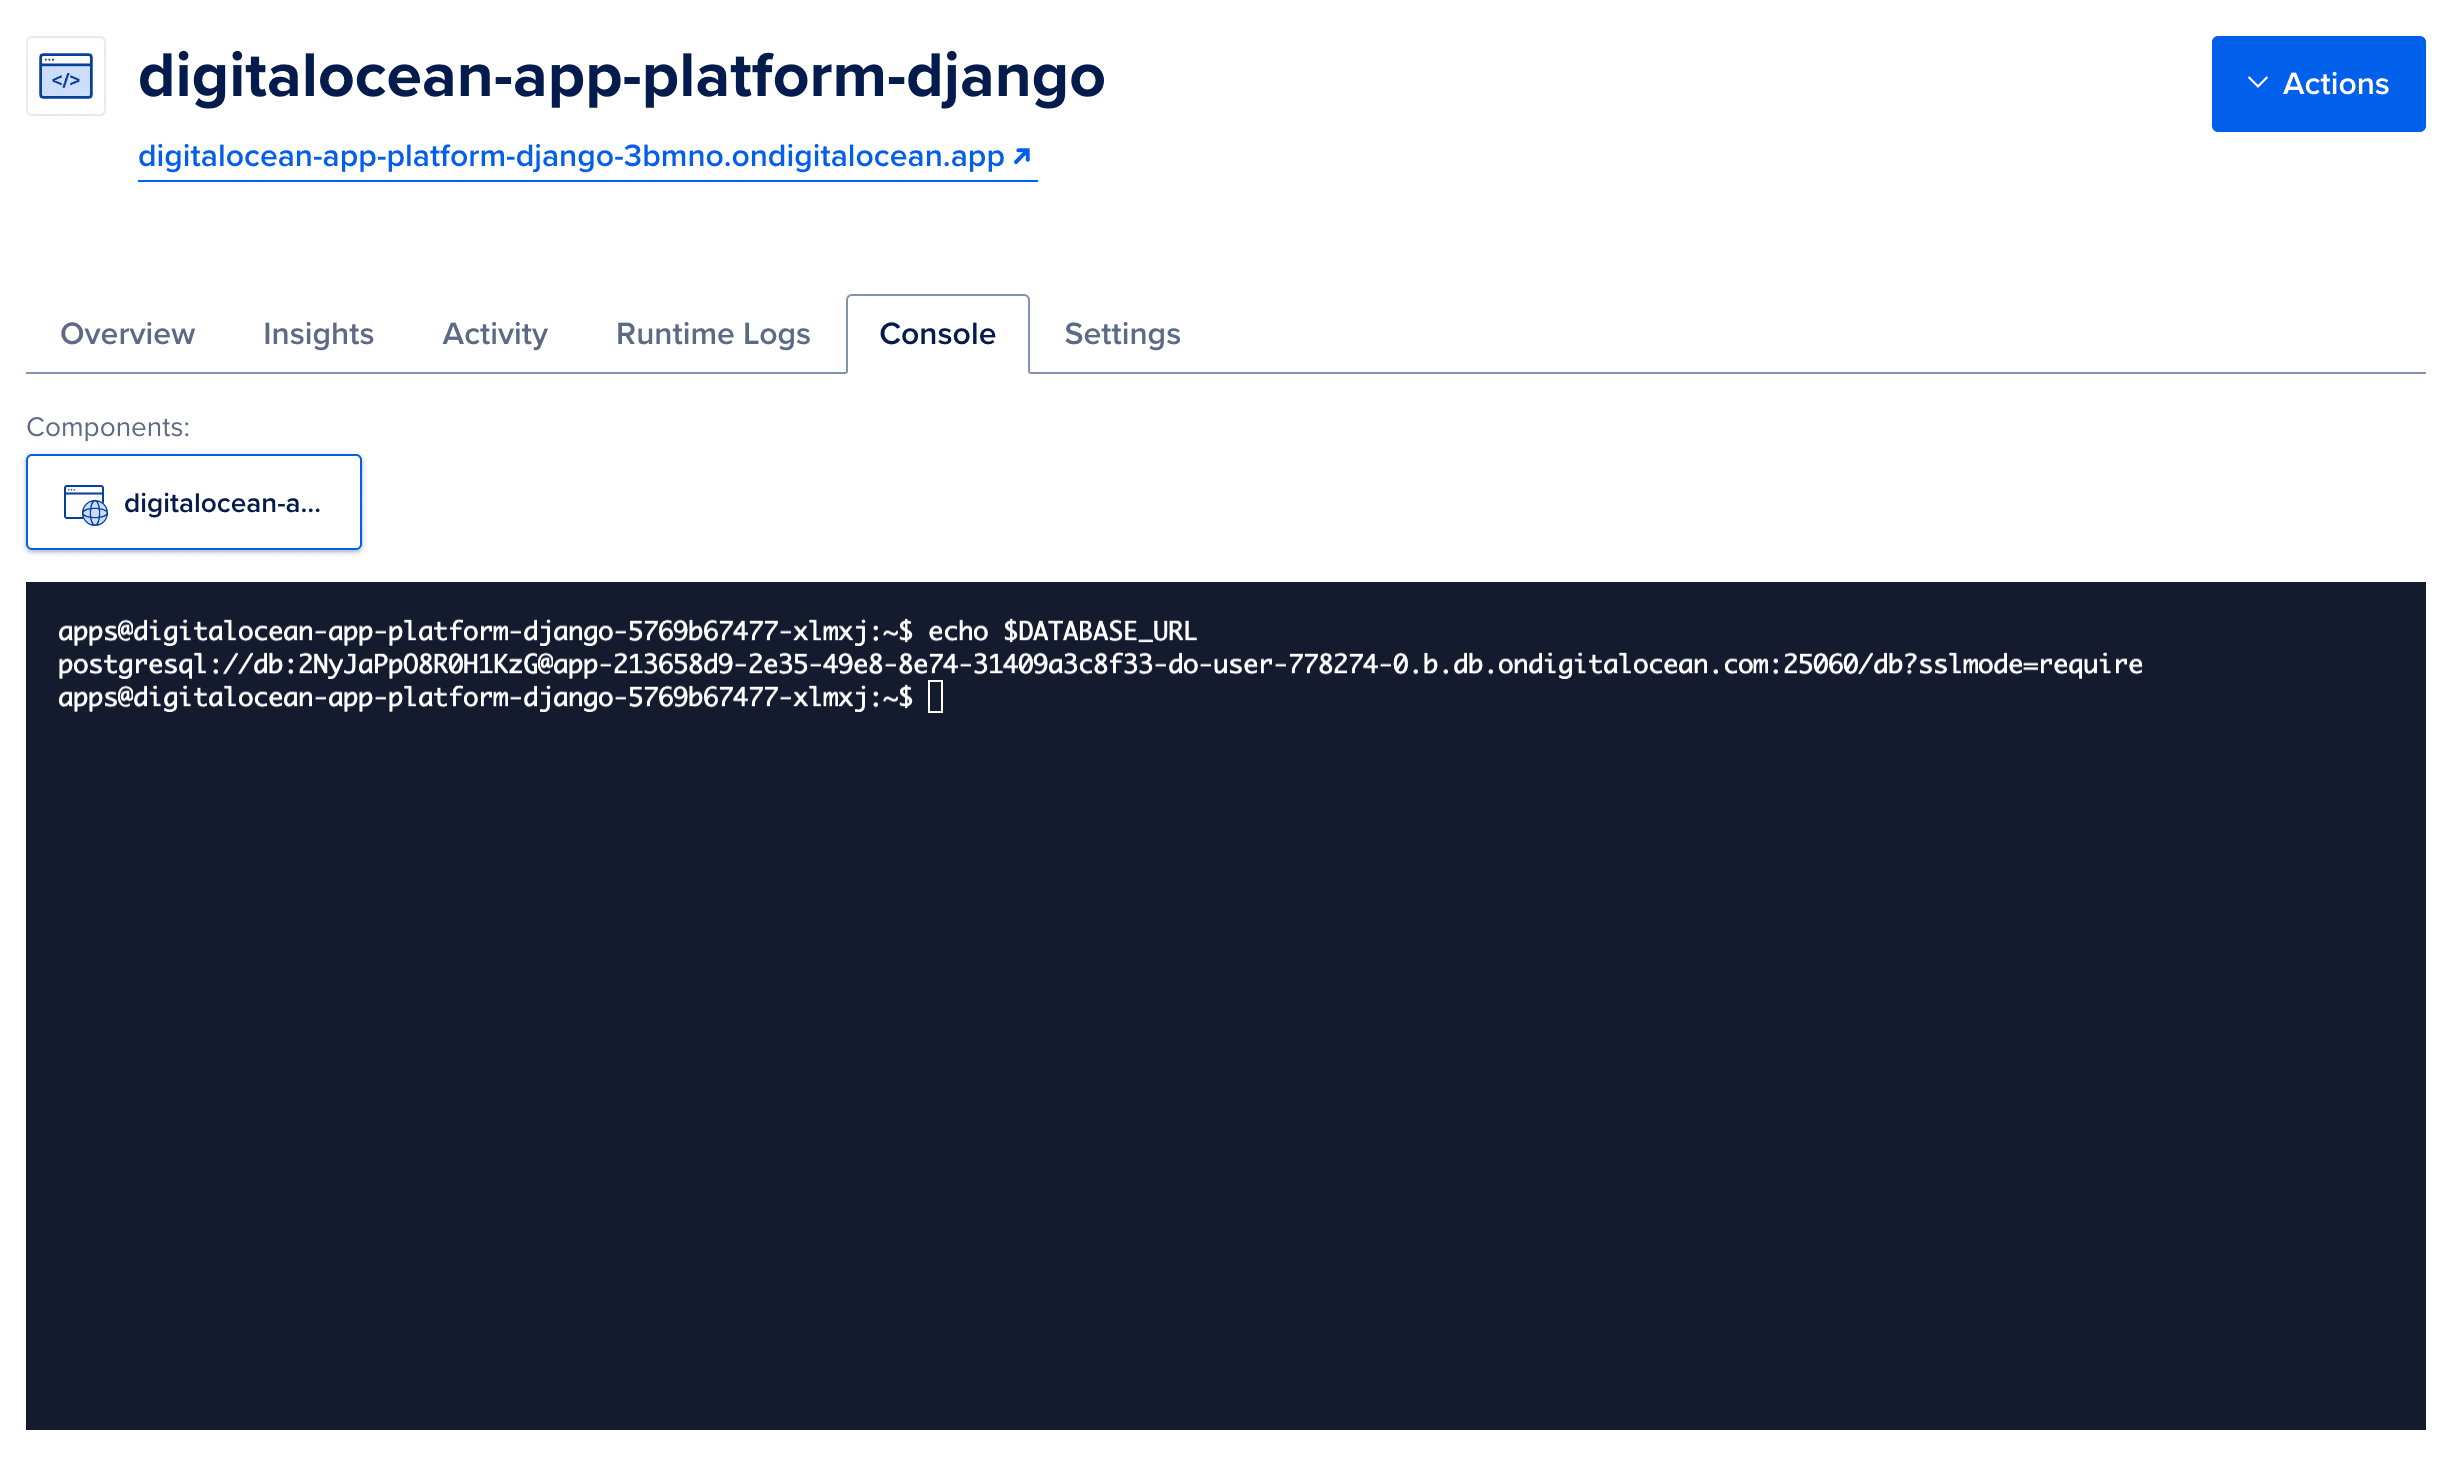
Add the following variable to the settings file to read the environment variable:
DATABASE_URL = os.getenv('DATABASE_URL', None)
Next, update the database config like so to use the DATABASE_URL if it exists and configure Postgres:
if not DATABASE_URL:
    DATABASES = {
        'default': {
            'ENGINE': 'django.db.backends.sqlite3',
            'NAME': BASE_DIR / 'db.sqlite3',
        }
    }
else:
    db_info = urlparse(DATABASE_URL)
    DATABASES = {
        'default': {
            'ENGINE': 'django.db.backends.postgresql_psycopg2',
            'NAME': 'db',
            'USER': db_info.username,
            'PASSWORD': db_info.password,
            'HOST': db_info.hostname,
            'PORT': db_info.port,
            'OPTIONS': {'sslmode': 'require'},
        }
    }
Add the appropriate imports to the top:
import os
from urllib.parse import urlparse
Add psycopg2 to the requirements:
psycopg2-binary==2.9.3
Make sure it works locally. Commit and push your code up to GitHub to trigger a new deploy.
Finally, after the deployment completes, jump back into "Console" to apply your migrations (via python manage.py migrate) and create a superuser (via python manage.py createsuperuser):
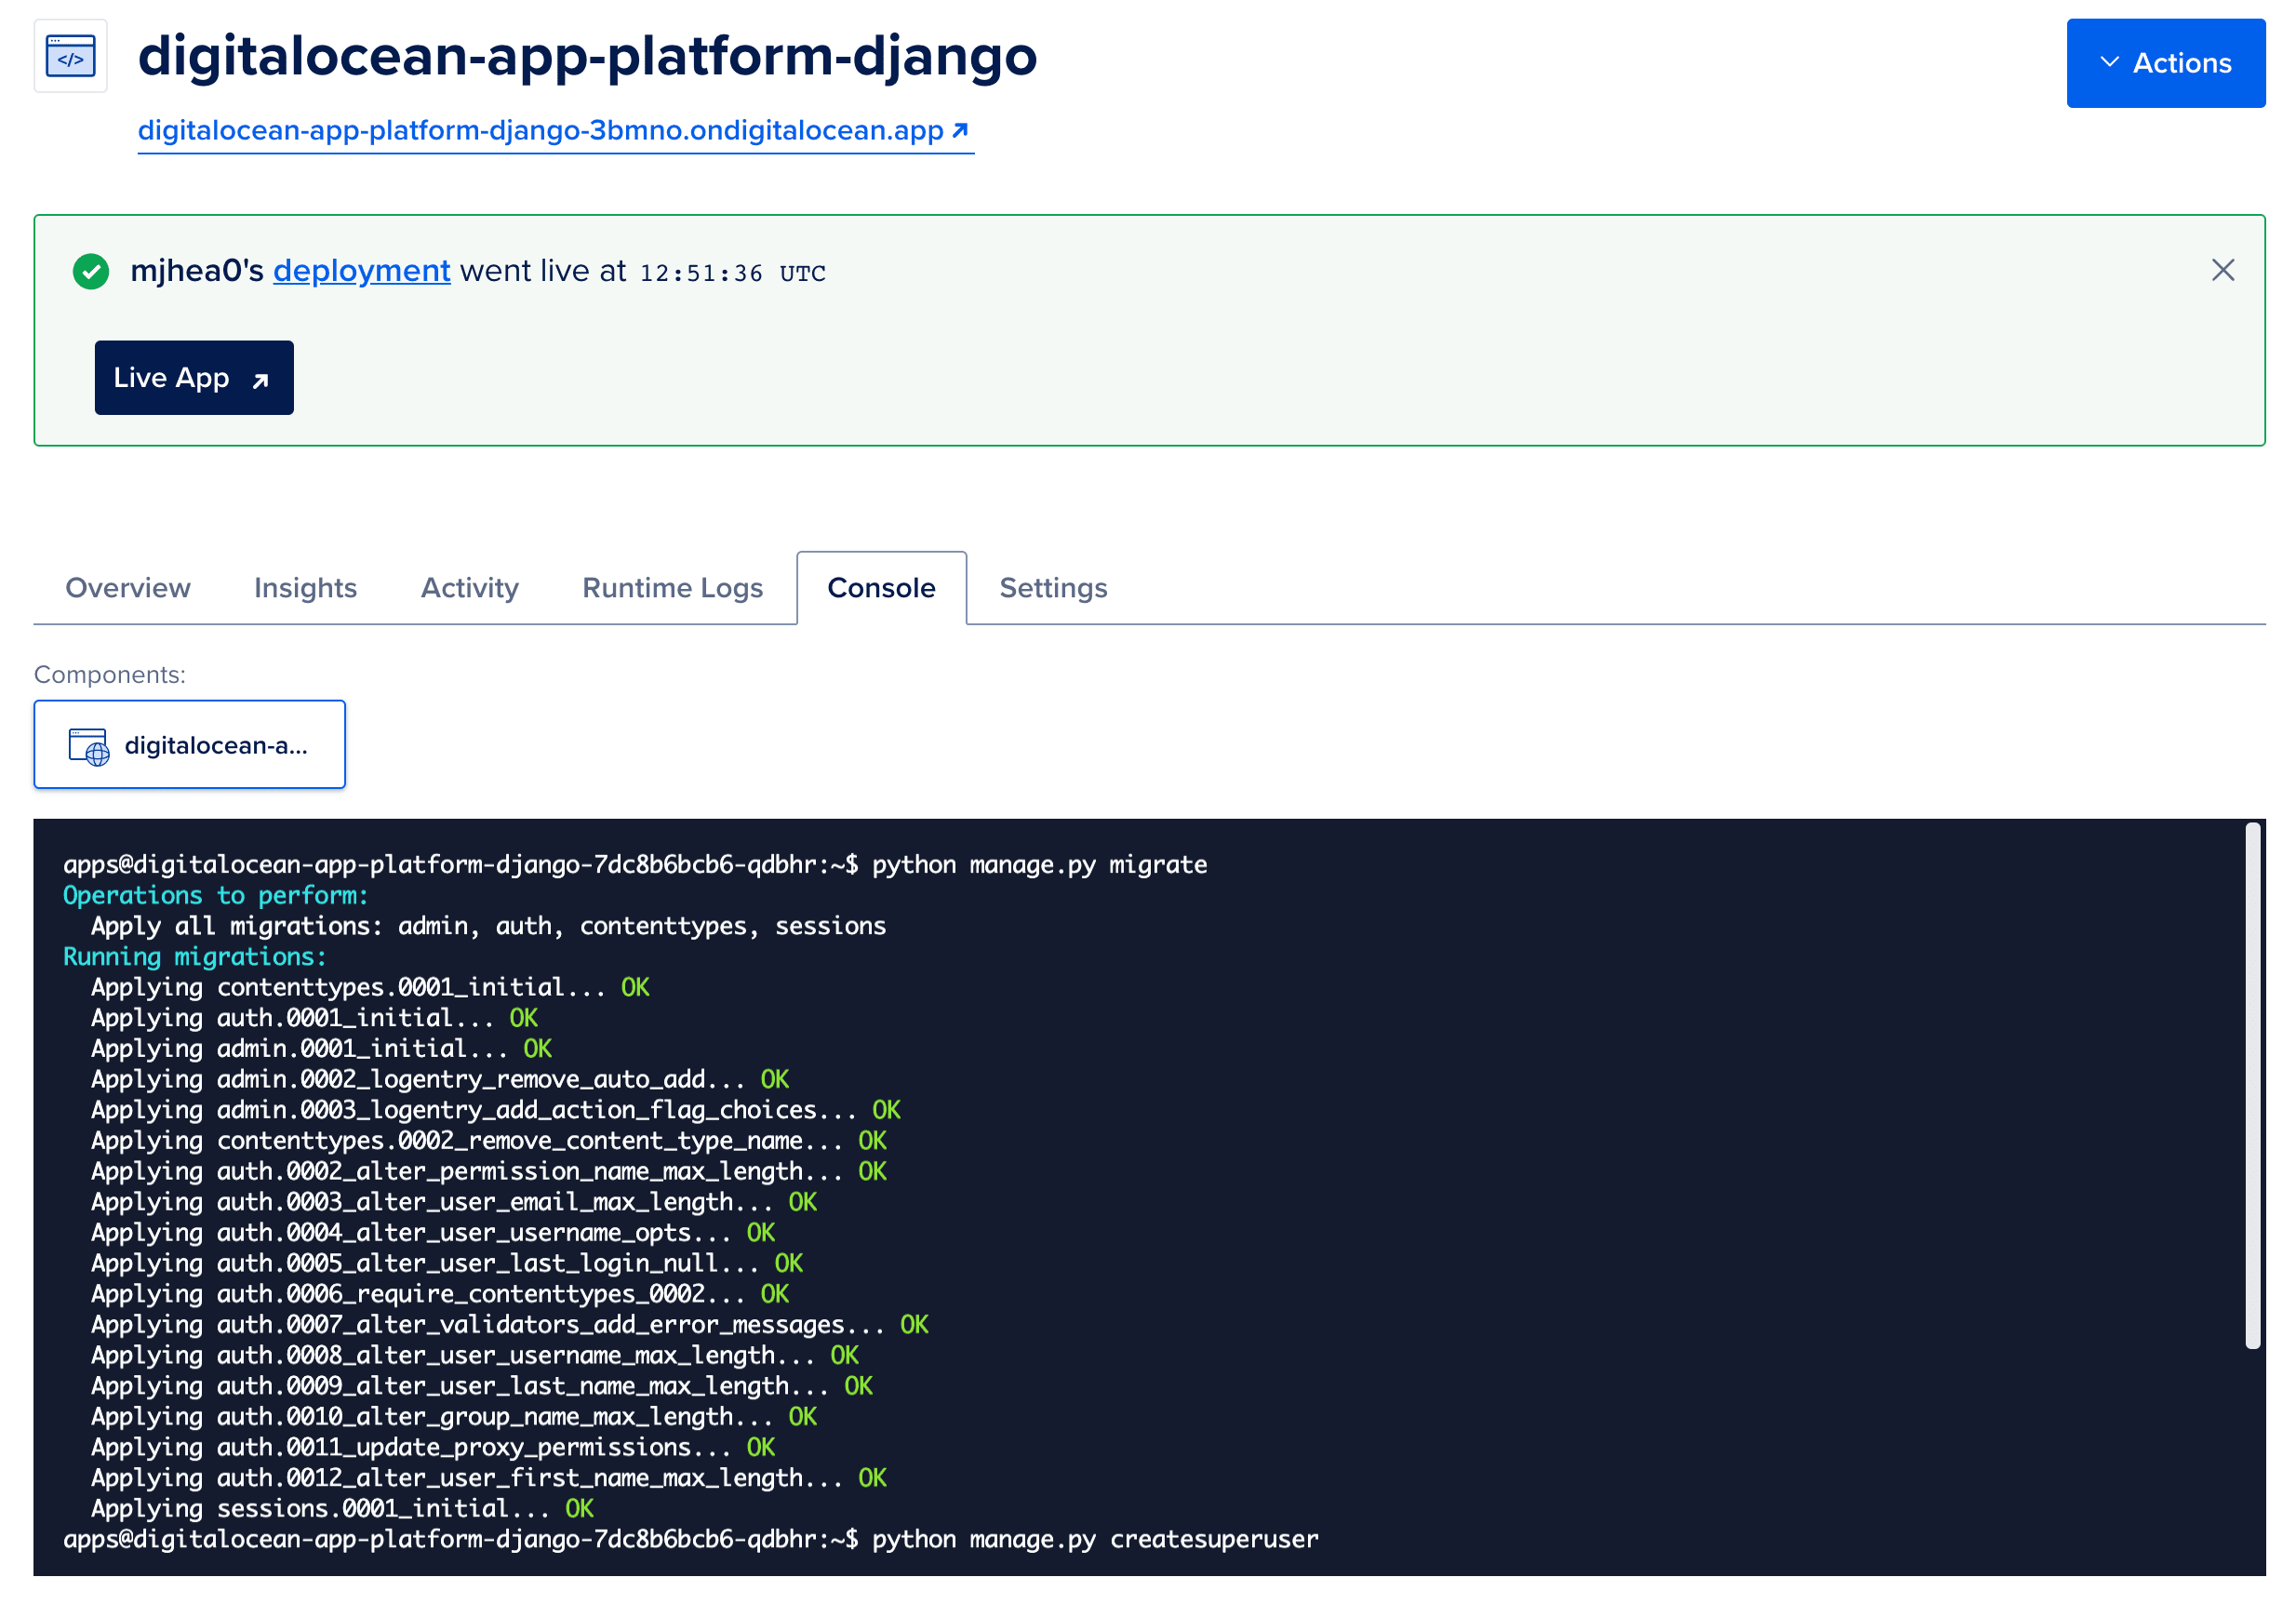
You can also verify that the Postgres config is being used:
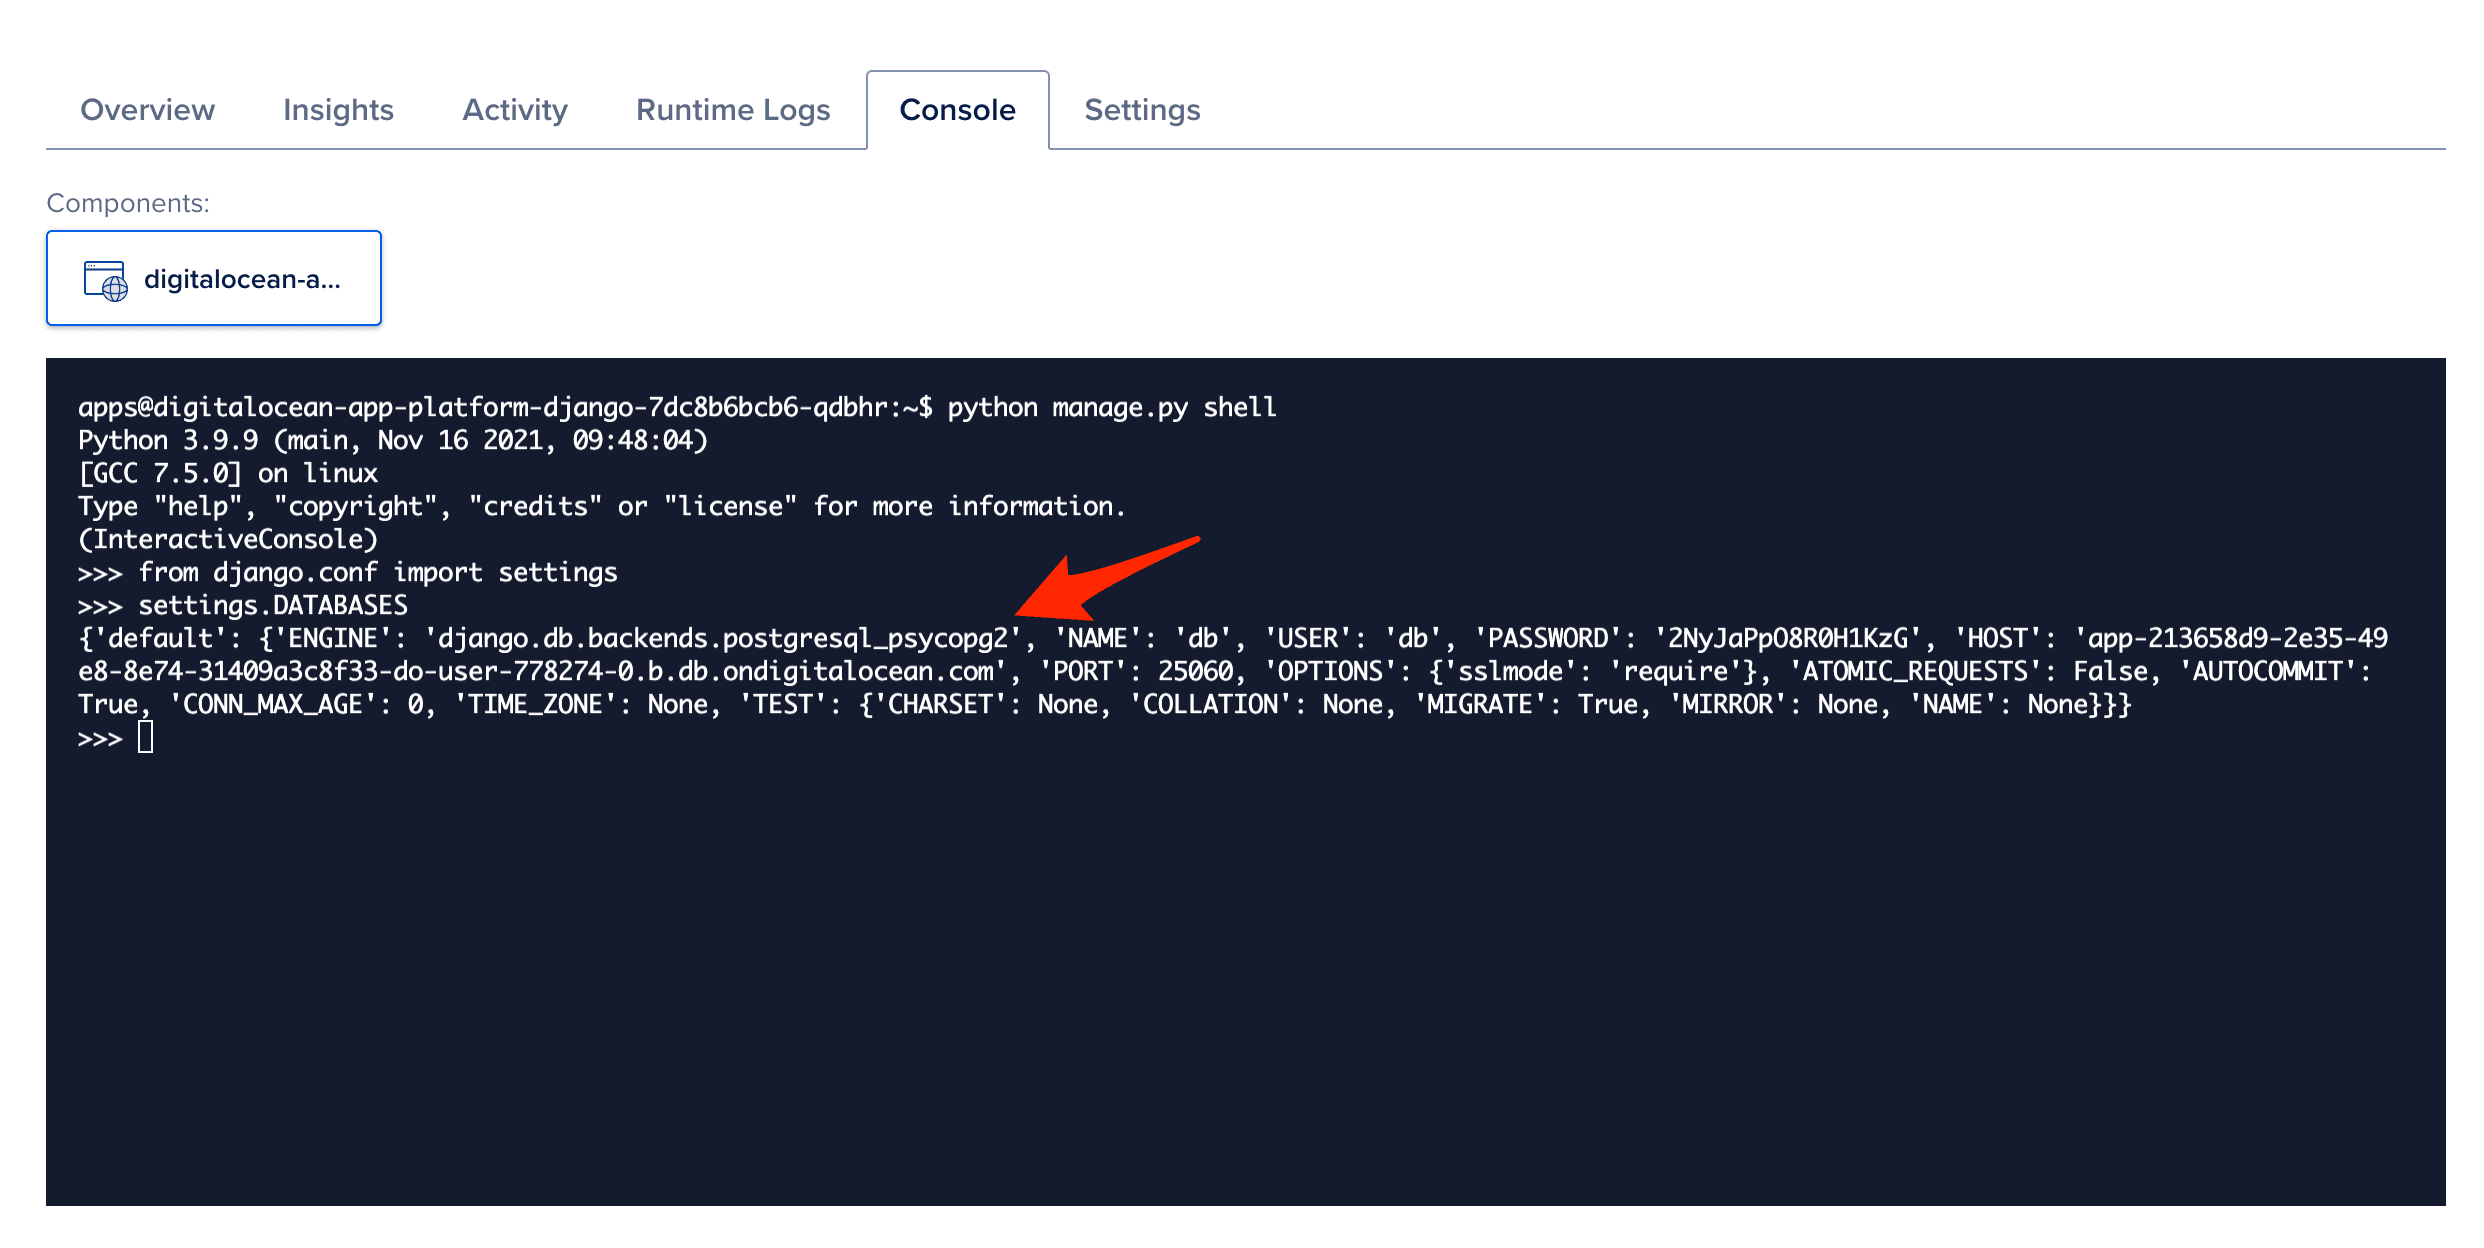
$ python manage.py shell

>>> from django.conf import settings
>>> settings.DATABASES
Environment Variables
Moving on, let's harden the app a bit by configuring the following settings via environment variables:
SECRET_KEYDEBUGALLOWED_HOSTS
Update the following variables in settings.py:
SECRET_KEY = os.getenv('SECRET_KEY', 'please-change-me')
DEBUG = os.getenv('DEBUG', 'False') == 'True'
ALLOWED_HOSTS = os.getenv('ALLOWED_HOSTS', '127.0.0.1,localhost').split(',')
Commit your code again and push it up to GitHub to trigger another new deploy.
After the deploy completes, click the "Actions" dropdown and then click "Manage Env Vars". Then, add the following variables in the "App-Level Environment Variables" section:
SECRET_KEY-52@y%9$#3#)9cff)jdcl&0-@4(u!y)dw@l2!e2s8!(jrrta_u+DEBUG-FalseALLOWED_HOSTS-digitalocean-app-platform-django-3bmno.ondigitalocean.app
Be sure to generate a new secret key and replace
digitalocean-app-platform-django-3bmno.ondigitalocean.appwith your domain.
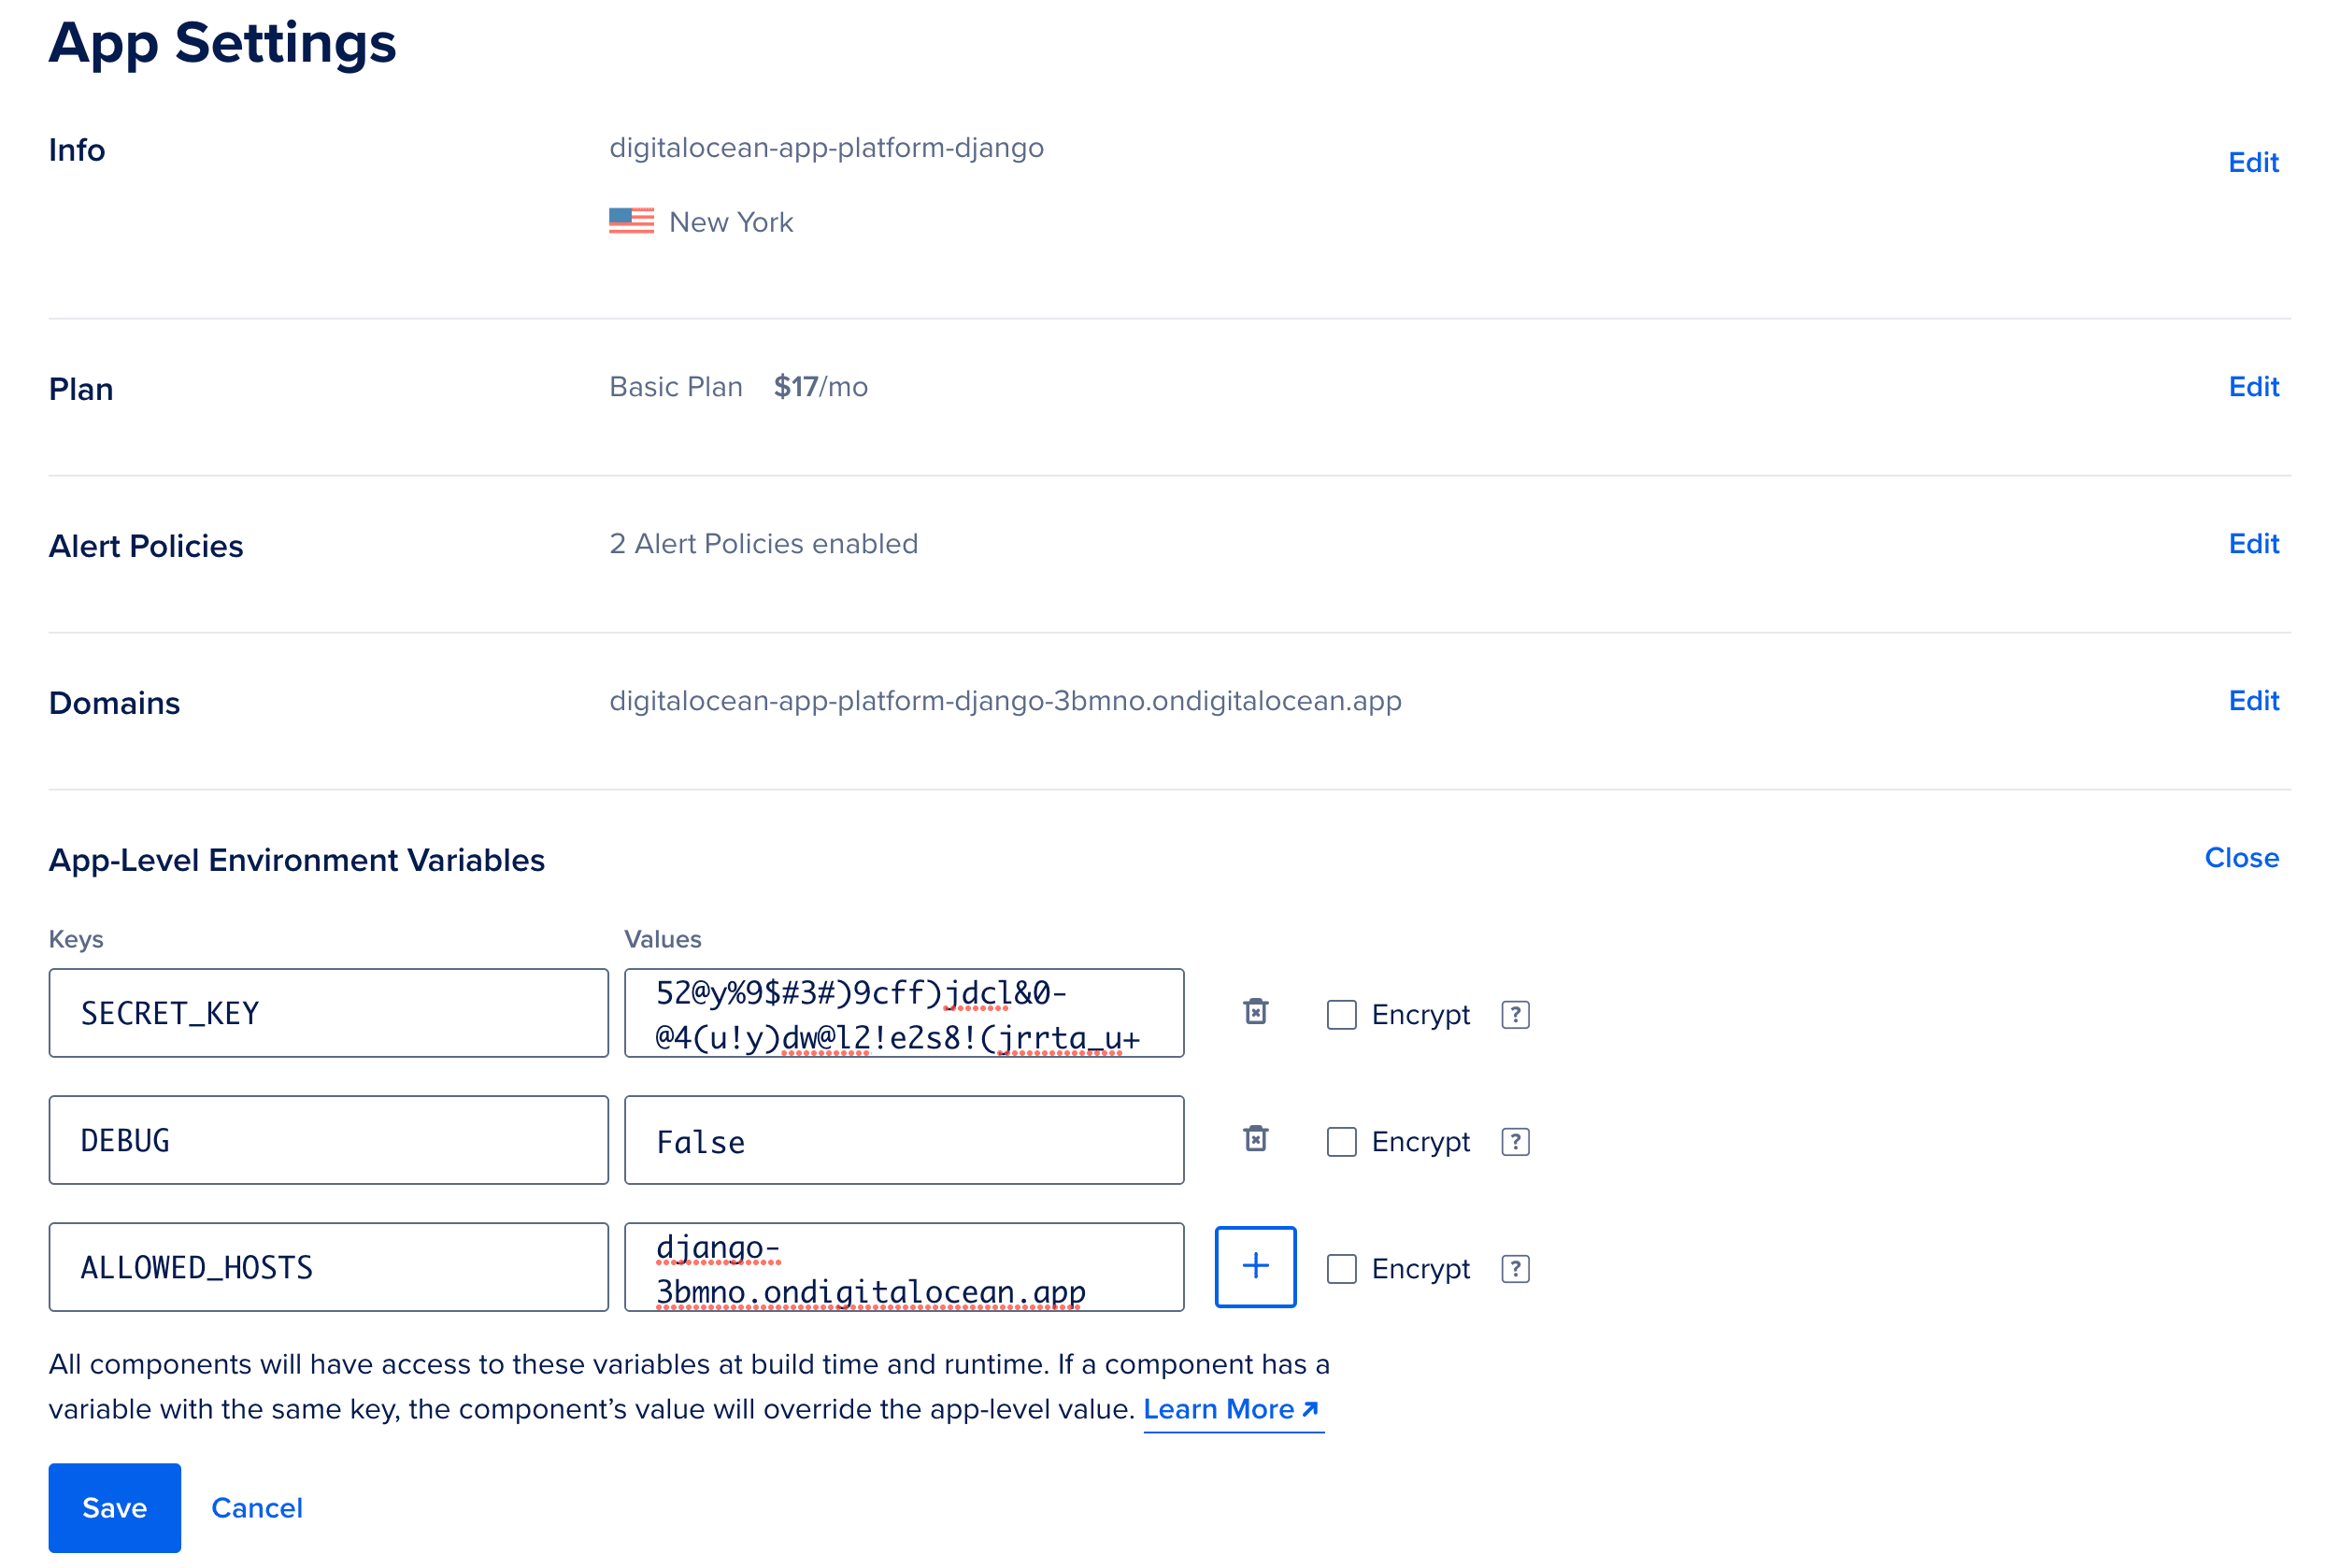
After updating, the app will automatically redeploy.
Static Files
We'll use WhiteNoise to manage static assets.
Add it to the requirements.txt file:
whitenoise==5.3.0
Update the MIDDLEWARE list in settings.py:
MIDDLEWARE = [
    'django.middleware.security.SecurityMiddleware',
    'whitenoise.middleware.WhiteNoiseMiddleware',  # new
    'django.contrib.sessions.middleware.SessionMiddleware',
    'django.middleware.common.CommonMiddleware',
    'django.middleware.csrf.CsrfViewMiddleware',
    'django.contrib.auth.middleware.AuthenticationMiddleware',
    'django.contrib.messages.middleware.MessageMiddleware',
    'django.middleware.clickjacking.XFrameOptionsMiddleware',
]
Then, to enable compression and caching support, add:
STATICFILES_STORAGE = 'whitenoise.storage.CompressedManifestStaticFilesStorage'
Commit. Push to GitHub. Once the deploy completes, make sure the static assets work on the admin page.
Celery
Although we won't demo how to set up Celery in this post, DigitalOcean makes it easy to configure Redis, which can then be used as your message broker and result backend. You can then set up the Celery worker as a "Worker" component via "Actions" -> "Create Resources":

Development Workflow
With autodeploy enabled, any time changes to the main branch are added to source control on GitHub, the app will redeploy automatically. With zero-downtime enabled by default, end users will not experience any downtime when redeploys occur.
It's best to use some flavor of the feature-branch workflow so that you can check in code to GitHub on a different branch than main so that you can test your app before the changes go live on production.
Example:
- Create a new branch
- Make changes to the code
- Commit and push your code to GitHub to trigger a CI build via GitHub Actions
- Open a PR against the main branch
- Merge once the CI build completes to update production
Conclusion
This post took a quick look at how to run a Django application on DigitalOcean's App Platform.
In general, App Platform is a powerful PaaS solution that you should definitely evaluate for your Django applications along with other solutions like:
The major downside at this point to App Platform is that it lacks some of the features and extensions that some of the other PaaS solutions provide. That said, according to this post there are a number of new features in the works like scheduled jobs, deployment previews, VPC integration, and deployment rollbacks.
If you do decide to use App Platform, be sure to:
- Review how to leverage vertical and horizontal scaling
- Configure an HTTP-based health check
- Set up a production-grade Managed Database as well as Redis
Make sure to delete your Django app along with the database so you don't incur any additional charges.
You can find the final code in the digitalocean-app-platform-django repo.