I recently completed the Microservices with Docker, Flask, and React course here on TestDriven.io, and about halfway through the course, I started getting a little impatient with how long it took Travis CI to complete my builds so I could get new Docker images pushed up to AWS and move on to the next step. I wanted a notification when the build was done so I could step away and work on something else instead of staring at the build log and waiting for it to be done. Travis comes with several notification options out of the box, but I wanted to get a notification through Telegram, which is not supported, so I decided to roll my own.
Contents
Setting up the Telegram Bot
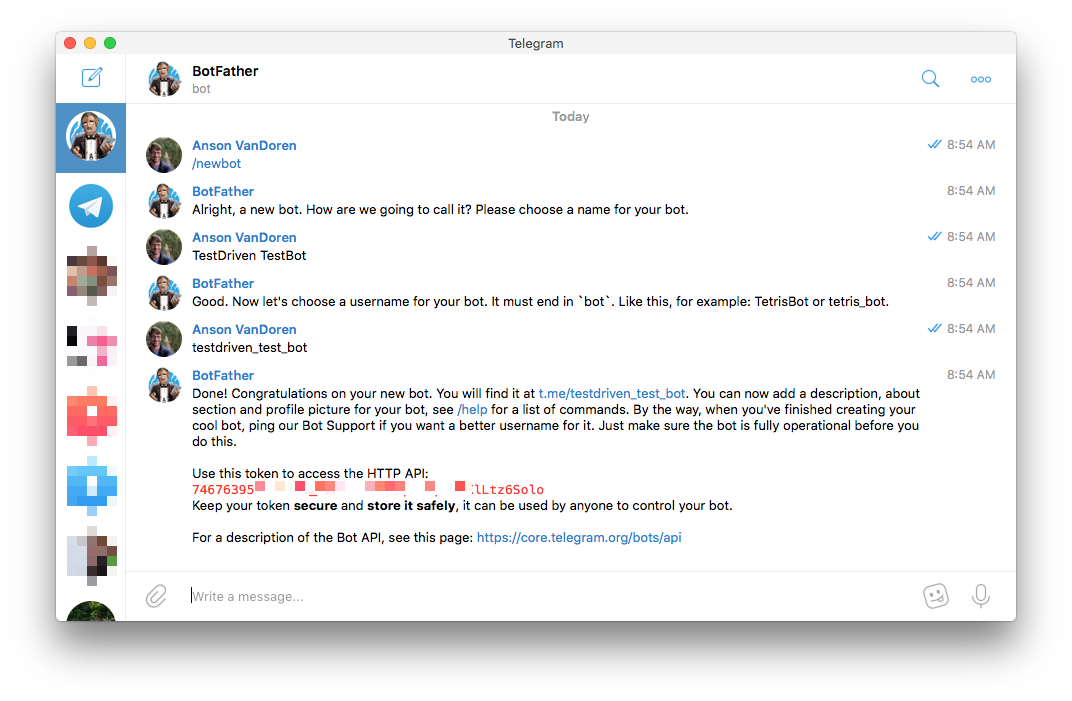
Telegram offers an API for creating bots that looked relatively easy to use, so I started digging through the official documentation. The first step is to create a dedicated bot, and this is actually done through the Telegram app itself, by interacting with the "BotFather". If you're following along, I'll assume you already have a Telegram account, so clicking the BotFather link should open a new conversation in your chat client. From there, you can type /start to get a list of possible commands.
Typing /newbot which will start the process by asking for a display name first (you'll see this name when getting messages from your bot), and then a username. For this example, I chose "TestDriven TestBot" for the display name, and "testdriven_test_bot" for the username. Note that your username must end with some variation of 'bot' as outlined both in the docs and by BotFather. Once done, BotFather will give you a link to your new bot, as well as an API token (I'll refer to it as <TOKEN> for the rest of this post), which you'll want to save somewhere.

To start with, the bot doesn't do much at all. Before I clicked the conversation link, I checked the status from the terminal using HTTPie (you can use curl, or a browser, or whatever you prefer... I just like the formatted output from HTTPie a lot better):
# curl https://api.telegram.org/bot<TOKEN>/getUpdates
$ http https://api.telegram.org/bot<TOKEN>/getUpdates
HTTP/1.1 200 OK
Access-Control-Allow-Methods: GET, POST, OPTIONS
Access-Control-Allow-Origin: *
Access-Control-Expose-Headers: Content-Length,Content-Type,Date,Server,Connection
Connection: keep-alive
Content-Length: 23
Content-Type: application/json
Date: Thu, 28 Feb 2019 17:06:45 GMT
Server: nginx/1.12.2
Strict-Transport-Security: max-age=31536000; includeSubDomains; preload

{
    "ok": true,
    "result": []
}
Be sure to replace
<TOKEN>with the token for your own bot if you're following along, and note that it'sbot<TOKEN>, and not just<TOKEN>.
The status above shows the bot is alive, but doesn't have any current conversations. I clicked the link from the BotFather message (t.me/testdriven_test_bot) and started a conversation, then checked the status again:
# curl https://api.telegram.org/bot<TOKEN>/getUpdates
$ http https://api.telegram.org/bot<TOKEN>/getUpdates
HTTP/1.1 200 OK
...
{
    "ok": true,
    "result": [
        {
            "message": {
                "chat": {
                    "first_name": "Anson",
                    "id": 488404184,
                    "last_name": "VanDoren",
                },
                ...
        }
    ]
}
The conversation I just started is showing up now, and I'll need the conversation id (488404184 in this case) which I'll call <CHAT_ID> below. Now that I have the token and chat id, I'll test sending a message:
# curl -s -X POST https://api.telegram.org/bot<TOKEN>/sendMessage \
#            -d chat_id=<CHAT_ID> \
#            -d text="The bot speaks"
$ http POST https://api.telegram.org/bot<TOKEN>/sendMessage \
       chat_id=<CHAT_ID> \
       text="The bot speaks"
HTTP/1.1 200 OK
...
{
    "ok": true,
    "result": {
        "chat": {
            "first_name": "Anson",
            "id": 488404184,
            "last_name": "VanDoren",
        },
        "date": 1551374658,
        "from": {
            "first_name": "TestDriven TestBot",
            "id": 746763956,
            "is_bot": true,
            "username": "testdriven_test_bot"
        },
        "message_id": 2,
        "text": "The bot speaks"
    }
}
Looks like the API is happy, and I can see the message sent in my Telegram client as well:

Everything is looking good so far, so now it's time to get this integrated into Travis.
Setting up Travis Environment Variables
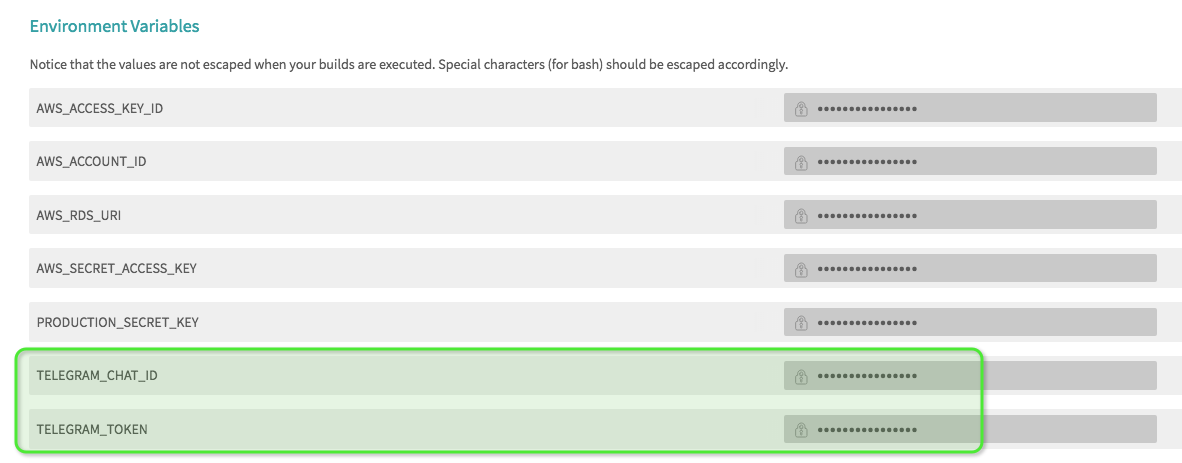
In order to have Travis send me a message on build completion, I'll need to let it know about both my Telegram API token, and the chat ID. I don't want to include either in my .travis.yml file or anything else I'm committing to a public repo, so the two options are either to encrypt them in the build script or set them as a Travis environment variable. More information about the two options can be found in the Travis documentation, but since I can use the same script for all builds/stages/versions, I chose to go with environment variables.
To create the environment variables, I navigated to my repo on and clicked "More Options > Settings", then scrolled down to the "Environment Variables" section. I added two variables, TELEGRAM_CHAT_ID and TELEGRAM_TOKEN. These are the same two variables I used above, but I renamed them to avoid ambiguity in my Travis settings.

Modifying the Build Script
Next I added an after_script step to my .travis.yml file. I could have easily done a simple notification directly in the build script file itself, but I wanted to add some extra details. So, I opted to write a separate shell script to encapsulate it and then just referenced that script in my build config file:
after_script:
  - bash ./telegram_notification.sh
Writing the Notification Script
In my project's root directory, I created a bash script called telegram_notification.sh:
#!/bin/sh

# Get the token from Travis environment vars and build the bot URL:
BOT_URL="https://api.telegram.org/bot${TELEGRAM_TOKEN}/sendMessage"

# Set formatting for the message. Can be either "Markdown" or "HTML"
PARSE_MODE="Markdown"

# Use built-in Travis variables to check if all previous steps passed:
if [ $TRAVIS_TEST_RESULT -ne 0 ]; then
    build_status="failed"
else
    build_status="succeeded"
fi

# Define send message function. parse_mode can be changed to
# HTML, depending on how you want to format your message:
send_msg () {
    curl -s -X POST ${BOT_URL} -d chat_id=$TELEGRAM_CHAT_ID \
        -d text="$1" -d parse_mode=${PARSE_MODE}
}

# Send message to the bot with some pertinent details about the job
# Note that for Markdown, you need to escape any backtick (inline-code)
# characters, since they're reserved in bash
send_msg "
-------------------------------------
Travis build *${build_status}!*
\`Repository:  ${TRAVIS_REPO_SLUG}\`
\`Branch:      ${TRAVIS_BRANCH}\`
*Commit Msg:*
${TRAVIS_COMMIT_MESSAGE}
[Job Log here](${TRAVIS_JOB_WEB_URL})
--------------------------------------
"
Testing it Out
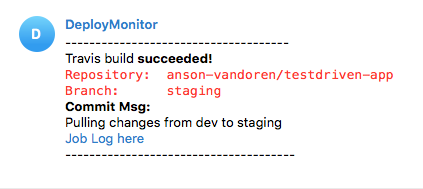
Commit your changes to .travis.yml and the new telegram_notification.sh file, push to Github, and wait for Travis to finish the build.

That's all it takes! You can modify the message to suit your needs and tastes, and Travis has quite a few built-in environment variables that you can pull into your notification script if you want. The above script is also available as a GitHub gist for convenience.
Once you have your bot up and running, it's remarkably easy to mix it into other projects as well. I am using the same bot for several different deployment scripts across a few different languages, frameworks, and platforms. Anywhere you can make an HTTP request, you can trigger a notification through the bot!
 Anson VanDoren